
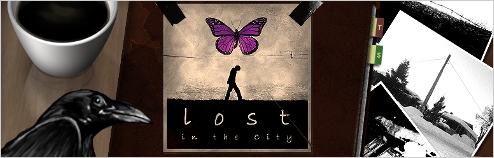
![]() Ever wanted to combine a hidden object game with a riddle-centric room escape title? Like strawberries and bananas, the two genres go together remarkably well, as Elephant Games' Lost in the City eloquently showcases. Steeped in mystery, you travel from room to room finding items, solving puzzles, deciphering riddles and completing simple mini-games as you unravel a particularly intriguing storyline filled with strange plot twists.
Ever wanted to combine a hidden object game with a riddle-centric room escape title? Like strawberries and bananas, the two genres go together remarkably well, as Elephant Games' Lost in the City eloquently showcases. Steeped in mystery, you travel from room to room finding items, solving puzzles, deciphering riddles and completing simple mini-games as you unravel a particularly intriguing storyline filled with strange plot twists.
 Your first date with the charming April went well, and you were quickly falling for this beautiful girl. The bliss didn't last long, however, as you began to feel strange after an innocent cup of coffee. The next thing you know, you awake in an abandoned city, lost and trapped with no knowledge of how you got there. A series of clues seem to be guiding you to something, so with no better plan of action, you set out to follow the path wherever it may lead.
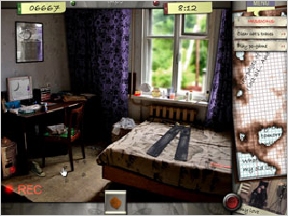
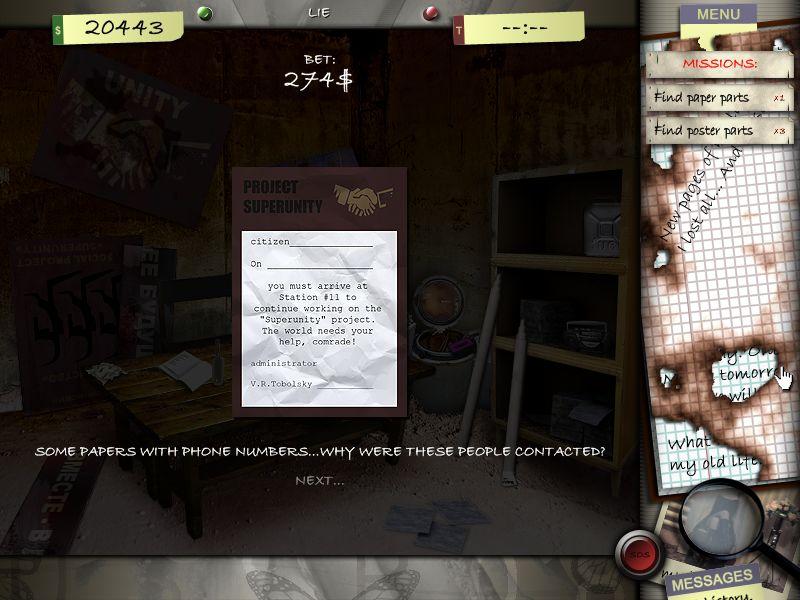
Each room presents you with a handful of items to find as listed on the right side of the screen. A magnifying glass is available to get a 10x zoom on an area of the scene, so don't be afraid to use it for those tiny objects. In addition to finding objects you'll often have tasks to complete such as "play the video tape", "drink the coffee" or "use the phone". How you accomplish these tasks isn't explained, though everything is spelled out quite nicely with the items you pick up and store in your inventory.
For the mini-games, expect nothing more than a few simple "assemble the image" puzzles alongside keypad riddles where you have to figure out the code. Pretty standard stuff, the challenge level is just about right, and you won't be jolted from the game's somewhat intense atmosphere by an ill-fitting puzzle getting shoved in front of your face.
As you move from room to room the storyline is gradually unveiled piece by convoluted piece. Where are you? How did you get here? Who is playing this game with you and why? And most importantly, what role does April play in all of this?
 Analysis: Games like Lost in the City are my bread and butter of the casual adventure world. Its strongest feature is by far the story, and I was drawn in from the "oooh"-inducing opening paragraph. It's a bit like watching an episode of Lost, with new questions being raised at every turn. Gotta love a good mystery, and Lost in the City delivers. The game's structure is also pleasing and manages to blend the best parts of the room escape genre with a hidden object game.
There's very little to criticize about Lost in the City, as most potential flaws are smoothed over by the fact that the game doesn't overextend itself and try to be more than the sum of its parts. Yes, the object finding can be a bit tedious, yes, the visual quality of some of the scenes could have been punched up a notch. But in the grand scheme of things, these don't detract from the experience of intrigue and mystery.
One thing I would like to lodge a complaint about is the scoring system. In games of this nature, exploration is what it's all about. What can you click and what happens when you try? Here, however, you're punished for misclicks with a penalty of lost money. Money is used for buying hints and unlocking bonuses from the title screen, both nice extras for any game to have. The problem is I'm afraid to try anything for fear of losing cash, leading to an unfortunately strong sense of game paranoia. The casual mode makes things less stressful than the full-on timer mode, but I still feel the punishment for trying to play the game is far too harsh.
Lost in the City is an excellent blend of casual hidden object gameplay and classic room escape adventuring. If you're a fan of either of these genres, enjoy a good mystery, or have a hankering to solve riddles, taking a stroll through this game is a no-brainer.
![]() Windows:
Windows:
Download the demo
Get the full version
![]() Mac OS X:
Mac OS X:
Download the demo
Get the full version


Walkthrough Guide
(Please allow page to fully load for spoiler tags to be functional.)
Lost in the City - Walkthrough
General Tips
At the right side, you can see your goals in the level
Your search list will be given after you found the list in the scene, also on the right side
Take care about the fact, that some goals may change, after you finish them - please always have a look at the goal list again
The SOS button is your hint, depending on what mode you are playing, you will loose 1 minute time (classic mode) or $ 50 (relaxed mode)
With right click you can use your magnifier to see small items
For every wrong click you will see a cross - first a green one, than a yellow and at least a red one. With the red cross you will receive a time punishment of 20 seconds (this is only for classic mode)
Some items will be moved into your inventory
Use them by left clicking
Inventory objects will stay and are avalible in every level
The location of the items and lists are random.
The lock pick mini games are random - when ever you open it, the circles will be in a diffrent position - The few in the walkthrough given solutions can ony be examples and wont work for every one
Mini games can be skipped with the SOS button, but it will cost you money or time
To find out, where you have to go next, you will always see a text hint below the map
With the earned money you can buy Secrets (avaible over the main menu) - these are the mini games and puzzles you played in the game, and art
Chapter 1: Welcome
Get the medicine from the table (crate) (or the the chair), that's random)
Get the list from the wall, which will show your other items, you have to look for
screen shot - Welcome
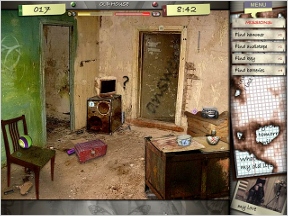
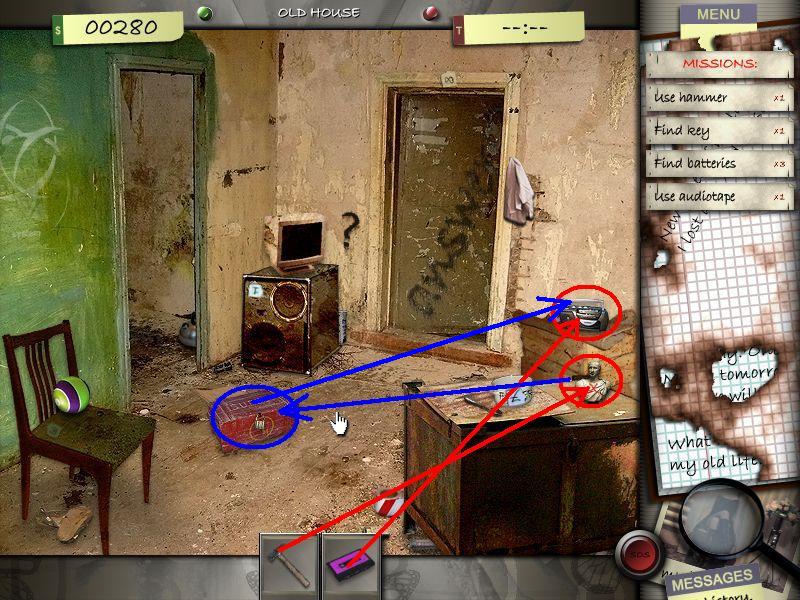
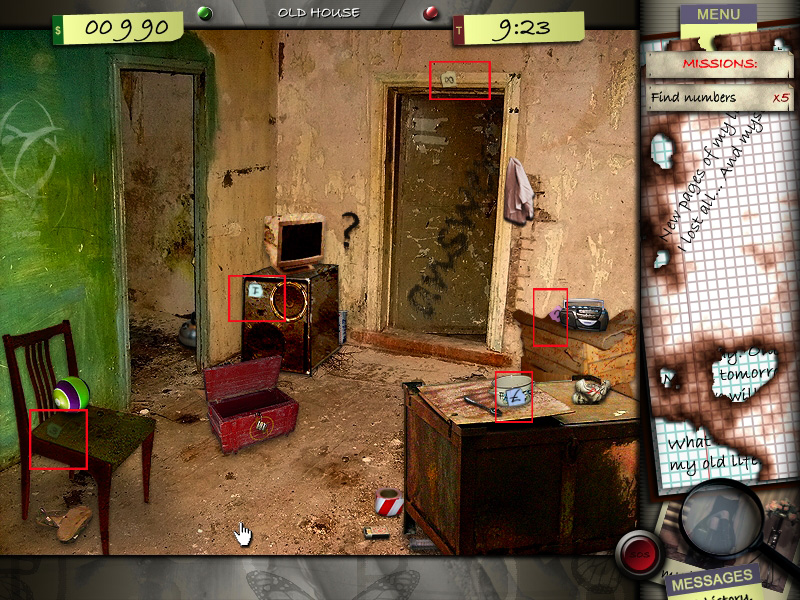
Chapter 2: The old house
Get the list on top of the TV
Hammer and tape will go into your inventory
Smash the bust at the right side with the hammer
Inside you find the key for the chest
Open the chest - inside you will find the batteries
Place the batteries in the tape recorder
screen shot - The old house
Now find the paper scraps, which will give you the code
screen shot - Code Papers
Under the stars you see a color bar - the color are according to the colors of the paper scraps with the numbers
Click the numbers in the correct order (you can click them with the mouse on the screen or type them with your keyboard)
Press Enter
The correct code would be
3 - 8 - 7 - 2 - 1
screen shot - Code
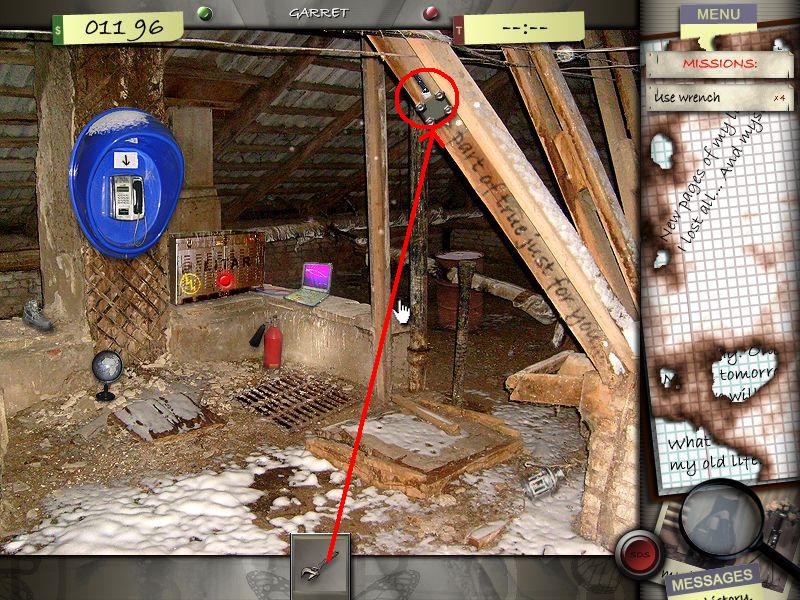
Chapter 3 - Attic
First find the list - hanging at the phone right side
Now find all items from the list
The cd will moved into your inventory
Put on the energy by clicking the generator in the middle of the scene
Put the cd into the laptop
Find the telephone number and the coins
Activate the coins and use them with the phone, do the same with the telephone number
screen shot - Attic 1
Search for the jacket and the map
The wrench will move into your inventory
Use the wrench with the four screws on the top of the front beam
Grab the knife
screen shot - Attic 2
Now you will the map - follow the tutorial and click the cross left to the little man
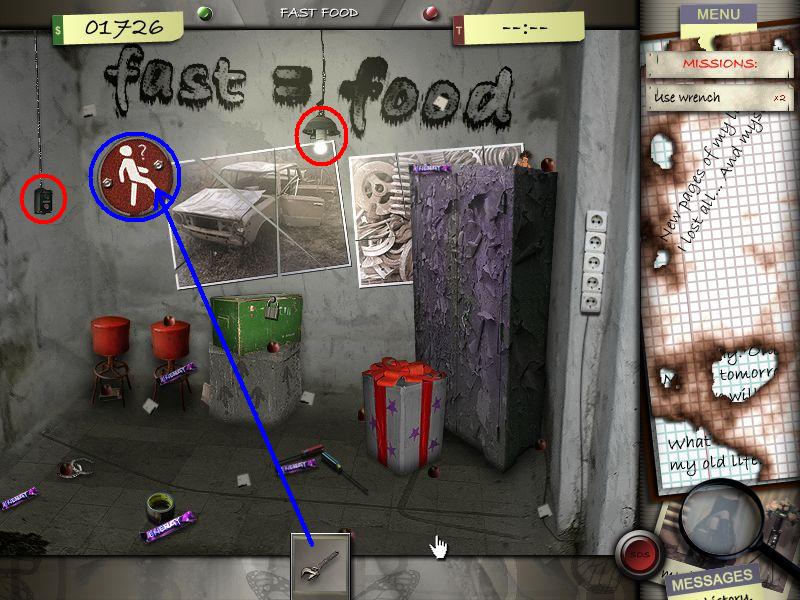
Chapter 4 - Fastfood
First find the light bulb
It will go into your inventory
Activate it and place it in the middle of the room at the lamp
Press the light switch at the left wall
Use the wrench from your inventory and loose the two screws from the sign on left side on top
Behind it, you will find your list
screen shot - List
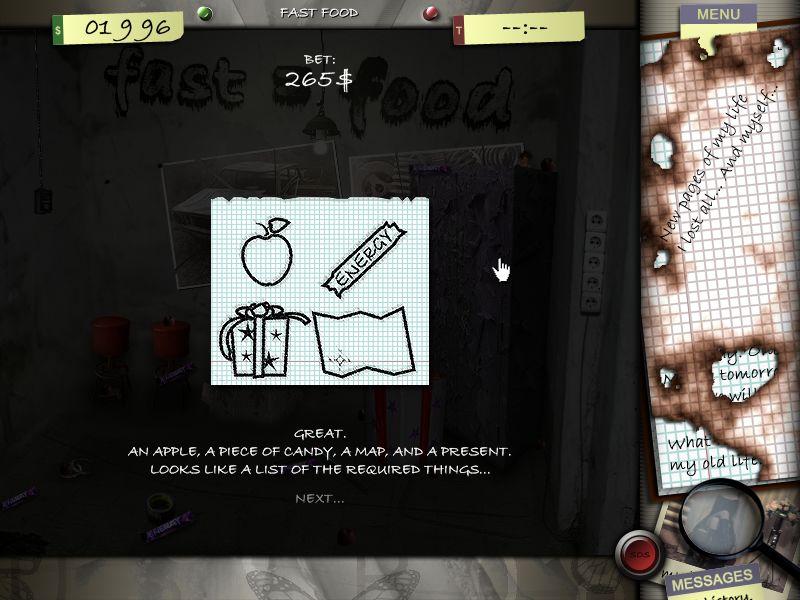
Find 6 paper scraps - assemble them - by clicking two they will swap places
screen shot - Puzzle
You will get a new list
The key will be found under the gift
Get the knife from the inventory and cut the thread, the key is tied with
It will go into your inventory
Open the green chest with the key and get the map out
You will have to choose the upper cross on the map - Club Runner
Chapter 5 - My Lane
On the top, you will see a bar, that shows you, how long you can stay in the steam
This time limit is also for players in the relaxed mode
If you take too long, you will have to start this level over
On the desk, you will find an oil can
Grab it, it goes into your inventory
Use it with the red handle at the pipe
Click the handle again and the steam will stop
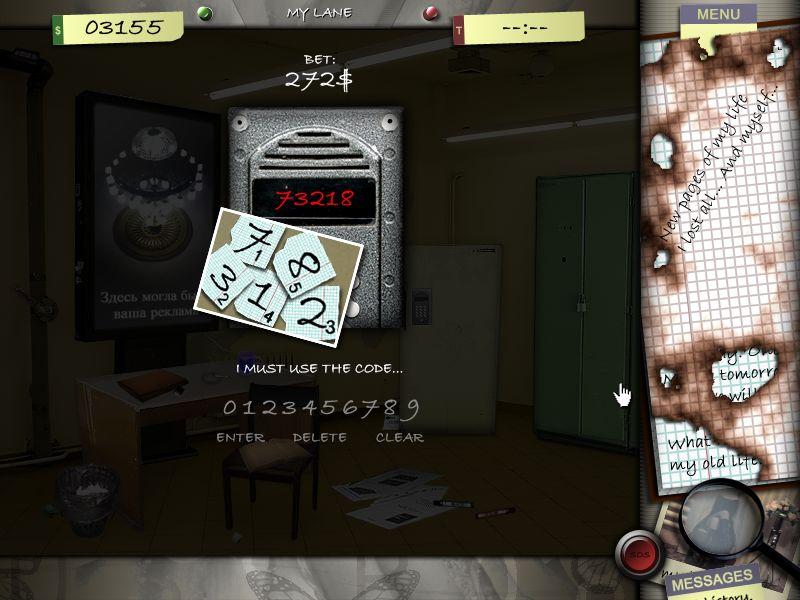
Find the 5 numbers, written on paper scraps
Click the cooler - you have to enter the right code
To do so, see the little number you find on the scraps in the left upper corner
This is the order of the numbers
Click enter
The right code is
7 - 3 - 2 - 1 - 8
screen shot - Code
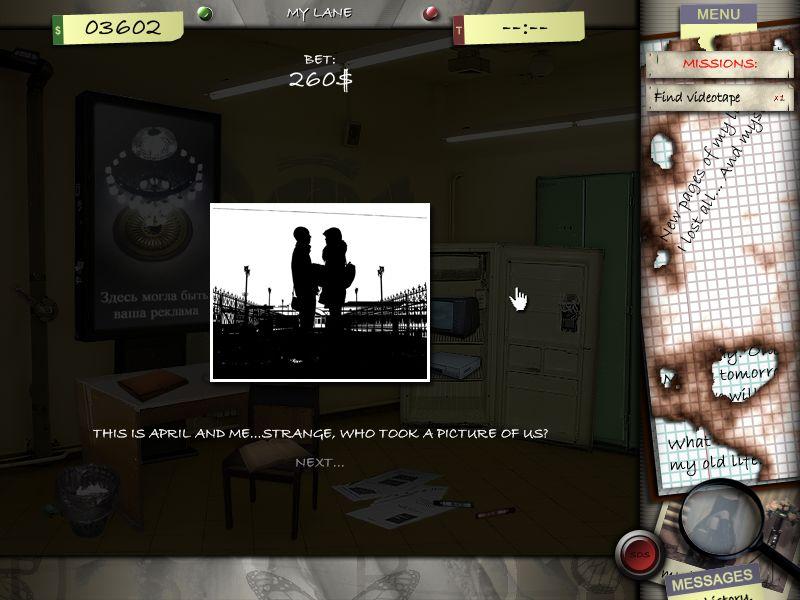
Turn on the televison
After finding the photo pieces, assemble the photo by swaping two pieces till the photo is complete
screen shot - Photo
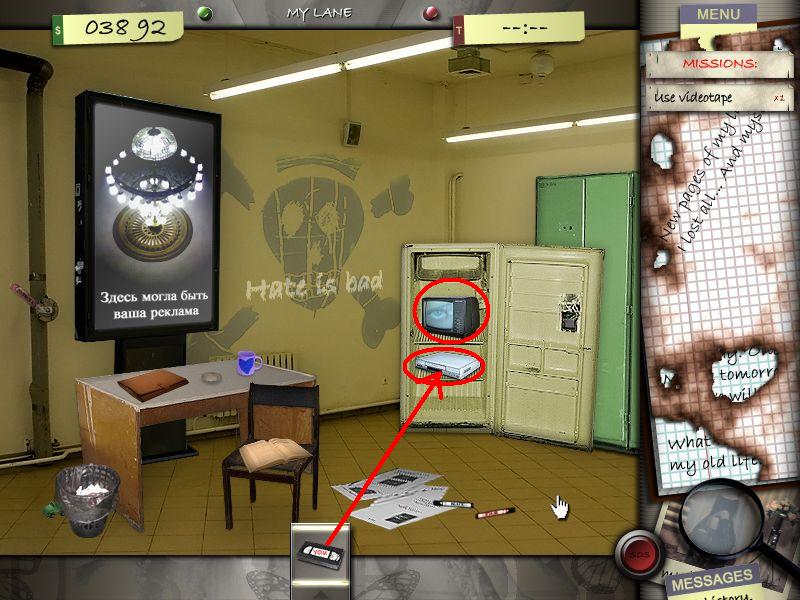
Now find the video tape - it will go into your inventory
Place the tape on the recorder in the cooler
screen shot - Video Recorder
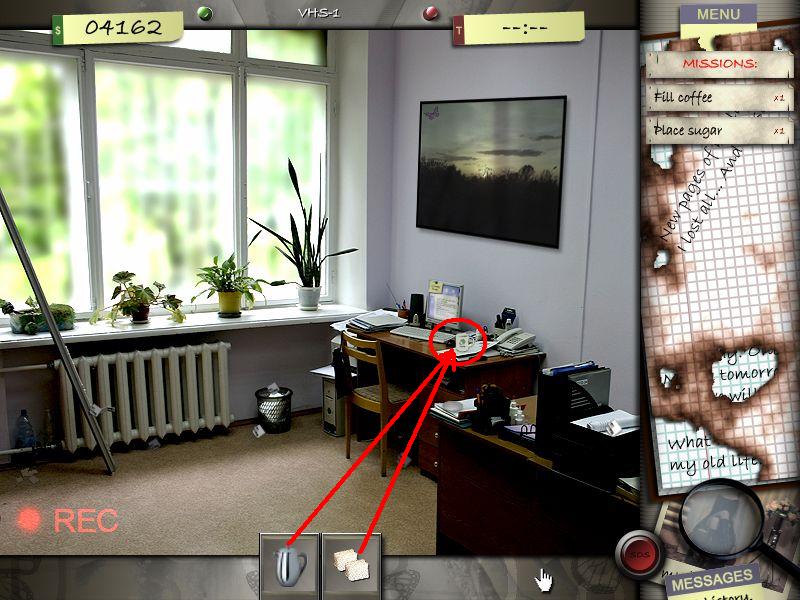
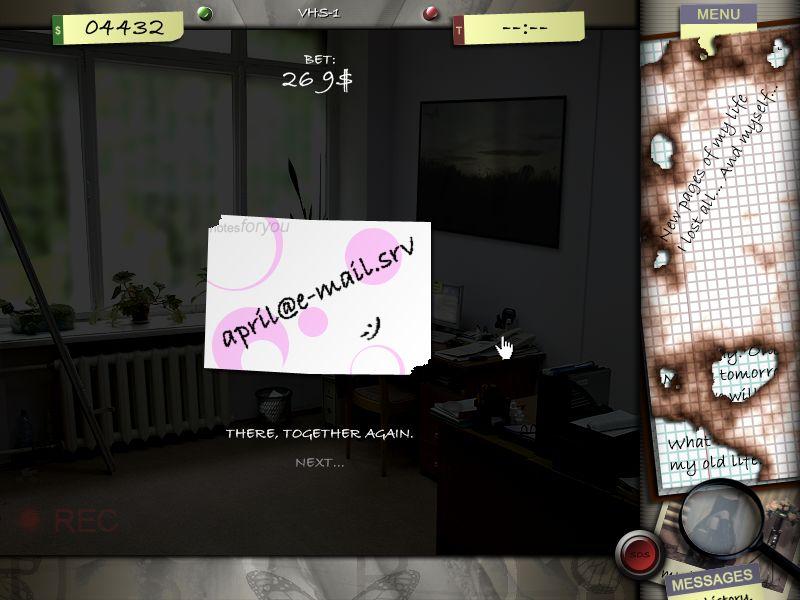
VHS 1
The coffee pot will go into your inventory, also the sugar
Click both on the cup on the desk
Click the cup to drink
screen shot - Coffee
Find the cookies and after that 6 paperscraps
Assemble the email adress as the puzzles before
screen shot - Email Adresse
Click the computer - you will need a password
The hint is the heart
But heart is long as password - so you have to find a four-letter word, that is connected with heart
Click enter, when you think, you found it
The password is:
LOVE
Click the telphone on the desk
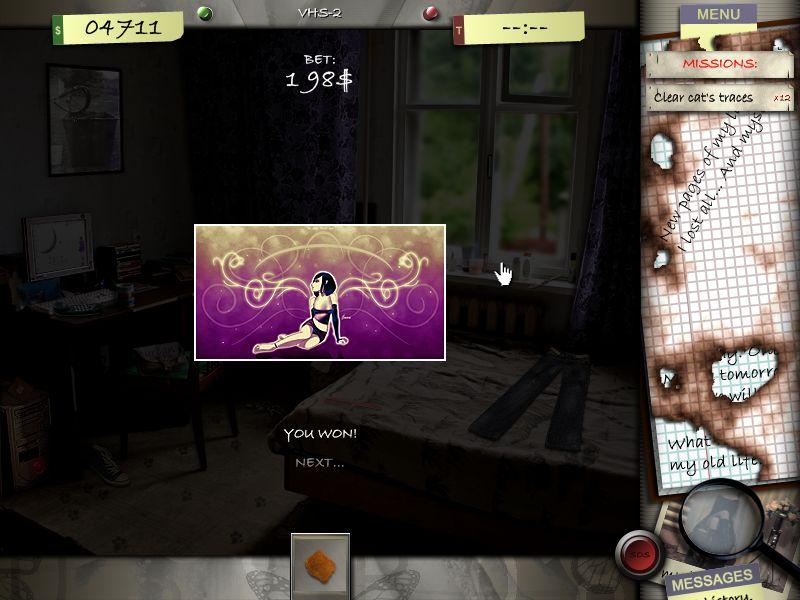
VHS 2
Find the telephone number (a little yellow note), which will go into your inventory
Activate it and click the telephone on the left side of the desk
Click it again to dial
Now click the screen to turn it on
Click again to get access to the puzzle
Swap always two pieces
The frames help you with the orientation
screen shot - Card
Find what you need to find from your list
Shut down the PC by clicking the red button left side on the floor, next to the desk
Get the rag from your inventory ano d clean the cat pawns on the floor by clicking at each of them with the rag
VHS 3
Place the wrapped flowers in the vase on the window board
Get bowl and place it on the left side of the window board, left to the hanging plant
Get all the candies from the floor and give them into the bowl
Click the bowl again to eat one of the candies
Click the screen to read the email
Click again to close it again and choose the Y at the end, when you are asked, if you want to mark the mail as unread
Find the photo
Click the coffee, left next to the screen on the desk, to drink it
Chapter 6 - Training
Find the note on the doll, right side
Get the print paper, it goes into your inventory
Activate it and use it with the printer under the chair
Grab the printed paper
Get all the items from your list
Cut open the seat of the chair with your knife from the inventory, where the white cross is shown. You will find the pistol here
Get the pistol and shoot on the red cross at the head of the doll
The map has to be assambled. Swap to pieces to make them change places
screen shot - Map
Your next goal is Unknown Building - the red cross at the bottom of the map
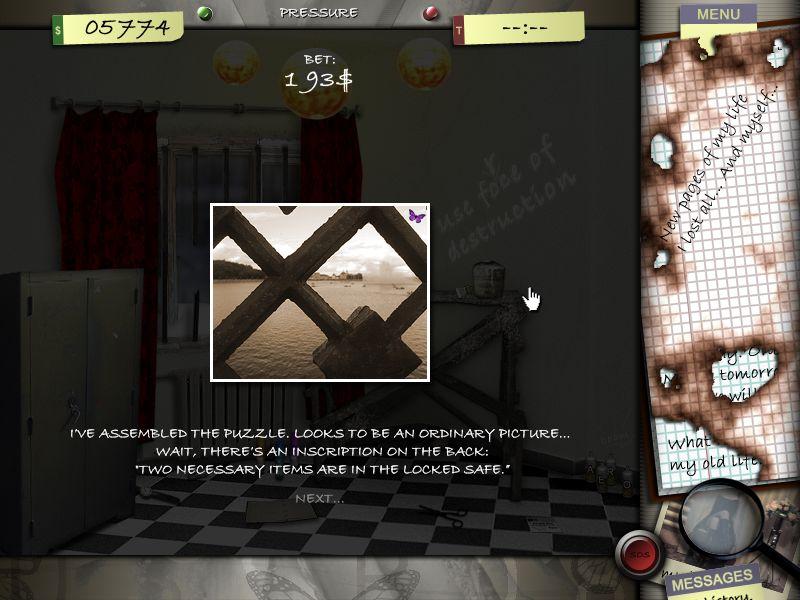
Chapter 7 - Pressure
Use the safety pin from your inventory to burst the balloons
Find the list and get all items
After you found all the puzzle pieces, assemble them
Swap two pieces to change places
screen shot - Picture
At the closet left, you see a red cross - right side from the left handle - place the blowtorch with the tape from your inventory there
Get the pistol out of the inventory and shoot on the blowtorch
The closet opens and you will find the missing items
Choose on the map the cross, left bottom, Restroom
Chapter 8 - History
Find the photos
The photo with the mask asks you to find a mask - find it, behind it you will find the list
Click the access card from your inventory onto the keypad at the dolls belts
Find all buttons for the keypad and bring them by swaping in the right order
The other photo shows you the black frame right on the top of the scene
When you click it, it will fall down and you see an outlet
Place buttons from your inventory on the keypad
Click the keypad and give in the code
You can see your access card - some of the numbers on it have a black point underneath
Enter this numbers, seen from left to right
The code is
1 4 6 8
Click first the telephone charger from your inventory at the outlet
Click now the cellphone at the charger
Click the cellphone again to get it back
Find 5 keys (they all have a letter attached)
With the blowtorch you have to burst the glas cabinet
Your next goal ist the building called Rabbit
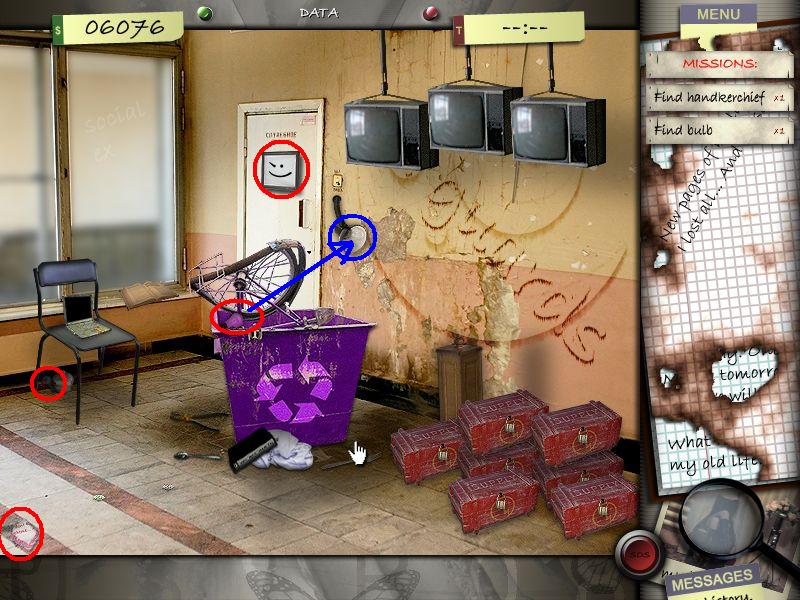
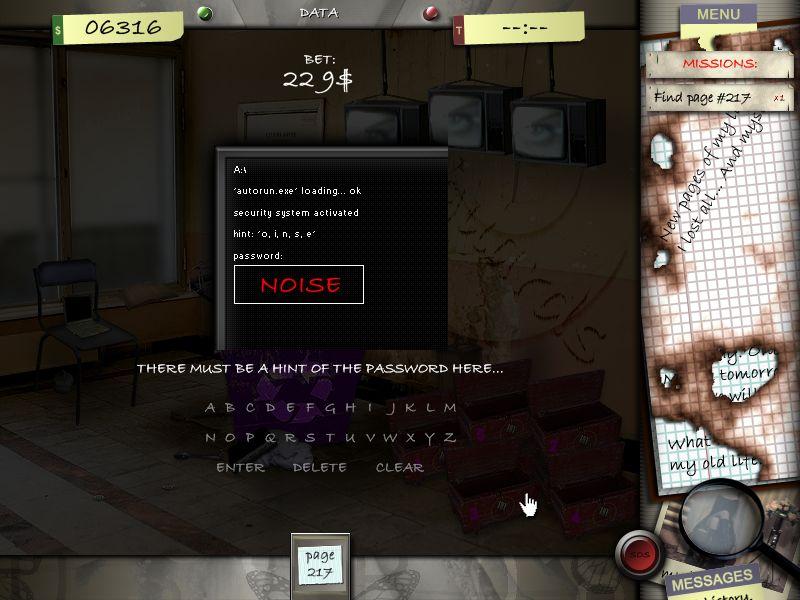
Chapter 9 - Data
The list hangs at the door, the tissue you will find in the lower left corner
The light bulb is in the trash bin, its going into your inventory
Under the chair, next to the sugar bowl you will find the key
Place the lightbulb at the lamp right next to the door
With the switch above the lamp you will put it on
screen shot - Data
Now you see the keys in your inventory
The chest on the floor have to be opened with the key, where the letter is according to the chest's number
a = 1 b=2 and so on
Get all the items out of the chests
Use the remote to turn on the tv's by clicking on them
Use the floppy disc with the laptop
Click it again to start
For the password you have to assemble the letters which are shown: o,i,n,s,e
NOISE
screen shot - Password
The note Page 217 you have to click at the book on the window board
On the map, you will choose Trolley Bus, at the right side
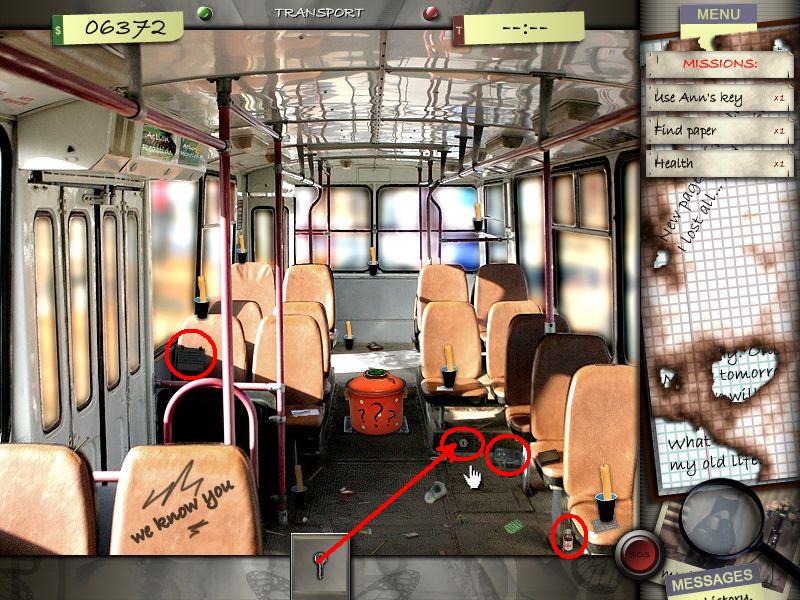
Chapter 10 - Transport
Open the suitcase under the seat right with the key from the inventory
Pick up the note
The medication is standing on the floor - right side
The list is hanging at the left side at the back of the chair next to the door
screen shot - Transport
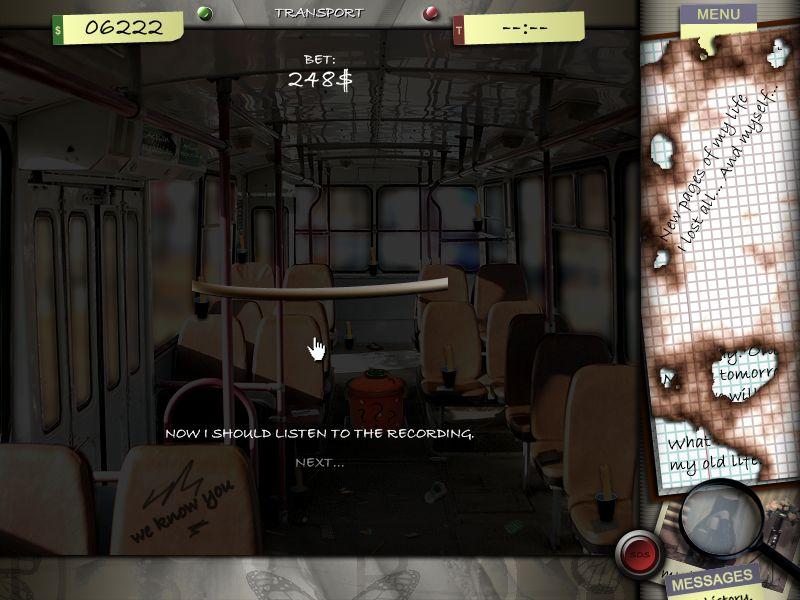
You will find a film in pieces and have to assemble it by swaping two parts
Right parts changing the color
screen shot - Film
On the map you have to choose Appartment House A, left side
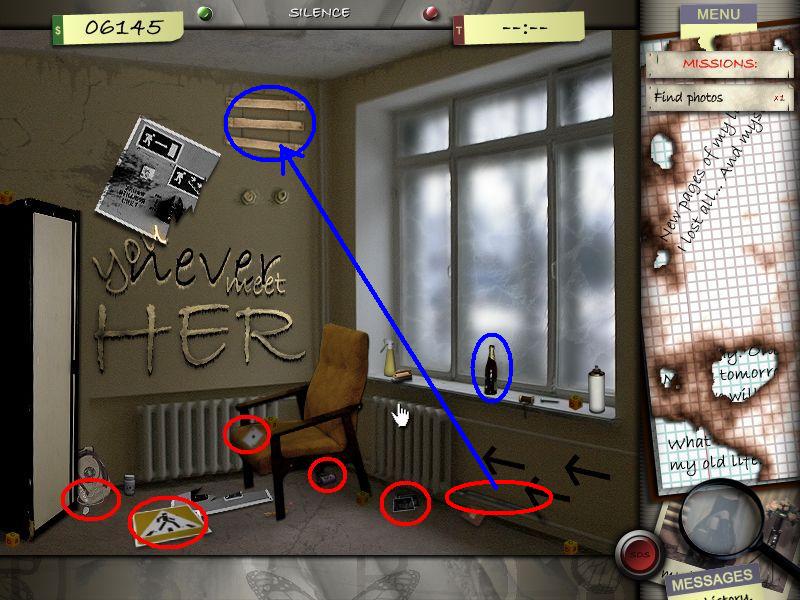
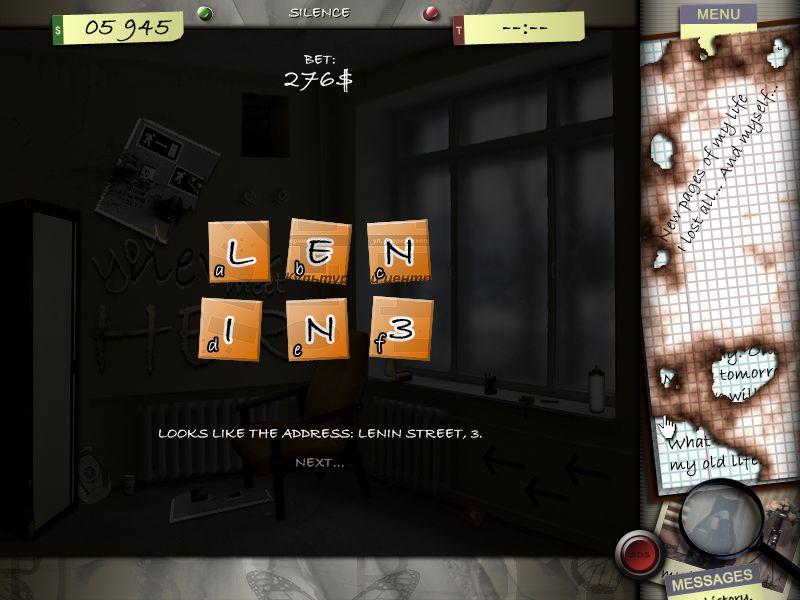
Chapter 11 - Silence
The photo is laying in front of the heater
Find all items, shown on the four photos
Get the paper from the middle of the room and the crowbar, located on the pipe, right side
Use the crowbar at the four planks, click the cover and get the book out
screen shot - Silence
With the hammer from your inventory you smash the bottle on the window board
Grab the message
Find all cubes
When you have them all, its your goal to bring them in the right order
They are having big and small letters on it - swap them, so that the small letters are acording with the alphabet a, b, c and so on
The adress, you have to assemble, is
LENIN 3
screen shot - Cubes
On the map, you choose the cross on the top Lenin Street 3/1
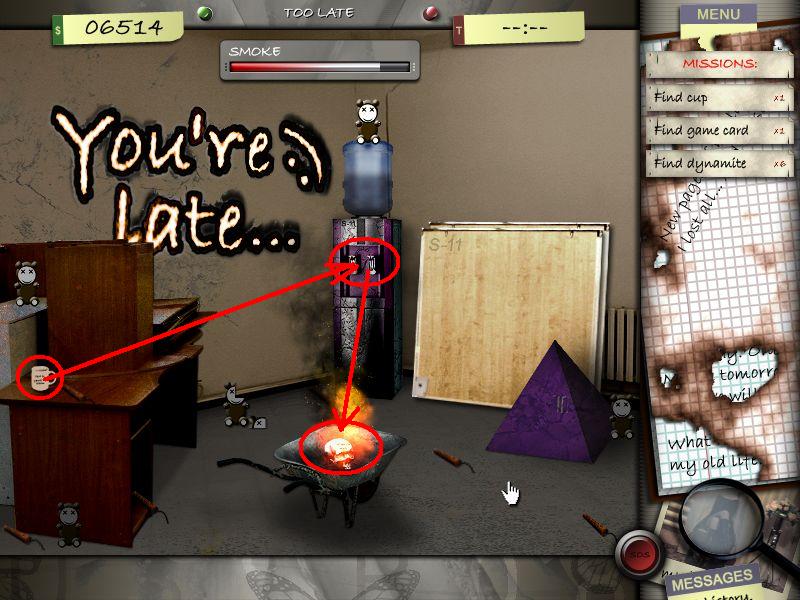
Chapter 12 - Too Late...
On top you will have bar, to show you how long you can stand the smother
Get the cup lelft from the table, fill it at the water dispenser and extinct the fire
Find the dynamite
Don't touch the skull before you found all dynamite sticks, as the light turns off and you will have to go on searching with a flashlight after taking the skull
screen shot - Too Late 1
Find the playcard and the toys
Assemble the toys in the known manner
screen shot - Toy
Use the knife from your inventory to cut open the water dispenser
Take out the scroll
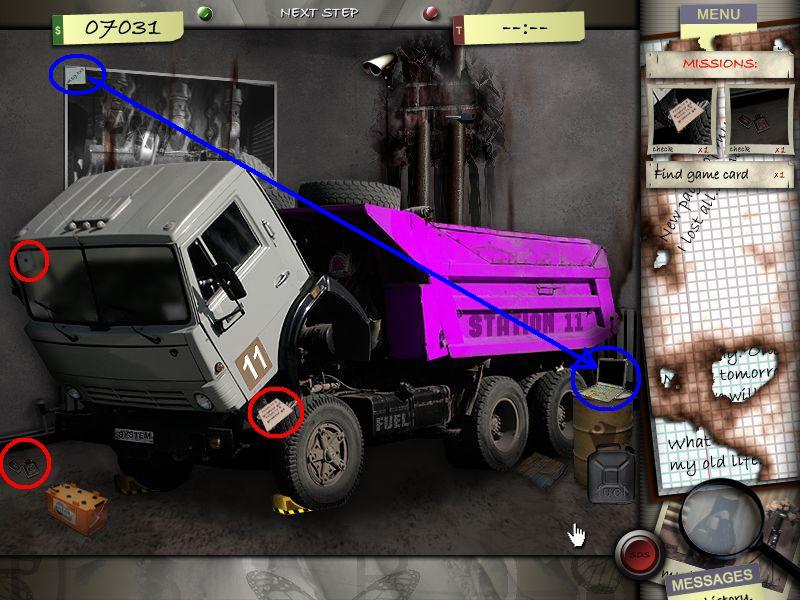
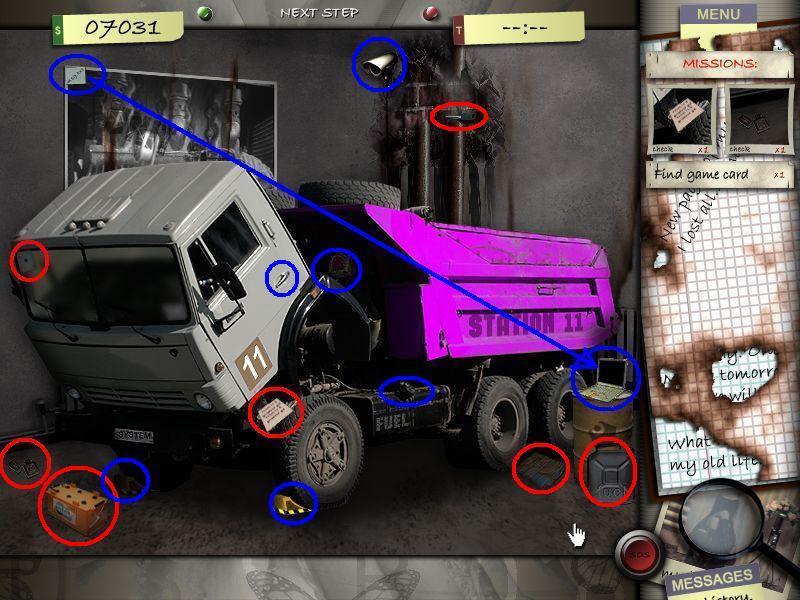
Chapter 13 - The next Step
Find the items you will see on the photos and the playcard
Use the flashdisk from your inventory with the laptop on the chair, right side
The note with the code is left on the top in the picture, hanging at the wall
Click the note from inventory at the laptop
screen shot - Next Step
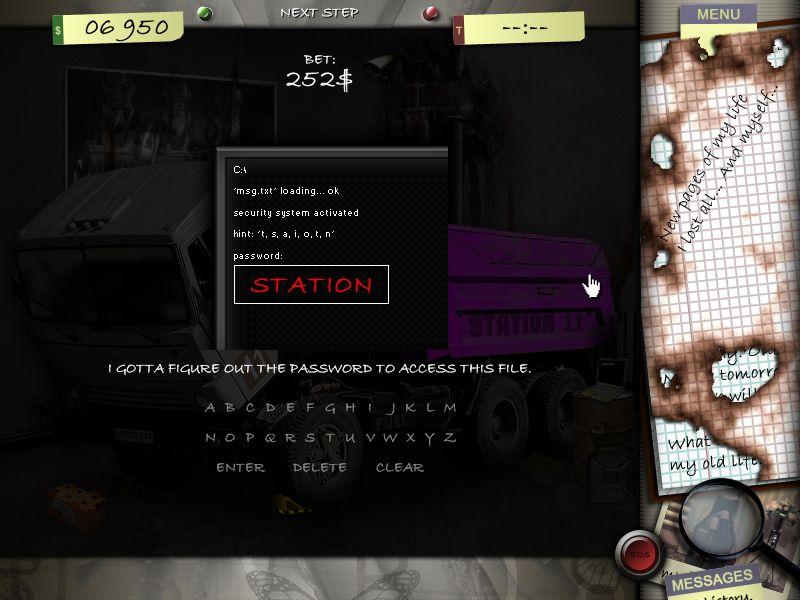
For finding the code you have to bring the letters t, s, a, i, o, t, n in the right order
STATION
screen shot - Code
Find the rest of the items and follow the next steps:
You will now have in your inventory: crowbar, fuel canister, pistol and a battery
With the crowbar you remove the immobilizers from the front wheels by clicking them both
The fuel comes in the tank, the battery between the cab and cargo area
With the pistol you shoot on the security cam in the middle on the top
Get the key out of the inventory and click it on the truck to start it
screen shot - Next Step 2
On the map you will choose the way to the east (right)
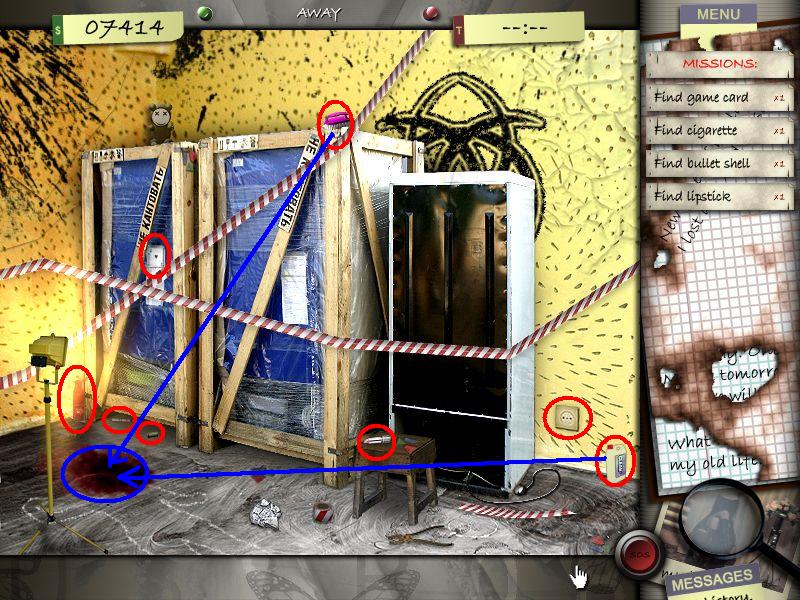
Chapter 14 - ... and gone
You will have a bar on the top, so you can see how long you will be able to stand the cold
Get the plug out of the outlet at the right wall
Find all the listed items
The brush and the cleanser will go into your inventory
Click first the cleanser and after that the brush on the blood stain, left on the floor
Click the light square spot you see and get out the paper
screen shot - And Gone 1
Find the stained glas pieces and assemble them
screen shot -Stained Glas
Click the glas at the free spot on the floor, where you found the note
On the map you have to choose the square 190 on the bottom and 210 left
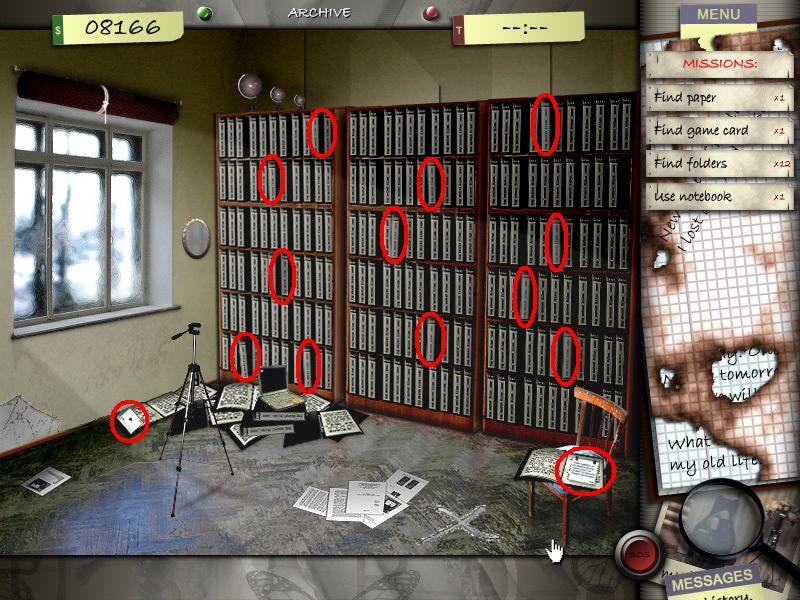
Chapter 15 - Archive
The paper is laying on the chair, right side
Find your items
The 12 binders you can see locate by looking at the white backs. The writing on the ones you need, look a little more grey than black
When you have them all a puzzle will open
Swap two pieces to change place and bring the binders in the correct order from 1 - 12
screen shot -Binder Puzzle
screen shot -Archive
For the code word use the letters from the telephone number pad
The code is
Spell the word HUMAN
Click 4 8 6 2 6
Click the laptop and you will receive 2 photos
Find the items and they will go in your inventory
Place the tripod on the white cross on the floor
Click the mirror on it
Use the knife to remove the thread that holds the curtain up
Use the knife again to remove the patch on the curtain
The mirror gives you a spot on the floor
Use the crowbar there
Click on the cover and and click again to enter the hole
screen shot -Archive 2
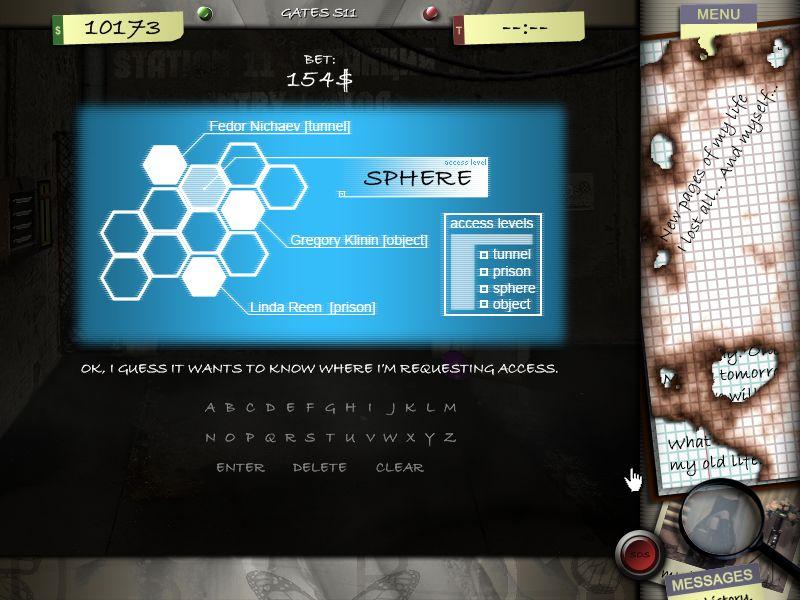
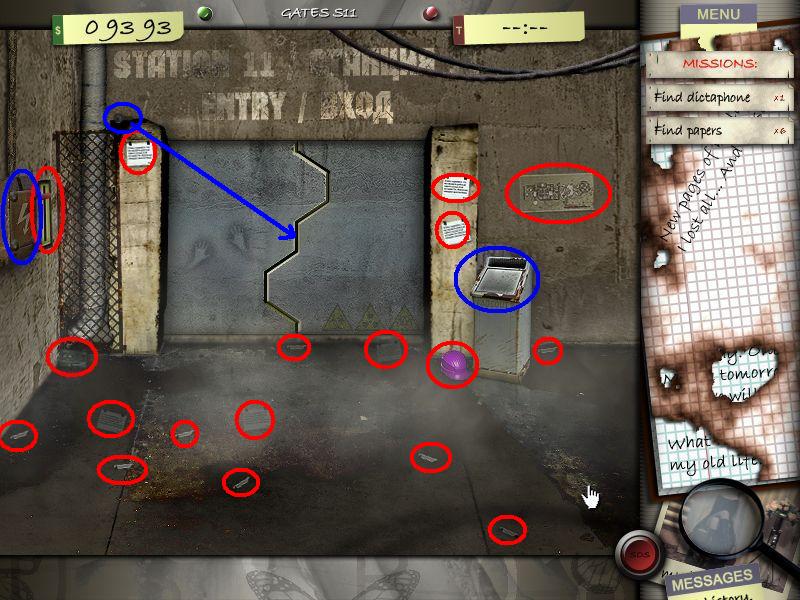
Chapter 16 - Gate S11
First turn on the light with
The recorder you will find left next to the gate at the corner
When you click on the control panel right next to the gate, the light turns off again
Get the screwdriver out of the inventory
Left next to the light switch is a fusebox
Use the screwdriver to loose all four screws
Click the cover and take out the four fuses
Look for the new fuses on the floor (the old ones also laying there, you just have to click till you found four working ones)
Try it again at the control panel, but it still does not work
So we use the good old methode: Use the hammer and smash the control panel with it
Now it works
screen shot -Gate S11
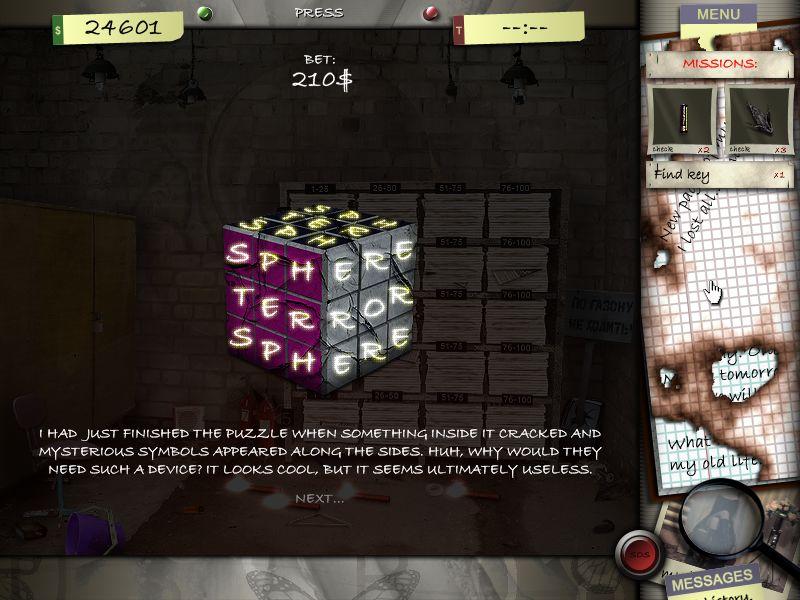
When you click the control panel one more time: it works!
Again a code is needed: you see three names with a description (tunnel, object etc)
The same words you see in the right lower corner
When you look again, you will see, that the one word from the right corner wasn't used
Enter the word sphere as password
screen shot -Code
The map is on the wall behind the control panel
Get the key and the helmet
Use the key to open the door
Choose on the map on the bottom Room of Sphere Experiments
screen shot -Gate S11-2
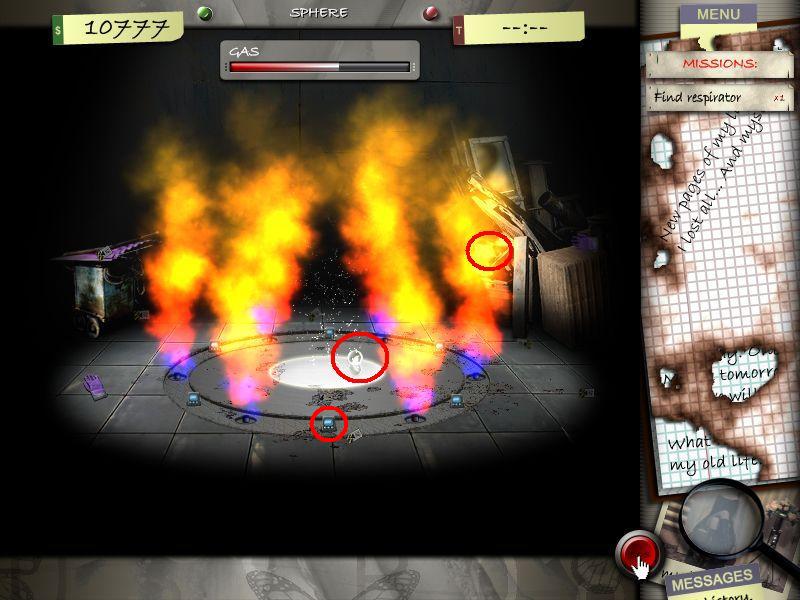
Chapter 17 - Sphere
You have bar on the top, find the respirator before the times runs out
Its right, next to the right fire
screen shot - Sphere
Whenever you click one of the PDA's you will have to solve a puzzle
Swap two tiles to change places and you will always receive a roman number (I, II, III, IV, V, VI)
After finding all place each card to the PDA correspondig to the roman number
The fire shuts down
Get the gloves and pick up the hot cover
screen shot - Sphere 2
Click first the gras and then the sphere in the middle of the grad
When the other spheres appear, just click them till you find the right one
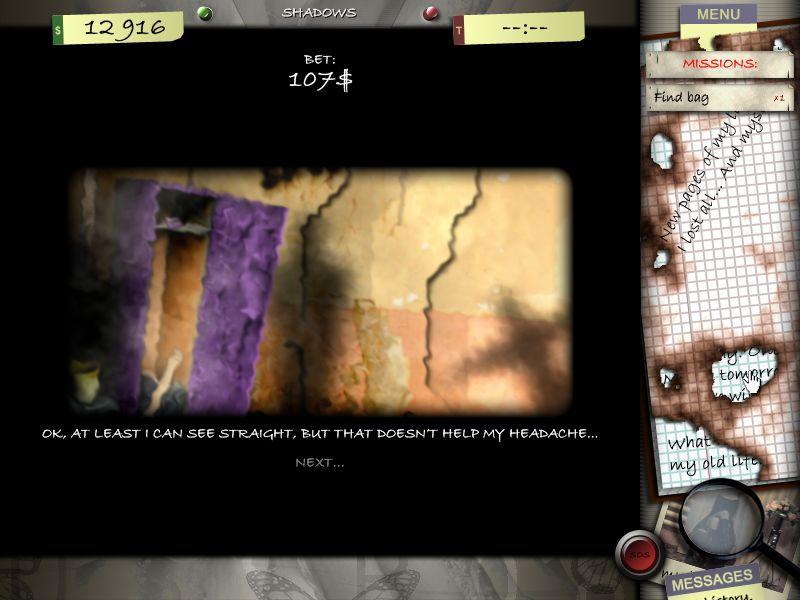
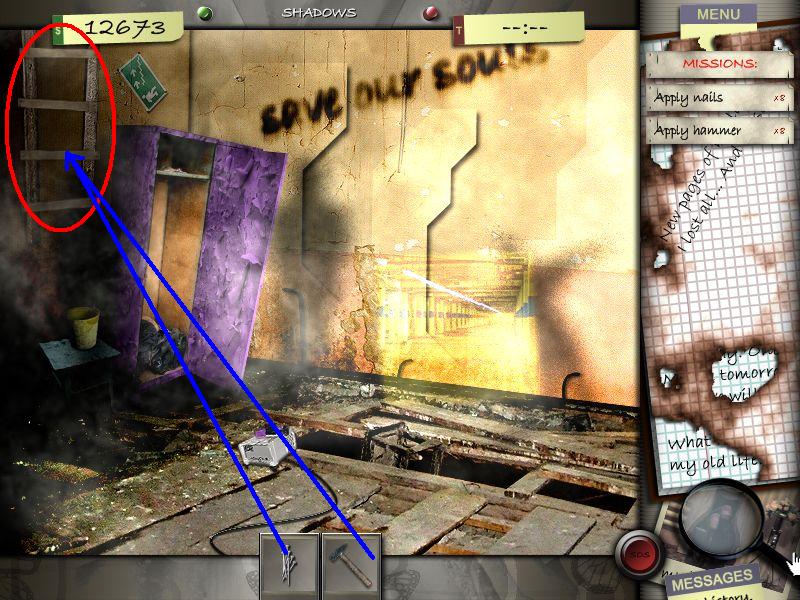
Chapter 18 - Shadows
Swap two pieces to change places
screen shot - Shadows
Find all items from your list and place the slides into the projector
The planks belong at the left wall to create a ladder
You need to take care about the distance between the planks, otherwise the plank is going back to your inventory
Now place all eight nails left and right at the end and fix them by smashing with hammer on each nail
Click the ladder to leave the place
screen shot - Shadows 2
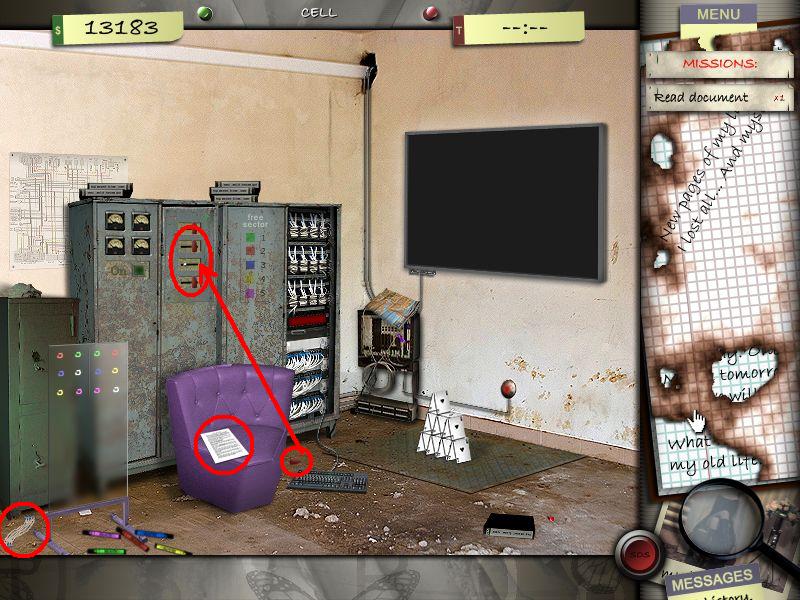
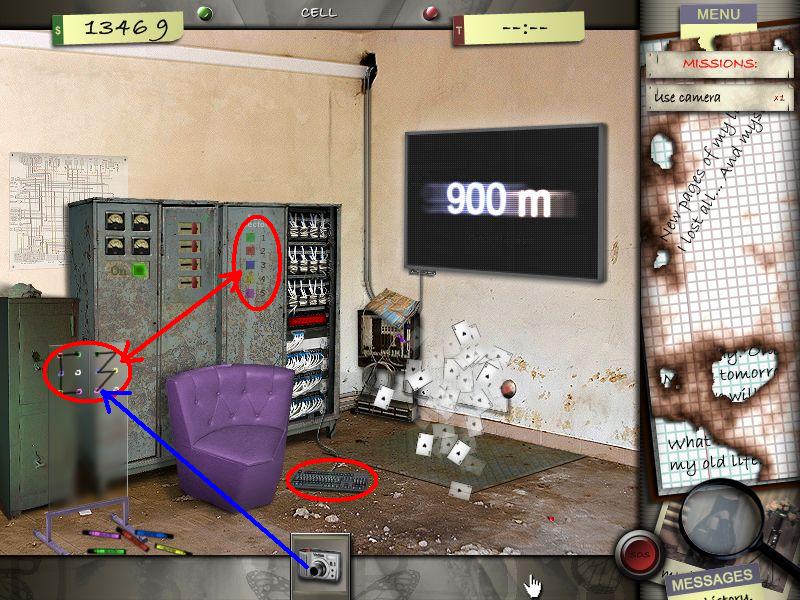
Chapter 19 - Cell
After finding the switch, place it at the switch cabinet, where the others are at the left side
screen shot - Cell 1
Look at the pictures in the right upper corner to see, what you have to look for
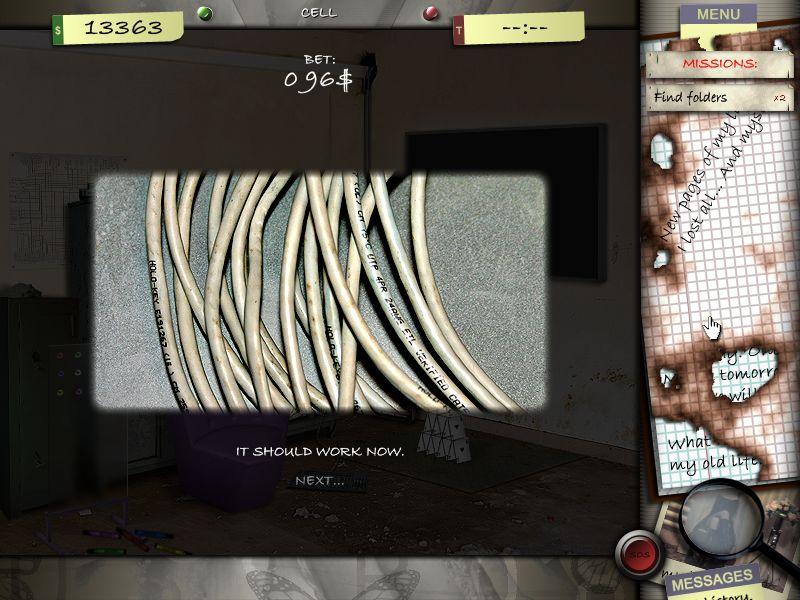
Click the switch an a puzzle will appear
Swap... you know how it works by now.... ;)
screen shot - Cable Puzzle
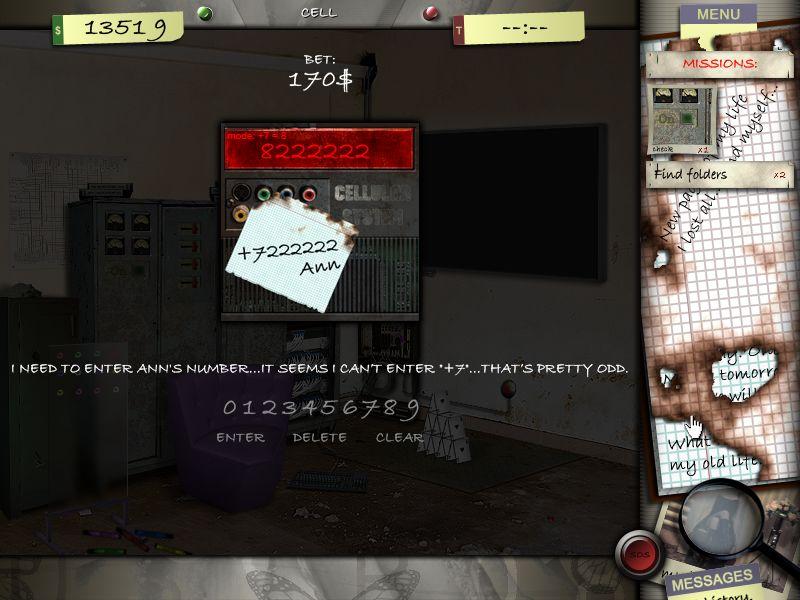
Place the cables in the back closet and a new code puzzle appears
On the top you can read +7=8
So you enter Ann's telephone number with the 8 at first
8 2 2 2 2 2 2
screen shot - Code Puzzle
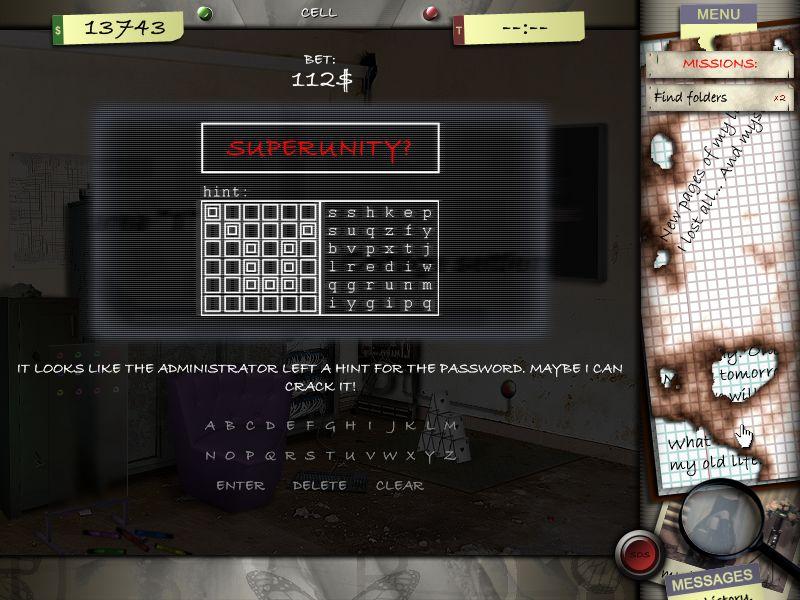
Click the green ON - sign at the switch cabinet
The next puzzle appears
The hints are the white squares in the left board
Look for the letters on the right board, according to the white squares on the left
Follow the line, starting at the top and use always the next one in line - imagine it as a snake from the head to the tail
The solution is SUPERUNITY
screen shot - Code Puzzle 2
The playcard you place on the card house on the floor
Click the keyboard on the floor
Right next to the switch cabinet you see 5 colored squares with a number behind
Use the marker at the glas board using the informations on the cabinet
Green is 1 - so click the marker on green - Red is 2 - so click the marker now on red
A line will be drawn between the two points
Do so with the rest and you will see
C 3
screen shot - Cell2
On the map you choose Graveyard (900m)
Now place the dynamite in the back lower corner and lit it with the lighter in order to move on
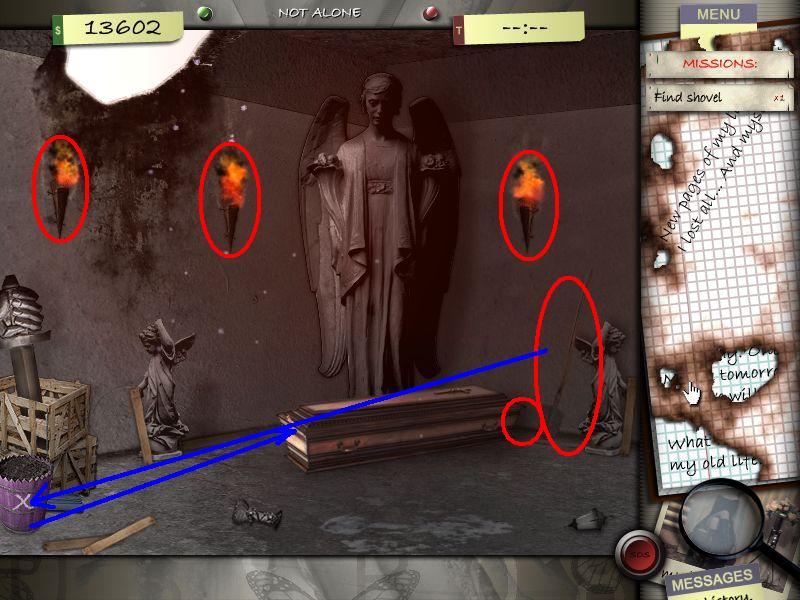
Chapter 20 - Not alone
First you have to make light
Get the oil can, right corner next to the coffin
For a strange reason you will already now be able to see fine
But you still have to lit the torches, so click every torch once with the oil can and after that with the lighter
Get the shovel and click the bucket with the white cross on the floor in the lower left corner
Get the key in front of the bucket and open the coffin
screen shot - Not alone
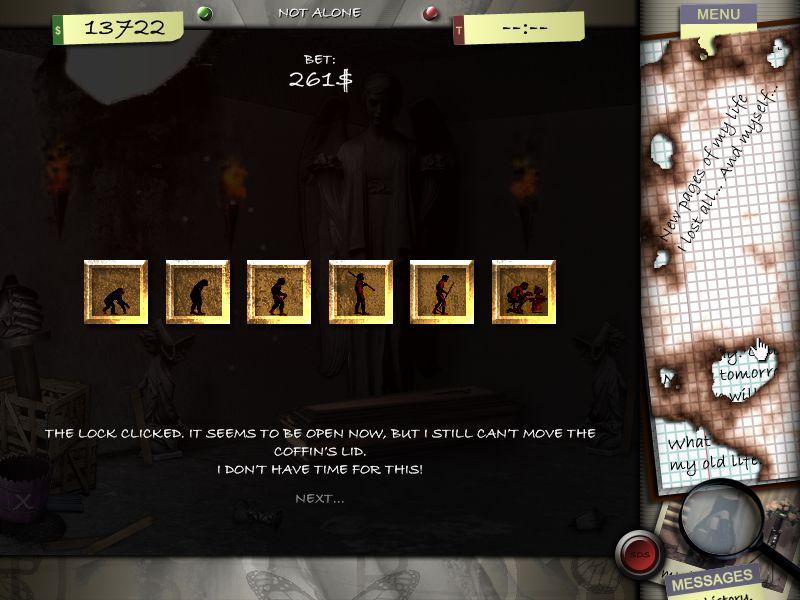
A puzzle appears
By swaping the squares you have to bring them in the order of evolution from left to right
screen shot - Code Puzzle 2
Get the crowbar and open the coiffin with it
When you get Ann out of the coffin, you will see a bar on top, showing you how much time you have to reanimate her
Click her chest for heartmassage and her face for breath giving according to the order, you are given on your list
Click Ann to wake her up
Find the blanket and click it on Ann
Get the firewood, place it in front of Ann, wet it with the oilcan and lit it with the lighter
On the map you want to choose the cross in the right upper cornerC 3
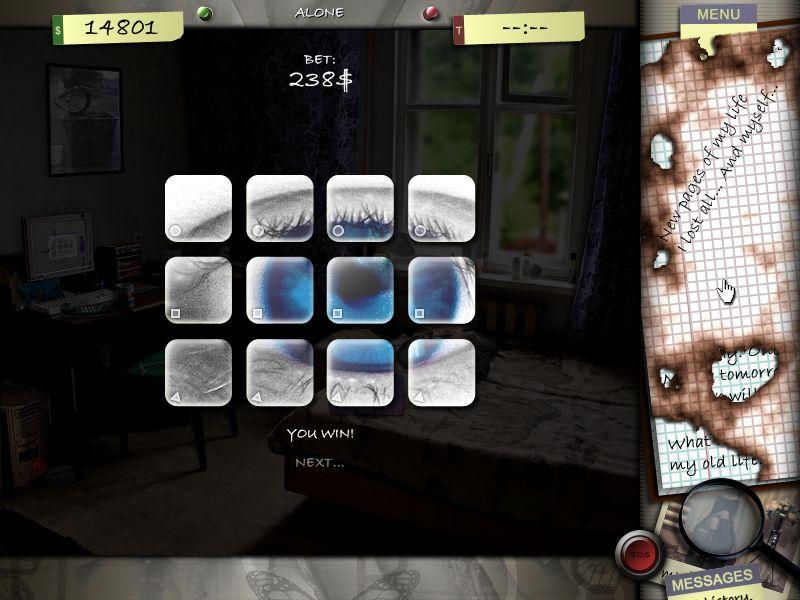
Chapter 21 - Alone
Click the PC Screen and enter the password
You have to reassamble the letters
The correct word is
B E A S T
Now you can get your emails by clicking on the screen again
Get the sponge and clean the cat pawn on the floor, on the wall and on the bed
Place the CD at the tower left next to the desk and click the screen again to play a game
You might already guess... right... swap....
screen shot - Puzzle
Pick up the phone in the front left corner of the desk
Find all your stuff
To find the pistol, click the pillow on the bed
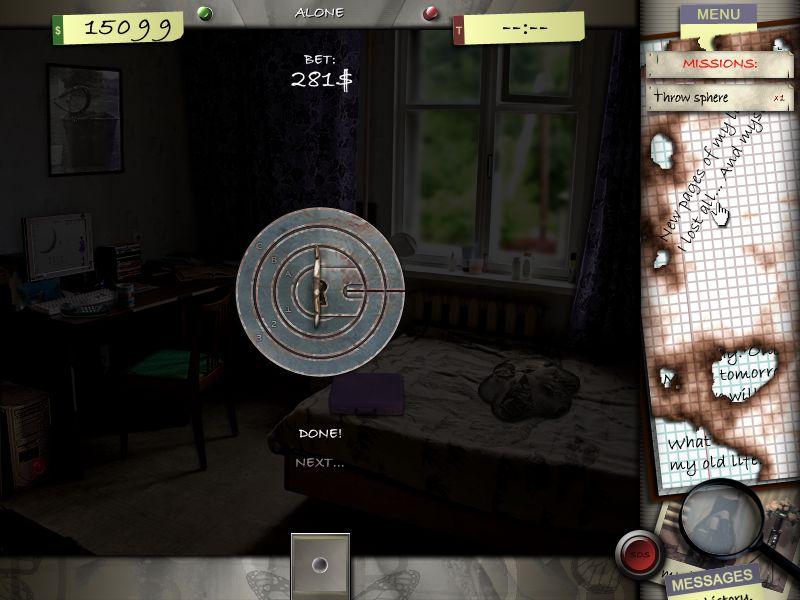
With the lockpick you have to open the briefcase on the bed
A puzzle open
You see three circles, all have a mark somewhere
The mark has to be right, at three o'clock
All three circles are doing diffrent
The inner circle moves itself and the outer circle
The middle circle moves only itself
The outer circle moves itself and the middle circle
So what you have to do, is:
Click the inner circle, till you see it at the right position
Now move the middle circle, till the marks go accord with the one of the outer circle
Now move the outer circle - as it moves the middle circle also, the lock will be open as soon as you reach the right position
screen shot - Puzzle
Get the paper out of the briefcase
Throw the sphere through the window in the right upper corner
Chapter 22 - Nowhere
The diary you will find in the paper bin
Click the laptop and figure out the passwort by reassambleing the letters
The password is:
K I S S
Click again the laptop and find the items from the photos
Afte collecting the paper scraps... yes, as usual
screen shot - Puzzle
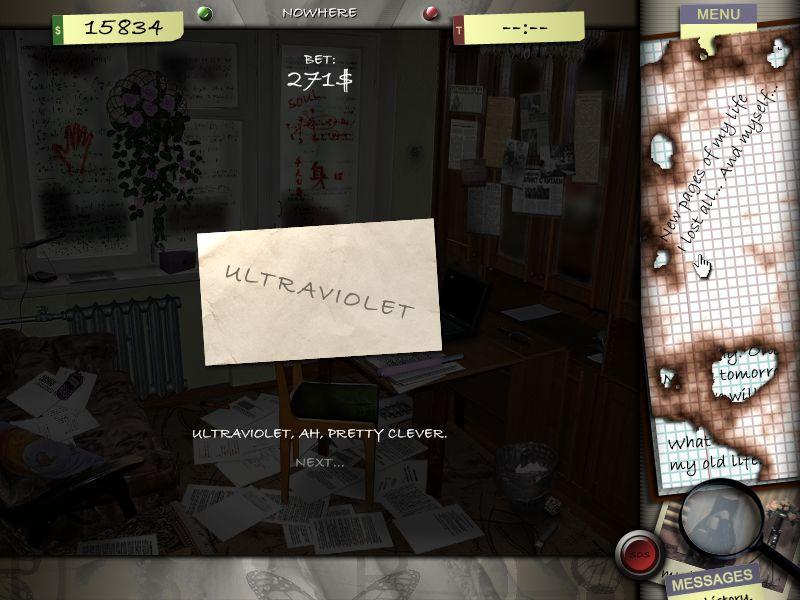
Find the UV-lamp
Activate the paper in the inventory and click it on the lamp
The usb stick has to be connected with the laptop
Click the laptop again
Use the lock pick to open the purple box on the window board
Another lock puzzle
The three circles all act diffrent
The inner circle is moving itself and the outer circle, but the outer circle counter clockwise
The middle circle is moving alone
The outer circle is moving itself and the middle circle counter clockwise
The solution is:
Place first the inner circle in the right position
After this place the outer one right
At last place the middle circle
Get the letter out of the box
Answer the telephone
Chapter 23 - Colonel
Click the Colonel in order to talk with him
Give him the money and the weapon from your inventory
For this you will receive the key for the file cabinet on the right
Open the bottom door and get the ticket and the envelope out
Use the ticket with the laptop
The code is the number on the ticket
12702
Pick up the water jar and give water into the glas on the desk
Get the glas and give it to the Colonel
Give the the tablett box also
Anser the phnone
Say Good Bye to the Colonel by clicking
Take the newspaper out of his hand
Chapter 24 - Déja Vu
Find all items
While looking for the broken pieces of the mirror, you cut yourself and have to find a bandage fast
It is on the step, left from the door
The mirror has to be fixed - you know how to do ... swap...
screen shot - Puzzle
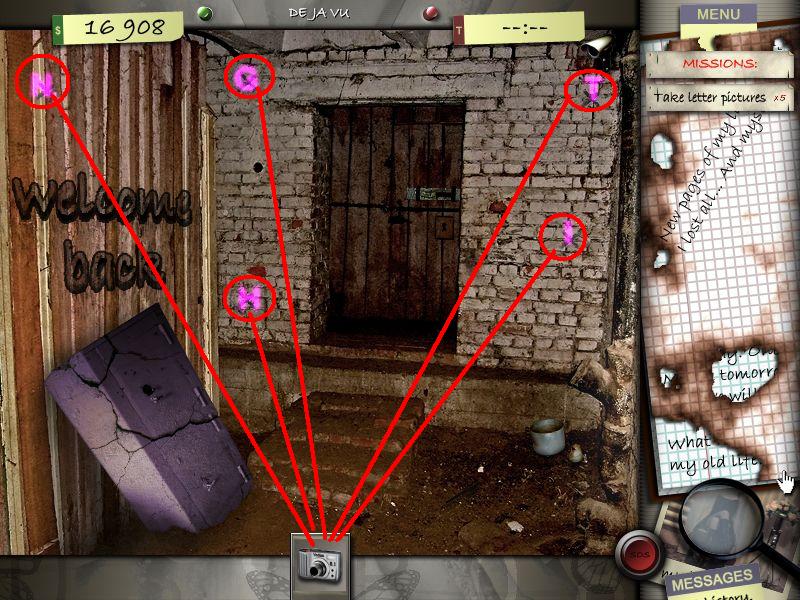
Get the UV lamp and click the crosses at the wall
You will see letters
Make a photo of each letter
screen shot - Puzzle 2
Reassemble the letters to the word NIGHT
Shoot with the pistol on the security cam in the right upper corner
Click the door latch and use the lock pin to open the door
The princip is same as before. watch the circles and bring all marks on the position three o'clock
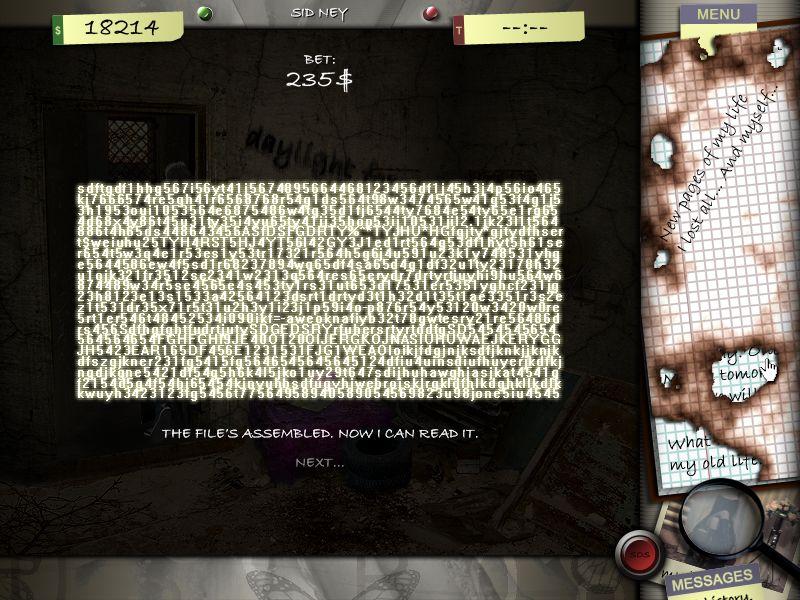
Chapter 25 - Sid Ney
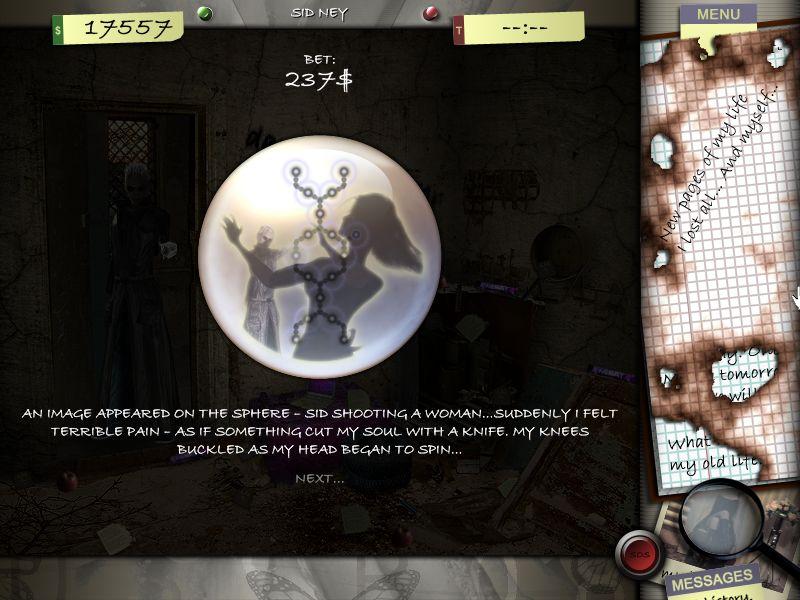
Use the pistol from your inventory and shoot onto the stranger in the door
Click him after, to speak with him
Give him the sphere
In the following puzzle, you have to make sure, that all parts get energy from the main sphere
They do not have to be connecet in a circle, just every part has to have a connection to get energy
You can turn each part with right click
screen shot - Sphere Puzzle
Talk again to Sid
Get the tabletts from him
After you found everything, get the floppy discs out of your inventory and click them onto the laptop
A puzzle... you know the way...
screen shot - Puzzle
Click the laptop
You see the word NIGHT and you tip says: What follows - on night follows DAY
Talk again with Sid
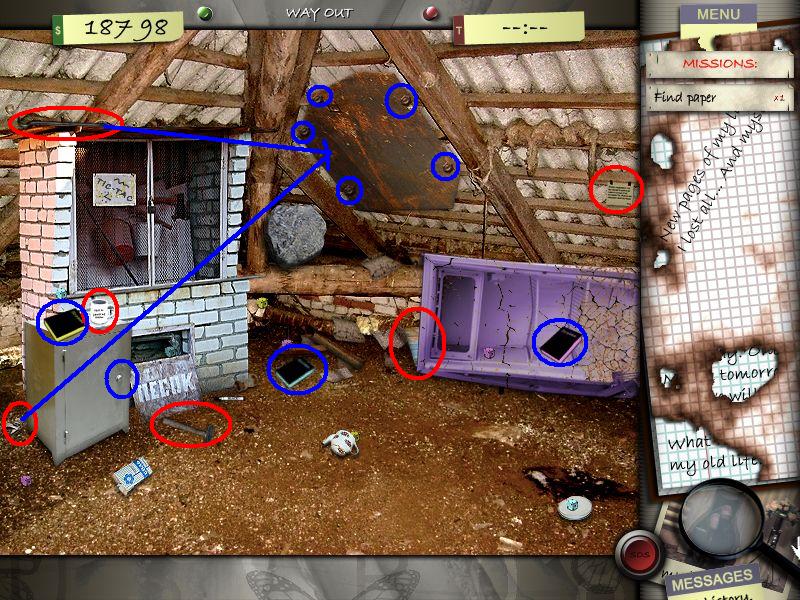
Chapter 26 - Way Out
After finding list, map and coffee, you have to use the lock pick at the small drawer
Find out first, which circle is doing what and find your way to the solution then
With the hammer, you smash the alarm clock inside the drawer - get the scroll
After finding the magic dice, you have to bring them in the right order
They are sorted from A - C
Purple: 3 6 5, blue 1, 2 4 and yellow 2, 4, 3
Get the dice out of the inventory and click them on the books, according to their color (puple dice - purple book and so on)
With the wrench you have to loose the five screws from the metall cover on the wall
Use the crowbar at the cover after
Click the hole to leave
On the map you have to choos the cross bottom right Psychatric Lab, Lenin Street 6
screen shot - Way out
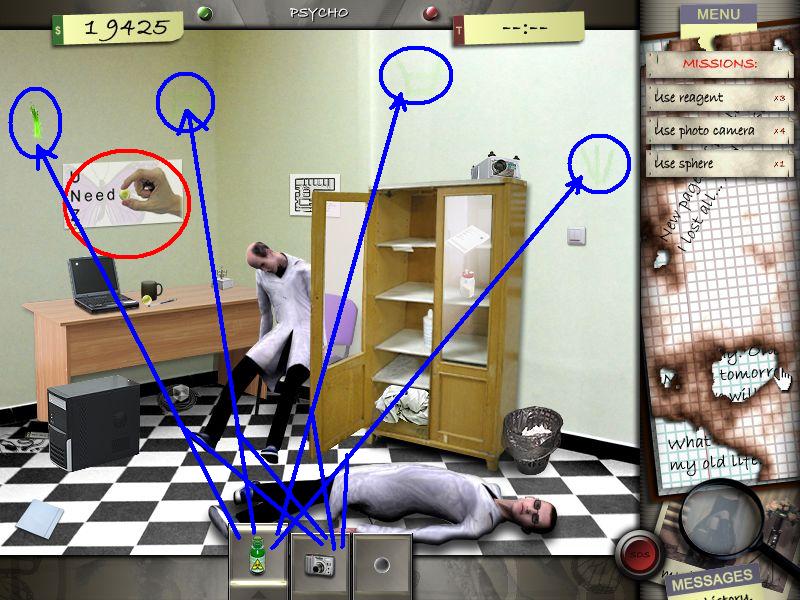
Chapter 29 - Psycho
Click the two men and find the items, you see on the photos
Get the medicine from your inventory and click the mouth of the laying man
Click the poster, that shows the hand with the pill
Use the crowbar to get rid of the three wooden planks at the medicine closet
Get the antidote
Use it for times at the wall - at the green spots
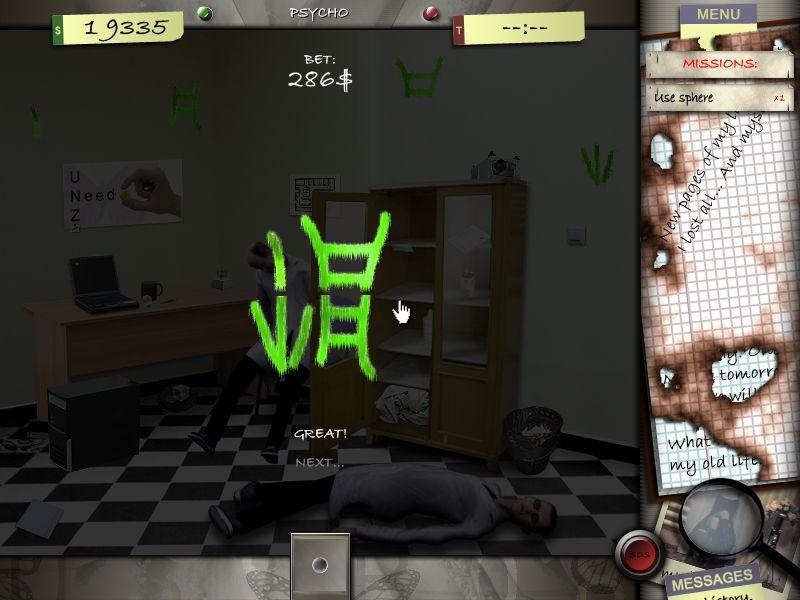
Use the camera to make a photo of each sign
screen shot - Psycho
You have to swap... till you find the right position
screen shot - Puzzle
The map you will find at the wall, left to the closet
Click the sphere at the square under the desk
For solving the puzzle connect all parts in a way, that all little spheres get energy
screen shot - Puzzle 2
Pick up the tablett from the desc
Open the PC with the screwdriver
In this case its enough just to click the pc
Get the hard drive and click it at the laptop after
Click the laptop again
On the map, you will choose the cross underneath the little man, Basement
Chapter 28 - Lies
After you found all parts of the form, a puzzle appears... you know, how it works...swap
screen shot - Puzzle
After finding all part of the poster... you can guess... swap
screen shot - Puzzle 2
And we do the same with the paper scraps ... swap
screen shot - Puzzle 3
The music tape goes into the tape recorder on the shelf
Get the jerrycan, standing above the tape recorder
Also find the rag
Use the jerrycan with the bottle on the table
Place the rag on top and lit all with the lighter
Get the bottle FAST from the table and through it at the wall, left to the shelf
You really have to be fast, otherwise, you will blow yourself up and have to start the level over
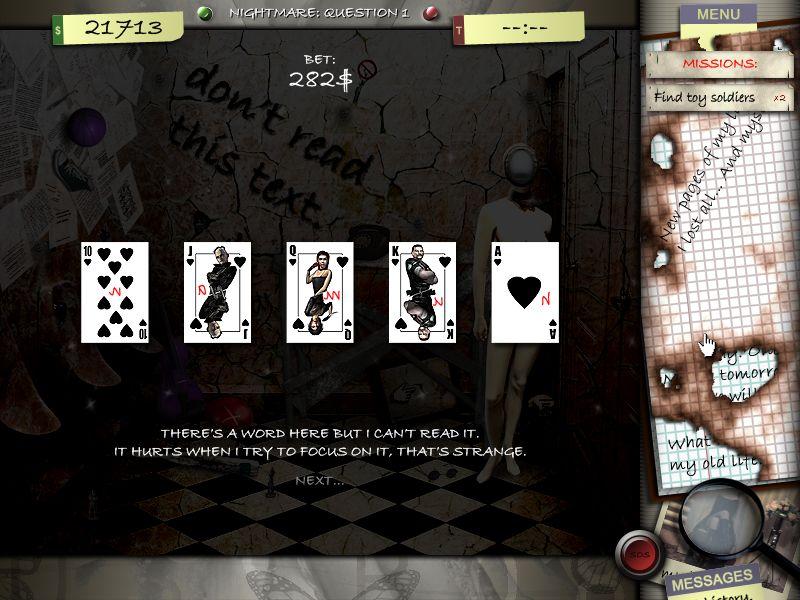
Nightmare: Question 1
Drink the coffee complete to see clear again
Click four times the doll's face to collect all masks and to look at yourself
Get the gun form the doll's hand
Acitvate the gun in your inventory and shoot the balloons
When you collected the cards you have to bring them in the right order by ... swaping
The right order is a royal flash - 10, jack, queen, king, ace
screen shot - Cardorder
Get the cards out of your inventory and click the head of the doll, which is a mirror
Now you can read the word on the cards
Click the telephone
The code for it is
The word on the card: H U M A N
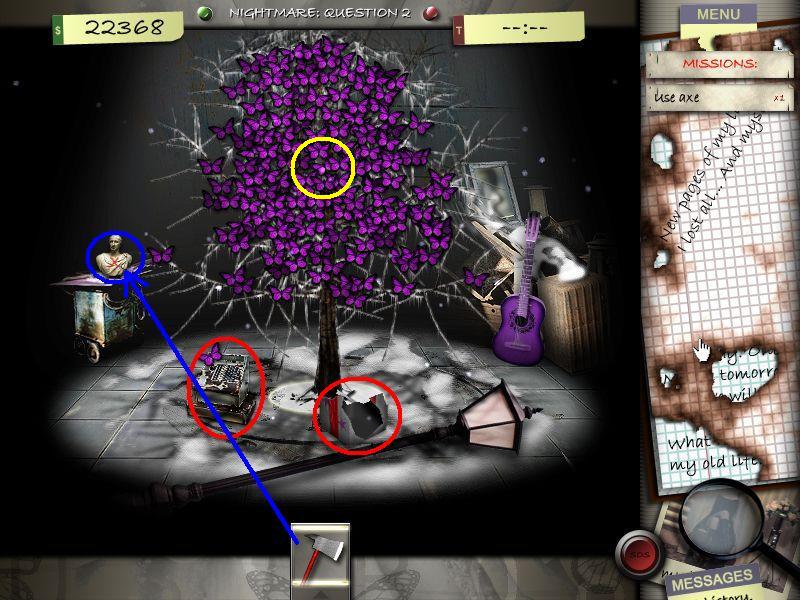
Nightmare: Question 2
Find the list
After collecting the money, click the cash register to open it
Get the money from your inventory and put it in
Close the cash register with a click
Click the appearing gift and get the axe
Activate it in the inventory and smash the bust in the back on the drawer
Look for the puzzle pieces
screen shot - Nightmare
Swap .....
screen shot - Puzzle
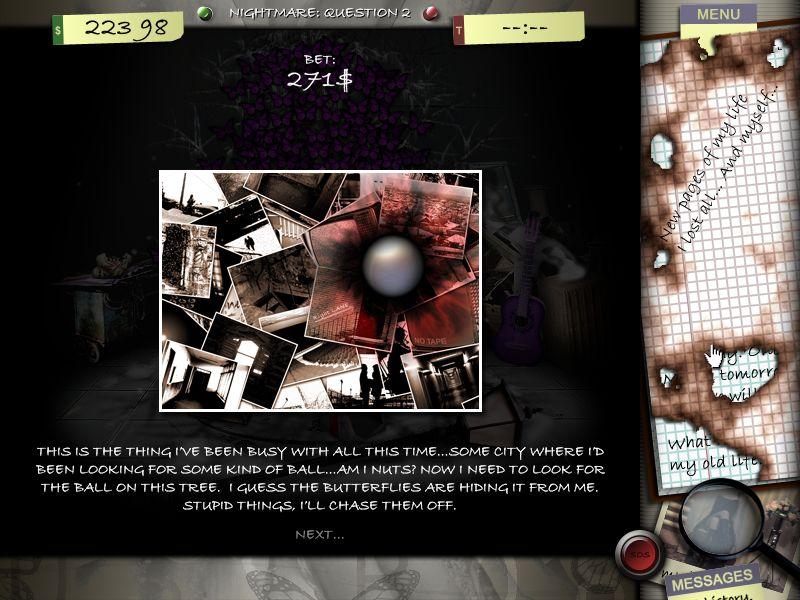
Click the middle of the tree to get rid of the butterflies until you found the sphere behind
Nightmare: Question 3
After finding the list, click the statue
Click the microphone on the stand to yell at the statue
The lock pick is right next to the gitarre
Use the lock pick at the chest - as before - first look, what circle is doing what
The inner circle moves the middle circle, but with double speed
The outer ring moves itself and the inner circle counter clockwise
The middle ring moves itselfs and the outer one counter clockwise
Der second circle seen from outside moves all circles exept the the inner one, all clockwise
Get all coins out of the chest
Use the with the slotmachine
You have to do it three times, till you see the name Ann
Click the microphone and enter as code the name Ann
The statue turns out to be Ann
Click her
Only get the red roses - hand them out to Anne
Click her again to talk to her
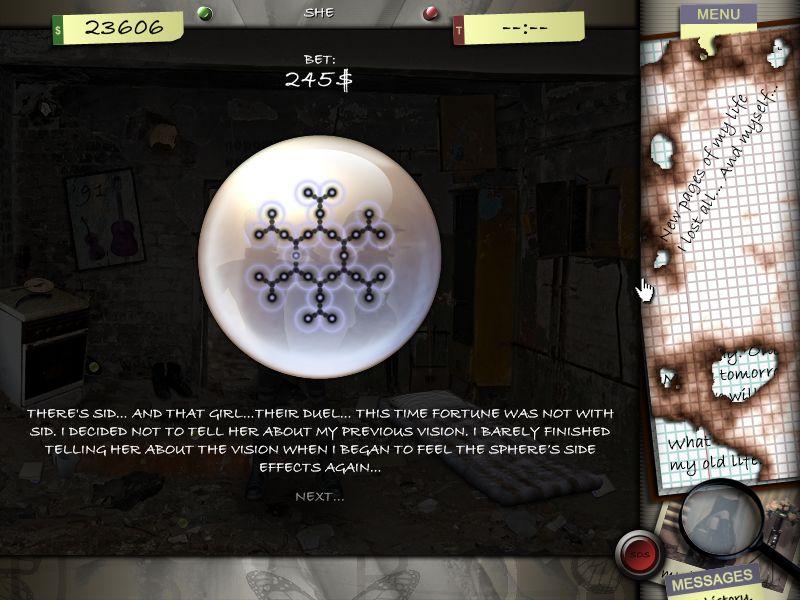
Chapter 29 - She
Click the lady in the door and take the photo out of her hand
Click her again
Give her the sphere from your inventory and do the puzzle - connect the parts by clicking the mouse
screen shot - Puzzle
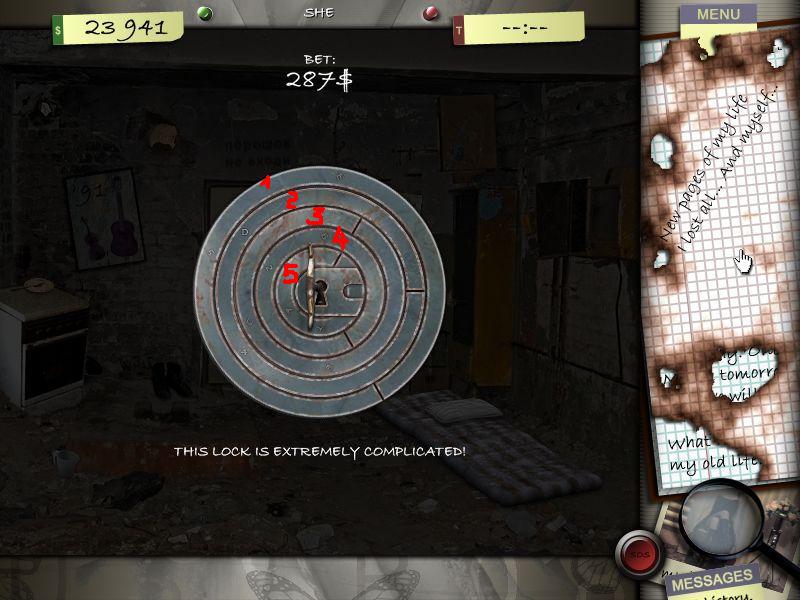
After finding the pills, click the lady again
The pistol is under the pillow - click it to push it beside
With the lock pick you open the door as known
Circle 1 moves just itself
Circle 2 move itself, circle 2 counter clockweis and circle 5 clockwise but with double speed
Circle 3 moves itself, circle 2 and circle 4 clockwise and circle 1 counter clockwise
Circle 4 moves itself and circle 2 counter clockwise
Circle 5 move circle 2 and circle 3 counter clockwise and circle 4 clockwise in double speed
screen shot - Puzzle 2
After the lock pick breaks click a few times the door to come through
Leave the room
Chapter 30: Ann
Click Ann to talk to her
Give her the photo from your inventory
Give her the tissue (click on her face)
Find the listed items
Put them all in the handbag, on the floor, next to Ann
Click Ann to talk to her
Find the next Objects, shown on the photo
Put the cd in the laptop and click it to read the file
Give the square to Ann and click her again to talk to her
screen shot - Ann
Get the map, Ann is holding in her hand, choose the top cross, Press-Center
Chapter 31 - Press
First find a signal rocket on the floor (red stick, looks like dynamite)
Activate it in the inventory and click then on the floor
Find the other three signal rockets and do the same
Look for the other items
The cube contains a puzzle in the know manner, swap....
screen shot - Puzzle
One of the keys gets into your inventory
Open the locker on the left side
Get the magnifier and the book
To get the newpaper use the single number for the row, the double for the column
As example: 4 - 60 is row 4 and colum 50 - 75
screen shot - Press
On the map you will choose the middle cross, Psychatric Lab
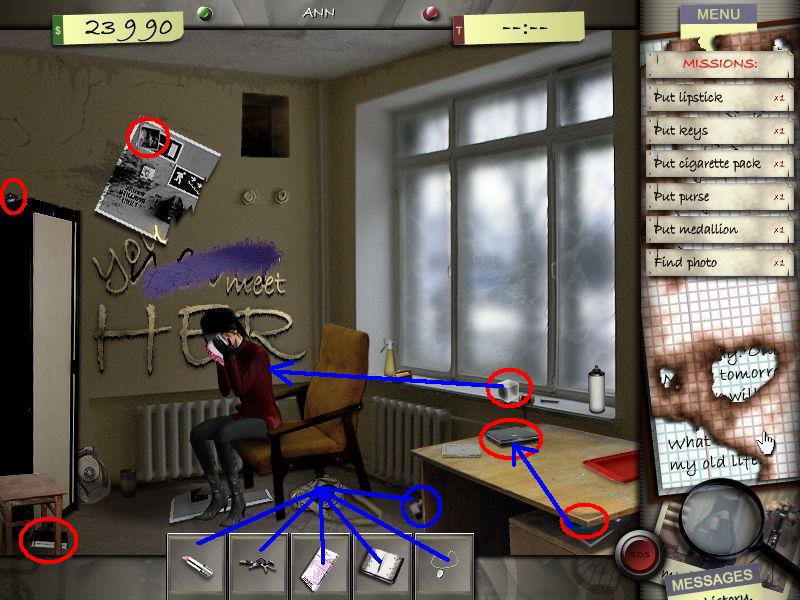
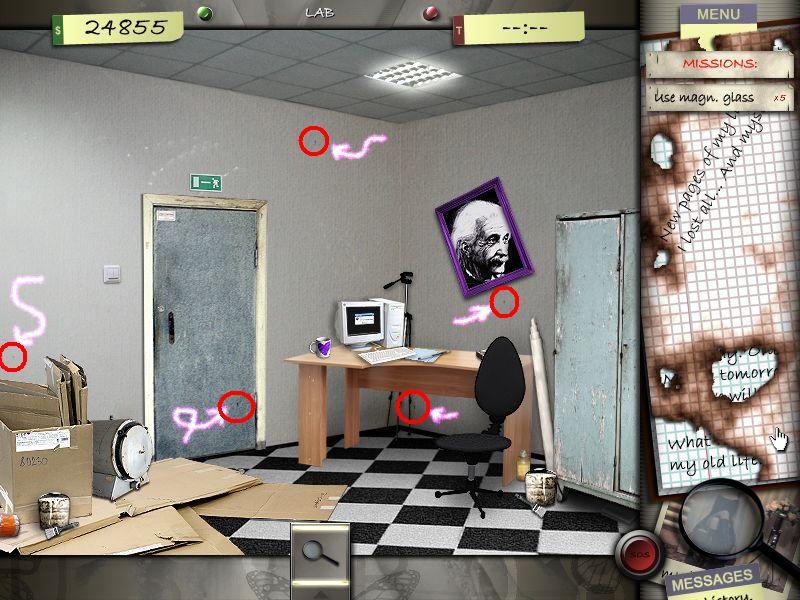
Chapter 32 - Lab
Find all items from the list and put off the light after
Get the UV - lamp from your inventory and click the five crosses in the room
Turn on the light again
Now use the magnifier on the little holes at the walls and the door, where the pink arrows point on
screen shot - Lab
Get the notebook from your inventory and click the photos
It doesn't matter in which order you do it
Bring the little men in the right order
Swap them and have a look at the horizontal lines, you see on the photos. They do have to fit
screen shot - Puzzle
Click the computer
The password is shown on the photo of the puzzle, the men form a word
The password ist
T R I CK
Enter the password and click the PC again
Click the door to leave
On the card you will choose the cross bottom right, Militea Post
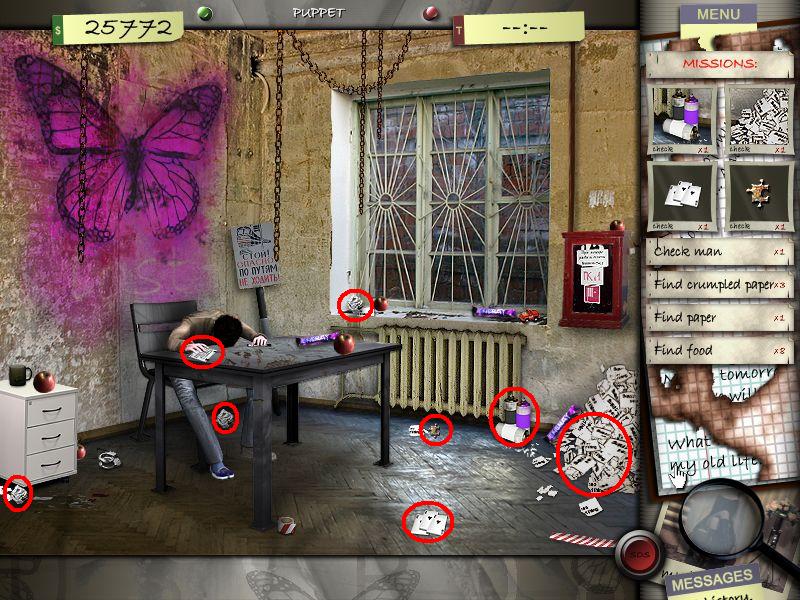
Chapter 33 - Puppet
Find the items on the photos and the list
Click the man at the desk
You have to do that ever and ever again, till you get the order to search the drawers
Get the usb stick from the middle drawer
In the upper you will find a bomb
screen shot - Puppet
Activate the knife and cut the right wire to deactivate the bomb
If you choose the wrong on, you will blow up everything
The right wire is the
green wire
Talk again with Nut
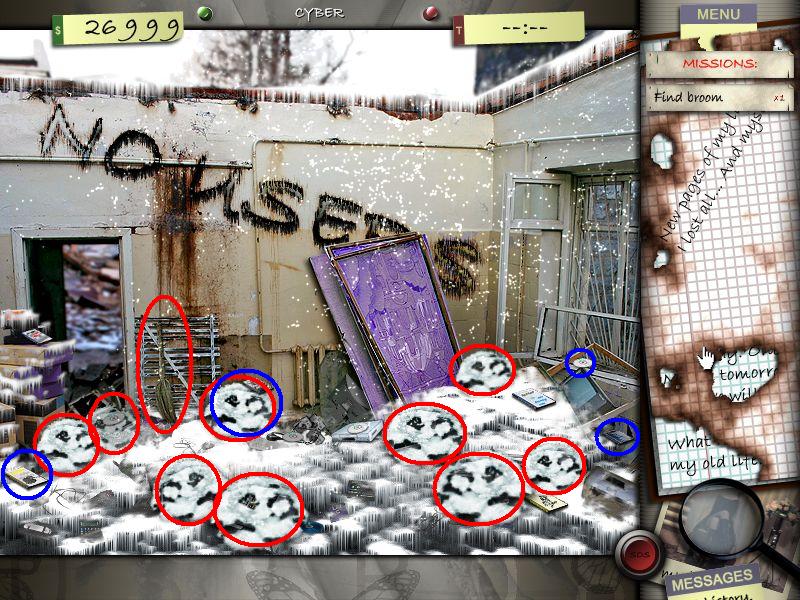
Chapter 34 - Cyber
Get the broom and take away the snow from the objects
Click the back PC to start it, activate the USB - stick in the inventory and click it at the pc
Find the right DVD box and the right CD (its random)
Get the CD out of the inventory and click the PC
screen shot - Cyber
A password puzzle opens
You have to give in the complete number code, like you see on the paper
Give the numbers in without the lines
Make sure, that you read the numbers well, which are a little dirty
094618540098163287555481
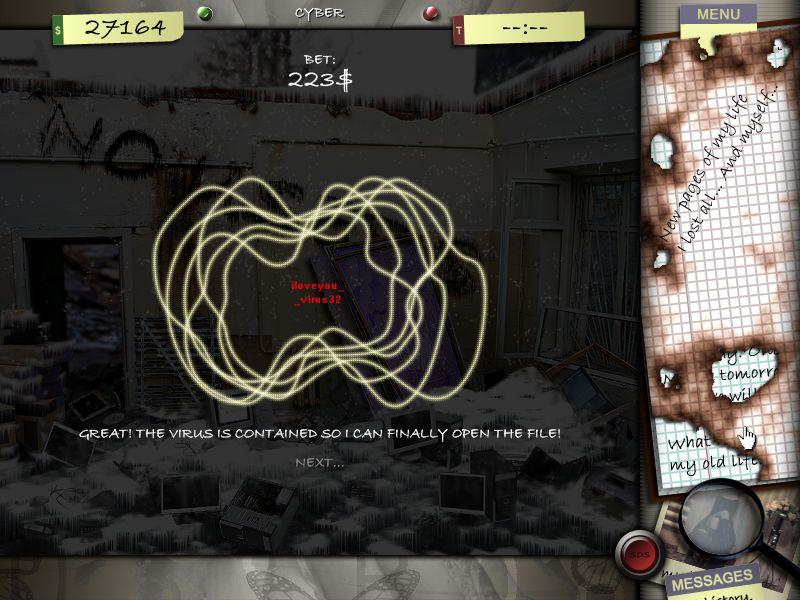
Click the PC again to reboot
The virus has to be killed with the well known puzzle, swap...
screen shot - Puzzle
Click the PC one more time to read the file and leave then through the door left side
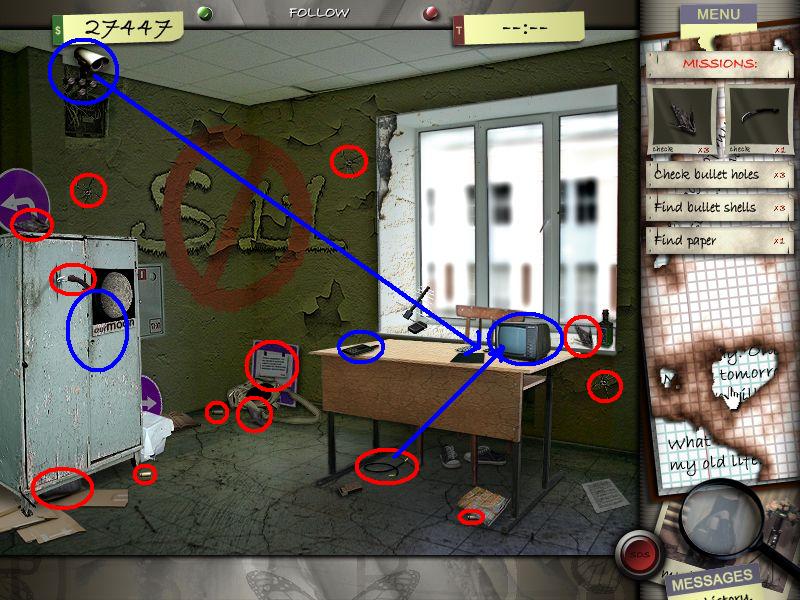
Chapter 35 - Follow
Look for all items and take a look at the three bullet holes
Use the wrench to loose the screws from the safety cam by clicking each of it
Click the cam to get it
Find the remote and the wire
Activate the wire in your inventory and click the TV
Place the wire in the right outlet
It is the
white one, which says: AUDIO
The cam from your inventory you now have to connect with the wire on the table
Click the TV to turn it on
With the crowbar you open the locker
Get out the bugs
screen shot - Follow
The GPS - device is laying on the table
You have to figure out the code
Have a look a the bugs, they all have the same number in the front - 3298 -, just the last one is diffrent
One is missing
The code has to be
3298 3
Get the map - you are looking for 5/20
The 5 is shown in blue in the bottom left corner, so you need to look in the blue fields
The second cross from the left in the upper row is b20
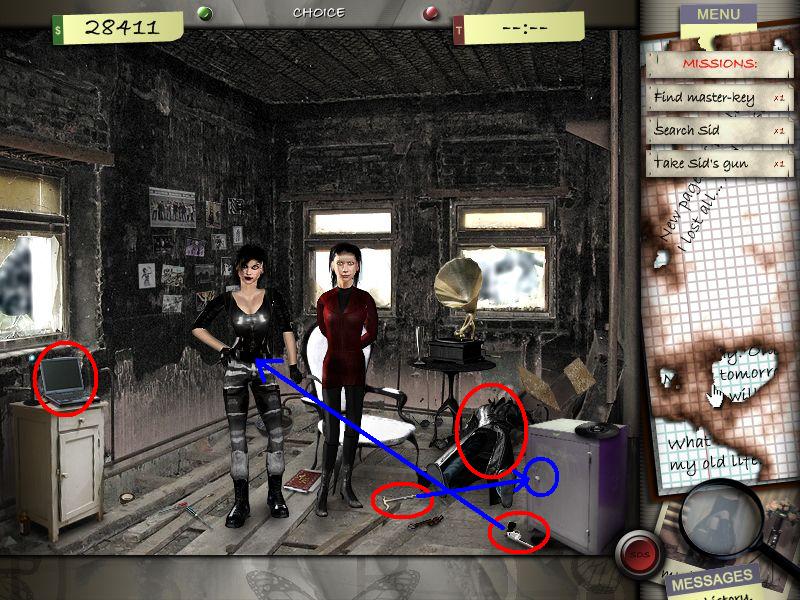
Chapter 36 - Choice
You have to be fast again - you can see at the bar on the top, how much time you have left
Talk to Narha, the woman on the left and with Sid, he is the one at the right
Get the pistol out of your inventory and shoot on Sid
Talk to Narha
Free Ann with the knife by clicking with the knife on both wrist and ankle
Talk again to Narha
Find the list and click the notbook on the drawer on the left
Find the pick lock, get Sids pistol and search him
Give the pistol to Narha
screen shot - choice
Oben the door of the drawer with the pick lock
Circle 1 moves alone
Circle 2 moves itself and circle 5 counter clockwise
Circle 3 moves itself and circle 2 and 4 clockwise
Circle 4 moves itself and circle 2 counter clockwise
Circle 5 moves itself, circle 1 counter clockwise and circle 4 clockwise
screen shot - Puzzle
Get the CD out of the drawer
Acitvate it in the inventory and click the laptop
Click it again to read the file
You see the names Mozart, Bach, Shubert, Beethoven, Glinka
The letters with the red point have to be assambled to a new word
The word is
MELBOURNE
Give the notebook to Narha and click all blue symbols in the moving circle left from Narha
Talk again with her, after that with Ann
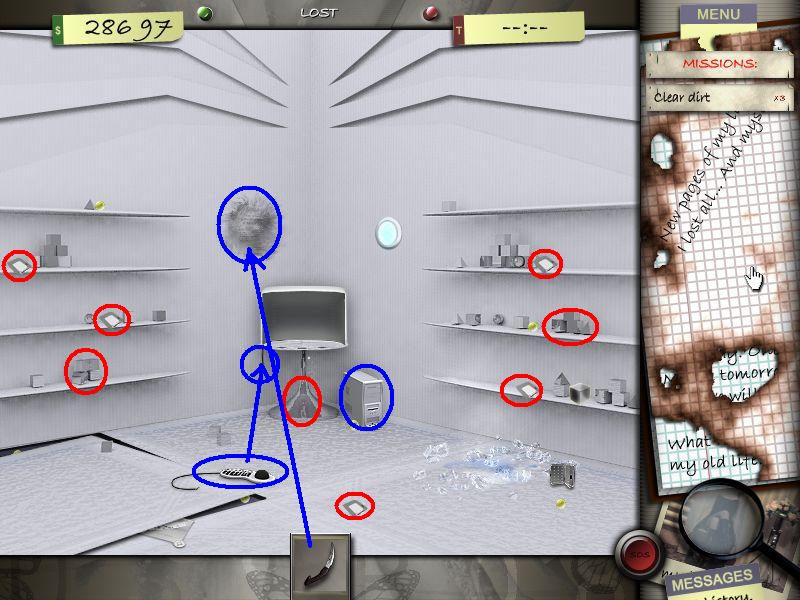
Chapter 37 - Lost
Turn on the light, in the middle of the scene, marked with a hand
Get rid of the covers on the two shelfs and on the TV
Click the knife in the inventory and then a few times on the dark spot at the wall
A note appears, click and read it
Get the keyboard
Activate it in the inventory and click then the wire, that hangs left at the TV
Use the isolation tape to fix the right wire and connect the two
Click the blue button on the keyboard
Find the cartridges and place them at the tower
screen shot - Lost
Click the TV
You see the letters e y t m s - next to the letter you see frequences
Also there are frequences above the space for the password
Compare the frequences - same frequence means: letter
The password is
SYSTEM
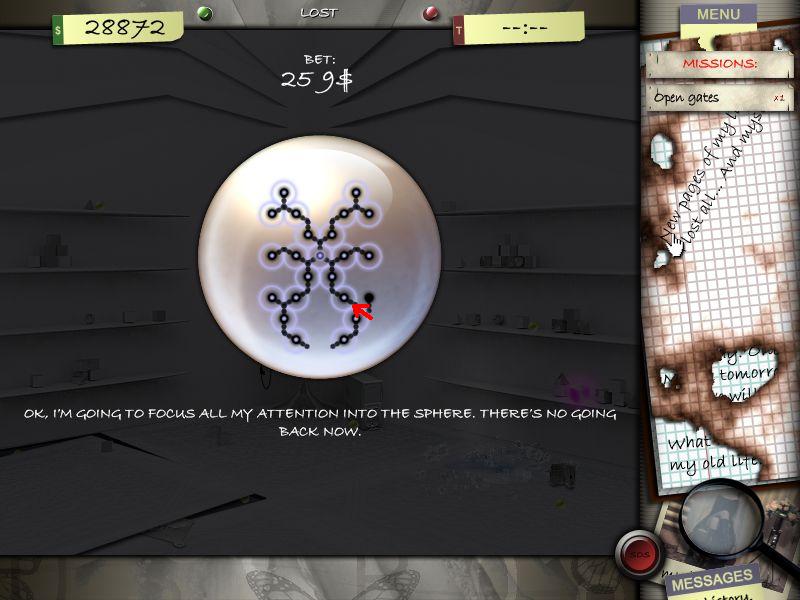
The sphere from the inventory you click on the pink square in the right shelf
The puzzle we know - click the parts to connect each sphere with energy
screen shot - Puzzle
Look for the pills to see clear
Click the TV and find the pill box
Find the map
Click the cross in the right upper corner, Hall
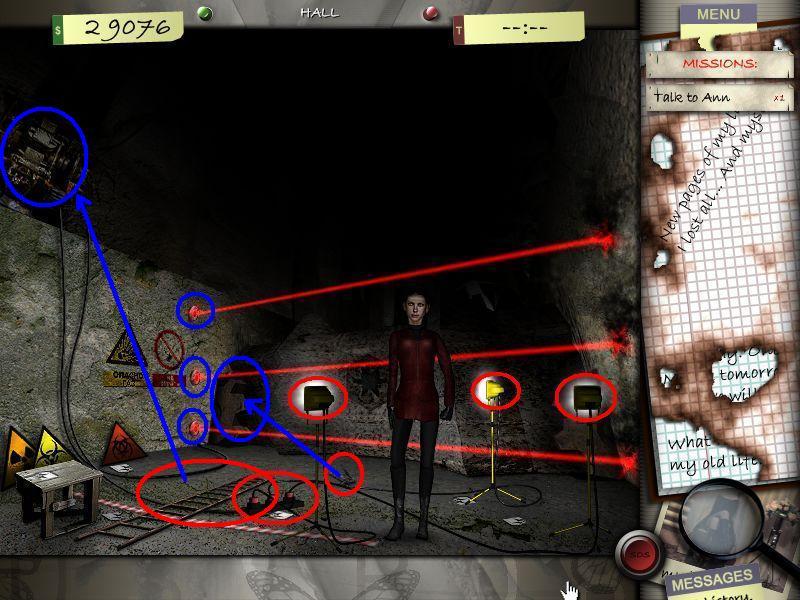
Chapter 38 - Hall
Put the light on by clicking the plugs into the outlets and then click the three spotlights
Talk to Ann
Click on her belly
Get the pistol out of the inventory and shot on the right side ending of the lasers
screen shot - Hall
Find the paper pieces and yes... swap
screen shot - Puzzle
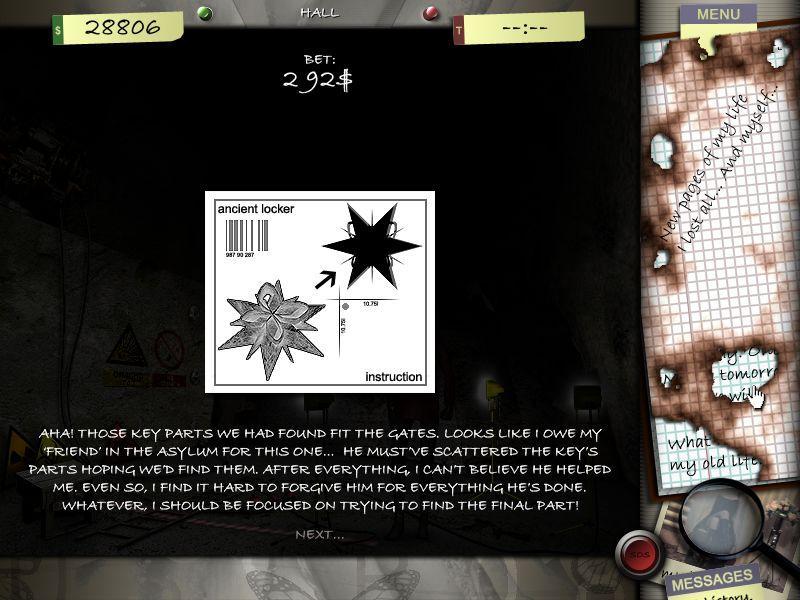
Find the ancient key and set back together by .. you won't believe it... swaping
screen shot - Puzzle
Activate it in the inventory and click it into the empty spot at the wall behind Ann
Get the ladder and place it at the left wall
Click the generator
Click the generator again and talk to Ann
Get the hairpin out of her left hand (her left)
Use the hairpin with the generator and a puzzle appears
Choose the upper cross with 440 V
Click the wall, where you put the key
Talk to Ann
Use the crowbar at that wall
screen shot - Hall 2
Talk to Ann
Leave the room
Chapter 39 - Tunnle
Talk to Ann and find the items from the photos
Give the artefact to Anne
Get it back and talk again to her (she is wearing at around the body)
screen shot - Tunnle
Click four times the web next to Ann to reveal a chest
Use the pick lock
Circle 1 moves just itself
Circle 2 moves just itself
Circle 3 moves itself and circle 5, circle 1 in counter clockwise
Circle 4 moves itself and circle 2, circle 5 counter clockwise
Circle 5 moves itself and circle 4
screen shot - Puzzle
Get the food out of the chest and give it to Ann
Find the correct two dice
One in front of the chest - to find the other one you will have to click away most of the cubes, laying around
You have to remove the others first, before you can take the right one
Connect the parts by clicking them, till all spheres are having energy
screen shot - Puzzle
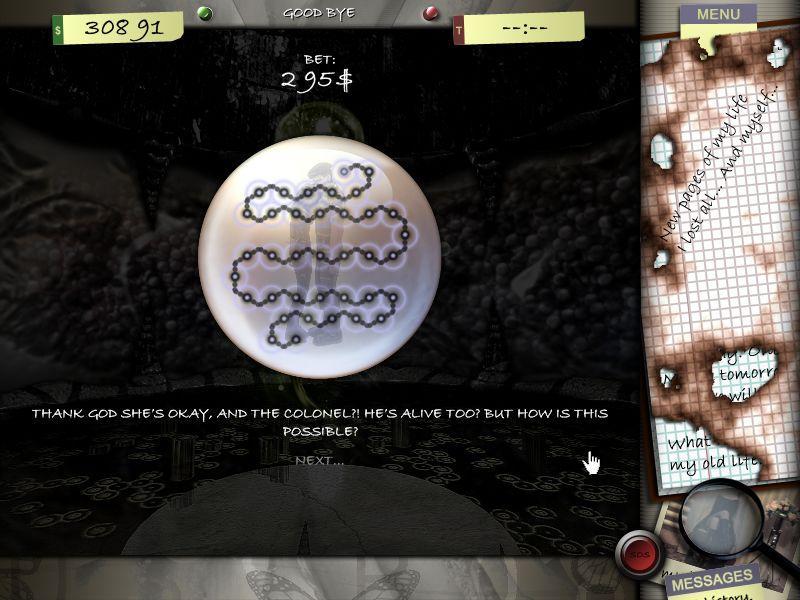
Chapter 40 - Good bye
The is laying in the middle of the scene
Connect all parts
screen shot - Puzzle
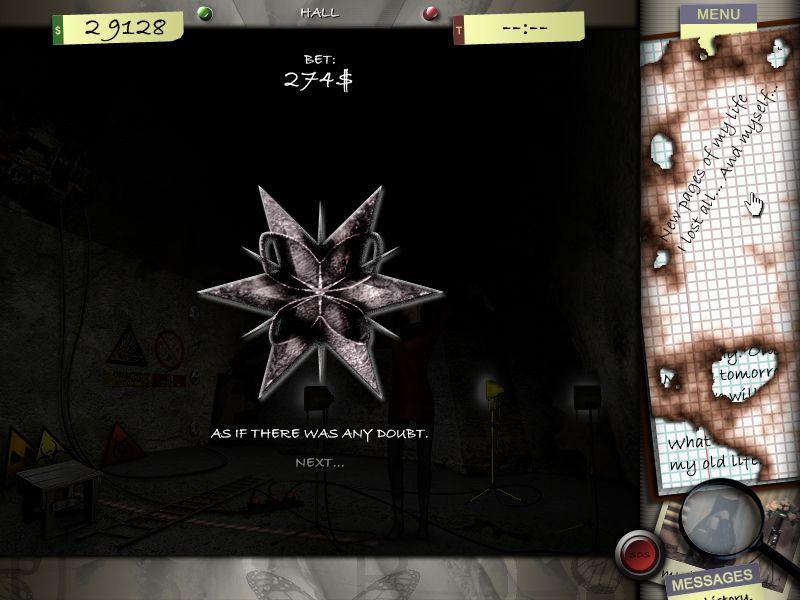
A ghost appears, having symbols at both sides
Talk to him
Then click him again to say, that you are ready
He will show you for a short moment a symobl , that you have to find and click (you see the time running down in the bar on top - the time bar renews with each symbol)
After you found all symbols, talk to him again
Click him a few times to talk
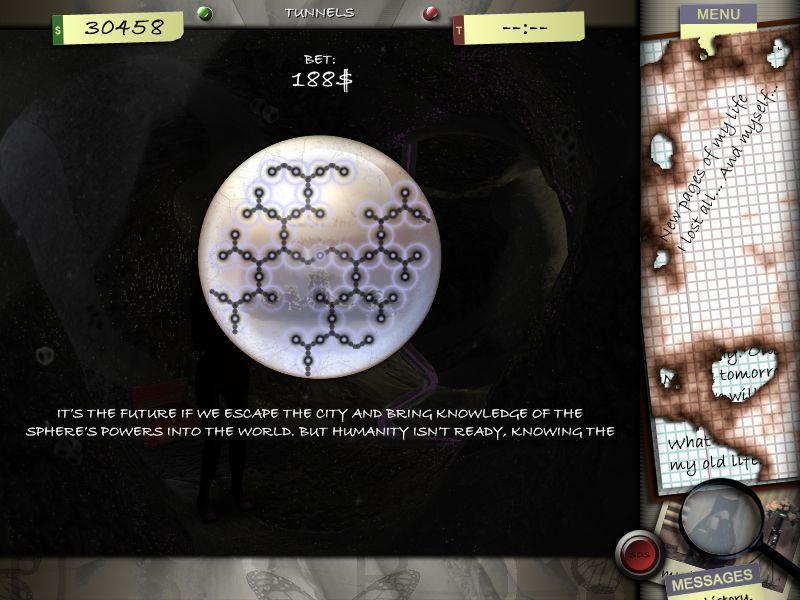
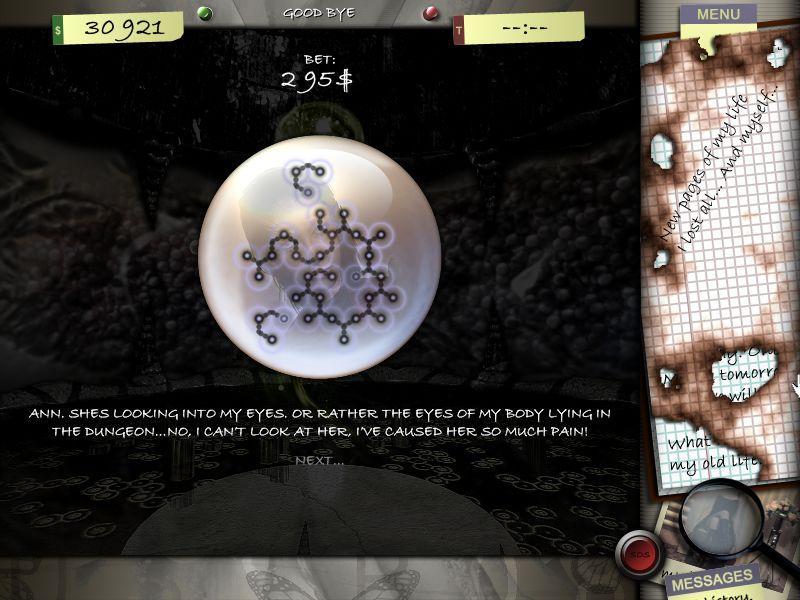
Find the three spheres, one after the other and solve the puzzles
screen shot - Sphere 1
screen shot - Sphere 2
screen shot - Sphere 3
Talk again with the ghost, till you found out the secret of the city
Live in this city ......
Thanks so much to Kayleigh for writing up this walkthrough :D!
Posted by: Kero |
March 18, 2009 3:08 AM
|
March 18, 2009 3:08 AM