
![]() It's easy to forget that being the little guy doesn't always have to mean getting your lunch money stolen or having sand kicked in your face.
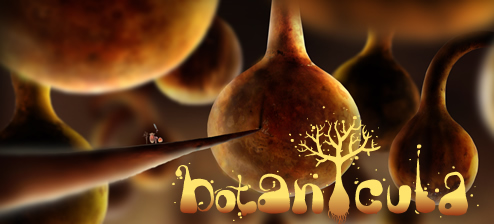
It's easy to forget that being the little guy doesn't always have to mean getting your lunch money stolen or having sand kicked in your face.  Sometimes it's not about who's biggest, but who's willing to take the chances and do the most for the things that are important... even when it gets a little scary. Amanita Design's playful and stunning new point-and-click adventure Botanicula follows five tiny but determined forest sprites who are determined to save the last seed of their beloved tree from invading dark parasites. Packed with charm, rich design, imagination, and both humour and a bit of creepiness, it's the sort of adventure you can't help but be swept away in and root for the little guy every step of the way.
 In most ways, Botanicula plays like a typical point-and-click title. Moving your mouse around the sides of the screen will reveal arrows you can click to move to other locations, and your cursor will change if you pass it over a spot or creature you can interact with. Some objects require you to do more than just click; you can pull on switches, for example, or turn cranks by clicking and performing the appropriate mouse movement. If you move your cursor to the top of the screen you can check what you're carrying, as well as any items you should be gathering for your current objective, and moving it to the bottom will allow you to save and load your game, or change the settings.
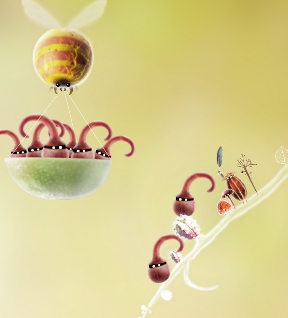
 Though under attack from an unknown menace, the massive tree you'll explore is still teeming with life. Weird, sometimes slightly alarming life, but life nonetheless. The myriad of little creatures you'll come across are often more concerned with their own tiny existences, but will sometimes help or hinder you. Whenever you encounter an obstacle in your story progression, you'll usually be given a visual list of items you need in your inventory at the top of the screen. As you explore, you'll come across various obstacles that need to be dealt with, and each of your intrepid band of heroes can be clicked on to try their hand (... twig... leaf?... uh... butt?) at helping out in certain locations. Not everyone will always be helpful, but hey, it's the thought that counts. Don't you wish you had a buddy who was always willing to plug something with their keister for you?
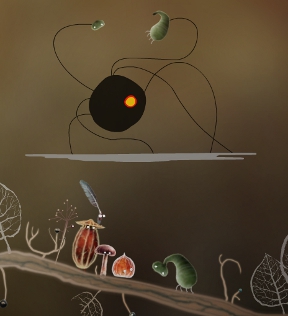 Analysis: Botanicula is, in a word, gorgeous. It's also engrossing, delightful, and creative, but first and foremost, it's a beautiful game. The expressiveness and detail packed into each little creature is really remarkable, and the storybook environments are a joy to explore. Just because a particular area doesn't have anything relevant to your current objective doesn't mean you shouldn't explore; click around and you'll find oodles of little secrets that exist only to surprise you and provide a bit of extra magic. It's this attention to detail that makes Botanicula so incredibly rewarding to experience, and when you combine it with the game's stellar original soundtrack you have an otherworldly little tale that feels like a dream. Sometimes even a nightmare, since the farther your heroes venture the worse the parasite infestation becomes, and the game is definitely not without its creepy or even frightening moments.
In terms of gameplay and puzzles, Botanicula operates on its own logic, though not particularly difficult, and you're going to have to be open to experimenting in every screen. Since there are no words or even any real directions, all you can really do is try whatever you can think of and click around until you get a feel for what needs to be clicked in what sequence. In most cases, this works really well. Paying attention to your surroundings and how they react to your actions is all you need, and figuring out what each creature wants or needs is very rewarding. It's just unfortunate that Botanicula's effort at mouseplay sometimes get in the way of that reward. In particular, some of the puzzles that rely on mouse movement and physics to get past can be frustrating. Which is unfortunate, since in a game as surreal and lovely as this, annoyed is the last thing you want to be when the rest of the experience seems to be working so hard to draw you in.
Still, once Botanicula gets its hooks into you, even those infrequent irritations won't be enough to get you to stop. Just when you think you've seen everything, Botanicula pulls out something new. A new creature with its own bizarre biology. A place where fish swim through the trees or frogs serenade you. A holiday celebration. It's all so strange and wonderful that it's almost impossible not to want to see more. Botanicula is an amazing journey and has more than a little magic to share with you if you're willing to explore. You'll enjoy every hour you spend with it, especially if you take your time to hunt down all the little surprises hidden in each area. It's the sort of game you can find yourself grinning like a dope at. Highly recommended, unless you have something against having joy in your life. In which case, stop reading my articles, Mr Ebert.
![]() Windows:
Windows:
Get the full version
Get the full version from GOG.com
![]() Mac OS X:
Mac OS X:
Get the full version
![]() Linux:
Linux:
Get the full version


Walkthrough Guide
(Please allow page to fully load for spoiler tags to be functional.)
Botanicula Walkthrough (Part 1)
Chapter 1
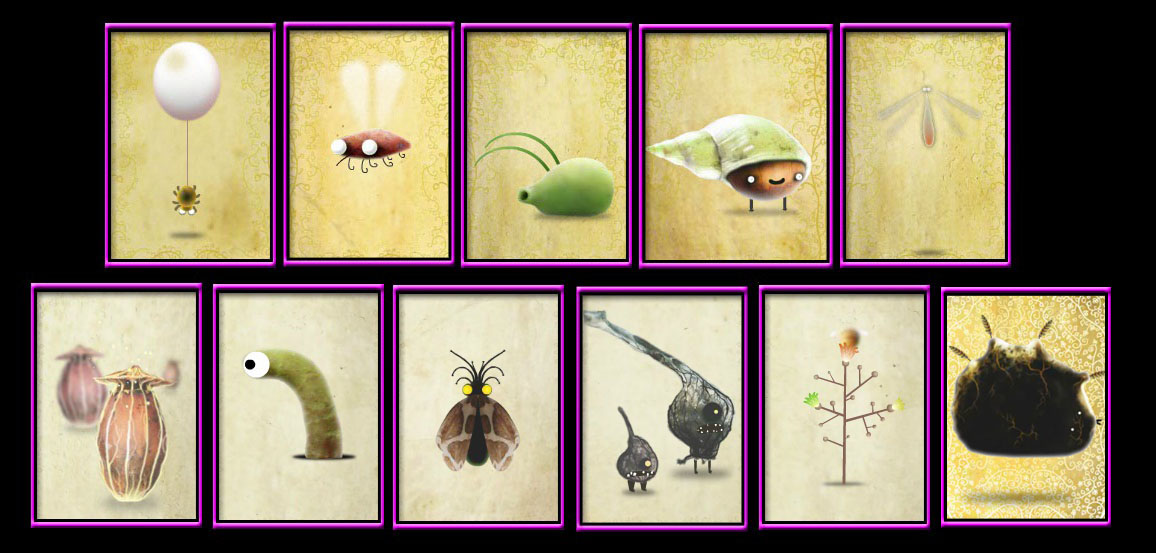
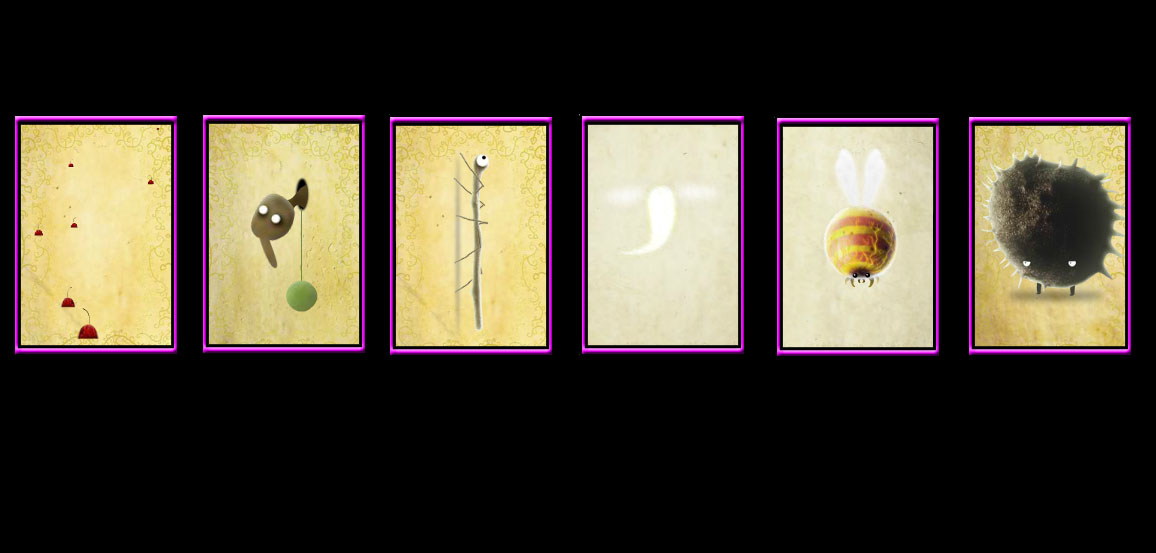
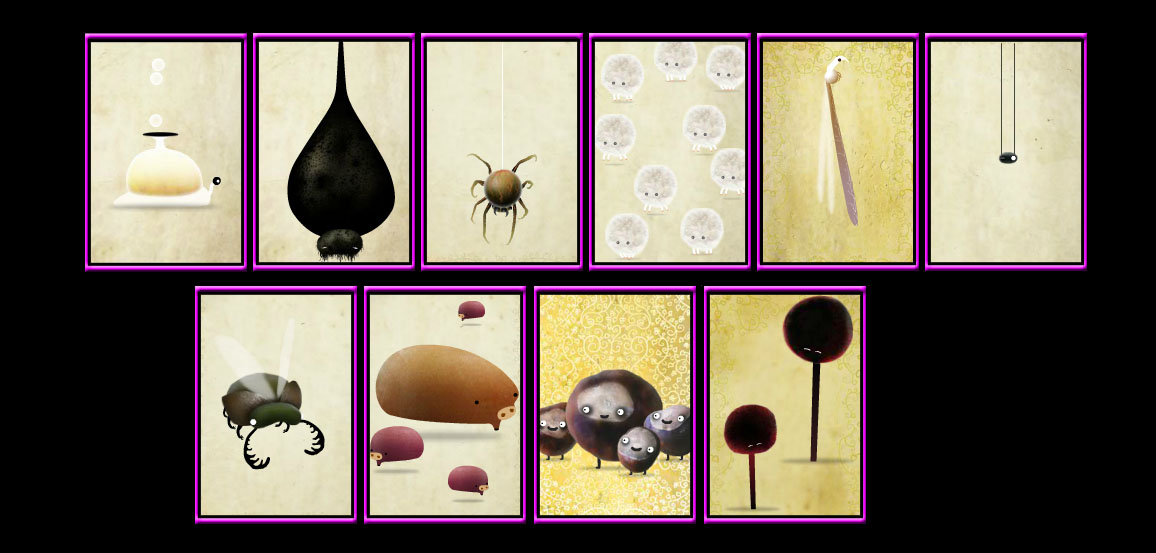
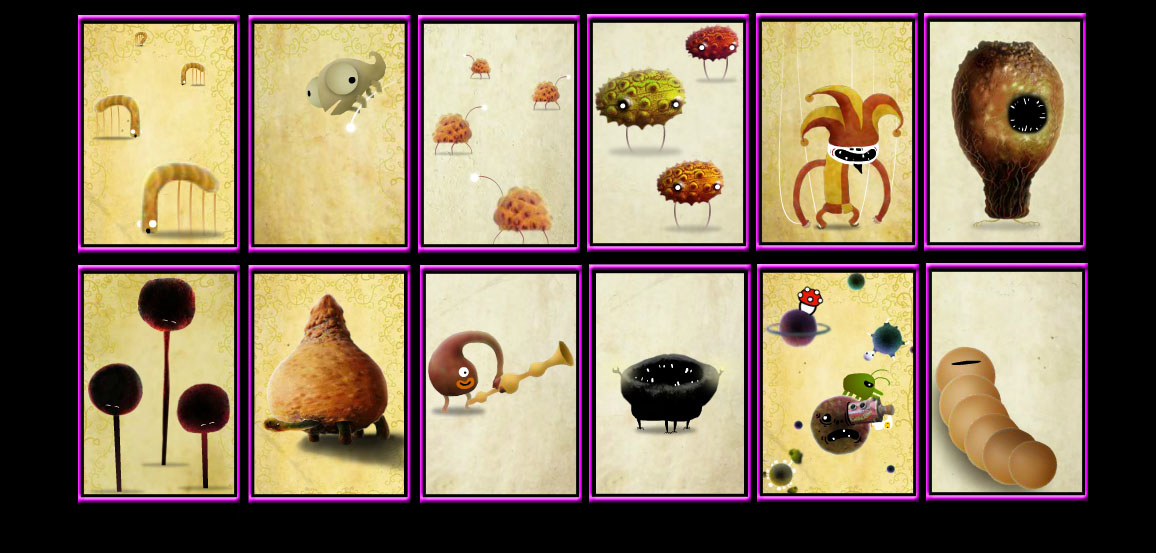
There are 11 Creature Cards in Chapter 1.
Cards 1-11.
Scene 1 - Tree of Life
Click each of the seeds at the tips of the tree branches.
Scene 2 - Flat Snake Creature
If you click the large, brown creature blocking the path it will rattle and show you that it is missing three feathers on its back.
Climb up to travel to the next scene.
Scene 3 - Crossroads
Click the small black animal that is partially concealed on the underside of the right branch to make it hide behind the left leaf.
Click the left leaf and the creature will move to the right leaf.
Then, click the right leaf and it will run back again to the left leaf, this time carrying a small, red fruit.
Click the left leaf and the creature returns to the right leaf, now carrying a red fruit and a green fruit.
Next, click the right leaf and the animal will run to the left leaf holding a large pumpkin.
Finally, click the left leaf one last time and the creature will run to the middle of the branch with a jack-o-lantern and stop.
Click the jack-o-lantern to light it up, and then click it a second time to hatch the fly.
A new card for the fly creature will be added to your deck at the top left corner.
Click the green creature that is behind the large leaf at the top of the middle branch to make it crawl down.
Click the little green guy again and he will eat the leaf and fall.
When you return to the scene, the green creature will be back and you will receive a new card in your deck.
Click both of the thin, brown twigs two times (one twig is on the underside of the left branch and the other twig is on the underside of the small branch sprouting out of the right side of the middle branch) to cause their flowers to bloom, which will lure the bees.
Go left to the next scene.
Scene 4 - Rustling Leaf
Click the rustling leaf on top branch to reveal the little spider.
Click and drag the spider directly downward to drop him from his thread to hang on a balloon.
As the spider floats by, click its balloon to pop it.
A new card for the spider will be added to your deck.
Click each of the four thin, brown twigs at the underside of the right branch to bloom their flowers.
The largest twig in the middle needs to be clicked twice in order for its flowers to bloom.
If all of the flowers from the twigs in both Scene 3 and Scene 4 have bloomed, then you will receive a new card in your deck.
Continue left to the next scene.
Scene 5 - Guard Monsters
When you reach this scene, two black, little monsters will block your path.
Click the stick-shaped character in your group to send him to fetch the Feather (1/3).
A new card for the monsters will be added to your deck.
Return to Scene 4, then climb up the middle branch to reach the next scene.
Scene 6 - Red Leaf Branch
Click the red leaf to hatch the fly.
Go down once, then return to the scene and there will be multiple new red leaves on the branches.
Open each of the three red leaves to hatch more flies.
A new card for the flies will be added to your deck.
Go back to Scene 3, then climb up the middle branch to reach the next scene.
Scene 7 - Hat Creatures
Click all six of the round creatures with hats on the top of the branch.
A new card for the round creatures will be added to your deck.
Go down to return to Scene 3, then go towards the upper right branch twice to travel to the next scene.
Scene 8 - Tip of the Branch
Click the brown leaf at the end of the branch four times.
The first three clicks will release a few bees, and the fourth click will drop the feather down to the next scene, where your team will follow.
Scene 9 - The Hole
Click the feather creature in your party to send him into the hole.
It will pull out a moth which will add a new card to your deck.
Next, click the mushroom creature in your party to look in the hole.
This time a worm will poke out of the hole and add a new card to your deck.
Finally, use the little seed creature in your party to pull a shell out of the hole.
Click the shell to reveal a Feather (2/3).
If you click the shell another four times, you will reveal the shell creature and add a new card to your deck.
Move right to travel to the next scene.
Scene 10 - Floating Feather
Catch the Feather (3/3) as it floats through the air.
Return to the Scene 2.
Scene 2 - Flat Snake Creature
Click the rattling creature blocking the path to give him the three feathers.
You will receive a new card for the large creature in your deck.
Now that the path is unblocked, go down to travel to the next area.
Chapter 2
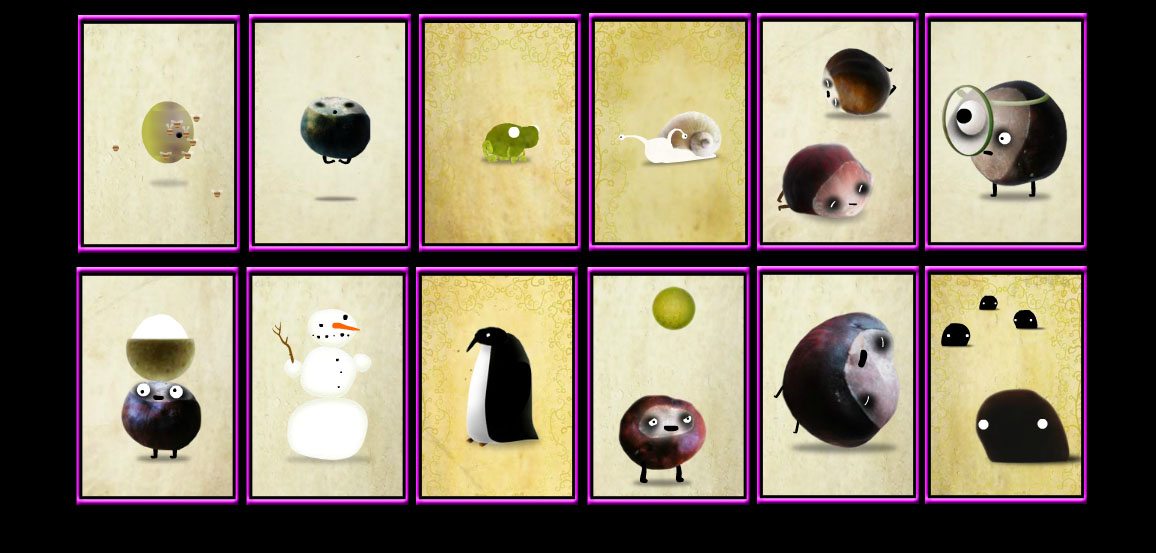
There are 18 Creature Cards in Chapter 2.
Cards 12-23 Part 1.
Cards 24-29 Part 2.
After the cinematic, go left to reach the first scene.
The mushroom card will also be added to your deck.
Scene 1 - Starting Point
Click the round creature after it falls over to learn about the spider monsters.
Move left to travel to the next scene.
Scene 2 - Snail Creature
Click the small hive hanging from the top branch to send a bee out of the hole.
Click the round fruit the bee knocks down to the lower branch to lure over the large, grey snail.
A new card for the snail will be added to your deck.
Use the snail shell to hop up to the higher branch, then continue left to the next scene.
Scene 3 - Air Pipes
When you reach this area, note that there is a wide section of the branch filled with air with several floating creatures, a hanging red fruit, a key at the top, and four pipes at the top that are blowing out air.
If you move your cursor across the red fruit, it will bounce the fruit in the opposite direction.
Direct the fruit through the first air pipe (Counting the pipes from left to right) to hit the key to the right over the next pipe.
Send the fruit through the second air pipe to push the key to the branch.
Finally, bounce the fruit up through the fourth pipe (the lowest on the right) to knock the key off the branch.
After the key drops, a new card for the amoeba creatures will be added to your deck.
Pick up the Key (1/5) when it lands on the right side of the branch.
Go back to Scene 2, then down and left past the snail to reach the next scene.
Scene 4 - Black Spider
After the cinematic with the spider monster, your team will automatically run across the lower right branch to the next scene.
Scene 5 - Berry Branch
Click the white patterned leaf and move the cursor upward to pluck it from the branch.
The Map feature will be added to your toolbar in the upper left corner; your location is indicated by the glowing spot on the leaf.
Go down the lower right branch to travel to the next scene.
Scene 6 - Cone Buzzing Creatures
If you rapidly click the cone-shaped creature multiple times, it will open its mouth and start to buzz.
This will cause two more identical creatures to arrive - click all three creatures until they are buzzing simultaneously to make four more creatures come to the branch.
Once again, quickly click the cone creatures until all seven are buzzing at the same time.
If you can get all of them to buzz at once, a very large cone creature will fly to the branch and a new card for the buzzing creatures will be added to your deck.
Click the huge cone creature to make it open its mouth, then click its mouth to go inside.
Inside the huge creature's head is a smaller cone creature sitting on a twig; click it to make it spit out a key on a string.
Use the round creature with the hat to grab the key.
Click all of the other team members to help him pull on the string.
Pick up the Key (2/5) that drops to the floor and exit the mouth.
Move down to reach the next scene.
Scene 7 - Storyteller Creature
Click the black creature standing at the top of the branch to watch the cinematic.
You will receive a new card for the story-telling creature in your deck.
Go back up to Scene 6 and move right to reach Scene 8 (which is a crossroads point that leads left to Scene 9, up to Scene 1, or right to Scene 10); continue left to reach Scene 9.
Scene 9 - Pecking Creature
Click the leaf growing on the top side of the branch to send out the tiny spot-shaped creature.
A new card for the spot creature will be added to your deck.
Click the long, thin bug pecking at the underside of the branch.
You will receive a new card for the thin bug will in your deck.
If you click the two more times, he will pull out a giant beetle from the branch.
A new card for the beetle will be added to your deck.
Move right twice to travel to Scene 10 where you will see two spikey creatures fighting, then go right a third time to reach Scene 11.
Scene 11 - Rattling Creature
If you wait a short while, a large musical creature will drop down tot he branch.
Click the rattling animal a fourth time to scare away the musical creature and add its card to your deck.
Go right to the next scene.
Scene 12 - Crystal Spikes
Click and hold the red and yellow striped spine that is sticking out of the top of the red spike creature.
Drag the spine down towards the branch to bend it in a curve and hold it in place.
Wait for the rattling animal to jump on top of the spine, then release the mouse to fling the animal up into the air.
A new card for the rattling animal will be added to your deck.
Click the green spiked creature sitting in the middle of the branch to move it to the right.
The feather creature on your team will automatically fly to pick up the Key (3/5).
Click the green spikey creature sitting on top of the white spine on the upper right side of the branch.
You will receive a new card for the spike creatures in your deck.
Go back to Scene 10, then move past the two spike creatures on the lower left branch to travel to Scene 13.
Scene 13 - Red Hook Creature
Click the red hook at the bottom of the branch to uncover the little creature inside.
If you click the red hook creature three more times, he will cast off the bottom of his shell.
Click the red hook creature a fifth and final time to make him grow back a new bottom shell.
Click the discarded bottom shell to reveal a second red hook creature.
A new card for the red hook creatures will be added to your deck.
Go all the way back to the first scene, then continue right to reach Scene 14.
Scene 14 - The Funnel
If you move your cursor under the red hopping creatures, they will bounce away in the opposite direction.
There is one large hopping creature on the left side of the main branch; position your cursor directly under him, then quickly move it up and to the right to launch the creature through the air and into the orange funnel.
The funnel will cough up multiple red hoppers and you will receive a new card in your deck.
Move towards the upper right branch to travel to the next scene.
Scene 15 - Stick Insect Creature
Click the small, green dot sticking out of a tube on the left side of the branch to reveal the long-nosed creature.
A new card for the long-nosed creature will be added to your deck.
Click the thin bug shaped like a twig near the bottom of the branch three times to move it upwards.
You will receive a new card for the twig insect in your deck.
Go up past the top branch to reach the next scene.
Scene 16 - Flyer Nests (Left)
Open the red egg in the upper right nest to hatch the white moth.
Follow the white moth back down to Scene 15.
Scene 15 - Stick Insect Creature
Click the white moth to send it flying again.
Follow the moth right to the next scene.
Scene 17 - Flyer Nests (Right)
Catch the white moth as it darts around to make it lay three red eggs in the upper right nests.
Click the three red eggs to hatch another 3 white moths.
A large moth will then arrive and drop the Key (4/5) into the right nest.
You will receive a new card for the white moths in your deck.
Go back to Scene 14, then move towards the lower right branch to travel to the next scene.
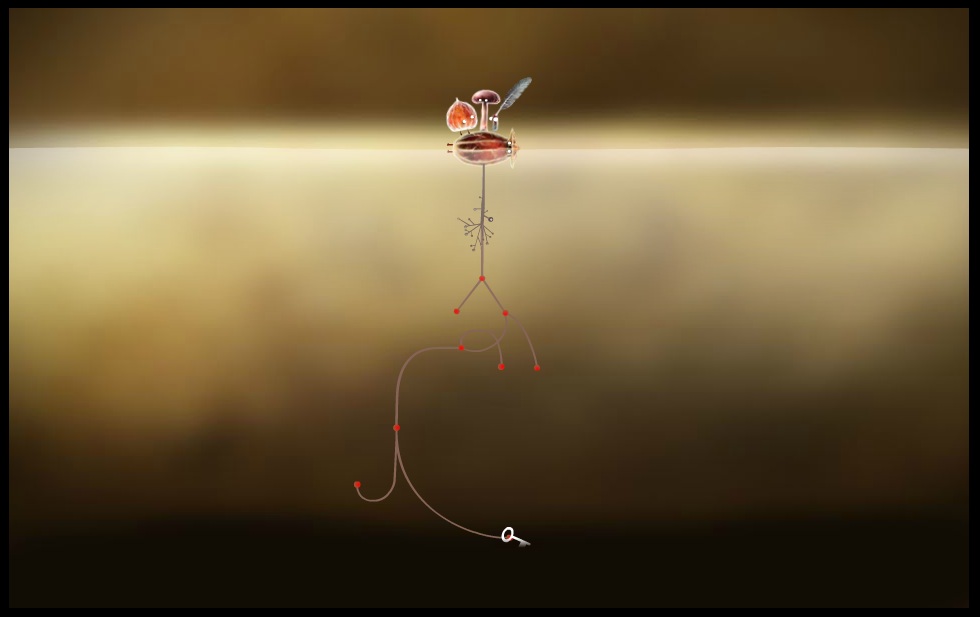
Scene 18 - Locked Acorn
Click the key hanging from the tip of the small twig.
After the cinematic, you will be transported to the inside of the bee hive.
Click the twig creature in your party to move him into the water.
If you click the red tip of the twig creature, he will extend that section of his branches outward.
The goal here is to click the left or right section in the right order to reach the key at the bottom of the water.
If you do not reach the key after your third click, the branch will retract and the puzzle will start over.
Click the red dots at the end of the sections in the following order:
Right.
Left.
Left.
Solution.
If done correctly, the branch will pick up the final Key (5/5) and you will be returned to Scene 18 with a new creature card.
Move to the right past the acorns and a large, thorny creature will scare your team back to the left.
A new card for the thorn creature will be added to your deck.
Click the down arrow over the largest acorn on the right branch.
Click the pea pod with the 5 keyholes to open the lock and move to the next area.
Chapter 3
There are 6 Creature Cards in Chapter 3.
Cards 30-35.
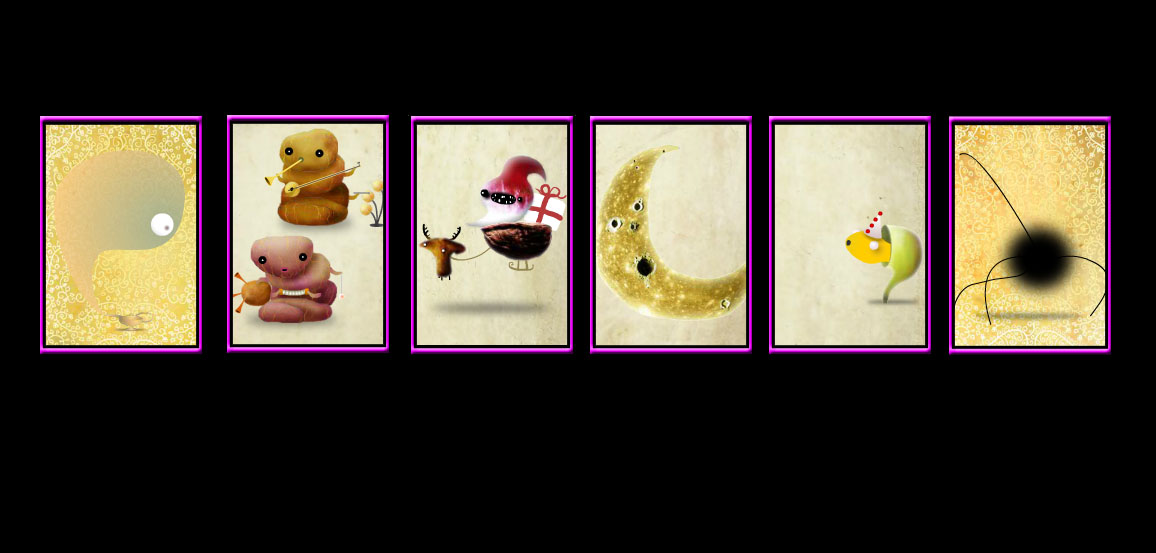
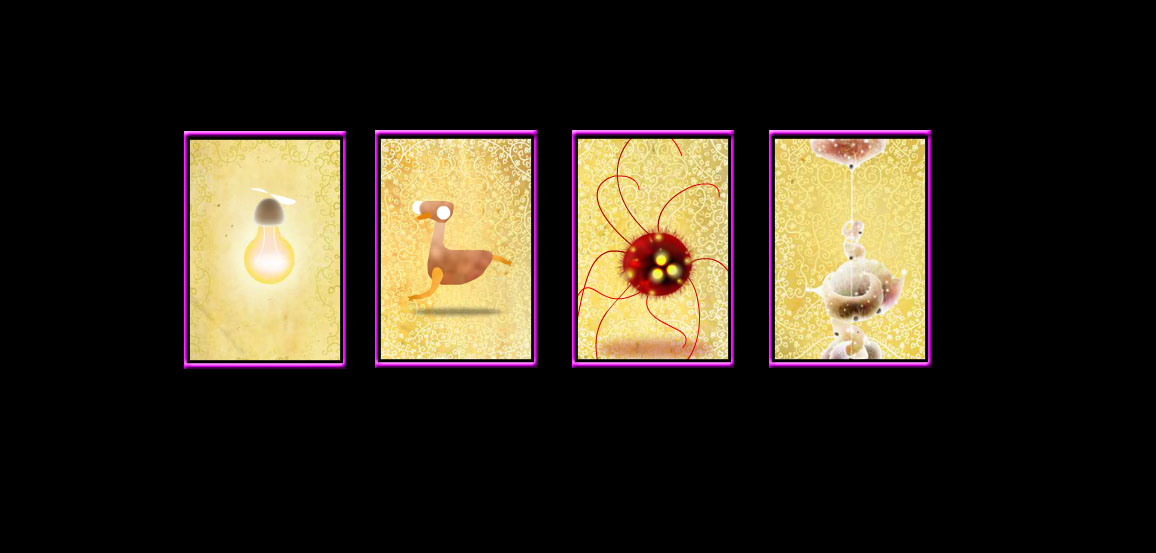
Scene 1 - Magic Lamp
Rub the gold lamp in the center of the spotlight to unleash the genie.
A new card for the genie creature will be added to your deck.
Each of the creatures on your team will have a wish pop up above their heads.
Going from right to left, click each of the creatures to travel to their wishes.
At the end of each wish you will receive a new card in your deck.
The Feather's Wish: Music
Click the small, white ball on the left side of the stick to open the stage.
You must click all of the instruments to play the entire song.
The left musician sings if you click his mouth, he also plays the bagpipes on the left side, the accordion with his middle hands, and a yo-yo on the right side.
The right musician plays the horn with his mouth, the banjo with his middle hands, and the drums on the right side.
Click the triangle that drops from the top of the screen to exit the scene.
The Twig's Wish: Gifts
Click and drag the red handle at the end of the string to pull it down.
After the present is delivered on the branch, click the box to open it.
You will automatically be transported back to the first scene.
The Big Guy's Wish: Stars
Click the right side of the seesaw to jump onto it.
Click the green seed that flies off of the seesaw to make it grow.
Click the round spaceship that lands on the surface of the crescent moon.
You will automatically be transported back to the first scene.
The Mushroom's Wish: Carnival
Click and drag the orange crank to rotate it in a clockwise motion several times.
If you continue to rotate the crank, a yellow creature will sprout out of the speaker and start the ferris wheel.
Click the yellow creature to return to the first scene.
The Seed's Wish: Spider
Click the knot tied at the bottom of the red string to catch the spider.
The spider monster card will be added to your deck.
After the cinematic, you will arrive at the next area.
Chapter 4
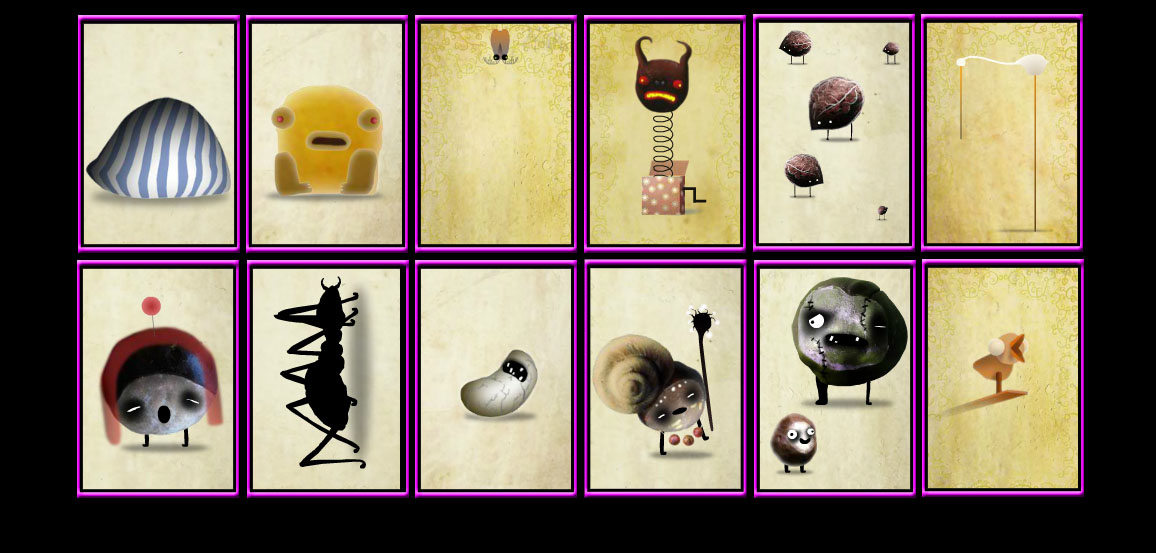
There are 21 Creature Cards and an addition to your story teller card in Chapter 4.
Cards 36-47 Part 1.
Cards 48-56 Part 2.
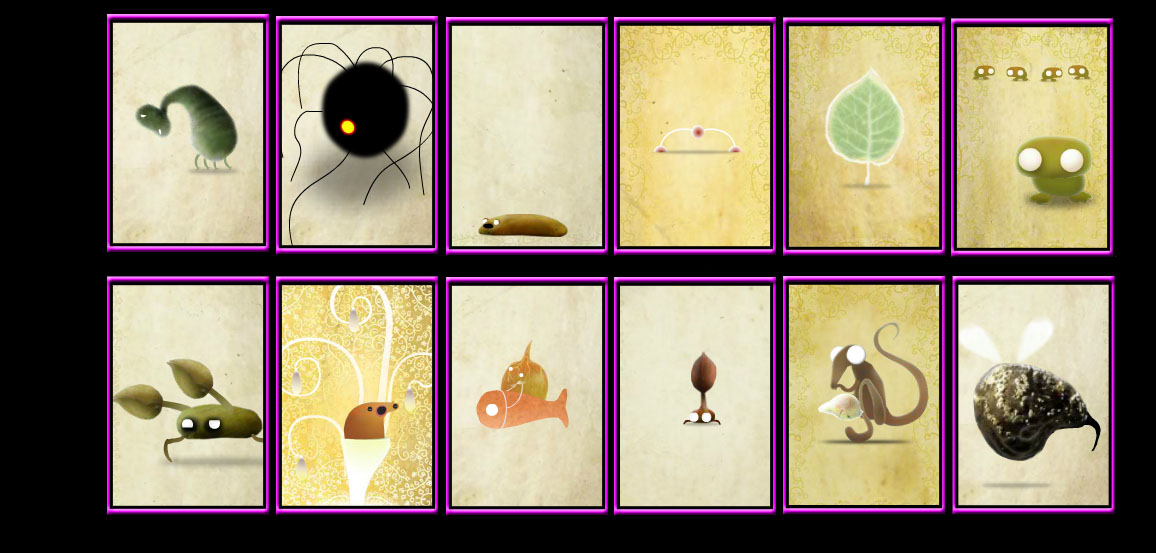
Scene 1 - Detachable Creature
Click the green bean-shaped head that is bouncing on top of the twig at the left side of the branch.
Place the head on top of the overturned green creature lying on the branch.
A new card for the creature with the detachable head will be added to your deck.
Move right to travel to the next scene.
Scene 2 - Giant Spider
After the cinematic, the giant spider monster card will be added to your deck.
Go right to Scene 3, then continue left to reach Scene 4.
Scene 4 - Dandelion
Click and hold the dandelion, then swing it from left to right to shake off all its seeds.
Click the green head of the bare dandelion to add it to your inventory.
Go back to Scene 3, move up to reach the spider tormenting the snail, continue right past the two spiders and dead bees, then go right one more time to reach Scene 5.
Scene 5 - Hungry Slug
Click the yellow slug and he will ask for a green ball.
Give the slug the dandelion head in your inventory to travel to Scene 6.
A new card for the slug creature will be added to your deck.
Scene 6 - Crying Round Creature
Talk to the crying creature to learn he lost his three little friends.
Follow their images to the right to reach the next scene.
Scene 7 - Red String Creature
Click the small, red circles hanging from the middle string on the upper branch.
A new card for the string creature will be added to your deck.
Click the little bee sitting on the right leaf to send it to the left leaf.
Click the bee again after it lands on the left leaf to chase it back towards the middle (carnivorous) leaf.
As the bee approaches the middle leaf, click the leaf to open its mouth and it will eat the bee.
You will receive the carnivorous plant card in your deck.
Go right to Scene 8 with the fisherman, then continue down to Scene 9.
Scene 9 - Water Bowls
Click the little frog in the lower right water bowl to make him hop up to the next bowl.
Click him three more times until he jumps up to the branch and is joined by three other frogs.
If you click all four of the little froggies on the branch, they will sing a song.
After the song is over, you will receive a frog card in your deck.
Move left to reach the next scene.
Scene 10 - Crab Creatures
Click any of the crab creatures to wake up the large green crab.
After green crab chases you back one scene, go left to return to Scene 10.
When the crab chases after you a second time, your team will drop down to a new scene.
A new card for the giant crab creature will also be added to your deck.
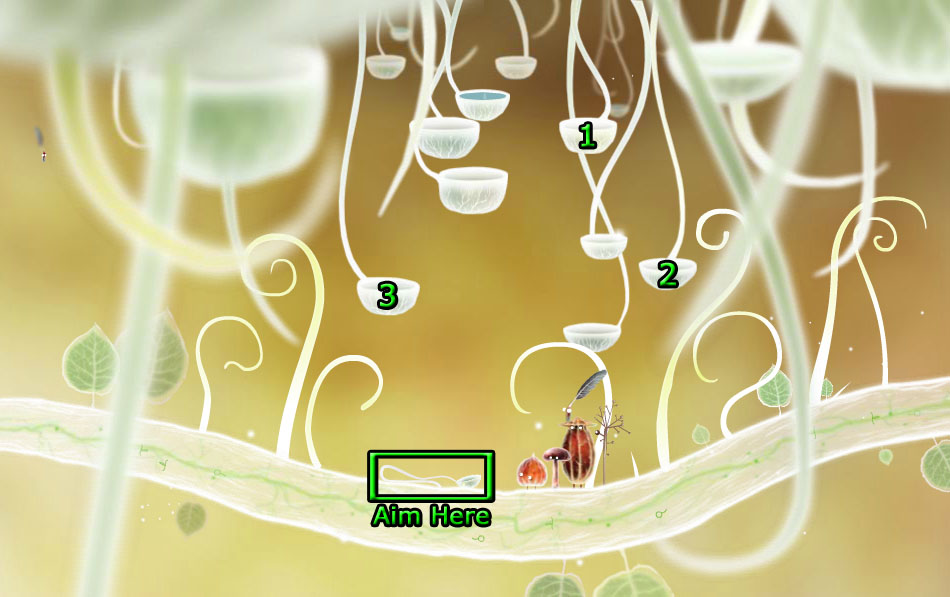
Scene 11 - Empty Bowls
The goal at this scene is to direct the water dripping into the water bowl at the top down to the wilted bowl on the branch.
Click the bowls to move them to the left, right, or middle.
When you click the bowl filled with water at the top, it will spill down and then jump from any bowl it touches until it reaches the branch below.
Move the three bowls into the middle positions as shown in the screenshot below to reach the wilted sprout at the bottom.
Solution.
After the sprout is watered, it will grow upward and provide you a pathway back up to Scene 10.
If you water all of the sprouts on the branch, a pod will appear next to the sprout leading up to Scene 10.
Open the pod to add a new firefly creature card to your deck.
For now, move left to travel to Scene 12.
Scene 12 - Yellow Pods
Wait for the worm to appear on the u-shaped yellow pod to the left.
Click the worm to send the feather creature on your team to collect it and add the Worm to your inventory.
Go right twice to reach the next scene.
Scene 13 - Round Creature 1
Click the little round creature stuck in the water bowl to find you need to send a team member to rescue him.
Use the mushroom on your team to rescue the round creature.
Follow the creature left, then you will automatically climb back up to Scene 9 and complete the first Round Creature Rescue (1/3).
Go right to return to the fisherman at Scene 8.
Scene 8 - The Fisherman
If you talk to the fisherman, he will as for a worm.
Give him the Worm from your inventory to put on his hook.
After the cinematic is over, you will receive the fisherman card in your deck.
Pick up the Crab creature the fisherman leaves for you on the left branch to add it to your inventory.
A new card for the small crab creature will also be added to your deck.
Go left to return to Scene 7, then move towards the upper right branch to reach the crossroads at Scene 14; continue along the upper right branch to travel to the next scene.
Scene 15 - Monkey Creature
If you move your cursor over the leaves or wait a few seconds, you'll see a little monkey creature jumping back and forth between three of the leaves.
Quickly click and drag away each leaf to pick it off the branch and the monkey creature will dive into the hole.
After the monkey dives in the hole, the stick creature on your team will poke his eye in the hole to look inside.
Click the eye twice to reach the monkey creature.
A new card for the monkey creature will be added to your deck.
Move left to travel to the hanging bat creature at Scene 16, then continue left to the next scene.
Scene 17 - Nectar Leaf
Click the fly sitting on the branch in the background at the upper left corner.
After a short wait, the fly will drink the nectar from the large leaf.
As the fly drunkenly floats around the screen, wait for it to move over the funnel-shaped snail.
Move your cursor over the fly to drip the nectar from the fly's body into the funnel.
A new card for the drunk fly will be added to your deck.
When enough of the nectar has filled the snail, it will move right towards Scene 16.
You will also receive a card for the funnel snail.
If the snail doesn't get enough nectar the first time to fill it, simply click the leaf again to repeat the minigame.
Follow the snail right to Scene 16.
Scene 16 - Hanging Bat Creatures
Click and drag the hanging bat creature downward to drop the beetle onto the edge of the top branch.
Wait for the funnel snail to stop at the middle of the lower branch under the bat creature.
Click and hold the snail's shell, then release your hold to send out a big bubble from the funnel.
Move your cursor over the bubble to pop it.
If you pop a large enough bubble close to the bat it will wake up temporarily and shake the upper branch, dropping the beetle down to the bottom branch.
A new card for the bat creature will be added to your deck.
Click the beetle to add it to your inventory.
Go right twice to reach the next scene.
Scene 18 - Hanging Spider
Use the Crab creature from your inventory to snip the spider hanging on the white thread.
You will receive a new card for the hanging spider in your deck.
Move right to travel to the next scene.
Scene 19 - Sheep Pile
When you reach this scene, the round creature will fall under a pile of white sheep creatures.
Click and hold the sheep creature at the top of the pile, then quickly flip the cursor upwards to throw the sheep creature off the pile.
Continue to throw off each sheep at the top until you've freed the round creature.
If you remove all the sheep, a new sheep card will also be added to your deck.
Click the uncovered round creature on the branch to complete the Round Creature Rescue (2/3).
Go back to the cocoons at Scene 14.
Scene 14 - Cocoons
On the underside of the upper left branch are three hanging cocoons.
Click the smallest cocoon, then the medium sized, and finally the largest cocoon to lure over an insect with very long wings.
You will receive a new card for the long winged insect in your deck.
Move to the upper left branch to travel to the next scene.
Scene 20 - Long-Legged Creature
Click and drag away the black long-legged creature to pull one of its legs off the branch.
Hold onto the free hanging leg, then place it at the tip of the right branch.
A new card for the long-legged creature will be added to your deck.
If you click the top left branch to move your team to the middle of the bridge, a large, flying beetle will approach.
Before the flying bug scares away your team, use the horn shaped beetle from your inventory to blow it away.
A new card for the flying beetle will be added to your deck.
Continue left to the next scene.
Scene 21 - Hungry Pigs
After the pig creatures fall asleep, climb to the top of the acorn branch.
Click the acorns to drop them to the bottom branch
When the pigs come over to eat the acorns, click the largest brown pig to jump on top of him.
The pig will spit out the final creature for the Round Creature Rescue (3/3).
You will also receive a new card for the pig creatures in your deck.
Go left to travel to the next scene.
Scene 22 - Storyteller Creature
Click the black creature that is sleeping on the end of the branch.
After the cinematic, you will receive an addition to the story-telling creature card in your deck.
Go all the way back to Scene 6.
Scene 6 - Crying Round Creature
Click the now happy round creatures bouncing on the branch to travel to the next area.
Now that all three round creatures are reunited, you will also receive a new round creature card in your deck.
Chapter 5
There are 25 Creature Cards in Chapter 5 and an additional 3 cards during the transition cinematic at the end of the chapter.
Cards 57-68 Part 1.
Cards 69-80 Part 2.
Cards 81-84 Part 3.
When you first travel to the area, the round creature inside the wheel room will ask you to collect 14 Birds.
After the cinematic, go down the hole in the middle of the floor to travel to Scene 1.
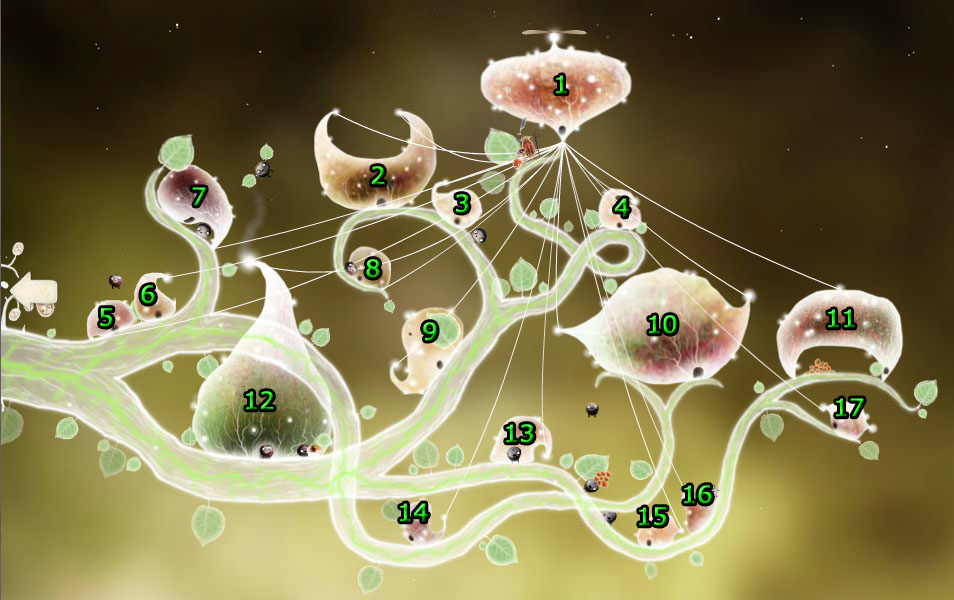
Scene 1 (& House Map)
Scene 1 is a large area that contains several houses that each lead into a miniature scene.
Refer to the map below for a numbered list to navigate all of the houses.
Houses Map.
Start by going into House 3.
House 3 - The Tree Room
Click all of piles of soil on the pedestals to attract the bees.
After the bees build their hive on the third tree (counting from left to right) you will receive a new card in your deck.
Click the yellow bean on the top of the fifth tree to light up the mountain range at the top of the screen.
You will also receive a new card for the floating creature in your deck.
Next, click the balloon at the top of the first tree on the left to fly it through the tunnel.
Click the little man with the red hat to send him to the mountains in the balloon.
After the little man stops at the mountain, click his red hat to reveal the red, spiny plant.
Click the Red Plant to add it to your inventory.
Exit the building and go into House 4.
House 4 - The Horn Room
The goal in this room is to blow the horns three times to assemble the correct parts to each animal.
Start by blowing the bottom horn on the right wall every time.
If you get a Frog head: blow the bottom horn a second time, then blow the top horn to complete the Frog.
A new card for the frog creature will be added to your deck.
If you get a snail head: blow the bottom horn three times.
A new card for the snail creature will be added to your deck.
If you get a bird head: blow the bottom horn a second time, then blow the middle horn.
Pick up the completed Bird (1/14) when it drops to the ground.
Exit the building and go into House 5.
House 5 - The Dream Room
On the left side of the room is a ball with a tap that is dripping with water.
Select one of your characters to drink the water to start the minigame.
Only the level for the big creature with the hat contains the Bird.
Refer to the sections below for the instructions to each character's minigame:
Seed Creature Level
Hold your cursor to the left or right and the seed will follow.
Alternate running from one side of the circle to the other side to gain speed.
Once you're moving fast enough, you can run him all the way to the white sphere at the top of the circle to escape the level.
Stick Creature Level
Move the cursor to the left or right to pull the bubble in that direction.
Each time the bubble hits the funnel at the bottom of the area, it will get darker in color.
The bubble must hit the same funnel four times to release the spider.
Hit the funnel containing a spider for the fifth time to escape the level.
Mushroom Creature Level
Click all of the bubbles blocking the center of the hourglass to pop them.
Clear a path for the mushroom inside the bubble to fall through the gap in the middle.
Reach the spider at the bottom of the hourglass to escape the level.
Feather Creature Level
As the bubble falls, move the cursor to the left or right to steer it in that direction.
Wait until you see a spiked ball, then touch it with the bubble holding the feather to pop the bubble and exit the level.
Hat Creature Level
Move the cursor to the left or right to run the hat creature from side to side.
The vase at the top will periodically shoot out bubbles that bounce off the walls.
Collect the bouncing bubbles to make the hat creature's bubble grow larger.
Eventually, the vase will release a bubble containing a bird; catch the bubble to collect the bird and exit the level.
After you escape the hat creature level, click the Bird (2/14) standing on top of the hat.
A new card for the two sleeping creatures will be added to your deck.
Exit the building and go into House 7.
House 7 - The Shaman's Room
Click the shaman three times to speak with him.
The shaman will tell you that he wants a seed in exchange for the bird egg hanging from the string in his room.
Exit the building and go into House 8.
House 8 - The Collector's Room
Speak with the round creature standing on top of the pedestal.
The collector will tell you that he wants a red spiny plant.
Give him the Red Plant from your inventory.
A new card for the collector creature will be added to your inventory.
Take the Bird (3/14) he throws down to the floor.
Click and drag the white plant with a long, thin tail end that's pinned to rotate it's yellow frame.
Pick up the Coin (1/3) that drops from the frame to the bottom right corner of the room.
Exit the building and go into House 10.
House 10 - The Snow Room
Click the swinging bucket at the middle of the ceiling to dump the snow into a pile on the left side of the floor.
After the creature with the ladder refills the bucket, click it again to dump the snow onto the pile a second time.
When the creature with the ladder returns to refill the bucket, you will also receive a new card in your deck.
Click the igloo on the upper right side of the room to launch the bird on the sled into the snowman.
A new card for the snowman will be added to your deck.
Click the bird to pull it out of the snowman, then take the Bird (4/14) on top of the snow pile.
If you click the igloo two more times, you can find an extra Coin.
Click the igloo 10 more times and one of the penguins will get stuck inside the door.
Drag the giant penguin outside of the igloo, and it will land on top of your party.
Hold and drag the penguin up to lift him.
A new creature card for the penguins will be added to your deck.
Exit the building and go into House 11.
House 11 - The Ball Game Room
Click the creature bouncing the ball to learn he wants to play a game.
You can select any member of your team to play against him, but only the mushroom character can successfully compete.
To win the game, the ball must hit the ground on the opposing player's side three times.
Move the cursor left and right to direct the mushroom back and forth.
Click just as the ball hits the top of the mushroom to jump him upwards and launch the ball in the air.
After you beat the ball player, he will kick the bird over to the right side of the court.
You will also receive a new card for the ball playing creature in your deck.
Take the Bird (5/14) from the ground.
Exit the building and go into House 12.
House 12 - The Dining Room
Wait for the creature carrying the stack of seeds to arrive, then click the pile in his arms to drop one of the seeds to the floor.
Pick up the Seed on the ground to add it to your inventory.
Take the pepper shaker on the shelf above the chef's head.
Move the pepper above the large, sleeping giant creature, then quickly shake the cursor from side to side to pour the pepper.
When the sleeping giant creature wakes up, he will move to the bowl of soup and distract the chef.
You will also receive a new card for the sleeping giant creature in your deck.
Before the chef returns, take the Bird (6/14) that is sitting on the perch above the soup bowl.
Exit the building and go into House 13.
House 13 - The Family Room
Open the oven to find the bird.
The large creature with the chef hat will ask you to find them food in exchange for the bird.
Give the Seed from your inventory to the large creature to receive the Bird (7/14).
Open the drawer at the top of the green cupboard to find the Coin (2/3).
Find four shadow creatures hiding around the room to add the shadow creature card to your deck.
Move the cursor over the three bowls in the lower right corner of the room to find the first shadow creature.
Rapidly click the top off of the silver pot on the shelf above the chef's head to uncover the second shadow creature.
Click and drag the lid upwards from the thin jar on the same shelf to reveal the third shadow creature.
Move the cursor over the shadow creature hiding on the stove pipe at the top of the room.
Exit the building and go into House 14.
House 14 - The Sleeper's Room
Open the closet to find the glass jar.
Pick up the jar, then use it on the larger glass lamp at the top of the ceiling to collect the fireflies.
The Firefly Jar will be added to your inventory, causing the room to go dark.
You will also receive a new card for the grumpy blanket creature in your deck.
Take the sleeping Bird (8/14) at the upper right section of the room.
Exit the building and go into House 15.
House 15 - The Junk Room
Click the cork to unplug it from the right wall, causing the room to fill with items.
Open the umbrella to find the Bird (9/14).
Click the valve twice to open the large safe.
Take the Toast Creature inside the safe to add it to your inventory.
A new card for the toast creature will be added to the deck.
Click the orange balloon and move it down to the spring in front of the door.
Click the spring to pop the balloon and free the moth creature, which will also add a new card to your deck.
Exit the building and go into House 17.
House 17 - The Jack-In-The-Box Room
Click the jack-in-the-box three times to make the bird pop out.
Click the Bird (10/14) at the end of the spring before it disappears back into the box.
If you click the jack-in-the-box 10 more times after taking the Bird, a new creature card will be added to your deck.
Exit the building and go into House 2.
House 2 - The Dark Room
Use the Firefly Jar from your inventory on the empty lamp hanging from the ceiling to light the room.
After the creatures run to the sides of the room, you will receive a new card in your deck.
Click and drag the tightrope downwards while the bird runs back and forth.
Wait for the bird to reach the middle of the rope, then release the rope to launch the bird into the ceiling.
Take the stuck Bird (11/14) from the ceiling.
Click the seed-shaped creature sitting on the nest in the upper right section of the room to lift it.
If you have not yet collected the first two coins, you can find one inside the nest.
If you already have two coins, however, the nest will be empty.
Exit the building and go into House 6.
House 6 - The Vending Machine Room
Pick up the Coin (3/3) on the floor to put it inside the vending machine.
A small raincloud will float from the machine to the top of the room.
Insert the remaining two Coins from your inventory into the machine.
After you put in the third coin, the raincloud will expand and fill the room with water.
Wait for the room to drain, then take the Bird (12/14) floating in the puddle at the lower left side of the room.
If you leave the room and return, a stork and a frog will appear.
Wait for the frog to jump under the stork's beak, then click the stork to catch the frog.
A new card for the stork creature will be added to your deck.
Exit the building and go into House 9.
House 9 - The Temple Room
Use the Toast Creature from your inventory on the altar under the tent to receive the Bird (13/14).
A new card for the temple creature will be added to your deck.
Exit the building to return to Scene 1, then move towards the left end of the branch to travel to Scene 2.
Scene 2 - Seed Branches
Click the seed hanging above the middle of the branch to send a character from your team after it.
After the ant carries the seed, you will receive the ant card in your deck.
Go down the lower left branch to reach Scene 3.
Scene 3 - Nest Entrance
Click and drag the cork at the bottom of the hive downwards to unplug it.
Go through the opened hole at the bottom to enter the hive.
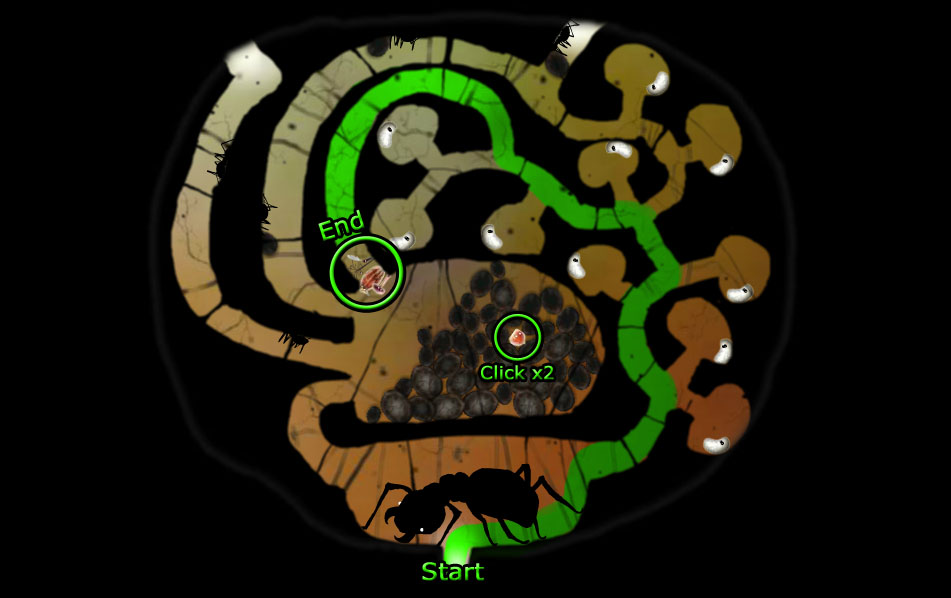
Scene 4 - Ant Maze
Guide your team to the glowing seed creature in the center by choosing the correct path to navigate through the maze.
If you make an incorrect move, you will reach a dead end with an angry egg creature which will add a new card to your deck.
Start by moving forward to the large ant at the bottom of the labyrinth, then click the directional arrows in the following order:
Right x2.
Left.
Right.
Left x2.
Up x2.
Solution.
Click the seed creature in your party twice to break him free from the pile.
You will receive a Seed in your inventory and be automatically transported back to Scene 1; then go into House 7.
House 7 - The Shaman's Room
Give the Seed from your inventory to shaman.
Click the Egg the shaman transports to the floor to pick it up.
A new card for the shaman will be added to your deck.
Exit the building and go into House 16.
House 16 - The Frankenstein Room
Click the switch at the side of the steps to revive the frankenstein creature.
A new card for the frankenstein creature will be added to your deck.
Click all five of the cuckoo clocks at the sides of the room to add a card for the cuckoo creature to your deck.
Rapidly click the six horns at the top of the room to make the helicopter lightbulbs all come out simultaneously.
You will also receive a new card for the helicopter lightbulb creatures in your deck.
Exit the room, then re-enter House 16 to move the two creatures off the platform.
Place the Egg from your inventory on the platform.
Flip the switch to hatch the egg to collect the final Bird (14/14).
A different way to hatch the egg is to travel to the Dark Room (House 2) and put the egg in one of the nests. This is not necessary, nor will it give you a new card.
Exit the building and return to House 1 to travel to the next area.
Posted by: Trinn |
April 19, 2012 4:32 PM
|
April 19, 2012 4:32 PM
Botanicula Walkthrough (Part 2)
Chapter 6
There are 32 Creature Cards and the final part to your storyteller card in Chapter 6, as well as 2 additional cards during the transition cinematic at the end of the chapter.
Cards 85-95 Part 1.
Cards 96-107 Part 2.
Cards 108-118 Part 3.
Scene 1 - Entrance
After the cinematic, you will receive three new cards for the bird creature, the red spider, and the helicopter device in your deck.
If you move the cursor over the left and right sides of the path, you'll see two glowing symbols on each side.
These symbols will appear throughout the level and are used to indicate landmarks in that direction.
The semi-circle with three lines sticking out of the bottom is the star room where you put the blue seeds into the tubes in the ceiling.
The circle with the dot in the middle is the circus area for the tear drop-shaped creatures.
The small circle with dash lines at the bottom is the cannon room with a single tear drop-shaped creature.
The lightbulb shape with the dot in the middle is the devouring creature's room.
The cloud shape is the floating lights area with the bouncy cloud creatures.
The infinity symbol refers to the looping tunnels area.
The water symbol is the submarine creature's room.
The egg shape with the zig-zag pattern is the area with tightropes across multiple doors.
The circle with six squiggly lines on top is the nerve cell creature's room.
The three rings side-by-side is the worm creature's tunnel area.
The three circles with a vertical line at the bottom is the forest room.
The Pacman shape is the temple area and, eventually, the exit.
Head left to reach Scene 2.
Scene 2 - Grazing Worms
Click all nine of grazing worm creatures around the area.
A new card for the worm creatures will be added to your deck.
Go down the lower left tunnel indicated by the lightbulb symbol and the cloud symbol to reach the next scene.
Scene 3 - Hungry Lizard
Click the glowing shell-shaped plants to release the white flies into the air.
Click the lizard to make him eat one of the flies.
You will receive a new card for the lizard creature in your deck.
Pick up the Blue Seed (1/8) the lizard spits into the grass beside the left tunnel.
Go down the lower right tunnel indicated by the cloud symbol to travel to the next scene.
Scene 4 - Floating Lights Islands
The goal in this area is to bounce off the cloud creatures to reach the floating island in the top right corner.
Click a cloud creature to move it to a different side of the island.
Note that a creature will not reposition itself if its path is blocked.
Click the down arrow above the small cloud creature's head on the bottom left island to jump down onto it and then bounce to the adjacent island on the upper right side.
Click the small creature once to move it to the right.
Click the lager creature on the same island twice to move it to the top of the island where the small creature was previously standing.
Click the creature on the small island at the top of the middle area to move it to the underside of the island.
Click the down arrow above the large creature's head on the lower left island to hop up to the highest island in the middle area.
Jump down to the adjacent small island on the lower right side.
Click the cloud creature at the bottom of the island you just left at the upper left to move it back to the top of the island.
Click the cloud creature on the larger island to the lower right to move that one to the top of the island as well.
Click the large cloud creature on the island at the top right corner to move it to the right.
Jump onto the cloud creature at the top of the lower right island to bounce from there to the small island on the upper left, and and then to the island at the top right corner.
When your team is standing on the island at the top right corner, move right to travel to the next scene.
Scene 5 - Floating Lights Sphere
Take the Blue Seed (2/8) sprouting from the island at the top left corner.
The goal in this area is to reach the green leaf block floating by the top of the largest tree.
Just like in the last scene, you must click the cloud creatures to move them back and forth.
However this time, you also have to jump over the trees by bouncing off their backs.
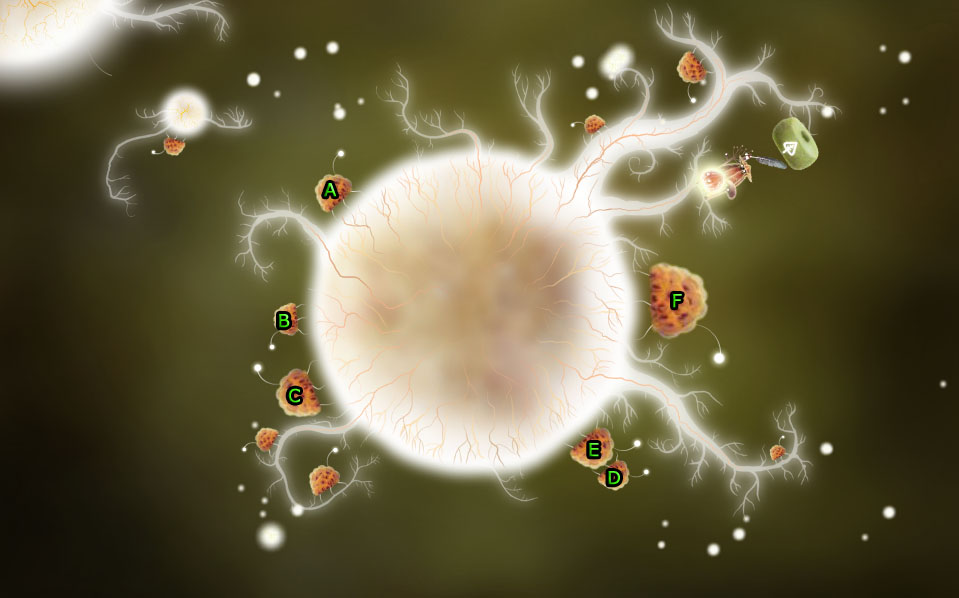
Refer to the following screenshot for a labeled guide to the creatures used in the step-by-step instructions below.
Screenshot.
Click Creature A once to move it to the left.
Jump down to the right side of Creature A.
Click Creature C once to move it down.
Then, click Creature B once to move it down.
Click Creature D twice to make it climb onto the small branch.
Jump onto the back of Creature A to hop all the way to the bottom of the sphere where Creature D was originally standing.
Click Creature E to move it left towards the branch.
Click Creature D to move it on top of Creature E's back.
Click Creature E again to return it to the right side, next to the tree.
Move your team right once, then jump on top of the small branch to hop all the way to the large tree under the green leaf box.
Solution.
Click the Green Leaf Box (Element 1/4) to add it to your inventory.
You will also receive a new card for the cloud creatures in your deck.
Without moving any of cloud creatures from the solution, hop on Creature F's back to return to Scene 4.
Scene 4 - Floating Lights Islands
Jump onto the adjacent island to the upper left.
They should be correctly positioned already, but if necessary, move the large creature on the lower left island and the creature on the upper island in the middle area to the top of their respective islands.
Jump onto the large creature's back on the lower left island to return to the grassy platform at the upper left corner.
Move left to go back to Scene 3, continue left to reach Scene 6 with the devouring creature, then take the upper left path to reach the first section of the infinite tunnels scene.
Scene 7 - Infinite Tunnels Roundabout
Move your cursor over the three spikey creatures, and they will flee through a different tunnel.
Follow them to the the next tunnel, then move your cursor over them again to receive a new spike creature card in your deck.
Go back through the tunnel you entered from to return to Scene 7.
Go directly up to reach Scene 8, then continue through the upper left tunnel to travel to the puppet show at Scene 9.
Scene 9 - Puppet Show
Click the curtains on the miniature stage six times to watch the full show.
A new card for the jester creature will be added to your deck.
Go back twice to return to the roundabout at Scene 7, then go down the lower right tunnel to move to the inner section of Scene 8.
Move towards the tunnel directly to the left to travel to the crossroads at Scene 10.
Scene 10 - Infinite Tunnels Crossroads
Go through the tunnel directly to the right (at the 3 o' clock position) to travel to the devouring creature at Scene 6.
Scene 6 - Devouring Creature
Click the Horn sticking out of the lower left section of the grass to add it to your inventory.
You will also receive a new card for the devouring creature in your deck.
Go back to the crossroads at Scene 10, then continue down the lower right tunnel (at the 5 o'clock position) to travel to the story teller at Scene 11.
Scene 11 - Story Teller
Click the story teller creature hanging at the end of the tunnel.
After the cinematic, you will receive a new addition to the story teller card in your deck.
Go back to the crossroads at Scene 10, then continue through the left tunnel (at the 9 o' clock position) to travel to the cliff at Scene 12.
Scene 12 - Cliffside
Wait for the brown creature to drop down on a rope and stick out its tongue.
Click the hanging creature's tongue before it disappears, then move the cursor away to extend the tongue as far as possible.
While the tongue is stretched out, clicking flip the head up and down to wake up the turtle.
Do not leave the scene until the turtle eats the leaves.
A new card for the turtle creature will be added to your deck.
Pick up the Blue Seed (3/8) beside the turtle's hind leg.
Exit the infinite tunnels labyrinth by going back to Scene 10, then moving up, down, and right to reach the top of Scene 6 with the devouring creature.
From there, go right twice to the crossroads at Scene 15, then move towards the lower right path to reach the dark area at Scene 13.
Scene 13 - Tightrope Doors Lower Section
Speak to sad creature standing alone in the dark, and he will tell you he wants a horn.
Give him the Horn from your inventory to light up the room.
You will also receive a new card for the horn playing creature in your deck.
Click the creature with a large mouth patrolling the bottom.
A new card for the black creature will be added to your deck.
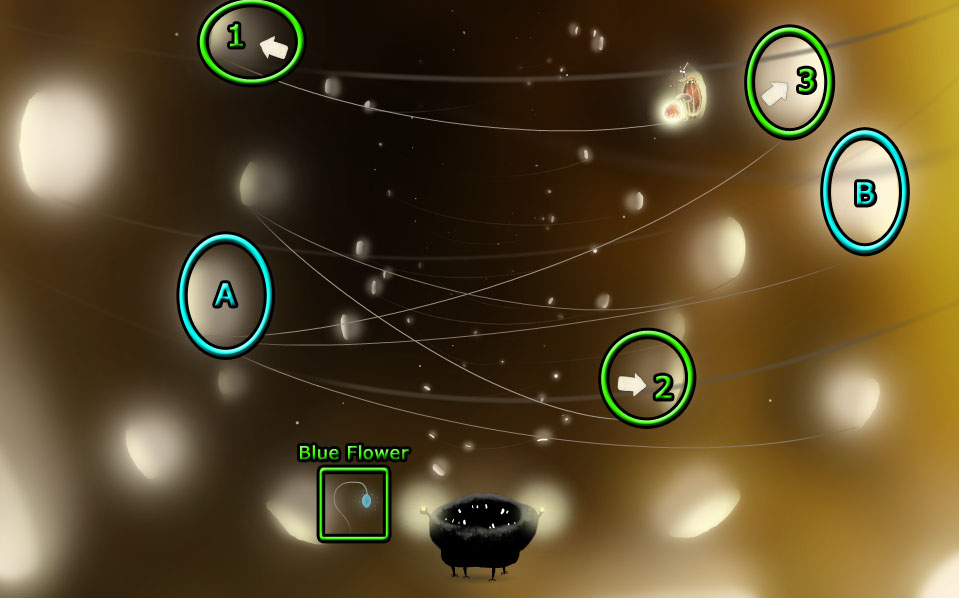
The goal of this room is to reach the blue flower at the bottom level.
Click a doorway to travel to it across the tightrope; you can only move across the space to doors that are connected by a rope.
To reach the bottom flower, refer to the screenshot below and click the doors in the following order:
Go left into Door 1.
Take the lower right path to Door 2.
Follow the upper right rope to Door 3.
Pick up the Blue Flower before the black creature scares your team away.
Solution.
When your team flees from the black creature, they will retreat to Door A.
Take the middle rope leading to Door B to travel to the next scene.
Scene 14 - Tightrope Doors Upper Section
Just like in the lower section, at this scene you have to cross the tightropes to go through the doors.
This time, you must reach the sun block at the top of the level.
Follow the lower right tight rope to Door 1.
Take the upper right path through Door 2.
The first time you reach the top tightrope, your characters will automatically fall down to the lower scene, then climb back up to the start of the level.
Simply go through Doors 1 and then 2 again to reach the top tightrope.
Solution.
Click the Sun Box (Element 2/4) above the tightrope to add it to your inventory.
Your team will automatically exit through Scene 13 to the crossroads at Scene 15.
From there, move left to the nerve cell creature at Scene 16.
Scene 16 - Nerve Cell Creature
When you enter the room, the nerve cell creature will trap your team pull them towards the center.
Click and drag away each of the six colored spheres stuck to the walls around the room to pull them out.
After all of the spheres are lodged into the nerve cell creature, click a member of your team to select them.
Move your selected character as far away from the nerve cell as possible until the connecting link is fully extended.
Click to release the link, which will drop your creature down into the cell and shatter it to pieces.
When the nerve cell shatters, the six spheres will remain in the air floating around the white ball of light like planets.
Click the yellow planet at the top of the right side thirteen times to complete it.
Pick the Blue Flower (5/8) off the surface of the planet.
Click the purple planet in the middle of the right side twice to complete it.
Click the blue planet at the bottom of the right side three times to complete it.
Click the green planet at the bottom of the left side once.
Click the red planet in the middle of the left side three times to complete it.
Click the blue planet at the top of the left side twice.
If all of the planets are completed, you will receive a new card for the planets in your deck.
Go left to the worm tunnels at the next scene.
Scene 17 - Worm Tunnels
The goal at this scene is to acquire the gold star by pulling it through the maze.
Click the bright start inside the chamber with the sleeping worm to start the minigame.
Move your cursor through the maze while the star is selected to guide it through the tunnels.
If you move too far away or accidentally place the cursor in a wall, the star will become stuck in the wall.
Direct your cursor on top of the star to free it, then continue moving through the maze.
Solution.
If you can successfully guide the Star to the exit, it will be added to your inventory.
You will also receive a new card for the worm creature in your deck.
Go back to Scene 16, then continue right to the lightbulb plants at Scene 18.
Scene 18 - Lightbulb Plants
Click all of the mushrooms in the area to light them up.
A new card for the lightbulb plants will be added to your deck.
Go up twice to travel to the crib at Scene 19.
Scene 19 - The Crib Room
At the ceiling of the area are four white glowing balls with multiple tendrils hanging down.
If you move your cursor over all of the tendrils to ring them like windchimes, a new creature card for the orbs will be added to your deck.
Click the baby creature sleeping inside of the crib to wake it up.
Wait for the mother to bring her baby a mushroom and go back to sleep.
Follow the mother down to the area with the mushrooms, then click one of the mushrooms and wait for her to pick it up.
After you've fed the baby from each scene, a new card for the mother and baby creatures will be added to your deck.
Move right to travel to the forest at the next scene.
Scene 20 - Forest
Move your cursor over the deer to chase it around the circle.
A new card for the deer creature will be added to your deck.
Speak to the sad-looking worm on top of the tree and he will ask you for a gold star.
Give it the Star from your inventory to light the room.
Click the worm to split it into two copies.
Click either of the the green worm three times to move them to the top, then click it a fourth time to drop it down to the bottom.
You will also receive a card for the worm creature in your deck.
Take the Blue Flower (6/8) that sprouts from the upper right wall.
Click and drag away the striped ball at the end of the red stem on the left wall.
Pick up the Ball after it falls to the ground to add it to your inventory.
Go back to the crib at Scene 19, then continue left to the U-shaped mushrooms at the next scene.
Scene 21 - Seesaw Plants
Click the both of the U-shaped mushrooms to alternate the size of their left and right sides.
A new card for the mushrooms will be added to your deck.
Continue left to the blue seed tubes at the next scene.
Scene 22 - Blue Seed Tubes
Click the Blue Seed (7/8) sprouting from the right side of the ground to put the first seed inside of the tube.
Put the 6 other Blue Seeds from your inventory into the tube in the middle of the ceiling.
One Blue Seed is still missing, so you will have to return later to place the remaining seed.
Move left to the grazing worms at Scene 2, then take the upper left path to travel to the circus area at the next scene.
Scene 23 - The Circus
Give the Ball from your inventory to the teardrop-shaped creature standing on the transparent Eye.
After the creature hops on the ball, the Eye will be added to your inventory.
Interact with the all of the teardrop creatures in the scene to add a new card to your deck.
Go back to the blue seed tubes at Scene 22, then go down to the multicolored bouncy creatures in the next scene.
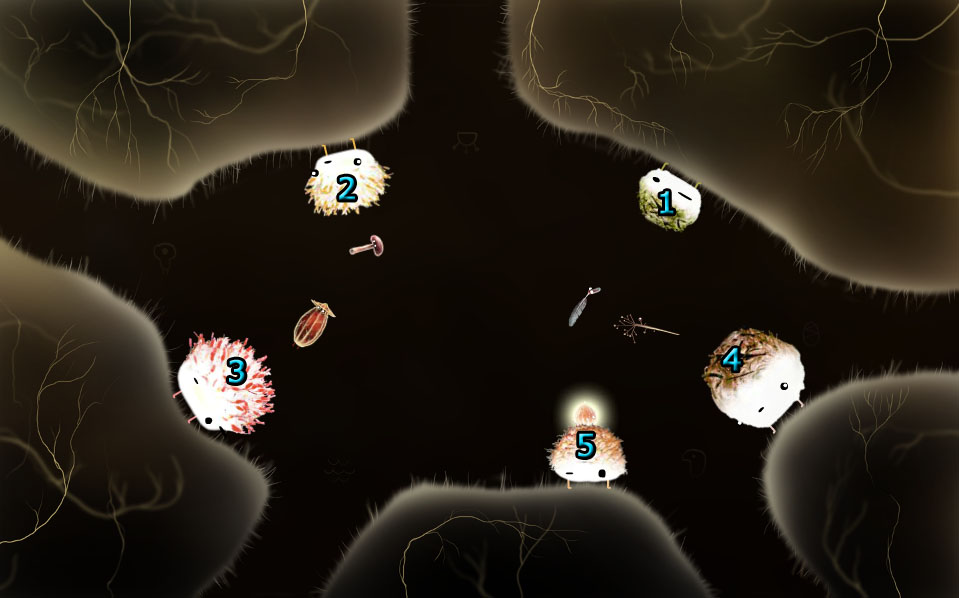
Scene 24 - Bouncy Creatures
Click each of the white creatures with the colored hair to bounce on them.
Note how many times your character jumps on each white creature.
Quickly click on the white creatures in order from largest to smallest amount of bounces so that all of your characters are jumping simultaneously.
Solution.
Click any of the creatures to move your team back to the ground.
A new card for the bouncy creatures will be added to the deck.
Go down the lower left tunnel to travel to the submarine creature at the next scene.
Scene 25 - Yellow Submarine
Speak with the submarine creature to learn he's missing his eye.
Give him the Eye from your inventory.
Click the submarine creature to travel to the underwater zone.
You will also receive a new card for the submarine creature in your deck.
Scene 26 - Underwater Area
At the starting area, move your cursor over the creatures with lights on their heads floating by.
A new card for the floating creatures will be added to your deck.
Move directly left twice to travel to the top left corner of the zone.
Click the right hanging eye of the largest slug creature, then move it towards the hole at the top of the submarine to attach it.
A new card for the slug creature will be added to your deck.
Move towards the bottom right corner twice, then go down to reach the rock creatures at the bottom of the area.
Click the slug creature's eyeball tethered to the top of the submarine, then click the top of the largest rock creature to attach it to its back.
While the rock creature is lifted, pick up the blue Water Box (Element 3/4) on the floor to add it to your inventory.
Move your cursor over all seven of the rock creatures to receive a new card in your deck.
Go up and then right to reach the jellyfish area in the lower right side of the zone.
Move the cursor over one of the jellyfish creatures as it floats by to add a new card to your deck.
Go down to travel to the bottom right corner of the zone.
Click the Blue Seed (8/8) sprouting from the ground to add it to your inventory.
Move up and then right to the right wall.
Move your cursors on the glowing creatures with multiple tentacles.
A new card for the light creatures will be added to your deck.
Go up to the shaft of light at the upper right corner of the zone, then go towards the light to enter the cave with the peanut creature.
Scene 27 - Peanut Creature's Cave
Click the peanut shaped creature to start the bug race minigame.
Click and hold the mushroom over the up, down, left, and right arrows in the center of the race track to move your insect in the corresponding directions.
Your bug must make a full lap in a clockwise direction to the finish line before the opposing bug reaches it first.
Do not touch the opponent, or you will temporarily lose control of your bug.
An easy strategy for winning the race is to hug the inner wall to cut as much distance as possible.
After the race, the peanut creature will jump up and down repeatedly.
Before he stops, click the red pumpkin-shaped plant at the top right corner of the room to knock off his helmet.
Click the Helmet on the ground to add it to your inventory.
You will receive two new cards in your deck: one for the peanut creature and one for the bug creatures.
Click the submarine to go back into the underwater area.
Scene 26 - Underwater Area
Move up and then left to reach the top wall of the zone.
Point your cursor at the floating black circle creatures to add a new card to your deck.
Go back to the surface by moving left and then up, then return to the blue seed tubes at Scene 22.
Scene 22 - Blue Seed Tubes
Put the last Blue Seed from your inventory into the tube in the middle of the ceiling.
You will receive the Star Box (Element 4/4) in your inventory.
A new card for the tube creature will be added to your deck.
Return to the circus area at scene 23.
Scene 23 - The Circus
Click the cymbal hanging from the rope in the middle of the ceiling two times to lower it.
Go down the lower right tunnel to the cannon room at the next scene.
Scene 28 - Cannon Room
Give the Helmet from your inventory to the teardrop-shaped creature sitting on the hill.
Click the down arrow at the bottom of the cannon to move underneath it.
Click the fuse at the back to fire the cannon.
A new card for the cannon creature will be added to your deck.
If the cymbal at the circus scene was correctly positioned, the cannonball will fire the creature directly into it, triggering the circus cinematic.
At the end of the clip, a new card for the circus will be added to your deck.
Go back to the bouncy creatures at Scene 24, then continue down the lower right tunnel to travel to the temple.
Scene 29 - Temple
Talk to the floating creature to give him the 4 Element boxes from your inventory.
A new card for the floating creature will be added to your deck.
After the cinematic, you will be transported to the next area.
You will also receive two new cards in your deck: one for the element boxes and one for the red sphere.
Chapter 7
There are 5 Creature Cards in Chapter 7.
Cards 119-123.
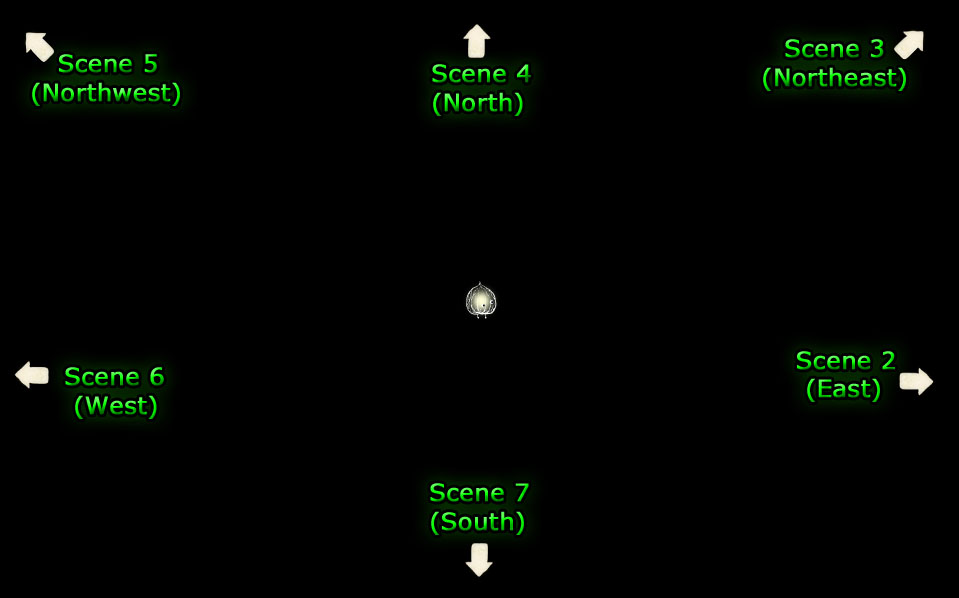
Scene 1 - Dark Room
This scene acts as the main hub to all of the other area.
Move your cursor to the one side of the screen, then click the directional arrow to move to that side.
Your character will initially bump against the doorway; simply click the door again to enter that area.
Refer to the map below to see all available directions needed to complete the zone.
Scene 1 Map.
Complete the minigames to acquire the white sphere in each section, then exit the room to return to the main scene.
Move right to go to Scene 2.
Scene 2 - East Room
In this area, you must make it to the white sphere by shooting any approaching creatures before they can attack.
Click your character to select him (he will start to sparkle and glow) then move the cursor over an enemy to fire at it.
The red light inside an enemy's body indicates how many shots it takes to kill it.
First Section
Click your character to start moving through the first section.
You will be attacked by five enemies who approach one at a time - each enemy will only take one shot to kill.
After the 5th enemy is dead, the pincer enemy will attack; shoot the monster three times to destroy it.
Second Section
When you reach the second section, another round of five enemies with will attack.
Shoot each of them once as they approach to destroy them.
After they're gone, you will be attacked simultaneously by one enemy that takes 2 hits to kill, and a second enemy that takes 6 hits to kill.
Destroy the 2-hit enemy first, then take out the larger enemy.
Third Section
As you enter the third area, two enemies that take one hit to kill will attack.
After they're dead you will be simultaneously attacked by multiple enemies from all directions at once.
Shoot each enemy one time to destroy it, prioritizing the ones that are closest or moving the fastest first.
Click the white sphere on the stand at the bottom to lure the giant monster.
You must shoot this enemy 17 times to kill it before it devours you.
After it's destroyed, click the White Sphere (1/6) to consume it.
Click the arrow at the top of the area to exit the room and return to Scene 1, then move to the upper right corner to travel to the next scene.
You will also receive a new card for the giant creature in your deck.
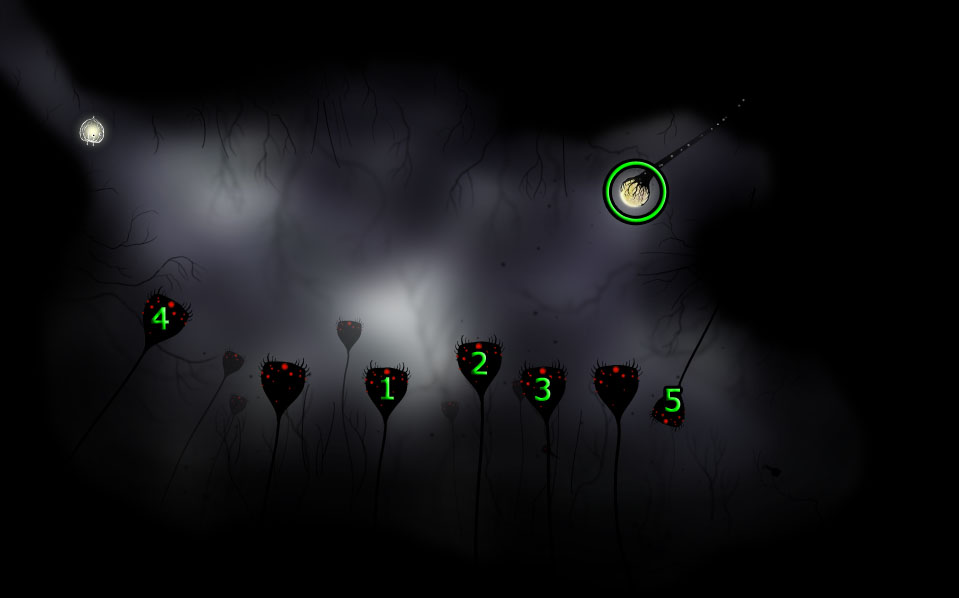
Scene 3 - Northeast Room
The goal in this area is to reach the white sphere by lowering all of the monsters at the end of the long stems.
Click one of the seven black creatures with a shortened stem to extend it.
Making one stem longer will shorten one or more different stems connected to the one you clicked.
Refer to the screenshot below and click the stems in numbered order from 1-5 to solve the puzzle:
Solution.
After all of the monsters have been lowered, click the White Sphere (2/6) at the upper right corner to collect it.
A new card for the stem creatures will be added to your deck.
Return to Scene 1, then go directly up to travel to the next scene.
Scene 4 - North Room
To complete this area, you much reach the white sphere inside the top pod at the middle without being caught by the collector monster.
Wait for the monster to capture you inside the lower left pod.
Open the adjacent pod to the left to release the large creature with the hat.
Quickly click the empty pod to sneak inside of it while the guard chases after the hat creature.
Next, release the round creature from the upper left pod.
Again, you have to click the empty pod to hide inside while the guard is distracted.
Open the hat creature's pod a second time.
While the guard is chasing the hat creature, enter the pod containing the White Sphere (3/6) to collect it.
You will also receive a new card for the guard monster in your deck.
Return to scene one, then move towards the top left corner to travel to the next scene.
Scene 5 - Northwest Room
Click the white sphere in the middle of the empty room to reveal the giant red monster.
Click the monster's legs before it has a chance to attack you.
After the monster falls to a pileon the room, click its body to chase it around the room and it will divide into five sections.
If you move the cursor over the white ball, it will hop to a different section.
Move the white sphere to the section that is second from the left, then click the red body under the white sphere to start the minigame.
Your character will be absorbed into a round bubble and fall towards the bottom of the screen.
Before it has a chance to hit the floor, click the mouse to launch a jellyfish monster into the air, which will bounce your character's bubble back up.
Hitting the bubble from the left or right will push it to the sides, so aim your hits a little off to the side if you need to move horizontally.
When the bubble touches the White Sphere (4/6) it will be added to your inventory and end the minigame.
A new card for the red monster will be added to your deck.
Return to Scene 1, then move to the left to travel to the next scene.
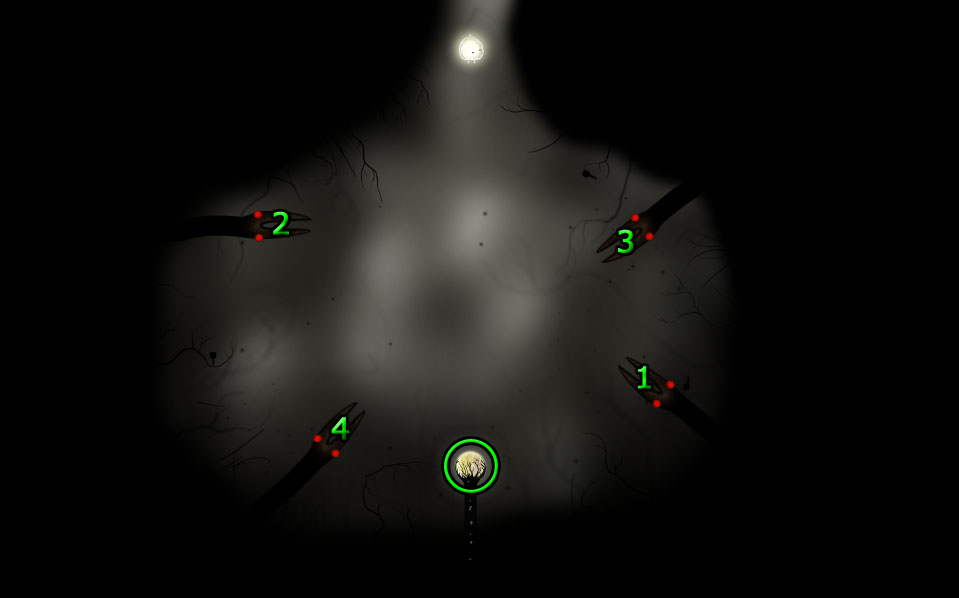
Scene 6 - West Room
In this area, there are four snake-like monsters guarding the white sphere at the bottom.
Click the snake's heads in the correct order to tangle their heads so you can safely pass.
Refer to the screenshot below and click the snakes in numbered order from 1-4 to solve the puzzle:
Solution.
Before the snake heads have a chance to untangle, click the sphere at the bottom of the screen and they will try to attack you and tighten their knots.
Now you can safely move to the bottom and take the White Sphere (5/6).
A new card for the snake monsters will also be added to your deck.
Return to Scene 1, then go straight down to travel the next scene.
Scene 7 - South Room
Click the black spider monster to start the cutscene.
The End
Posted by: Trinn |
April 21, 2012 3:01 AM
|
April 21, 2012 3:01 AM
For Lucie:
Cards in each level:
Chapter 1 (Feathers): 11 cards
Chapter 2 (Keys): 18 cards
Interlude (Genie): 6 cards
Chapter 3 (Children): 21 cards + second part of the story which is added to your existing 'old wise man' card
Chapter 4 (Chickens): 25 cards
Transition: 2 cards
Chapter 5 (Leaves): 32 cards + final part of the story which is added to your existing 'old wise man' card
Transition: 3 cards
Chapter 6 (Energy): 5 cards
Posted by: OneBreath |
April 25, 2012 6:52 PM
|
April 25, 2012 6:52 PM