
The Silent Age: Episode One
Platform: iOS, Android

![]() The Silent Age: Episode One from House on Fire is built like a classic point-and-click adventure game. It goes to extreme lengths to keep everything as crisp and minimalist as possible, reducing the controls to quick taps and pouring on massive amounts of attention-getting atmospheric details using just a few sound effects and some subtle gradients. But it's that stark simplicity that makes The Silent Age such a fetching game, one that will have you eagerly awaiting future installments!
The Silent Age: Episode One from House on Fire is built like a classic point-and-click adventure game. It goes to extreme lengths to keep everything as crisp and minimalist as possible, reducing the controls to quick taps and pouring on massive amounts of attention-getting atmospheric details using just a few sound effects and some subtle gradients. But it's that stark simplicity that makes The Silent Age such a fetching game, one that will have you eagerly awaiting future installments!
 It's the early 1970s and Joe has a pretty crummy job as a janitor in a large, faceless government building. One day the management calls him in for a talk. It looks like Joe is getting a promotion! And by promotion we mean Joe will now be cleaning the sub-basement laboratories in addition to his normal duties. New keycard in hand, Joe heads down the elevator, only to discover drops of blood and a dying man who claims to be from the future. Promotion, indeed.
All you need to do to investigate Joe's world is tap on anything of interest. Joe walks on his own and will even run if you do a quick double tap. Inventory items and conversations are all handled in a similar manner, so you don't have to worry about picking the appropriate action verbs to get things done. Just tap and go! Joe's super-useful instantaneous time travel device lets him swap back and forth between time periods with a tap of the screen. Most of the game's puzzles revolve around switching time periods, interacting with items or grabbing something important, then switching back and putting those discoveries to good use.
 Analysis: The Silent Age is a beautiful game. Not in the "OMG how did they make those graphics?!!" sort of way. This is the kind of beauty that comes from delicious artwork, phenomenal sound design, and fantastic writing all coming together to set an unbeatably intriguing atmosphere. Helping the unassuming hero Joe prevent a mass extinction simply by being an average guy couldn't be more riveting!
The Silent Age isn't a fast-paced game, but it isn't overly wordy, either. It's filled with a surprising amount of empty space. Even when lots of things are on the screen the game still feels empty. It's not that there isn't enough to interact with or that the environments are underpopulated, it's just The Silent Age making sure you feel confused and alone, just like Joe. The pacing is quite good, and as the game suggests when starting up, the experience is even better with headphones.
The Silent Age: Episode One is, as you could probably tell, only the first part of the story. Episode two is currently in the works, though at the time of writing no release date has been announced. There's enough content to fall for in the first episode, and the experience will keep you occupied for a good hour or so. It's a bit like Kentucky Route Zero in overall design and emotional impact, which is definitely a positive thing. Basically, The Silent Age is really really good. One of those rare releases that's more of an experience than the simple label of "adventure game" could ever hope to convey.
NOTE: This game was played and reviewed on the iPad 3. Game was available in the North American market at the time of publication, but may not be available in other territories. Please see individual app market pages for purchasing info.


Walkthrough Guide
(Please allow page to fully load for spoiler tags to be functional.)
The Silent Age: Episode One Walkthrough
Chapter 1 - The Present
You start the game in a hallway on the 22nd floor.
Read the note beside the orange door to find that the boss, Mr. Hill, would like a word with you.
Open the door and go through it to enter the supply room.
Pick up the LIGHT BULB on the shelf just past the entrance.
Replace the broken light bulb hanging from the ceiling with the LIGHT BULB in your inventory, then pull the chain under the repaired bulb to light the room.
Pick up the BLUE ACCESS CARD on the coffee table.
Take the RUBBER GLOVE from the shelf where you found the light bulb.
Exit through the door to return to the hallway.
Walk to the right to find the blue access card reader.
Use the BLUE ACCESS CARD on the card reader to open the blue elevator.
Enter the elevator to travel to the management floor.
Move left and speak to the secretary sitting at her desk.
Continue left to the padded door, then open it and enter Mr. Hill's office.
Go all the way right to find Mr. Hill.
Talk to Mr. Hill to receive the RED ACCESS CARD.
Go back to the elevator to return to the 22nd floor.
Move to the left end of the hallway to reach the red elevator.
Use the RED ACCESS CARD on the card reader to unlock the doors, then enter the elevator.
When the elevator reaches its destination, tap the button panel to open the doors.
Exit to the sub-basement labs.
Follow the trail of blood on the floor to the broken access panel at the right side of the room.
Use the RUBBER GLOVES from the supply room to repair the access panel.
Tap the access panel to open the door and continue forward into the super computer room.
Examine the lab coat hanging on the wall to receive a HANDKERCHIEF.
Use the HANDKERCHIEF to wipe up the blood trail on the floor at the bottom of the large, round door.
Exit the room and return to the management floor via the red and then blue elevators.
Show the BLOOD-SOAKED HANDKERCHIEF from the super computer room to the secretary to receive a BAND-AID.
Go back to the super computer room in the basement laboratory.
Place the BAND-AID over the left button beside the round door to hold the button down.
Tap the right button to open the door, then continue forward to enter the room.
Talk to the injured man lying on the floor.
Chapter 2 - The Future
After talking to the police officer, take the TIME TRAVEL DEVICE he places on the table.
Press the green button at the center of the TIME TRAVEL DEVICE to travel to the future.
Tap the glowing door to open it and go out to the hallway.
Walk left and go up the stairs to the 1st floor.
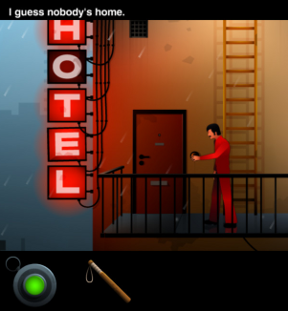
Go to the narrow walkway at the center of the corridor to find the hanging corpse.
Search the hanging man to locate a key at his belt, then tap the KEY to add it to your inventory.
Move to the right side of the hall and pick up the HAMMER on the ground in front of the boarded door.
Go back down the stairs to the ground floor.
Open the locked door to the right of the stairway with the KEY.
Go through the open door into the evidence room.
Examine the corpse on the ground to find an ID CARD.
Note the rusty padlock on the evidence locker grate. You can't remove it yet, so you'll have to return later.
Exit the room and go back up the stairs to return to the 1st floor.
Use the ID CARD to unlock the door between the stairway and the hanging corpse, then go through the door to enter the office.
Remove the NOTE pinned to the bulletin board on the wall.
Open the drawer at the right side of the desk and take the bottle of WEAPON OIL.
Leave the room and continue up the stairs to the 2nd floor.
Investigate the portrait of Abraham Lincoln on wall beside the lockers to uncover a wall safe.
Use the NOTE from the 1st floor office room to open the safe and receive the PAPER CLIP.
Return to the evidence room on the ground floor.
Use the WEAPON OIL to oil the rusted padlock on the evidence locker.
Pick the lock with the PAPER CLIP.
Open the unlocked gate and take the KATANA leaning against the wall.
Leave the room and go back to the 2nd floor.
Move right to the rope holding up the hanged man tied to a door handle.
Use the KATANA from the evidence room to cut the rope.
Return to the ground floor.
Walk right to find the skeleton that dropped down from the 1st floor, and pick up the ROPE on the ground beside the body.
Go up the stairs to the 2nd floor.
Open the right door and continue forward into the lieutenant's office.
Use the HAMMER to break the right window pane, then go out the window to the balcony.
Attach the ROPE to the yellow leafy branch on the right side of the tree.
Tap the rope to climb down.
Chapter 3 - The Machine
Walk all the way right into the sunbeam to charge your solar-powered TIME TRAVEL DEVICE.
Press the green button at the center of the TIME TRAVEL DEVICE to travel back to the present.
Move left to the motorcycle.
Search through the motorcycle tool bag to find a SCREWDRIVER.
Continue to the metal door on the left and unlock it with the SCREWDRIVER.
Go through the opened door to the police station entrance.
Take the UMBRELLA from the bin beside the garage door.
Press the green button at the center of the TIME TRAVEL DEVICE to travel to the future.
Go left to the ruined police car.
Examine the open car door to find a NIGHTSTICK.
Use the TIME TRAVEL DEVICE again to return to the present, then return to the station back lot.
Walk all the way to the wall on the right side of the area.
Use the UMBRELLA to pull down the fire escape ladder to the left of the wall.
Climb up the ladder and then go up a second ladder to reach the rooftop.
Take the CARPET hanging from the laundry line.
Use the TIME TRAVEL DEVICE to travel to the future.
Drop down through the hole that appears at the right side of the roof to enter apartment 1F.
Remove the piece of torn wallpaper at the left side of the wall to uncover a broken door to apartment 1G.
Press the green button at the center of the TIME TRAVEL DEVICE to travel back to the present.
Lift the curtains over the window on the right wall to light the room.
Pick up the bucket of WALLPAPER PASTE on the floor.
Tap the lamp to turn on the light, then take the revealed KEY inside the lampshade.
Use the KEY to unlock the left door.
Go out the door and down the ladder to the back lot.
Pour the WALLPAPER PASTE onto the poison ivy plant.
Climb up the fire escape ladder to reach the balcony.
Use the TIME TRAVEL DEVICE to travel to the future.
Now that the ivy plant has been killed, you can reach the door to apartment 1G.
Tap the door to remove the DOOR HANDLE.
Go through the right door to enter apartment 1F.
Attach the DOOR HANDLE to the broken door you revealed behind the wallpaper earlier.
Walk forward into apartment 1G, then use the TIME TRAVEL DEVICE again to return to the present time.
Break the window at the left side of the room with the NIGHTSTICK.
Place the CARPET over the broken glass, then tap the window.
Chapter 4 - The Entry
Remove the lid from the trash can and take the BROOM HEAD inside.
Press the button on the TIME TRAVEL DEVICE to travel to the future.
Pick up the MEAT HOOK hanging from the bottom of the window to the right of the butcher shop door.
Walk all the way left to the wall, then tap the broken plate to place it against the wall.
Use the BROOM HEAD on the uncovered circular indentation on the ground to dust off the manhole cover.
Lift the manhole cover up with the MEAT HOOK.
Climb down into the manhole.
Pick up the metal BAR on the ground to the right of the ladder base.
Go up the ladder to return to the back alley.
Use the TIME TRAVEL DEVICE to return to the present.
Push the button at the edge of the blue wall to open the gate.
Continue through the doorway to the front of the hospital.
Use the TIME TRAVEL DEVICE again to go to the future, then walk all the way right to the locked container.
Remove the lock from the container with the BAR, and take the BONESAW inside the opened container.
Examine the skeleton leaning against the tree to find a LIGHTER.
Use the TIME TRAVEL DEVICE to return to the present time.
Go through the left door to the back alley. Press the button on the TIME TRAVEL DEVICE again to go to the future and then climb down into the manhole.
Note the location of the switch on the wall and keep an eye on it while you use the TIME TRAVEL DEVICE once again to travel to the present time.
Tap the same area on the wall where you saw the switch in the future to hit it now and turn on the light. If you have trouble finding the switch, swipe around the room and stop where you see the words "What is switch."
Use the BONESAW to cut through the bars blocking the front of the large drain.
Enter the drain and pick up the SYRINGE on the ground at the end of the passage.
Go back to the hospital entrance (you'll need to travel to the future to go up the manhole ladder and then travel to the present to go through the electric gate).
Inject the SYRINGE into the bottle of turpentine to extract some of the liquid.
Return to the sewer drain where you found the syringe (switch to the future to reveal the manhole and then travel to the present to uncover the drain).
Move to the grille in the ceiling at the right side of the drain.
Push the button on the TIME TRAVEL DEVICE to go to the future.
Use the SYRINGE on the pile of rubble to pour the turpentine.
Ignite the turpentine-soaked rubble with the LIGHTER. The smoke from the flames will travel through the grille in the ceiling and chase off the hornets in front of the hospital.
Return to the hospital entrance now (switch to the present to exit the drain, then to the future to climb up the ladder, and then back to the present to go through the electric gate.)
Once you reach the front door, use the TIME TRAVEL DEVICE to go to the future.
Open the main entrance doors and enter the hospital.
Chapter 5 - The Corpse
Go through the open doorway on the right to enter the garage, then press the button on the TIME TRAVEL DEVICE to go to the present time.
Take the CAR BATTERY on the shelf to the right of the door.
Use the TIME TRAVEL DEVICE to return to the future, then exit through the open door.
Walk to the yellow doors on the right and pick up the TIRE IRON leaning against the wall.
Push the TIME TRAVEL DEVICE button once again to go back to the present.
Open the door marked "A" to enter the upstairs office.
Use the TIME TRAVEL DEVICE to travel to the future.
Go down the gaping hole in the floor at the right side of the room to reach the morgue.
Pick up the SCISSORS on top of the broken shelf at the far right side of the room.
Use the TIME TRAVEL DEVICE to go back to the present time.
Cut off the TOE TAG on the corpse with the SCISSORS.
Travel to future again using the TIME TRAVEL DEVICE, then go out the door to the downstairs office.
Attach the BATTERY to the loose cables hanging from the broken x-ray to light the room.
Pick up the revealed SMALL KEY on the ground between the skeletal doctor's legs.
Use the TIME TRAVEL DEVICE to go to the present.
Search inside the desk drawers to find the AMBULANCE KEY.
Go up the stairs to the hallway, then re-enter the office through door A.
Unlock the file cabinet between the desk and the window using the SMALL KEY.
Use the TOE TAG on the opened file cabinet drawer to locate the file with an ADDRESS.
Return to the future with the TIME TRAVEL DEVICE and go to the garage.
Once you enter the garage, switch back to the present time.
Use the TIRE IRON on the tire lying on the floor to repair the ambulance.
Push the yellow button on the wall to open the garage door.
Use the AMBULANCE KEY and the ADDRESS on the ambulance to escape the hospital.
Posted by: Trinn |
March 3, 2013 11:36 PM
|
March 3, 2013 11:36 PM