
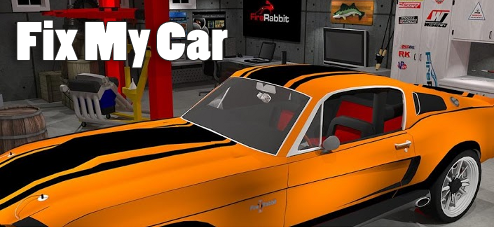
![]() When FireRabbit says Fix My Car, you're not in for an escape-the-room game in the traditional sense but a fix'em up and ride away on the open highway project. You begin with a task list already drawn up; search throughout a garage geared toward auto repair and detailing to find the parts and tools needed and get to work fixing up your classic American muscle car.
When FireRabbit says Fix My Car, you're not in for an escape-the-room game in the traditional sense but a fix'em up and ride away on the open highway project. You begin with a task list already drawn up; search throughout a garage geared toward auto repair and detailing to find the parts and tools needed and get to work fixing up your classic American muscle car.
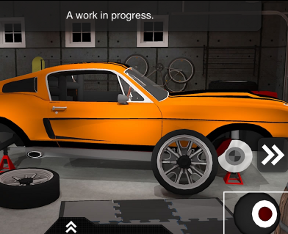 Most everything you do is controlled by a tap, either on the part you're picking up or on the area you want to repair. Inventory is kept in a separate menu so switching items takes a few extra taps. Both this inventory system and navigation can be a bit awkward, which provides unnecessary hindrances to an otherwise casual experience. Much of the challenge comes from the hidden object aspect to the game where you must locate parts and damage on the car. It can take effort to make your way around all sides of the car and the work space and it's easy to miss key areas. A single in-app purchase gives access to hints and solutions, which begin with a slight nudge and, on request, end with the outright solution. It's also helpful to pull up the checklist and scroll down to compare completed tasks to those still unfinished. The checklist is long, yet it shouldn't take more than an hour to complete which is right about before the novelty wears thin.
The methods used to tune-up this car are probably neither applicable nor advisable in real life. Yet the achievement-oriented approach is very gratifying and the unique hybrid of genres works remarkably well by tapping into creative impulses and rewarding progress. Fix My Car is the right balance of challenge and achievements to appeal to every ilk of player. Car enthusiasts, room escape fans and hidden object adventurers should all fit comfortably in the driver's seat.
NOTE: This game was played and reviewed on the iPad 2. Game was available in the North American market at the time of publication, but may not be available in other territories. Please see individual app market pages for purchasing info.


Walkthrough Guide
(Please allow page to fully load for spoiler tags to be functional.)
Fix My Car Walkthrough
The tasks are arranged in the order they appear on the check list, although they are unlocked at different times.
Unlock Car
The in-game tutorial will guide you in completing this task.
Fix Passenger Door
From the toolbox, turn right. On the other side of the room you can see a bike on the counter; tap to go there.
Next to the bike is a blue can of SPRAY LUBRICANT. Take it.
Back up and turn right twice. Then, tap the "Fire Rabbit" poster to jump to the other side of the car. Turn around until you're facing the passenger side of the car.
Use the SPRAY LUBRICANT on the passenger side door.
Install Car Seats
From the passenger side of the car, turn right, then tap the open garage door to go outside.
Barely visible in the shadows on the right side of the screen is the DRIVER'S CAR SEAT. Pick it up.
Go back into the garage and go to the area behind the car...
Get the PASSENGER SEAT from on top of the tall red tool cabinet.
Turn around until you face the driver's side of the car.
With either CAR SEAT in your hands, tap the inside of the car to complete the "Install Car Seats" task.
Unpin Hood
Go to the cabinet area behind the car, in the back of the garage.
Open the toolbox and take out the PLIERS.
Turn right then click the front of the car to move to the hood of the car.
In the bottom corners the screen are two pins that hold the hood closed.
Use the PLIERS on each pin to unlock the hood (tap above the pin on the right instead of the pliers in your inventory).
Apply Car Ornaments
Go to the cabinets behind the car and open the top cupboard on the right (the one with a "Racer X" sticker on it).
Get the CAR ORNAMENTS.
Apply the CAR ORNAMENTS to three areas on the car (some won't be revealed until you move other objects):
Drivers Side - Front Fender
Passenger Side - Front Fender
On the Dashboard - Above the Glove Box
Clean Windshield
There's cleaning spray in a green and blue bottle next to the battery charger.
Go to the driver's side of the car and turn left to face the closed garage door and you'll see the black and red charger near the front bumper. Zoom in closer and get the CLEANING SPRAY AND PAPER TOWELS.
Go to the frong of the car and examine the windshield.
Use the WINDOW CLEANING GEAR to wash it.
Open Trunk
Get the CROWBAR from the shorter tool chest that's to the right of the tall red tool cabinet.
Go to the back of the car and use the crowbar on the trunk to unlock it.
Fix License Plate
Go the front of the car and then go down under the front bumper. Here, in the upper left corner, you can see a SCREWDRIVER. Take it.
Go to the back of the car and use the SCREWDRIVER to tighten the license plate back into position.
Fix Garage Door
If you haven't already, get the SPRAY LUBRICANT from by the bicycle.
From the passenger's side of the car, turn right to face the closed garage door. Zoom in on the hinge near the door's keypad:
Use the SPRAY LUBRICANT on the hinge.
Fill-Up Car
After opening the trunk, you can get the GAS CAN.
Go to the driver's side of the car and use the TANK OF GAS on the gas cap (just behind the rear window spoiler.
Install Missing Brake
Unlock this task by completing "Activate Online Account."
Go to the driver's side of the car and examine the brakepad on the rear wheel: part #3443.
At the computer, enter that part # then pick it up from the picnic table.
Re-enter the garage and go to the passenger side of the car:
Put the new BRAKEPAD in the rear wheel well.
Mount Car Wheels
First get the WRENCH from inside the small toolbox on the counter behind the car.
Go around the car and use the wrench on each of the four wheels.
Repair Cracks
After opening the trunk, get the WELDING TORCH.
Then, search around the car for 6 cracks:
Underneath the trunk, on the gas tank.
Under the passenger's side door, on the exhaust pipe.
Under the hood, on the engine.
Under the hood, on the radiator.
Under the driver's side door, on the muffler.
Under the front of the car, on the oil tank.
Install Muffler
Pick up the MUFFLER from the wire rack by the passenger side of the car.
Go to the passenger side of the car and look underneath. You'll see an area between two pipes where something is missing:
Install the MUFFLER in that spot.
Activate Online Account
After opening the glove box, get the CREDIT CARD.
Go over to the computer and use the CREDIT CARD on the monitor that reads "There is no credit card on file" and your account information will automatically be added.
Find Driving Glasses
Go to the office area of the garage and zoom in on the computer desk.
Get the DRIVING GLASSES from keyboard shelf under the laptop.
Add Radiator Fluids
As you're facing the passenger side of the car, turn right until you see a stack of crates and some wire racks. Zoom in on that area.
The top of a WATERING CAN FULL OF WATER can be seen back behind the crates. Take it.
Go to the front of the car, open the hood, and use the WATERING CAN on the radiator cap (front middle) to fill it up.
Recharge Car Battery
The "DISCHARGED" CAR BATTERY is inside the car behind the driver's seat. Take it out.
The car battery charger is the black-and-red cube in the front of the garage, near the closed garage door (driver's side of the room).
Put the DISCHARGED CAR BATTERY in the charger and you'll have a FULLY CHARGED CAR BATTERY.
Install Charged Battery
After recharging the car battery, go back under the hood and put the FULLY CHARGED BATTERY in the lower front corner of the engine.
Fix Radio
If you haven't already, get the PLIERS from the small toolbox on the counter.
Enter the car and zoom in on the radio in the middle of the dash.
Use the PLIERS on the broken fuse panel and the radio will be fixed.
Tighten Steering Wheel
Inside the car, examine the steering wheel:
Use the WRENCH (which is found inside the small toolbox) on the ugly, loose bolt you see there.
Upgrade Car Pedals
Complete "Activate Online Account" to unlock this task.
Go to the computer and order part #6543 (as indicated on the checklist) and pick them up from the bench outside.
Inside the car, examine the area under the steering wheel:
Apply the new PEDALS.
Open Glove Box
Get the CROWBAR from the red tool chest in the back corner of the room.
Enter the car and examine the glove box:
Use the CROWBAR to open it.
Fill Nitrogen Tank
From inside the car, get the EMPTY NITROGEN TANK from the backseat.
Go to the front of the garage, to the area between the two garage doors. There is a nitrogen filing tank.
Use the EMPTY NITROGEN TANK on the filing station.
Go back inside the car and replace the TANK FULL OF NITROGEN to the area between the seats in back.
Find Driving Gloves
Inside the car, zoom in on the area between the seats (where the nitrogen is).
They're hard to see because they're the same color as the carpet and upholstery, but the DRIVING GLOVES are under the passenger seat, just the fingers showing.
Install Rearview Mirror
Find the REARVIEW MIRROR in the trunk: it's barely visible along the bottom edge of the screen, just a very thin, grey rectangle.
Take the rearview mirror inside the car and apply it to the windshield.
Install Shifter Knob
The missing SHIFTER KNOB is on the trunk, between the spokes of the spare tire. Get it.
Inside the front seat of the car, focus on the area just below the radio.
Put the SHIFTER KNOB on the gear shift.
Fix Engine Braces
Use the WRENCH (found inside the small toolbox) under the hood, on the bolts securing the engine braces.
Install Shaggy Dice
The SHAGGY DICE will come with your bumper order. After you have installed the rearview mirror, pick them up outside on the bench.
Go inside the car and put the SHAGGY DICE on the rearview mirror.
Change Oil
Get the green can of OIL from the wire shelves in the front right corner of the garage (near the stacked crates).
The FUNNEL is on the yellow engine rack in the middle of the garage, to the left of the crates.
Get the WRENCH from the toolbox and a FRYING PAN from the top of the cupboard.
Go to the front of the car and look underneath.
First place the FRYING PAN on the floor under the oil drain plug.
Use the WRENCH to remove the oil drain plug/bolt.
Then, replace the BOLT.
Stand up and look under the hood.
Place the FUNNEL on the right side of the engine.
Then, pour the OIL into the funnel.
Install Front Bumper
As indicated on the checklist, use the computer to order part #6688 and pick up the BUMPER from the table outside.
Go to the front of the car and zoom in on the grill area:
Put the BUMPER on the car.
Install Fog Lights
You need to complete "Install Front Bumper" to unlock this task.
Look under the hood. Find a FOGLIGHT in the bottom left corner of the engine bay.
Examine the FOGLIGHT to see the part number (3322) and order it on the computer.
When you receive your new FOGLIGHT, take both to the front of the car, zoom in on the bumper, and put each FOGLIGHT in its place.
Fix Rear Window
Go to the back of the car and zoom in on the rear window. Along the bottom right edge you'll see a blurry part #. Zoom in for a closer look:
Note the last four digits of the number: 8881.
Go back to the computer, order the part, then pick it up from the table outside.
Return to the back of the car and examine the broken rear window...
Install the NEW REAR WINDOW.
When all tasks are completed, drive off and enjoy cruising the highway!
Posted by: elle |
July 6, 2013 3:30 PM
|
July 6, 2013 3:30 PM