JayisGames.com is now available ad-free!
Jay is Games recommends Cheat Happens with 8,000+ games and 35,000+ trainers!

Abacus


  • Currently 4.4/5
  • 1
  • 2
  • 3
  • 4
  • 5
Rating: 4.4/5 (139 votes)
Comments (36) | Views (10,763)

Weekday Escape

SonicLoverOkay, pop quiz. Which of the following is the correct definition of the word Abacus? Is it (A) a contagious disease that causes high fevers and itchy backs, (B) a line of undergarments for men, (C) an ancient device used for counting and mathematics, (D) an escape game by Otousan, author of Libra and Bird Escape, or (E) both C and D are correct?

If you answered E, then congratulations—you got it right! (Don't get a big head, though. It's always the "both C and D are correct" choice.) Now, on to the subject at hand...

AbacusIf you're familiar with Otousan's work, you know what to expect from Abacus: a four-walled room with simple, gradiented graphics and plenty of puzzles, most of which center around a particular theme. In this case, the theme is the blue enigma machine over on the cabinet there and the circular tumblers that it uses. All you need are your brain and your mouse: click around the room to navigate, particularly the bars with the arrows if you want to change what you're looking at. Pick up items and use them (click to select, click to use), or use the "About item" button to get a good look at whatever you've selected. Solve puzzles all around the room, get everything figured out, and eventually get that door open.

Is it a good game? Indeed it is. The puzzles show a bit more variation than Otousan's games typically do, and the game as a whole is a bit longer and more substantial (it must be, there's a save feature this time!), which is good for those of you who found the developer's past games too easy. The graphics and audio, as usual, are non-intrusive but clear, and everything flows logically. The only real downside is that one or two of the puzzles can be a bit too frustrating; if you don't know the tricks you can be shuffling those tumblers until your hair turns gray.

So if you're looking for a little mental challenge to help you through the week, Otousan delivers as always. Now, if you'll excuse me, I need to go lie down; my temperature reads 105 fahrenheit and my back itches like crazy...

Play Abacus

Walkthrough Guide


(Please allow page to fully load for spoiler tags to be functional.)

Abacus Walkthrough

  1. You'll start facing a chair. Zoom in on the abacus on the table; you can play with it, but you can't do anything with it yet. Note, though, that it has five rows of ten beads of varying colors.

  2. Zoom out and turn right. A door with no handle and a locked panel. Turn right again to face a weird five-by-ten panel with numbers in odd places.

  3. Wait a minute. Five-by-ten? That's just like the abacus! Go look at it and note the colors that match up with the numbers. I'll do it for you: from 1 to 8, dark-dark-dark-light-light-dark-dark-dark.

  4. Now check out the panel to the right of the gray panel. It wants a code of... dark and light? Input the eight-pip code we just deduced and hit ENTER/RESET. The gray panel will shift.

  5. Hey, look at the way it shifted. I bet we could set the abacus like that! Set the bottom row as far left as possible, the next row up as far right as possible, and the other three with four beads on the left and six on the right.

  6. It looks like a three-letter something. F-U-S? Interesting. But we're not done with the gray panel. Zoom in on the entry panel again and note that there's one more button, for a horizontal line apparently. Grab the coin stuck beside it.

  7. Now zoom out, then in on the gap in the middle of the panel. Take the "2" tumbler and note that the blue ? disappears when you do. Well, we'll worry about that later. Zoom out and turn right, there's one view we haven't looked at yet.

  8. There's a blue machine on the cabinet, but we'll worry about that later. The far left cabinet contains a gray book; leaf through it, but there's nothing of interest yet. The far right cabinet contains a blue book; leaf through it and it'll tell you how to use the blue machine. Grab the blue card stuck between two pages.

  9. Turn back to face the abacus and zoom in on the orange thing below it. Stick the blue card where it says "CARD" and the coin where it says "COIN". (Try not to get them mixed up.) It wants a three-letter code; try "F-U-S" from the abacus.

  10. Press ENTER and voila! You get a 3 tumbler. Maybe it did something to the card, too... examine it. It now displays a three-digit number that can be made with the digits 1, 2, and 3. (It's different every game.) Now it's finally time to use that blue machine.

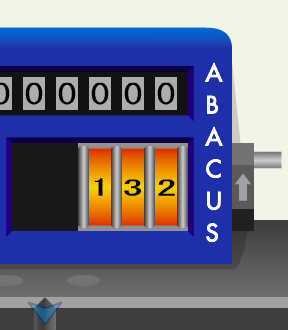
  11. The blue machine already has the 1 tumbler in it, how convenient! Arrange it and the other two tumblers to match the number on the blue card, then turn the crank on the side once to transfer that number to the display above. Finally, hit ENTER/RESET.

  12. A peg popped up? Weird... wait, I remember this from one of Otousan's older games. Check the middle-left cabinet; it's unlocked now! Pick up the blue handkerchief on the top shelf.

  13. Remember the instructions from the gray book? Use the handkerchief on the one bead on the abacus's top row that looks like it's smudged. ...Hm, examine that handkerchief and unfold it. Interesting pattern.

  14. Hey, try making that pattern on the abacus. The middle row will have five beads on either side, and the rest forms a diagonal line, just like on the handkerchief. Now... what about the numbers the handkerchief displays?

  15. If we match up the numbers like we did before, we get dash-light-dark-dark-dark-light-dark-dash. Go enter that on the input panel where we entered the last one like it.

  16. The gray panel separates a bit more. Zoom in on the crack in the upper middle where you got the 2 tumbler. It's now got some more features, but grab that magnifying glass... and wipe off that dirty lens with the handkerchief.

  17. There are two places you need to use the magnifying glass. The first is on one page late in the gray book, which reveals the code for the gold safe beneath the blue machine. Input it (it varies) and get another coin. The second is the bead you cleaned off on the abacus, which gets another three-letter code (KXH).

  18. Let's use the orange machine beneath the abacus again. Coin and card in their respective slots, KXH where it calls for a three-letter code, punch ENTER.

  19. It gives you a green key... and probably changed the card again. Examine it and it's got a new number... which according to the bar below is a three-digit number times a one-digit number.

  20. Use the key on the matching keyhole near where you put in those bead codes for the gray panel, and the entire green panel will be exposed. Put any tumbler in the slot beside it and it'll activate and show you the dispensary of tumblers. The arrows move the slot, and the round button swaps the slot's tumbler with the one above.

  21. Use this mechanism to swap the three tumblers you've got with the three bearing the digits from the password card's three-digit number (the "xyz" from "password = xyz * q"). Once you've got them, go back to the blue machine.

  22. The password card identifies the password as "xyz * q". Put the tumblers in the machine according to the x-y-z, then turn the crank q times. This should make the machine display the password proper, so press ENTER/RESET. Take the screwdriver and note the code the safe is asking for... blue-blue-red-red? Maybe it's finally time to mess with those blue and red ? tumblers from the dispensary.

  23. Use the screwdriver to remove the panel next to the slot on the green panel, revealing two more slots. Put your three tumblers in those slots (any order), then use them to retrieve the blue, red, and 0 tumblers. We'll have to use the blue machine to determine their values.

  24. It's easier than you'd think: just put the tumblers in in this order: blue, 0, red. Then turn the crank once, look at what the machine displays, and input that verbatim in the safe. You'll reveal a pink book... with some cryptic clues, plus a third coin between the pages.

  25. Those clues are telling you a new combination for the abacus. It'd take forever to solve it, so I'll just tell you: the proper arrangement has 6 beads to the left of the space in the top row, then 2 beads, then 2, then 8, then 0.

  26. It spells three letters: P-J-E. Looks like another job for the orange machine below the abacus. Coin in, card in, P-J-E in, ENTER, and you get a knob. Remember that weird hexagonal slot on the blue machine, to the left of where the tumblers go? The knob goes there.

  27. This time the card wants a more complex code, a three-digit number times another three-digit number. xyz * qrs? Well, we're going to need the tumblers with the numbers xyz from the dispensary if we want to input this one.

  28. It's more complicated this time since we have to swap three tumblers at a time each time. Here's a tip: getting one or two of the tumblers you want is no progress. Just focus on getting the three of them together in the dispensary so you can take them all out at the same time.

  29. Now, the blue machine. "Password = xyz * qrs". Put the tumblers in to spell the number xyz, then turn the crank qrs times to get the password.

  30. Nah, just kidding. Doing that would take all day. That's what the knob's for. Shifting it left and right shifts the tumblers, changing the place value of our input. So turn the crank q times with the tumblers in the leftmost position, r times for the middle position, and s times for the rightmost position.

  31. Done? Then press ENTER. There are no cabinets left to unlock, so instead the machine gives you a black key. Take the tumblers back and take the key, and use it to unlock the panel by the door.

  32. A math problem? b/c = 3/a, increasing order for a, b, and c? Note the ring-shaped holes; we need to put three tumblers in those slots to satisfy the equation. Cross-multiplying to get 3c=ab helps. The official solution is 4-6-8, but a crafty player who got lucky with the values of the red and blue tumblers can come up with alternative solutions like 8-9-24. (If you're one of the crafty ones, you can recheck the values of red and blue by peeking at the safe in the middle-right cabinet.)

  33. Once you've got your solution, get the appropriate tumblers from the dispensary (remember the tips I gave you last time you used it), then slot them in appropriately and the panel will move... and so will the door! You're out! Taste the fresh air!

36 Comments

Stuck already. I feel like the Abacus and the wall are related, but the way I thought they should be related didn't work. If the grid on the wall were 11 squares wide, I might think the Abacus would have to have the beads arranged properly to become the right clue. Since it isn't, it would be illogical to count the gaps.

Reply
bearharry May 9, 2012 1:20 AM

this game has 1 end or 2 end??

Reply

They definitely didn't make that one easy.

Reply
Jazzer May 9, 2012 2:17 AM

One of the greatest escape games in a long time. bearharry: I only found one ending.

Reply
Ashiel May 9, 2012 2:19 AM

Definitly not easy. Hard as effing heck. I'm stuck at the beginning, have reel 1 and the keycard... and I'm at a brick wall. I've clicked everything and tried my damndest to figure out the password that the keycard opens.

Guess I'll have to wait for the walkthrough to say 'look idiot'

Reply
Jim_in_Oz May 9, 2012 2:21 AM

Alright, I've got

the red and blue discs

but I cannot for the life of me see the way I'm supposed to get the values of them. Aaargh!

Reply
Jazzer May 9, 2012 2:22 AM

Tenzhi

I found it by trial and error: Align all the gaps to the right hand side.

Reply
Jazzer May 9, 2012 2:25 AM

Jim_in_Oz:

for the 3rd disc, take zero and put it between the red and the blue.

Reply

Well, I've gotten

Disc 1, Disc 2, Disc 3, the magnifying glass, a cloth (used), 2 coins (used), and the key card.

I'm stuck at

the 2nd "put in the coin and the key card, and punch in the 3-letter password" puzzle.

Help?

Reply

Moving the gaps around doesn't help. There are 10 beads on each row and the grid is 10 squares wide. Aligning the gaps to the right doesn't change the 10 x 5 grid.

Reply

Never mind, P.O.P. goes the weasel. Taking another look at

the gray book

helped.

Reply

Alright, I see now that it works exactly as I originally thought, but for some reason I missed number 8. I shall now punish myself with 23 strikes from the DERP stick.

Reply

And I'm out! :D

Hoo, that was more of a mental workout than I've had in a while...felt good.

Reply
spaceloaf May 9, 2012 3:01 AM

Wow, that was amazingly brilliant! While it might not have had the graphical polish that some of the other games do, the puzzles were very unique and creative. This gets a definite 5/5 from me.

Reply

I don't see the second coin.

Reply

silly me, I needed to

take the grey book more literally.

Reply
vulpisfoxfire May 9, 2012 5:13 AM

Arg. Got everything but the pattern for the last letter code. I can't seem to properly match the pictures. :-/

Reply

Walkthrough:

>You are looking at the wall with the abacus. Go left.

>You are looking at the wall with cabinets along the bottom.

>Open the rightmost cabinet. Open the blue book. Take the password card.

>Click the blue machine. Take the [1] Reel.

>Look at the wall numbers. The clue is on the abacus.

D= Dark, L= Light
DDDLLDDD

>Take the [2] Reel from the dent in the wall. Take coin from console.

> Move back to Abacus wall. Position the abacus so it resembles the numbers wall. Zoom out. Note that the abacus spells out "FUS"

> Inspect machine below abacus. Insert card in card slot and coin in coin slot. Input "FUS" and press enter button.

>Take [3] reel and card. Inspect card. "1,2,3". Inspect machine where [1] Reel was retrieved. Put 1 in the first slot, 2 in the 2nd slot, 3 in the third slot. Press lever to the right. Press enter and retrieve reels.

>Zoom out and open middle-left cabinet. Take blue hanky.

>Move back to abacus wall. Wipe the scratched bead with blue hanky.

>Inspect blue hanky and position the abacus according to the hanky.

>Face numbers wall. Similar to the first password, input the password from the hanky.

S=stick.
SLDDDLDS

>Zoom out and retrieve magnifying glass from wall. Clean with hanky.

>Go back to cabinet wall and open leftmost cabinet. Turn to last page and use magnifying glass where indicated on the page. Input password into the safe on the middle left cabinet. [This is random]

>Retrieve coin from cabinet.

>Go back to abacus wall and inspect the tarnished bead with the magnifying glass. [Password is KXH]

>Zoom out, then inert card, coin and "KXH" on the machine below the abacus and retrieve green key.

>Use green key on the keyhole on the console of the numbers wall. Numbers wall is now Reel Wall.

>Inspect card. Password is "2388" with a note that 2388= 796*3

>Insert any reel into the reel wall. Move the machine around with the arrow buttons above the wall, exchange reels with the round wall.

>Retrieve reels 7,9,6

>Go back to cabinet wall and put reels "7,9,6" in that order. Press the lever three times, then press the button.

>Zoom out and open middle right cabinet. Retrieve screwdriver.

>Zoom into the reel wall, and use the screwdriver on the reel slot. Retrieve Red, Blue and 0 reels.

>Go back to cabinet wall and zoom into the machine above the cabinet. Put the Blue, 0 and Red reels in that order. Note down the numbers and input them into the safe in the middle right cabinet.

>Note pictures in book. Make them match the abacus.

The abacus should spell out "PJE"

>Put card, coin and "PJE" in the machine below the abacus. Retrieve lever and card.

>Card should include an equation. Retrieve the left three numbers. (For example, if you get 437*414, retrieve 437)

>Input the reels and the left/right lever on the machine above the cabinet. If the reels slot is in the leftmost space, the number of times you turn the crank should be multiplied by 100. If it's in the middle, it's multiplied by 10, and in the default position, it's multiplied by 1. In the above example, I should put 4,3,7 in that order, move the slot to the left most space, and then turn the lever on the right four times, move the slot to the middle space, turn the lever on the right one time, and finally, move it back to the default space and turn the lever on the right four times before pressing enter.

>Take the key.

>Use key on red panel next to door. An equation should say B/C=3/A, and A

A=4, B=6, C=8. I didn't solve it myself. I used WolframAlpha

>Retrieve the reels, and put them in their respective slots.

>Escape.

Reply

Walkthrough
(this is my first time writing a walkthrough so bear with me)

This is a more puzzle-oriented room escape rather than pixel hunting, so most difficulty would be from solving the puzzles themselves

Looking around:

Front:
-Look at the abacus on the desk. Notice one bead has some white marks on it. You can freely slide the beads along the abacus

-Underneath the desk is an orange coin machine

Left:
-There are 4 cabinets. The middle two are locked
-Leftmost has a grey book in it with hints
-Rightmost has a blue book with hints. The last page has a password card
-On top of the cabinets is a strange blue machine with numbers on it. There is a yellow disc numbered [1] which you can take, which I'll refer to as Disc 1

Right:
-There is a grey door (presumably the exit?) without any handles or doorknobs on it.
-Next to it is a red panel that needs a key

Back:
-There is a huge grid of squares with numbers on it
-On the bottom right there are some buttons

Solving:

1. Notice that the grid of squares is referring to the abacus. If you align the abacus all to one side, you will get a 10x5 grid, just like the wall. The numbers on the grid refer to the colours of the beads on the abacus as a password. The password is BBBWWBBB. Enter this password on the bottom right of the grid

3. The grid slides open! Check the bottom right. Notice an extra 3rd dash button is revealed, and also you will find Coin I. Check the hole in the grid; you will find Disc 2

4. You can put Coin I and the password card into the orange machine. The machine now requests for a 3-letter password

5. Look back at the grid and see the big picture. Note how there are gaps as the grid slides out. We can slide the beads on the abacus to mimic these gaps too. As we do that, the abacus reads out 3 letters, FUS. Input this into the orange machine

6. You will get back the password card, and Disc 3. Inspect the password card. It now has numbers printed on it,

7. Remember the hint on the blue book on the far rightmost cabinet. It give hints on how to operate the blue machine. It turns out that, it is somewhat like a mechanical calculator! You can slot in three yellow discs into the calculator, and each time you turn the crank it adds to the 6-digit code above

8. We have 000321 on the password card, and Discs 1~3. Put in the three discs in the order 321, and turn the crank once. Press the enter button to input this code

9. A grey peg slides out. This was locking the middle left cabinet from before. Open the cabinet to find a blue rag, and a yellow safe that needs a 3-shapes password

10. Notice how the blue rag has a grid of circles and dashes on it. Does this refer to the abacus? Note how the top middle circle has a shine/star on it. This must refer to the dirty bead on the abacus. Wipe the dirty bead on the abacus using the blue rag, to reveal that its actually a white bead with a "dash" on it.

11. Now, align the abacus so that it matches the diagram on the blue rag. Again, the numbers on the rag correspond to the order to input a password on the grid wall. The password is (dash)WBBBWB(dash)

12. The grid slides out even further! The bottom right now reveals a green keyhole. The gap in the wall reveals some strange slot, and a magnifying glass. The magnifying glass has a stain on it which can be rubbed off by the rag.

13. With the magnifying glass, we can go back to the grey hint book, turn to the last page and inspect the "dash". It reads out 3 shapes, which is the password to the yellow safe (randomised passcode). Note that the grey book also hints us to inspect the dash on the abacus bead too

14. Open the safe to receive Coin II. Put Coin II and the password card back into the orange machine, again asking for a 3-letter password. Inspect the dash on the abacus bead with the magnifying glass, giving the 3-letter password, KXH

15. You get back the password card, and obtain a green key. Use this green key on the green keyhole on the grid wall

16. The grid slides out even further, revealing a green panel on the wall. This green panel accepts discs, and you can use it to swap the disc with another if desired. Notice there are two ? discs coloured red and blue, that you cannot obtain yet

17. Check your password card, which reveals (randommised) a new number code. On the white space below, it reveals a hint. In my case, my password was 1707, and the hint was 1707=569*3. This means, I will need the Discs 5,6,9, and rotate the crank 3 times on the calculator (569*3=569+569+569). Swap out the 3 discs you already have with the 3 discs that you require, go back to the calculator and input the password

18. A 2nd grey cylinder pops out, unlocking the final cabinet. You will find a screwdriver, and another yellow safe with a 4-digit blue/red code

19. Go back to the green wall panel, and unscrew the two screws on it. This now reveals 3 slots for swapping discs. Insert in the 3 discs we already have, and try swapping out. This allows us to retrieve the Red ? Disc and the Blue ? Disc. Also, to make the next part easier obtain Disc 0

20. Go back to the calculator. The yellow safe needs a 4-digit blue/red code. This refers to the value of the blue/red discs that we got. What are the values? Plug them into the calculator, and try to guess the numbers. The numbers are 2-digits long. To make it easy, put in the discs in this order: Blue, 0, Red. Turn the crank once. This reveals the password for the safe (because 100*B+R seperates both numbers)

21. Finally, open the safe to find a pink book. The last page contains Coin III. The book also contains 5 pictures of the abacus, and gaps. As usual, put in Coin III and the password card into the orange machine, asking for yet another 3-letter password.

22. Using the 5 picture hints, go back to the abacus. There is only one possible solution using the picture hints. To make it easier, start with the first picture, and look for the only possible place for sliding the beads to match that picture. Then work your way with the rest.

23. Eventually, the abacus will read out 3 letters, PJE. As usual you will get back the password card, and take the black knob.

24. Go back to the calculator and plug in the black knob. Now we can slide the cage around! Read the password card again. It now freaks you out by asking for a full 6-digit password. In my case, it is 112054, with the hint 358*313. You might be thinking now, putting in the Discs 3,5,8 and turning the crank 313 times will take forever. However, since we can slide the cage, we don't have to do that. By sliding the cage furthest left, we get the 100s position, the middle gives the 10s position, and the rightmost as usual gives the 1s position. 358*313=358*(3*100)+358*(1*10)+358*(3*1) in this example. Input the password.

25. We now get a Black key. Use this key on the red panel next to the door, revealing a panel and (more) maths. An equation b/c=3/a is written, and three slots for three discs are below, with a

26. We need to find the numbers a

27. Swap out and retrieve discs 4,6,8, and plug it into the board.

28. ...and you've escaped!

Reply

Amendment to part 25,26 above:

25. We now get a Black key. Use this key on the red panel next to the door, revealing a panel and (more) maths. An equation b/c=3/a is written, and three slots for three discs are below, with a greater than b, b greater than c

26. We need to find the numbers a,b,c that satisfies b/c=3/a. Multiply out both sides gives a*b=3*c. There is only one possible solution for this, which is 4*6=3*8. Hence, a=4,b=6,c=8. Thus we need to plug in the Discs 4,6,8 in order.

Reply
solotoro May 9, 2012 7:45 AM

M2C1, on your amendment

That's the only solution for three one-digit numbers, but because the blue disc equals 12, there is another valid solution available.(Also, it's a < b < c)

Reply
solotoro May 9, 2012 7:56 AM

Oh, whoops! Given SonicLover's clarification,

I can't say there DOES exist an alternate valid solution to the final puzzle, only that there MAY, depending on what value blue and red discs you get.

Reply

stuck toward the end

According to a walkthrough i was supposed to swap the discs i had with 0 red ? and blue ? to get my new password on the calculator, which i did get. Now this last part about the huge number, which mine was 947*121, it won't let me swap for those discs as they are in seperate sections. i'd be swapping forever at this point. Is there an easy way to do this?

Reply
ThemePark May 9, 2012 12:32 PM

Brilliant game! I'm impressed with how many different puzzles that have been made with just an abacus and some discs.

Reply
4red3s May 9, 2012 2:02 PM

Looks like a really good game. I cannot visualize the abacus and the grid together. If it had not been for the first hint about how to move the beads the first time, I would not have gotten any further. Break time is up for me. Play well everyone.

Reply

Couldn't find the Happy Coin...

Reply
Jim_in_Oz May 9, 2012 8:55 PM

Well, that was quite the brain-strainer. I really enjoyed it, too.

Reply
Namchokdef May 9, 2012 11:42 PM

yay i was lucky my blue coin is 24
i can't past this 5 times until it has walkthrough

Reply

That was a fun and uniquely minimalist puzzle! Like several others, I got completely stuck at the very beginning, but figured things out after that. The tumbler puzzles turned out to be easier than they looked like they were going to be, but I shudder to think what the designer would have come up with if there had been four or five cabinets to unlock.

I can't read Japanese, but based on the illustration I assume the escape screen says

Congratulations! You have escaped into the city where everything is made of abstract grids and beads. You believed your character was solving a fiendish puzzle, but in this world that is their normal morning routine!

Reply
Max O'Lydian May 10, 2012 7:53 PM

@SonicLover: Technically: C, D, *and* E are correct- just sayin'

Reply
awfulperson May 12, 2012 4:22 PM

I don't very often, but I am giving this one five mushrooms. Challenging and clever!

Reply

Just replayed this game. I forgot how much I liked it. Very clever puzzles, not too difficult but requiring thought.

Reply

^ Scroll Up | Homepage >

Leave a comment [top of page]

Please consider creating a Casual Gameplay account if you're a regular visitor here, as it will allow us to create an even better experience for you. Sign-up here!
  • PLEASE UNDERSTAND SITE POLICIES BEFORE POSTING COMMENTS
  • You may use limited HTML tags for style:
    (a href, b, br/, strong, em, ul, ol, li, code, spoiler)
    HTML tags begin with a less-than sign: < and end with a greater-than sign: >. Always. No exceptions.
  • To post spoilers, please use spoiler tags: <spoiler> example </spoiler>
    If you need help understanding spoiler tags, read the spoiler help.
  • Please Preview your comment before posting, especially when using spoilers!
  • No link dropping, no domains as names; do not spam, and do not advertise! (rel="nofollow" in use)
chrpa Jayisgames needs your help to continue providing quality content. Click for details Welcome to the Roundup 66 - Retro with four games! After you find the ten monkeys in the chapter, look in the inventory. You will find a...  ...
chrpa Jayisgames needs your help to continue providing quality content. Click for details Welcome to the Roundup 65 with three games! As mentioned in the previous roundups, only odd-numbered episodes are featured since even-numbered are for Robin Vencel's patrons (the...  ...
chrpa Jayisgames needs your help to continue providing quality content. Click for details Hi! Weekday Escape and Weekday Puzzle are here! First we have two new cans from tomoLaSiDo and then two small rooms from isotronic. That's all for this...  ...
6,365 Views
0 Comments
chrpa Jayisgames needs your help to continue providing quality content. Click for details Welcome to Mobile Monday! We have another beautiful game from Nicolet and it's a winter game as it should be. Tasuku Yahiro have released another of their...  ...

HELP Jayisgames.com

Recent Comments


Display 5 more comments
Limit to the last 5 comments

Game of the week


Dark Romance: Vampire Origins Collector's Edition

Your Favorite Games edit

add
Save links to your favorite games here. Use the Favorites editor.

Monthly Archives