
Escape from Tesshi-e's Room 2
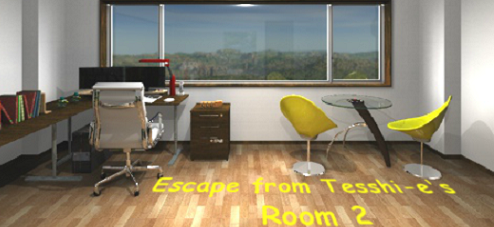
![]() You know, as a room escape enthusiast I just love a scenario where a friend/colleague/stranger locks me into a space and refuses to let me out or feed me until I've solved all the puzzles in the room. If you think that means I really, really love the escape games of Tesshi-e, well, you'd be right. If you think that means that there is something really, really wrong with me, well, you're also right, but that's besides the point. The point is that occasionally a person needs something more than just crisp visuals and clever puzzles in their escaping. Sometimes a person also yearns to need to put together random crap found in a room to construct something useful (that or a device in which to capture their kidnapper, either way is fulfilling). Good thing we have Escape from Tesshi-e's Room 2 to fill that void. (As of this writing, the game is currently Japanese only.)
You know, as a room escape enthusiast I just love a scenario where a friend/colleague/stranger locks me into a space and refuses to let me out or feed me until I've solved all the puzzles in the room. If you think that means I really, really love the escape games of Tesshi-e, well, you'd be right. If you think that means that there is something really, really wrong with me, well, you're also right, but that's besides the point. The point is that occasionally a person needs something more than just crisp visuals and clever puzzles in their escaping. Sometimes a person also yearns to need to put together random crap found in a room to construct something useful (that or a device in which to capture their kidnapper, either way is fulfilling). Good thing we have Escape from Tesshi-e's Room 2 to fill that void. (As of this writing, the game is currently Japanese only.)
 The construction comes roaring back to the forefront in Tesshi-e's latest effort. Whether you love it, hate it, or love to hate it, construction is one of those type of puzzles Tesshi-e will return to again and again, perhaps not as frequently as the wobbly picture puzzle but often enough that it has become a hallmark. This game not only brings back this fun and frustrating puzzle, but brings it back in a big way. Aside from the complex series of mind-benders, Tesshi-e is mastering the art of multiple use objects, in that the handy and helpful items you find in the room have two or more uses, making the interconnections between puzzles even tighter and more entertaining.
Tesshi-e room escapes have always been fun, but it has been nice to see them progress from something slightly above average to the standout escape games they have become today. With their multi-layered puzzles and smooth controls Tesshi-e has earned the right to stand with the giants of the room escape field. With the usual two endings (the second featuring a very familiar restaurant), Escape from Tesshi-e's Room 2 continues the trend of point-and-click fabulousness that we've come to expect.


Walkthrough Guide
(Please allow page to fully load for spoiler tags to be functional.)
Escape from Tesshi-e's Room 2 Walkthrough
General Information
There are no color-based puzzles this time around.
Examine everything you pick up, items may be hiding other things.
Try using items you pick up on other items, this game features construction.
Almost everything you pick up will have more than one use, remember that.
There are two ends, regular and happy coin.
Good luck!
Exploration
You begin facing a wall with the door out. To the right of the door is a picture on the wall, yes, it's the wobbly picture puzzle.
Also to the right of the door is a small table, click on it for a close up.
On top of the table is a device that is holding a screwdriver. The device has four different shaped buttons (triangle, circle, square, upside down triangle). Note that the device is screwed down to the top of the table.
There is also a small drawer on the table, but it is missing a knob. Back up.
There is also a bed to the right of the small table, but although you can click on it there's nothing to see.
Turn left.
You are now facing a long cabinet. Note that there are three sets of doors in the lower part of the cabinet.
On top of the cabinet is an odd device. There is also a clock on the far left of the wall.
The left set of doors in the cabinet need a key.
Click on the middle set of cabinet doors for a close up. Click on them again to open them. There is a device inside with four dolls, each with a number (4, 2, 6, and 8). Notice that each doll has a slot for a key beneath it. Back up.
The set of doors on the right side of the cabinet are held shut with a string or wire.
Click on the device on top of the cabinet for a close up.
Looks like a long tube that ends up at a pressure device. Notice the key hanging above the pressure device.
Yep, looks like we're going to be constructing something to go into that tube. Back up.
Click on the clock for a close up.
The hands on the clock have symbols. If you presume that the minute hand has the circular symbol, and the other hand (with the hour-glass shaped symbol) is the hour hand, then the time appears to be 5:45.
Also notice the symbols in place of numbers around the face of the clock. The heart appears to be 2, the diamond is in the 4 position, the spade in the 6 position, and the club in the 8 position. A clue! Or more than one clue!
Back up and turn left.
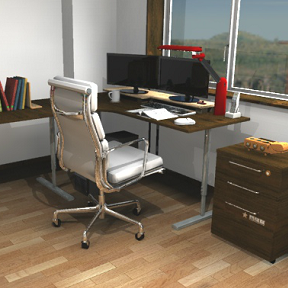
You are now facing a wall with a large window. There is a glass table to the right, and a desk to the left.
Click on the table twice for a close up.
Hmmm, Roman numerals and a red and blue arrow. Another clue? Back up twice.
Click on the desk for a close up. Lots to see here.
To the right of the desk is a rolling drawer set-up with a wooden Mr. Hippo on top. Click on the drawers for a close up.
The top drawer needs a key, and the bottom drawer obviously needs a three letter code (note the star next to the code key).
Click on the middle drawer to open it and take the red/blue pencils that are inside. Back up twice.
Now click on the Mr. Hippo for a close up.
Mr. Hippo has three symbols, a diamond, a spade, and a club on his back. Looks like he also needs three keys. Back up.
Click on the chair to move it back. Now we can see underneath the desk a bit better.
Click on the tower beneath the desk for a close up.
There's an ear bud set here, click on it to take it, you never know when you'll want to listen to some jazzy tunes.
Click on the lighter gray panel to turn on the tower.
You'll also notice the CD/DVD slot at the top, you can open it but it's empty.
Back up.
There are two Mr. Birdys on the desk to the left of the monitors. I'm sure they mean something.
Click on the top of the desk near the keyboard for a close up.
Note the cool dual-monitor set-up. Hey, does that scene look familiar?
Just below the keyboard is a book, click on it for a close up.
Click to take the piece of paper beneath the book. Another clue! A clue with shapes and a red arrow!
Back up.
Click on the right monitor. Yes, that is a very familiar scene. Back up.
Click on the left monitor. Hey, see the pink Mr. Birdy?
Click on Mr. Birdy and watch him fly around the screen. Do you think that the pattern he's flying is a clue?
Back up twice.
If the chair is not back underneath the desk, click on it to push it back. Notice the books on the left dog-leg of the desk? Click on the books for a close up.
Hmmm, those books appear stacked in a very peculiar order. Back up.
Back up again and turn left.
You are now facing the wall with the bed. You can click on the books again, or you can click on the bed, but there's nothing new to see here.
Turn left. You should now be facing the door again. Time to solve some puzzles!
The Wobbly Picture Puzzle
Turn right (or left) twice to face the wall with the window.
Click on the desk for a close up, then click to move the chair back.
Click on the left monitor for a close up.
Click on Mr. Birdy and watch him fly. He is flying the pattern for the wobbly picture puzzle. Notice which corners he hits and in what order.
Back up three times, then turn left (or right) twice to face the wall with the door.
Click on the picture for a close up.
The pattern for the picture is the same pattern Mr. Birdy flew: upper left, lower left, upper right, lower right, lower left, upper right.
Click on the picture corners in the correct pattern and the picture will raise up, revealing an alcove.
Inside is a white card, take it.
While the card is in close up, click on it to open it and take the item from inside (green plastic sheet).
You now have a green plastic sheet with holes cut out. Notice the red arrow.
Close down the green sheet into your inventory. Notice that there is still something in the alcove. Take the item (spade key) and back up.
The Desk Drawers
Turn left (or right) twice to face the desk.
Click on the desk for a close up, then click on the drawer unit for a close up.
The top drawer needs a key, let's try the spade key we just found.
Once you've used the key, click on the drawer to open it. Notice that the key went back into your inventory.
Take the knife from the drawer and back up.
Hmmm, while we're here, can we open that bottom drawer, the one with the three letter code?
Maybe the star to the left of the code is a clue?
Where have we seen stars?
On the books to the left of the desk, that's where.
Back up, then click on the books for a close up.
Yeah, there's that peculiar arrangement of books. Notice that some books have stars on them?
Is that the clue?
The red books with stars on them are laid out in a particular pattern, forming letters.
They form E, N, and V.
Back up, then click on the drawers for a close up.
Enter the three letter code and click on the drawer to open it.
Inside is a box with a red USB plug, take it.
Back up three times.
The Right Cabinet
Turn right to face the low cabinet.
Click on the right set of doors for a close up.
Note that the doors are tied (or wired) shut.
Good thing we just picked up a knife, isn't it?
Use the knife on the string/wire, then click on the doors to open them.
Inside is a small black item (knob), take it and back up twice.
The Small Table
Turn right to face the door.
Let's see if we can solve the small table to the right of the door.
Click on the table for a close up.
We just got a knob, so use the knob on the drawer, then click on the drawer to open it.
Inside is a box with a four digit code. Notice the two symbols on the front, one like an hourglass, one a circle.
Where have we seen those symbols before?
We saw the symbols on the clock.
If the hourglass symbol is the hour hand, and the circular symbol is the minute hand, the time we saw on the clock was 5:45.
In international time, that is 17:45 (presuming that it is the afternoon, not early morning).
Therefore the code would be 1745.
Enter the code into the box and click on the top to open it.
Yay, we now have a club key!
Take the key and back up.
Now click on the item on top of the table for a close up.
Looks like we need to push the buttons in some sort of order to get that screwdriver.
Those symbols look familiar, where have we seen them before?
That's right, on that sheet of paper we found! It had a bunch of those symbols, and a red arrow.
But how do we figure out the order to press the buttons?
You have the clue in your inventory, that green plastic sheet with the red arrow.
Pull up the paper with the symbols from your inventory.
Use the green sheet on it.
The cutouts on the sheet show the symbols, the arrow shows the direction.
That gives you a pattern of: upside down triangle, square, circle, square, triangle, circle.
Push the buttons in the order indicated by the clue then take the screwdriver.
Use the screwdriver on the screws holding the device down. Once it moves you will see a white disk, take it.
Back up three times.
The Left Cabinet Doors
Turn left to face the low cabinet.
Click on the left set of doors for a close up.
Use your new key (club key) on the doors. Notice the key goes back in your inventory after opening the doors.
Inside the doors is a small box, take it.
The box has a small screw in the lower left corner, while the box is in close up use the screwdriver on it.
Inside the box are some circular hooks, take them and back up twice.
The White Disk
Let's take a look at that white disk we picked up.
It has some lines on it, and two arrows, one red, one blue.
Where have we seen red and blue arrows before?
That's right, the glass table!
Turn left to face the window.
Click on the glass table twice for a close up.
Once you can see the Roman numerals and the arrows clearly, use the disk on it.
Once the arrows line up, the other (black) lines point to numerals. Notice that each line is a different length.
Take the disk and back up twice.
This also looks like a CD, let's see if it will work in the tower.
Click on the desk for a close up, then click on the chair to move it.
Click on the tower for a close up, then click on the CD/DVD player to open it.
Place the disk, close it, and back up.
Click on the right monitor for a close up.
Mr. Birdy is now on the right screen!
If you click on him he will say error. Hmmm, we appear to be missing something.
Hey, do you notice that red USB device coming out of the bottom of the right monitor?
Have we seen anything that has a USB plug?
Yes, that box we found in the lower drawer.
Back up once, then use that box on the red USB device underneath the monitor.
The box is now plugged in, so click on the monitor for a close up.
Click on Mr. Birdy. Hey, a code lock!
There are four vertical lines, from shortest to longest, and a four digit code lock.
But what is the code?
We just saw the code on the table.
When you place the disk on the table, the four lines point to four Roman Numerals.
The shortest line pointed to IV, the next shortest pointed to VIII, the next longest to V, and the longest to II.
Therefore the code is IV (4), VIII (8), V (5), and II (2).
Enter the code and click on the green arrow to the right.
When the screen says success, back up once.
Notice that the box is now open, click on it and remove the item within (cylinder).
Back up four times.
Construction Time
Well, we have two keys, and we need a third for the Mr. Hippo.
Where have we seen another key?
In that clear device on the low cabinet.
Now we just need to construct something that will roll down that thing and get the key.
Looks like we have everything we need to accomplish that.
Turn right to face the low cabinet.
Click on the device on top of the cabinet for a close up.
Click on the checkerboard box that is still in your inventory.
Click on the box once it is in close up to turn it over.
Use the round hooks on the box. Now we need some axles.
Those two blue and red pencils might do, but we couldn't stick anything on them while they are blunt.
Close down the box and pull up the pencils.
Use the knife on the pencils to sharpen them.
We also need some wheels.
How about we cut up that white cylinder?
Pull up the white cylinder and use the knife on it.
Okay, now we have wheels!
Pull up the box again.
Use the sharpened pencils on the box. Now we have axles.
Use the cylinder pieces on the box to make wheels.
Click on the box to turn it over.
Use the ear bud cord on the remaining hook.
We now have a device we can drop down and pull back.
Use the device on the open end of the clear cylinder.
Once the cart rolls down and gets the key, click on the cord to pull it back.
Take the diamond key and back up.
Getting Out (Regular End)
This is a Tesshi-e game, so you know we need a heart key to get out of the door.
We have three other keys, a spade, a club, and a diamond.
Where have we seen those symbols before?
On Mr. Hippo, of course!
Turn left to face the window.
Click on the desk for a close up, then click on top of the three drawer unit for a close up.
Us the keys on Mr. Hippo on the matching symbols.
Once all three keys are in place his mouth will open, showing the heart key.
Take the heart key and back up three times.
Turn left (or right) twice to face the door.
Use the heart key on the door to get out.
Enjoy the coffee and the company!
Getting Out (Happy Coin)
Follow the regular end directions until you get the heart key.
Once you back up from Mr. Hippo, notice that all of the keys come back into your inventory.
You now have four keys, where have you seen four key slots?
Yes, the center doors of that low cabinet, back in the beginning.
That odd device with the four numbered dolls.
Turn right to face the low cabinet.
Click on the center doors for a close up, then again to open them.
Okay, we have four numbered dolls, and four key slots, but how do we know which goes where?
The key is the clock face.
Remember that four numbers in the clock face were replaced with symbols?
The 2 was replaced with a heart, the 4 with a diamond, the 6 with a spade, and the 8 with a club.
That gives you the order of the keys, since the dolls are numbered (from left to right) 4, 2, 6, and 8.
The order is diamond, heart, spade, club.
Place the keys in the slots in the correct order and a present will drop into the middle slot, the happy coin!
Take the Happy Coin and the keys and back up twice.
Turn right to face the door.
Click on the door for a close up and use the heart key to get out.
Enjoy dinner, it looks yummy!
Happy Coin will bring happiness to you!!
Posted by: grinnyp |
June 19, 2013 12:52 AM
|
June 19, 2013 12:52 AM