
Escape from the Kids Room

![]() I've said it before and I'll say it again, I want to live in Tesshi-e's world! I want friends/co-workers/bosses/total strangers who have nothing better to do than find really creative ways to lock me into a room so I can figure my way out. Only, I want them to make sure that it's a place where there's a bathroom attached, dontcha know, 'cause sometimes I'm a little slow with the escaping and a person has needs. Yes, Tesshi-e is back with their 60th (and isn't that a mind boggling number) room escape, Escape from the Kid's Room, which plays like Tesshi-e: The Greatest Hits Collector's Edition 2.
I've said it before and I'll say it again, I want to live in Tesshi-e's world! I want friends/co-workers/bosses/total strangers who have nothing better to do than find really creative ways to lock me into a room so I can figure my way out. Only, I want them to make sure that it's a place where there's a bathroom attached, dontcha know, 'cause sometimes I'm a little slow with the escaping and a person has needs. Yes, Tesshi-e is back with their 60th (and isn't that a mind boggling number) room escape, Escape from the Kid's Room, which plays like Tesshi-e: The Greatest Hits Collector's Edition 2.
 Our story begins with Mr. Y, the protagonist of Escape from Mr. Y's Room 2. Mr. Y has called and invited us over to his house for some room escaping fun. This time around, instead of a cozy yet minimal living room Mr. Y has gone all out and turned his kids' room into a room escaping treat, featuring a lot of puzzles and items that should look very familiar to anyone with a passing knowledge of Tesshi-e games. Wander around this charming and faintly alarming room, poking into every nook and cranny, solve some logical puzzles, find a lot of items, and even perform a tiny bit of construction to find your way out. Ah, welcome back, I've missed you, wacky Tesshi-e construction!
If you're not familiar with the Tesshi-e oeuvre (and, if so, why not?) then the game is pretty simple as room escapes go. Wander around either by using the navigation bars at the sides of the screens or click on objects for a closer look. Find some objects (actually, rather a lot of objects), figure out how to use them, solve some puzzles, and pretty soon you'll be wandering the night streets, either with or without the usual happy coin. As you take the time to explore this child's room you will begin to see a lot of familiar things. Hey, isn't that the bird figurine from Escape from the Hexagonal Room? And there are some hungry hippos, just like in Escape from the Snowman's Room. Look, there's capsules just like in Escape from Bed Room! And yes, that digital clock puzzle looks a bit like the one in the original Escape from Mr. Y's Room 2. Ah, the memories...
Analysis: So, yes, there's a lot that's familiar in Escape from the Kid's Room, but there's also some fresh new puzzle fun to be had as well. The puzzles are Tesshi-e's usual mix of logic, math, letters, and colors, and while not the most difficult out there are definitely a fun challenge. This is the best thing about Tesshi-e's escapes, the logic and the flow of the challenges. Many room escape designers never seem to master this ability to make the puzzles flow logically from one to the next in a wonderful progression.
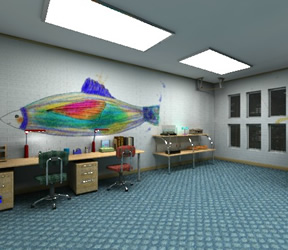
Of course the visuals are stunning as always. This time around the designer has eschewed the use of a lot of shiny and reflective services which only highlights both the realism and the charm of a kid's bedroom. The only problem is that it's a bit...well, industrial, isn't it? Almost jail-like with those white cinderblock walls and small windows, as if Mr. Y has not just created an interesting room but an interesting prison for his tykes. Mind you, the sparseness of the room makes the fact that there is no changing cursor easier to bear, as pixel hunting is kept to a minimum. Accompanying your exploration is also one kicking jazz tune rather than the usual, more plaintive music we've become accustomed to with Tesshi-e.
It's amazing how far we've come from Escape from Mr. Y's Room 2 to this point. Now we have fantastic English translations, better inventory control, and better controls (that save button is fantastic when you want to find both endings). We're still waiting, though, for Tesshi-e to pump up the puzzles into more difficult territory. Let's not sweat the small stuff. Escape from the Kid's Room is the perfect mid-week break, challenging but not too difficult, and a nostalgic look back for one of our most popular room escape designers. Pretty to look at and fun to play, Escape from the Kid's Room is definitely the perfect escape for those not wanting to spend too much time locked into a strange kid's room. And hey, maybe for giggles we can lock the kids in their later and see if they can make it out.


Walkthrough Guide
(Please allow page to fully load for spoiler tags to be functional.)
WALKTHROUGH
Step One: Collection/Exploration
View One: Orange tree wall
Get spade key from side of red suitcase on cubbies
On bottom row of cubbies, get toy train from leftmost basket
Examine the train; the front opens and asks for batteries.
Also on the bottom row, get the cup and ball toy from the middle basket
Turn Right: Fish Wall
Desk on Left Side
Left set of Drawers
Top drawer locked; try your spade key... it works!
Take lever
Bottom draw needs a 5 letter code
Desktop
Take plaid book on far left
Examine; it needs a 3 number code
Note that you can zoom in on the microscope
Note that you can zoom in on the digital clock; it has a cat (rabbit?) head symbol
Click on the books on the far right of the desk; a maroon one opens to show various flowers
Take note of the flower names and what color the page borders are
Second set of Drawers
Top drawer is locked
Take paper from middle drawer; it's a number clue
Take capsule from bottom drawer
Shelves on Right Side
Zoom in on water tank; only rocks
There is a hole on the front of the tank's base which says something might fit in it
Below is an apparatus and a test tube with a screwdriver in it
An arrow points from the water tank to a box that needs a four number code
Turn Right: Bunk Beds
Under bottom bunk's pillows is a "part"
Examine; notice holes
Need a ladder to get to the top
Note the symbols alone the edge of the top bunk
Turn Right: Girl and Birds Mural
Note the hole in the wall near the bottom left of the door
The door is held shut by a wooden bar that is screwed into place
Step Two: Solving
Plaid Book
Look at the piece of paper in your inventory with numbers on it
The gap is where the book's passcode should be; what numbers should go there?
The number pattern goes by column, and once the number 9 is reached it returns to 0
Column one goes up by two each time; column two goes up by one each time; column three goes up by 3 each time
The code is 842
Open the box and take out the clover key
The box is still in your inventory... open again, take slide
Clover Key
Use on the drawers in the middle of the desk; get scissors
Slide
Go over to the microscope and put slide in. View the slide, and you will see:
The word "flower"; below it, "2nd" (in blue), 7th (yellow), 5th (grey), 3rd (green), 1st (red)
Remember the book with the flower pictures? Rose had a blue outline ("2nd"), sunflower had a yellow outline ("7th"); camellia had a grey outline ("5th"), cosmos has a green outline ("3rd"), and tulip had a red outline ("1st")
If the places were 1st to fifth, you might have a color code... but we are missing 4th, and have a 7th.
The places refer to which letter in each flower name is used
2nd letter of rose = O; 7th letter of sunflower = W; 5th letter of camellia = L; 3rd letter of cosmos = S; 1st letter of tulip = T
You have a 5 letter code now
Drawer needing 5 Letter Code
Oh look! And you just got a code. Put it in, and take the capsule.
Box on Shelves needing 4 # Code
Start at the fish tank
You now have something that will fit in the hole at the tank's base
It is the lever! Put it in.
Water drains from the tank to the test tube; take the screw driver
Examine the screwdriver; you can open the cap
Take the battery
Look back in the fishtank
The lower water level shows the tips of the rocks; they look like numbers....
7217
Follow the arrow over to the box, to the right of the tank; put in the code
Take the capsule
Closet
Use the screwdriver on the bar holding the closet doors shut; get bar. Click on the bar again to get screws.
Inside the closet, take the ladder
Look at the safe. It has buttons with different symbols on them. You've seen these symbols before.
On the top bunk bed
"Head -> Foot" refers to which end of the bed you start at when deciding what order to use the symbols in; start from the side of the bed closest to the wall with the Girl and Fish mural (the head of the bed) and move back (towards the foot of the bed).
Circle, star, triangle, star, square, plus sign
Take the box inside the safe.
Examine the box. You can open the side panel. There are spaces to put something...
What in your inventory would fit?
The capsules!
Click to the left of the safe; there is a hole in the wall. We'll come back to this.
Top Bunk
Use the ladder to get up
A board is attached to the ceiling, and across from you is a ledge of some sort
Well, what do we have left to use?
We still don't know what the "part" is for"
Try the part on the board. It says the part can't be secured like this... we have to attach it to the board
Like with screws! Go to the part in your inventory, use the screws on it.
Now try it on the board. Tighten the screws so it stays!
What else do we have?
You can use the bar from the door... it's a railroad track!
And you have a train... AND a battery!
Put the battery in the train and place it on the track
The train knocked something off the ledge across the room!
Go look for it!
It's under the bed... but how to reach it? If only you had something long.
Like that railroad track...
Go back up the ladder and get it!
Use it to get the ball under the bed
Open the ball with the screwdriver; take capsule
Digital Clock
What is still in your inventory?
You still have the scissors, and the cup and ball toy
Use the scissors to get the ball off the toy
Where could this ball go?
Well, you've found two holes.
It doesn't go into the hole outside the closet...
But it does go in the hole inside the closet
Go back outside the closet; something was pushed out the other hole!
Something with a symbol on it... a cat--rabbit?--head!
The digital clock has the same symbol! So, use this item on the clock
You open the front, revealing a red 9 and a button. There are red symbols above the time now as well.
Those red marks... there are six total. What else is there six of?
There are six digits.
The *s show which are the important digits... the fourth and the sixth
When those digits add up to 9, click the button
You got the last capsule!
End!
Put all the capsules into the box's side panel
The box opens. It says "Happy!
Click the bottom to get a heart key
Regular ending: just use the key!
Happy Coin Ending
Your final clue is "Happy"
What can you do with a word?
How about use it as a five letter code?
Put it into the far left bottom desk drawer, and take the coin!
Posted by: Becky |
July 6, 2011 3:22 AM
|
July 6, 2011 3:22 AM
Escape from the Kid's Room Walkthrough
General Information
Examine everything you pick up, objects may be hiding secrets.
There are some color-based puzzles, so this walkthrough will contain directions for the colorblind.
There are two endings, regular and happy coin.
Good luck!
Exploration
You begin facing the door (yes, that's the way out). To the right of the door is an oddly shaped shelving unit. Click on the shelving unit for a close up.
There are three bins on the bottom shelves. Click on each bin to see what's inside.
The left bin holds a toy train. Click on the front of the train to see that it needs a battery.
Click on the middle bin and you will find a cup and ball toy.
The right bin doesn't hold anything, so let's turn our attention to the two middle shelves.
In each shelf is a backpack. The black backpack doesn't have anything, but the red one (on the left) has a club key.
There's nothing else to do here so back up.
Turn left.
You are now facing a double door, but it is secured with a long strip of wood and some screws. Looks like we need a screwdriver!
To the left of the door, low on the wall (near the floor) is a hole. Nothing we can do with that right now.
Turn left.
You are now facing a bunk bed. Note the lovely pattern of symbols carved into the top bunk.
Click on the bed for a close up then click on the pillows to lift them up. Underneath you'll find a V-shaped metal part (that's gotta hurt if you accidently slept on it).
If you click on the top bunk you will learn that you can't reach it. I guess we need a ladder.
You can back up and click underneath the bed, but there's nothing there.
Turn left.
You are now facing a double desk on the left and a two-shelf table on the right.
Click on the table for a close up.
On the top shelf is an aquarium of some sort, with an arrow shaped ornament to the right and then on the far right a box.
Looks like the charming box needs a four digit code.
If you click on the aquarium for a close up you will see that it appears to be hooked to a device on the lower shelf.
That device has a screwdriver, but we can't get it right now. Back up.
Click on the desk for a close up.
There are two sets of drawers on the left and right.
The top left and the top right drawers need keys.
The middle left drawer is empty, but the middle right drawer has a piece of paper in it. A clue!
The bottom left drawer needs a five letter code. The bottom right drawer yields a capsule.
Click on the books on the far left and you will get a book with a green heart on it that needs a three digit code.
In front of the left (green) chair is an object on the desk. Click on it for a close up and you will see that it is a microscope. Too bad we don't have a slide...
On the right side of the desk is a digital clock that has a picture of a bunny on it and the word "total".
To the right of the clock are some more books. Click on the book that says flowers and you will see several pages with different flowers on them.
Turning left will just take you back to the first view of the door. Time to solve some puzzles!
The Locked Book
Remember the note you picked up from the middle right drawer? It had a bunch of numbers on it as well as a green heart.
It can't be a coincidence that the book you picked up (that needs a three digit code) also has a green heart on it.
So is the note a clue to the code?
The note has three columns of numbers going from top to bottom.
Notice that the middle three set of numbers is missing.
To fill in the blanks you need to solve the mathematical progressions on the note. They are pretty easy.
Note that when the progression gets to double digits, all you are seeing is the last digit of the number, so a number like 12 would show up as 2.
The first column (on the left) is simply a plus 2 progression, so the missing number is 8 (0, 2, 4, 6, 8, 12, 14, etc.).
The middle column is even easier, as it is a plus 1 progression. The missing number is 4 (0, 1, 2, 3, 4, 5, 6, 7, etc.).
The column on the right is a plus 3 progression, so the missing number is 2 (0, 3, 6, 9, 12, 15, 18, 21).
Therefore the code for the book is 842.
Pull up the book from your inventory, then click on the code for a close up.
Enter the three digit code you got from the note and the book will open.
Once the book opens take the spade key. Pull up the book again, open it again, and take out the slide as well.
The Top Drawers
This is pretty simple.
On the left top drawer use the spade key you got from the book and take the handle.
Use the club key on the top right drawer and take the scissors.
The Aquarium and the Charming Box
Back up from the desk and click on the table that has the aquarium.
It looks like there are two things to do here: first, the arrow seems to indicate that the aquarium holds the clue for the charming box on the right; second, the aquarium is hooked up to the device that has the screwdriver.
If you look inside the aquarium all you can see is water and large rocks.
But what about that small hole in the tube that leads from the aquarium to the screwdriver device?
Looks like a handle is needed there. Luckily we just found one in the top left desk drawer.
Place the handle in the hole in the tube that leads from the aquarium to the device below.
Yay, we can now take the screwdriver!
Click on the top of the aquarium to look inside again. Hey, now that the water level is down you can see numbers on the rocks!
The code is 7217.
Back up once, then click on the charming box to the right of the aquarium.
Click on the box again and use the code you got from the aquarium to open it.
Great, just what we need, another capsule.
Back up twice.
The Double Doors
Turn right (or left) twice to face those double doors that are secured with the wooden strip.
Click on the doors twice for a close up and use the screwdriver to remove the strip.
While the strip is in close up, click on the loose screws to take them.
Now click on the doors to open them. Hey, a ladder! Take the ladder.
There's also a large safe here with symbols on it. Where have we seen those before? It also says "head to foot" below the clickable symbols.
Click to the left of the safe and you will see a hole in the wall. Looks like we need something round.
How about the ball from the cup and ball toy? That's round.
Pull up the cup and ball toy from your inventory.
Use the scissors on the toy to get the ball.
Place the ball in the hole and back up twice.
Something has fallen out of the hole next to the closet doors! Click on the hole for a close up and take the object.
We now have an overlay with a picture of a bunny on it. Does that look familiar?
Back up.
Opening the Safe
You know, the symbols on that safe look very familiar.
We've seen them somewhere before.
Turn left to look at the bunk bed.
Yep, the same symbols are there, carved into the top bunk.
The clue is both the symbols and the directions you found on the safe, head to foot.
You need to press the symbol buttons on the safe in the same order as they are on the bed.
Remember the order needs to be head to foot.
So the symbols to press are: circle, star, triangle, star, square, plus sign.
Open the closet doors and click on the safe for a close up.
Click on the symbols in the order you discovered from the bed.
Click on the handle to open the door and you will find a box. Take the box.
If you click on the front panel of the box, you will find there are 5 slots. Looks like we need three more capsules...
Back up twice.
The Top Bunk
Turn left to face the bunk beds.
Click on the bed for a close up, then use the ladder on the left side of the bed.
Click on the top bunk and you can go up.
Interesting, there's something on the far wall that you can't reach.
Close to you, though, is a block of wood that you could attach something to.
Construction time!
First, pull up the V-shaped metal thing from your inventory.
Use the screws on the V-shaped metal thing, then use that assembly on the wooden block on the ceiling.
Use the screwdriver on the V-shaped metal thing to secure it to the block.
Once the V-shaped thing is secure, place the long wooden strip on it. You have made a track!
Now we can use the toy train on the track. But wait, no batteries!
Notice that you still have the screwdriver in your inventory. Maybe it is still needed?
Pull up the screwdriver from your inventory and click on the back of it to turn it around.
Click on the back again and it will open up, revealing the battery. Take the battery.
Now pull up the toy train.
Click on the front to open it, then place the battery inside.
Close down the train and use it on the makeshift track you just made with the wooden slat.
The train will run down the track and knock off the object on the far wall.
Okay, you've knocked the thing down, time to retrieve it.
Before you leave, take the wooden slat back from where it is resting in the V-shaped thing.
Go back twice until you have the long view of the bed.
Click underneath the bed and you will see the object that fell down.
Use the long slat to retrieve the object (it is too far to reach otherwise).
You now have a red and white ball. Notice the slot in the middle?
Use the screwdriver on the slot in the ball and you will get another capsule.
Back up.
The Clock Puzzle
Turn left to face the desk.
Click on the desk for a close up, then click on the clock for a close up.
Notice that the time on the clock is your local time.
Hey, where have we seen that green rabbit head design before?
Perhaps on that overlay thing we got out of the hole in the wall?
Place the overlay on the clock. Notice that we now have a button, a number 9, and either dots or stars above the numbers on the display.
Only two of the numbers have stars, maybe they are the important ones?
Basically you want the two numbers with stars above them to total 9.
Since one of those numbers changes every second, you will have to wait until the right moment to press the button.
For instance, if the first number with a star is a 4, you will need to wait until the second number hits 5 before you press the button.
If you press the button at the right time you will get a fourth capsule. Only one to go!
Back up once.
The Lower Left Drawer
You should still be in a close up on the desk.
Now that we have the microscope slide, let's use it.
Click on the microscope for a close up, then use the slide on it.
Once the slide is in place click on it to see it in extreme close up.
Okay, the slide was concealing a clue. We have the word "flower", and some numbers.
2nd is in blue, 7th is in yellow, 5th is in gray, 3rd is in green, and 1st is in red.
Where have we seen flowers before?
That's right, the flowers book. Back up twice then click on the flower book to pull it up from the desk.
The first page, with the cosmos flower, is edged in green. The second page with the camellia is edged in gray.
The third page with the tulip is edged in red, the fourth page with the rose is edged in blue.
The fifth page with the sunflower is edged in yellow.
That's all you need to solve the puzzle of the five letter code for the lower left drawer.
The numbers in the microscope represent a letter in a word, and the color represents what page that word is on.
Therefore, the blue 2nd means the second letter in the word on the blue page. Since the rose is on the blue page, the letter you are looking for is O.
7th yellow is the seventh letter of sunflower (which is on the yellow page), and thus is W.
The 5th gray is the fifth letter of camellia, which is L.
The 3rd green is the third letter of cosmos, which is S.
The 1st red is the first letter of tulip, which is T.
Therefore the code is OWLST.
Click on the lower left drawer for a close up.
Enter the letters you got by combining the microscope clue with the flower book clue.
The drawer opens a little bit, revealing the fifth and last capsule.
Time to escape!
Regular Escape
Back up from the desk and pull up the box from your inventory.
Open the front panel of the box and place the five capsules in the slots.
Click on the top of the box to open it and you will see the word "happy".
Click on the word "happy" and you will reveal a heart key. Take the key.
Turn left to face the door.
Click on the door for a close up, then use the heart key on the door.
You will escape to a quiet suburban street scene.
Enjoy your drink with Mr. Y!
Happy Coin Escape
Follow the regular escape until you get the heart key.
The clue is in the word you saw in the box when you opened it, "happy".
Click on the lower left drawer again for a close up.
Change the code to HAPPY and the drawer will open up further, revealing the happy coin.
Take the happy coin, back up, and turn left to face the door.
Click on the door for a close up, then use the heart key to unlock it.
This time you escape to a busy and crowded street scene.
And this time Mr. Y gives you a birdy figurine as a present.
Happy coin will bring happiness to you!!
Posted by: grinnyp |
July 6, 2011 3:56 AM
|
July 6, 2011 3:56 AM