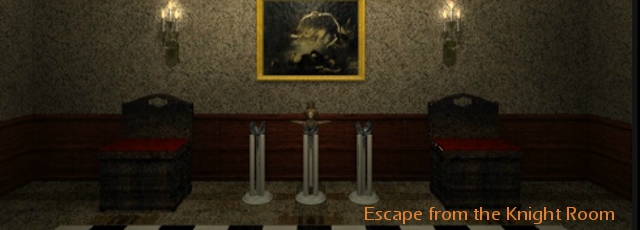
JayisGames.com is now available ad-free!
Jay is Games recommends Cheat Happens with 8,000+ games and 35,000+ trainers!

Escape from the Knight Room


  • Currently 4.6/5
  • 1
  • 2
  • 3
  • 4
  • 5
Rating: 4.6/5 (86 votes)
Comments (23) | Views (24,833)

Escape from the Knight Room

DoraIn Tesshi-e's plinky-plonky-soundtrack'd escape game Escape from the Knight Room, you're just looking to take it easy when you get a note from your old friend Mr. K about a strange room he's found, and wouldn't you know it? Now you're trapped inside, and all you've got to keep you company are a few suits of armor, some fine art... oh, and puzzles and secret mechanisms, of course. To play, just click around and explore! Without anything so fancified as a changing cursor, it's up to you to discover what's interactive and what isn't by combing every surface... seriously, there's some sneaky things going on here. To make progress, you may need to be persistent, or even a little rough, but hey, you don't play an escape game without breaking a few eggs... or... omelets... or... something. Somebody really needs to create a list of escape game proverbs. A Happy Coin in the hand is worth a pixel hunt in the bush... ?

Escape from the Knight Room is one of those games that's a lot more complicated than it initially seems. Compared to some of Tesshi-e's previous work it almost looks empty, but you can find yourself stonewalled fairly early on with the codes and tricks you'll be dealing with. Not all of it is intuitive, if only because at least one of the things you're required to do might not occur to you since the item in question doesn't seem to be responding to your attempts to meddle with it, and one puzzle might have you spinning in circles trying to crack its code. On the other hand, the way the game opens up with more layers and puzzles as you progress shows just how good Tesshi-e is at nesting clever puzzles inside your surroundings. While some of Escape from the Knight Room will definitely require you to wake your brain up, once you start piecing the clues together, you can't help but admire how smart a lot of it is. But then... it wouldn't be a Tesshi-e escape if it wasn't, right?

Play Escape from the Knight Room

Walkthrough Guide


(Please allow page to fully load for spoiler tags to be functional.)

Walkthrough

Facing the Door

You begin facing a double door. Click for a closeup.
Left side has a knocker. Right side has a dial. Click on the dial.
You can spin the dial to 8 positions. Click backward.
Examine the handles on the doors. There’s a key stuck in the door.

Wiggle the key several times until it breaks off. You now have HALF OF A HEART KEY

Examine the HALF OF A HEART KEY.

A code on the back reads 8159

Back out of the door – one more thing to notice in this view.
To the right of the door there’s a space in the wall that looks damaged.
Back out and turn to the right.

Facing the First Knight

You’re now facing a statue of a knight. There’s a wooden panel to his left and a painting flanked by some wooden frames on his right.
Click on the wooden panel, and again on the white panel. There’s a slot in the top.

You can use the HALF OF A HEART KEY to wedge it open.

Back out and click for a close-up of the dial.
Take the CRANK LEVER.
Move the dial around in a circle and take note of the letters it reveals.

E is at 12:00 on the dial, and moving clockwise reveals G, W, O, S (at 6:00), D, N, L

Back out and examine the knight, notice the base to his left needs a handle, but not the CRANK LEVER we have.
There’s a series of wooden panels below him, but nothing to interact with.
Back out and examine the painting and the two wooden frames.
There’s nothing to click, but it looks like something hangs in those two wooden frames.
Back out to the full view and turn right again.

Facing the Back of the Room

You’ll notice two wooden chests/benches, a large painting, and a three pedestals.
Click the left bench and open the seat.
Take the MR BIRDY and notice the marking on the floor of the bench.

A C opening down, a dash, and a C opening up

Back out and try the right bench. The panel under the seat is secured by screws.
Back out and examine the pedestals. MR BIRDY fits on the pedestals, but nothing happens in any position.
Finally, examine the painting. Predictably, it’s a bit wobbly.
Back out and turn right again.

Facing the Second Knight

You see a similar knight statue (but without the lever switch on the base), as well as two wooden panels.
Click the right wooden panel. There’s a hole at the top and a handle at the bottom, along with some spiraled arrows.

You can place the CRANK LEVER in the hole, which now spins clockwise and counterclockwise.
Follow the directions on the panel to open the door:

counterclockwise
clockwise
counterclockwise
clockwise

Click the handle to open the door. You see a metal safe locked with a 3 digit combination and some symbols on the front, Heart – Club, remember this.
Click to take a NOTE

The NOTE says A+B makes Superglue on one side.
On the reverse it has a painting and the letters GOLD DOLL

Back out and examine the right wooden panel.
It’s secured with a padlock.
Time to start solving puzzles!

The Wobbly Painting

The NOTE had some letters on it that match some letters we’ve already seen

On the circular dial, match the letters from the note to their positions on the dial.

GOLD DOLL
G is top right, O is bottom right, D is bottom left, L is top left
You can now solve the Wobble Painting at the back of the room

top right, bottom right, top left, bottom left, bottom left, bottom right, top left, top left

Take the MALLET and notice another circular dial like the won on the main door, as well as a small wooden safe with a 3 (Roman) numeral combination.

The Mallet

Remember the space in the wall to the right of the door that looked damaged?

Try hitting it with the MALLET (click a few times to swing it).

There’s a item here, A WINE GOBLET, and a code.

Club 7536

The Metal Safe

Return to the metal safe with the 3 digit code. We now have the pieces to this puzzle. The symbols on the safe say Heart – Club

8159 – 7536 = 623

Enter the code, back out and click the handle to open the safe.
Take the SCREWDRIVER

The Right Bench and Padlock Panel

Return to the bench to the right of the wobbly painting. Open the seat and use the SCREWDRIVER on the wooden panel.
When you open the panel you’ll see a North arrow facing the First Knight we saw.
There’s something else here, so don’t leave yet.

Click the wooden panel you just removed and take the KEY

Now you can use the KEY to open the Padlocked Panel to the right of the Second Knight.
Inside you’ll see a third dial, a second MR BIRDY, and a button.
Take MR BIRDY and push the button. Watch the animation where a the knight’s wooden panel opens.
Back out, click the wooden panel below the knight and take the A bottle.
Rotate the switch and you’ll see a SWORD emerge from the Knight.
Back out and click on the Knight, then take the SWORD.

The Wooden Safe and Pedestals

Examine the SWORD you just collected. On the back is a code.

IV III V

Use this code to open the wooden safe behind the wobbly painting.
Take the third MR BIRDY.
Notice that they each have their arms in a different position?
Go to the pedestals below the wobbly painting. The MR BIRDYs should be placed in a certain order

The clue from the left bench. Those aren’t Cs, they’re Birdy arms.

1st pedestal gets the MR BIRDY opening down, 2nd the one with flat arms, 3rd the one opening up

Take the HANDLE

The SWORDs and the DIALs

Use the HANDLE on the First Knight statue – the spot at the base.
This releases the second SWORD. Back up and take the SWORD from the knight.
We now have two SWORDs, but what do we do with them?

The SWORDs should hang in the two wooden frames beside the knight.

This opens the panel behind the small painting to reveal a 4th dial, a switch, and a Mr. Hippo with something in his mouth!
Flip the switch and you see another panel open at the base of the First Knight.
Go there and take the B bottle.

Now we have 4 Dials, one on each side of the room. Remember the North arrow facing the First Knight (the side of the room with the SWORDs).
Try setting the Dials on each side of the room to correspond with the cardinal positions. Mr. Hipppo is still closed.
What else could give us a clue about the dials?

Remember the letters in the circular dial? Try setting the dials that correspond to the north arrow to match with the clock position of the correct letter.

The dial on the North side of the room should be set to 9:00
East side at 12:00
South side at 6:00
West side at 3:00

Mr. Hippo is now open. Take the PLIERS.

Regular Escape

Use the PLIERS to remove the other half of the Heart Key from the main door.
Examine the WINE GOBLET, and pour the A Bottle and the B Bottle into it to form Superglue.
Dip the bottom half of the Heart Key into the Superglue, then combine it with the top half of the Heart Key.
Use the HEART KEY on the door lock and watch it unlock.

You may want to save at this point.

Then back up and click the door twice to escape.

Happy Coin Escape

After you unlock the door, back away from it and return to the circular dial with the letters beside the First Knight.
The first thing you should notice is that E is no longer at the 12:00 position, S is.
Match the new clock positions of the cardinal letters to the dials in the room.

The dial on the North side of the room should be set to 3:00
East side at 6:00
South side at 12:00
West side at 9:00

The Second Knight extends his arm and there’s something in his hand.
Go to the Second Knight and take the HAPPY COIN!
Return to the door and escape!

23 Comments

Had a little bit of thinking to do on this one, but not overly difficult.

Reply

well, I was rolling along nicely and feeling smugly smart. now stuck.

I have

put superglue on the end of the broken key, but have no luck sticking it anywhere useful

and I've

turned the 4 dials to their compass point, based on the N arrow, but nothing appears to have happened

Reply

Yeah having the same problem as prarielegal.

I know which way North is, and I've got what I think is the clue

from the GOLD DOLL letter dial

, but I'll be damned if I can figure out how to make the clock dials match up.

Reply

prairiegal - Is there something in the room that has the compass directions on it? Maybe not in their traditional positions?

Reply

Dial positions:

The circular dial with 8 letters contains the compass points NESW. Match their position on that circle to the location of each dial, relative to the north arrow.

The dial on the North side of the room should be set to 9:00
East side at 12:00
South side at 6:00
West side at 3:00

Reply

Could have sworn I tried that but it worked this time, thanks!

Reply

Wow, I am having a Monday apparently. Stuck right from the get go. I have a feeling the first puzzle you can solve is the wobbly picture, but I can't seem to find the clue for it anywhere.

Reply

@neo1973

You are correct, but you need one more item. Check something you wouldn't think to check.

Like the door.

Reply

Of course, the power of posting...

I'll be back if I get stuck again.

Reply

I'm out! But still have no clue how to get the special ending.

Some clues change once you unlock the main door. I know it has something to do with the cardinal directions...

Anyone has a hint as to where I should look?

Reply

Nevermind I've found it!

Reply

Stuck on

the A+B = Superglue hint

Reply

@mark0205

Do you have both bottles (A and B)?
If so, you are still missing something in which you could mix both liquids. You should revisit spots you might have overlooked

Reply

Walkthrough

Facing the Door

You begin facing a double door. Click for a closeup.
Left side has a knocker. Right side has a dial. Click on the dial.
You can spin the dial to 8 positions. Click backward.
Examine the handles on the doors. There’s a key stuck in the door.

Wiggle the key several times until it breaks off. You now have HALF OF A HEART KEY

Examine the HALF OF A HEART KEY.

A code on the back reads 8159

Back out of the door – one more thing to notice in this view.
To the right of the door there’s a space in the wall that looks damaged.
Back out and turn to the right.

Facing the First Knight

You’re now facing a statue of a knight. There’s a wooden panel to his left and a painting flanked by some wooden frames on his right.
Click on the wooden panel, and again on the white panel. There’s a slot in the top.

You can use the HALF OF A HEART KEY to wedge it open.

Back out and click for a close-up of the dial.
Take the CRANK LEVER.
Move the dial around in a circle and take note of the letters it reveals.

E is at 12:00 on the dial, and moving clockwise reveals G, W, O, S (at 6:00), D, N, L

Back out and examine the knight, notice the base to his left needs a handle, but not the CRANK LEVER we have.
There’s a series of wooden panels below him, but nothing to interact with.
Back out and examine the painting and the two wooden frames.
There’s nothing to click, but it looks like something hangs in those two wooden frames.
Back out to the full view and turn right again.

Facing the Back of the Room

You’ll notice two wooden chests/benches, a large painting, and a three pedestals.
Click the left bench and open the seat.
Take the MR BIRDY and notice the marking on the floor of the bench.

A C opening down, a dash, and a C opening up

Back out and try the right bench. The panel under the seat is secured by screws.
Back out and examine the pedestals. MR BIRDY fits on the pedestals, but nothing happens in any position.
Finally, examine the painting. Predictably, it’s a bit wobbly.
Back out and turn right again.

Facing the Second Knight

You see a similar knight statue (but without the lever switch on the base), as well as two wooden panels.
Click the right wooden panel. There’s a hole at the top and a handle at the bottom, along with some spiraled arrows.

You can place the CRANK LEVER in the hole, which now spins clockwise and counterclockwise.
Follow the directions on the panel to open the door:

counterclockwise
clockwise
counterclockwise
clockwise

Click the handle to open the door. You see a metal safe locked with a 3 digit combination and some symbols on the front, Heart – Club, remember this.
Click to take a NOTE

The NOTE says A+B makes Superglue on one side.
On the reverse it has a painting and the letters GOLD DOLL

Back out and examine the right wooden panel.
It’s secured with a padlock.
Time to start solving puzzles!

The Wobbly Painting

The NOTE had some letters on it that match some letters we’ve already seen

On the circular dial, match the letters from the note to their positions on the dial.

GOLD DOLL
G is top right, O is bottom right, D is bottom left, L is top left
You can now solve the Wobble Painting at the back of the room

top right, bottom right, top left, bottom left, bottom left, bottom right, top left, top left

Take the MALLET and notice another circular dial like the won on the main door, as well as a small wooden safe with a 3 (Roman) numeral combination.

The Mallet

Remember the space in the wall to the right of the door that looked damaged?

Try hitting it with the MALLET (click a few times to swing it).

There’s a item here, A WINE GOBLET, and a code.

Club 7536

The Metal Safe

Return to the metal safe with the 3 digit code. We now have the pieces to this puzzle. The symbols on the safe say Heart – Club

8159 – 7536 = 623

Enter the code, back out and click the handle to open the safe.
Take the SCREWDRIVER

The Right Bench and Padlock Panel

Return to the bench to the right of the wobbly painting. Open the seat and use the SCREWDRIVER on the wooden panel.
When you open the panel you’ll see a North arrow facing the First Knight we saw.
There’s something else here, so don’t leave yet.

Click the wooden panel you just removed and take the KEY

Now you can use the KEY to open the Padlocked Panel to the right of the Second Knight.
Inside you’ll see a third dial, a second MR BIRDY, and a button.
Take MR BIRDY and push the button. Watch the animation where a the knight’s wooden panel opens.
Back out, click the wooden panel below the knight and take the A bottle.
Rotate the switch and you’ll see a SWORD emerge from the Knight.
Back out and click on the Knight, then take the SWORD.

The Wooden Safe and Pedestals

Examine the SWORD you just collected. On the back is a code.

IV III V

Use this code to open the wooden safe behind the wobbly painting.
Take the third MR BIRDY.
Notice that they each have their arms in a different position?
Go to the pedestals below the wobbly painting. The MR BIRDYs should be placed in a certain order

The clue from the left bench. Those aren’t Cs, they’re Birdy arms.

1st pedestal gets the MR BIRDY opening down, 2nd the one with flat arms, 3rd the one opening up

Take the HANDLE

The SWORDs and the DIALs

Use the HANDLE on the First Knight statue – the spot at the base.
This releases the second SWORD. Back up and take the SWORD from the knight.
We now have two SWORDs, but what do we do with them?

The SWORDs should hang in the two wooden frames beside the knight.

This opens the panel behind the small painting to reveal a 4th dial, a switch, and a Mr. Hippo with something in his mouth!
Flip the switch and you see another panel open at the base of the First Knight.
Go there and take the B bottle.

Now we have 4 Dials, one on each side of the room. Remember the North arrow facing the First Knight (the side of the room with the SWORDs).
Try setting the Dials on each side of the room to correspond with the cardinal positions. Mr. Hipppo is still closed.
What else could give us a clue about the dials?

Remember the letters in the circular dial? Try setting the dials that correspond to the north arrow to match with the clock position of the correct letter.

The dial on the North side of the room should be set to 9:00
East side at 12:00
South side at 6:00
West side at 3:00

Mr. Hippo is now open. Take the PLIERS.

Regular Escape

Use the PLIERS to remove the other half of the Heart Key from the main door.
Examine the WINE GOBLET, and pour the A Bottle and the B Bottle into it to form Superglue.
Dip the bottom half of the Heart Key into the Superglue, then combine it with the top half of the Heart Key.
Use the HEART KEY on the door lock and watch it unlock.

You may want to save at this point.

Then back up and click the door twice to escape.

Happy Coin Escape

After you unlock the door, back away from it and return to the circular dial with the letters beside the First Knight.
The first thing you should notice is that E is no longer at the 12:00 position, S is.
Match the new clock positions of the cardinal letters to the dials in the room.

The dial on the North side of the room should be set to 3:00
East side at 6:00
South side at 12:00
West side at 9:00

The Second Knight extends his arm and there’s something in his hand.
Go to the Second Knight and take the HAPPY COIN!
Return to the door and escape!

Reply

Very neat. I liked the "medievalisation" of some things, like the marble Mr Birdies. It gave it a bit of a different feel, while still being unmistakably Tesshi-e.

Reply
Patreon Crew SonicLover February 12, 2015 3:51 PM

Wait a second! Half the puzzles in this game are copied from one of Tesshi-e's earlier works, Escape from the Room with No Furniture.

Reply

SonicLover - you're right about that. I played Escape from the Room with No Furniture not too long ago, and that made this one pretty easy. Some good improvements in this one (the circular letters dial and the back and forth with the knights, especially) that made it enjoyable. Plus there were more puzzles in this one.

Reply

A little bit frustrating...a couple of times I thought I was on the right track but I couldn't get the puzzle to work

the left/right of the crank handle, for example

. I had to look at the spoiler, confirm I HAD been on the right track, and go back.

I finally gave up at the

hippo

because

there does not seem to be any logical sequence to whatever compass points are being used, even with the spoiler. Kind of the opposite of the "ah HA" moments I play escape games for.

Reply

Directional clocks
The directions indicated are not concurrent with the game, but with the N, S, E, W as looking at a clock.

Door west (3:00)
Cabinet with button south (6:00)
Hippo East (9:00)
painting north (12:00)

Directional clocks

Door east (9:00)
Cabinet with button north (12:00)
Hippo west (3:00)
painting south (6:00)

Reply

Call me dense, but I sure had trouble with setting the dials. Set them to cardinal position? WHAT?? Set them to clock? Where is this clock?

Ahhh finally I get it.. The "clock" is definitely more like a compass. So its easy to see why your hint points to the "N" wall

Reply

This didn't seem as polished as most tesshi-e games to me. Still a fun time, though, and I loved the marble Mr Birdies.

Reply
lavamuffin February 24, 2015 3:09 PM

Good game, although the lighting was just super moody and dim. "Atmospheric," I think that's called.

I was creeped out when

the knight handed me the Happy Coin -- gasp! Is there someone in there?

but, all in all, a very good game.

Happy coin will bring happiness to you! :D

Reply

I absolutely cannot get

the Happy Coin. I've followed the walkthrough instructions to the letter several times. I've even tried nitpicky stuff like making sure I look in-game at the letter dial before I try, and resetting all the dials to 12:00 before going around the room and setting them to their new called-for positions, and even clicking on the knight to see if that would get him to hand me the coin.

Can anyone help? I'd kind of like to see the

alternate ending

after all this.

Reply

^ Scroll Up | Homepage >

Leave a comment [top of page]

Please consider creating a Casual Gameplay account if you're a regular visitor here, as it will allow us to create an even better experience for you. Sign-up here!
  • PLEASE UNDERSTAND SITE POLICIES BEFORE POSTING COMMENTS
  • You may use limited HTML tags for style:
    (a href, b, br/, strong, em, ul, ol, li, code, spoiler)
    HTML tags begin with a less-than sign: < and end with a greater-than sign: >. Always. No exceptions.
  • To post spoilers, please use spoiler tags: <spoiler> example </spoiler>
    If you need help understanding spoiler tags, read the spoiler help.
  • Please Preview your comment before posting, especially when using spoilers!
  • No link dropping, no domains as names; do not spam, and do not advertise! (rel="nofollow" in use)
chrpa Jayisgames needs your help to continue providing quality content. Click for details Hi! Weekday Escape and Weekday Puzzle are here! First we have two new cans from tomoLaSiDo and then two small rooms from isotronic. That's all for this...  ...
6,365 Views
0 Comments
chrpa Jayisgames needs your help to continue providing quality content. Click for details Welcome to Mobile Monday! We have another beautiful game from Nicolet and it's a winter game as it should be. Tasuku Yahiro have released another of their...  ...
6,161 Views
2 Comments
chrpa Jayisgames needs your help to continue providing quality content. Click for details We've got a new game from Rinnogogo's magical world and this time it really is magical.. Not only do you get to meet cute animals that express themselves...  ...
chrpa Jayisgames needs your help to continue providing quality content. Click for details After a few weeks of patient waiting, we have been rewarded - the new game from Ichima Coffeedo is here. We got a wonderful new game - it's...  ...

HELP Jayisgames.com

Recent Comments


Display 5 more comments
Limit to the last 5 comments

Game of the week


Dark Romance: Vampire Origins Collector's Edition

Your Favorite Games edit

add
Save links to your favorite games here. Use the Favorites editor.

Monthly Archives