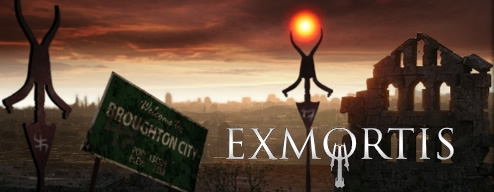
JayisGames.com is now available ad-free!
Jay is Games recommends Cheat Happens with 8,000+ games and 35,000+ trainers!

Exmortis 3


  • Currently 4.5/5
  • 1
  • 2
  • 3
  • 4
  • 5
Rating: 4.5/5 (37 votes)
Comments (44) | Views (15,607)

Exmortis 3

DoraIn 2004, Exmortis took your hand and lead you deep into the woods. In 2006, the sequel, Exmortis 2, showed you mankind's darkest hour... a fate you may have had a hand in. Finally, in 2009, you're given a chance to take your revenge, provided you can live long enough to see it out. From horror maestro Ben Leffler and 3RDsense comes Exmortis 3, a ghoulish point-and-click adventure meant to be played with the lights turned out and the sound turned up.

Taking place where the previous game left off, the story has you playing Mr Hannay once more, a man with a bone to pick with the Exmortis and their ancient lord, Vlaew. He's a little more well-equipped this time around, finding himself able to wield strange new powers such as telekinesis and teleportation and a few others you'll discover. But watch your step. The path ahead is littered with traps and other dangers that could bring your quest to an untimely end. The game autosaves for you fairly frequently, but making use of the multiple save slots available from the options menu is advised.

Exmortis 3Along with the time-honoured tradition of finding items and trying to combine them with other items (optional steps: consult walkthrough, call shenanigans on solution, throw tantrum), Exmortis 3 also features a fair amount of puzzles to solve. Some of them feel natural, such as re-wiring an electrical panel, but some of them are a little odd, such as playing a memory game with a traffic light. You heard me. If you get stuck, you can consult the full walkthrough located under the options in the menu, but doing so will penalize your final score slightly.

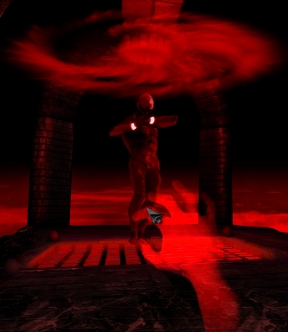
This is perhaps an odd thing to say about a game that features a bloody demon in a cowboy hat as its poster boy, but Exmortis 3 is very pretty. Lighting plays a big part, and not just in terms of providing darkened corners for unpleasantness to lurk in. Skies paint the landscape in tones of burnt copper and rusted rose, heavy clouds hanging overhead. You really do feel like you're in a ruined world, and the fleeting shadows and flickering lights of the lonely corridors will have you glancing over your shoulder.

Analysis: So it's been almost three years since the sequel, and you may be wondering how the game has held up, especially after its creator was picked up by Australian company 3RDsense. While the most obvious change is the addition of a price tag and a sleek new interface, but what else? The good news is, not much. Depending on whether or not you thought the originals were shining gems, the good news is also the bad news.

Some of Exmortis 3's problems aren't exactly exclusive to the title, but are rather familiar issues with the point-and-click game genre as a whole. You have situations that need to be resolved by The One Thing in a different location, when there are three objects in the room with you that would serve the same function. You may have to backtrack to meticulously hunt through scenes to find items that blend in a little too well with their surroundings.

Exmortis 3
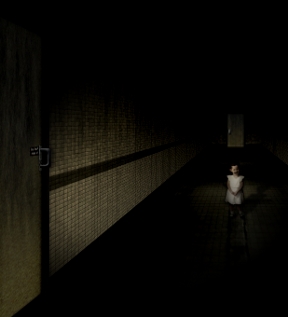
The other good news is that the trademark Exmortis gore and spookiness are back in full force, despite being somewhat more subdued than previous titles. Well, if you consider "subdued" as translating to "less things jump out at you while the soundtrack goes screeeeeeeeee!" A lot of work has been put into establishing atmosphere that builds up and has you tensing at every fleeting shadow, every unopened door, not only with visuals, but with sound as well. Distant footsteps. The hushed whisper of the wind. The stealthy creak of a floorboard overhead.

I needed a refresher course on the story myself, but found the over-long backstory available from the main menu more confusing than helpful and wound up replaying the originals instead. Most conversations offer you the option to skip through them, and a lot of the reading is optional, but shouldn't the story serve to enhance the gameplay rather than feel like it's been awkwardly spoon-fed to the player? The game absolutely shines when it lets up on the text-heavy scenes. A little less big ancient demons and prophecies, and a little more creepy little girls in dark hallways, please.

While there's no denying Exmortis 3 looks good, sounds good, and has had a lot of love put into it, is a pretty package enough bang for your buck? If you're expecting a lengthy epic in return for your cash, you may be disappointed. While still considerably lengthier than the first two installments, Exmortis 3 still may take only a few hours to play for veterans of the genre. A very polished few hours, to be sure, but whether or not you find it worth the cost depends on how much you value quality over quantity, and whether or not the limited replayability is a potential killer.

In the end, fans of the series will find a lot to like about this third installment, and little to be disappointed by. I encourage you to give the first two games a try if you've never played the series before, and then try the demo for this latest before you make your decision. Exmortis 3 is a worthy successor despite its flaws, and may just wind up making you think twice about dismissing the things that go bump in the night.

Be sure to play the free Flash demo. Just click "Play Online Demo" on the right side of the screen!

WindowsWindows:
Download the demo Get the full version

Mac OS XMac OS X:
Not available.
Try Boot Camp or Parallels or CrossOver Games.

Walkthrough Guide


(Please allow page to fully load for spoiler tags to be functional.)

This walkthrough can be found elsewhere but I assure you it was posted there BY ME. I've removed the profanity from where I originally posted it and this walkthrough will be broken down by chapters and, in some cases, even more broken down for character limit's sake:

Chapter: Extinction

  • Nuclear blast

  • Then these words appear:
    Upon the wings of fire and devastation
    I return. Reborn into a world that I once knew.

    Strange archaic powers, foreign
    and twisted, surge through me.

    How I came to be here, as more than
    human, I remember not.

    But I promise this - I will have my
    revenge upon the ancient enemy Vlaew…

    and my people will taste freedom once again.

  • Click Continue

  • Either click on P (Powers) and use Telekinesis on crane or Grab cable hanging down and hook on the ground to the right, combining them by dragging one onto the other in your Inventory list

  • If you chose to use the items rather than Telekinesis, on your Inventory list, click Use and tether the combined cable and hook to the pipe on the upper right of the crater's rim

  • Climb out of the crater

  • See the Broughton City sign in bad condition

  • Ignore the staff on the right unless you're playing the demo version. If you're playing the demo version, you'll see a preview of the Full Version. If you're playing the Full Version, clicking on the right staff will merely say "The Future Is Undetermined"

  • Click on the left staff

  • These words will appear:
    I remember the endless prison.
    A crimson prison without bars.

    Removed from my world
    and flung into limbo.

    Condemned to roam
    forever alone…

  • Click Continue

Chapter: Exile (Pt 1)

  • Click on the summoning totem

  • Click on the left summoning totem

  • Get the Power Cube

  • Click on the summoning totem

  • Click on the summoning totem

  • Middle torch is lit

  • Click on the right summoning totem

  • Click on the left summoning totem

  • Click on the summoning totem

  • Get the Hatred Cube

  • Click on the summoning totem

  • Left torch is lit

  • Click on the right summoning totem

  • Click on the right summoning totem

  • Get the Vengeance Cube

  • Click on the summoning totem

  • All 3 of the torches are now lit

  • Click on the pit

  • See one of the 3 cubes "unfolded" in the red light above

  • Click on I (Inventory), or press the I key on your keyboard, click on the cube that was "unfolded" on the list to the left and check the little red "Use" box

  • It will now be hovering over the left pedestal

  • See another cube "unfolded"

  • Click on I (Inventory), or press the I key on your keyboard, click on the cube that was "unfolded" on the list to the left and check the little red "Use" box

  • It will now be hovering over the middle pedestal

  • See yet another cube "unfolded"

  • Click on I (Inventory), or press the I key on your keyboard, click on the cube that was "unfolded" on the list to the left and check the little red "Use" box

  • It will now be hovering over the right pedestal

  • (There seems to be a bug in the game that can make the same "unfolded" cube show up sometimes. Just go with it and go to the Inventory and get which one it says…again if need be)

  • A portal forms and shoots chains at you

  • Meet Azrael

  • Listen, talk and ask or skip altogether

  • Azrael transfers his powers to you as a portal forms

  • The power of Telekinesis is added to your Powers (Even though we already had it in the opening sequence)

  • Spare him or use Telekinesis to destroy him

  • Back to the Broughton City sign you've come

  • Click on arrow to enter what's left of city

  • The power of Perception has now been added to your Powers

  • Click the far right arrow (pointing exactly right)

  • Click on the car

  • Click on the corpse and get the car keys and wallet

  • Click Use box for keys when you get them

  • Use those keys on the glove compartment and get the map

  • Click to the right to leave the car

  • The power of Teleportation has now been added to your Powers

  • Click on Market City (Sign on building) above car

  • Get the batteries off of the counter on the left

  • Note the cash register right of center - Needs code (We'll come to that)

  • Click the back of the store to leave

  • Click on the arrow pointing left

  • Click on the arrow pointing around the "5 o'clock" position

  • Click on the rope swinging near the right edge

  • On the far left is a kiln. Click on it

  • Get the fire poker which is leaning on the left side of the kiln

  • Click the bottom right skull's teeth and get the gold tooth

  • Combine the rope and the fire poker in your Inventory list (You'll use it later)

  • Click the left arrow

  • Click the right arrow

  • Click the building on the far left - apartment building

  • Click on the door in the center

  • Get the Post-It note from the right side (on the side of the shelving)

  • Click on the first aid box below that to open it, get the health pack (Use it or not. You shouldn't need it at this point but if you don't use it before the end of the next chapter, you lose it)

  • Click the center of the gaping hole in the wall to get a note to Jim which reads, "If you're alive and you're reading this, I've moved ‘the package' to room 13. We're gonna send these ****** all back to Hell! Tucker"

  • Get the radio on the counter to the left

  • Combine the batteries and the radio in your Inventory list

  • Get the fire extinguisher just below where the radio was

  • Click the left arrow to leave

Chapter: Exile (Pt 2)

  • If you mess up, click on the wire(s) that you messed up on or, if you've finished the puzzle, click outside of the immediate circuit board area to start over

  • When you're finished placing the wires, click on the black wire to plug it in

  • If it's done wrong, you'll get a shock. Use the health pack (or not, and if you didn't use it earlier)

  • If it's done right, the security gate at the counter opens revealing a room key (BA Apartments Key) - Room 23

  • Click the arrow at the "10 o'clock" position to go up the stairs

  • Click the arrow that continues up the stairs. You can't move the door to level 1, even with Telekinesis, so don't bother

  • Click on the door on level 2

  • Click on Inventory and Use the BA Apartments Key

  • Click on the door to Room 23

  • Click on the curtains in the center of the room for some light

  • Click on the wooden cupboard on the upper left to get letters to Michael. Read them or not. (Click on Use to do so)

  • Click on the paper in the dot matrix printer. (Read it or not)

  • Click on the pencil in the center of the table and click Use

  • Click on tablet just to the lower right of where pencil was

  • Click and hold to drag the pencil to reveal a code: 2670 (This code never changes)

  • Hmmmmm. What needed a code?

  • Click outside the paper area to put it down. It's then added to your Inventory

  • Use the fire extinguisher in your Inventory, or you can use Telekinesis, on the window to break it

  • Use the rope and fire poker you combined earlier to anchor to the window frame. We're gonna swing down to room 13 which is right below us.

  • Surprise! Room 13, but…what's that beeping?

  • Click on the roll of wire (center right - in front of some kind of case)

  • Click on the plunger/detonator (back left corner)

  • Click on the explosive pack (between the boxes left of center and down a bit)

  • Click on the case that the wire was sitting in front of, to open it. Uh oooooooh!! That's what that beeping was!

  • Depending on time left, (clock will count down in upper left of screen) click on the door to the right

  • Click on the rifle & Scope and click on the right cable holding the corpse up, off to the right. It cuts it.

  • Either Go out through that door to go down the stairs or, if time allows, click on Powers and use Teleportation to go to Market City (map will appear). Click on Market City then click on the white portal that forms) and click on the sign again to enter the market

  • Use the code you got from the tablet (2670) on the cash register and get a gold Rolex

  • If time still allows it, go off into the distance away from you to the marina area

  • Click on Inventory and Use rifle & scope

  • Click on the tall building to the left

  • Hear bullets whizzing by you?

  • The sniper is in the upper right balcony area of the building

  • See Vlaew on top of the building (the building sniper is shooting from) and hear Vlaew's evil laugh

  • The sniper's below him a few floors

  • Muzzle flashes give the sniper's location away

  • Aiming is somewhat slow and cumbersome (Due to old, outdated rifle and scope?)

  • Shoot the sniper

  • If you miss and still have some time left, try again. Don't take too long here. You'll need some time for the next task

  • Win or lose, get out of there

  • Use the health kit you got earlier if you got shot (and didn't use it earlier)

  • Go to the Subway on the right

  • Click on Inventory and Use the explosive pack - Place it on the gate (Telekinesis can be used but doesn't work. Just shakes the gate)

  • Click on Inventory and Use the fuse wire coil

  • Click on arrow pointing at 7 o'clock to back up once (Ya don't wanna be right there when it blows)

  • Click on Inventory and Use the plunger/detonator

  • Click on the detonator to detonate the explosive pack, blowing the subway gate

  • Click to go back to the right after the debris lands…and fast!

  • Click the doorway that has now been revealed to the subway

  • Phew! You made it! (Or did you?)

  • Witness a nuclear explosion

Chapter: Exposure (Pt 1)

  • Click on the escalator to go down

  • You hear a little girl crying. Sounds like your daughter! :o(

  • Click on "jerry can" (gas can, for us American folks) just left of the blood trail, lying on its side

  • Click on the green rubber hose on the soda machine up and to the left (after security gates)

  • Click on the door at the end of the concourse - the Ticketmaster's Office

  • Click on the dead dude to get a fan belt (I know. Why does some corpse have a fan belt, right?)

  • Click on the upper left of map and get the key to the Maintenance room

  • Note the computers to the left. One is beyond help, the other has no power.

  • Click the left arrow to go back out to the concourse

  • Click on Inventory and Use the Maintenance Key on the door to right

  • That's your daughter!

  • Click on her

  • Things go haywire and she pixelates into oblivion (Bye, sweetie! Don't forget to pray for daddy!)

  • When that's all over, click on the door at the end of the corridor - the Systems Room

  • Click around and you'll see that there's two generators and a switch

  • The generator on the left (Active Main) is empty of fuel

  • The generator on the right (Inactive Reserve) is full

  • The lever on the circuit cabinet to the right does nothing but reset when you click on it

  • Click on Inventory and Use jerry can/fuel can

  • Click between the two generators to place it - Can be touchy - Click just to the right of the closest end of the left generator. Eventually, it will set down

  • Click on Inventory and Use the green rubber hose

  • Click on the top of the jerry can/fuel can, and the hose connects and you hear liquid moving (provided you have sound)

  • The can is now full. Click on it to add that full can to your Inventory then click Use

  • Click on the left generator (Active Main), the far end on the top of it, to fill it with the fuel

  • Click on the switch on the circuit cabinet on the right to power it up

  • Alriiiiiiiiight! Power! B-b-but why's the light red?

  • *Sigh* It has to be configured (rerouted)

  • Click on the handle below the lever you flipped

  • A puzzle to solve. The goal to this puzzle is to use the levers around the edges to drag the O rings around until each of the 10 O rings is hovering over a LIT light. (This puzzle changes light locations each time, unfortunately) What I do is draw a quick sketch of 20 circles on a piece of paper, put an X over each light that DOESN'T light and leave the lights that DO light, alone. After you've figured out which lights light and which don't, you won't waste as much time. You can just concentrate on moving the O rings to the correct places.

  • Once you solve it, the light on the circuit cabinet turns green. The power has been configured/rerouted correctly.

  • Click the right arrow to leave the Systems Room

  • Click the left door to go back out to the main concourse

  • Go ahead to the Ticketmaster's Office again

  • Click on the computer just below the bottom left of the map

  • Click on the power button (The power button for the computer, not to use powers)

  • Eureka! We've got power!

  • Switch the Forced Radio Broadcast to Yes

  • Switch the Platform Lighting to On

  • Switch the Ticket Security Gate Status to Open

  • None of the other systems will stay switched

  • Click the power button on the computer to turn it off and return to the main view

  • Click the left arrow to leave the Ticketmaster's Office

Chapter: Exposure (Pt 2)

  • The security gates on the left are now open

  • Click on the turn styles there to head to the platforms

  • You'll see a few signs: From left to right, we have a sign with an arrow above some stairs (to platform 2), a sign with an arrow and a 1 (to platform 1) and two symbols representing Mens and Womens restrooms

  • Click on the Mens restroom sign

  • Click the slowly-blinking red light on the left side to turn the light on

  • A big scary man comes outta the mirror for a moment then goes away (If you're jumpy, we'll ALL wait for you to go change your pants)

  • Click on the paper towel dispenser

  • Click on the paper towel to add it to your Inventory

  • Do this two more times until you have a total of 3 paper towels in your inventory

  • Click on Inventory and Use the 3 paper towels on the drain for the sink on the right

  • Click on the top of the faucet and turn the water on

  • It overflows

  • Click on the right arrow and see where the water has gone into a drain and caused its contents to float to the surface

  • Click on the Magnetic Key Card to add it to your Inventory

  • Click on your daughter, Steph's, toddler shoes hanging in the stall

  • Click the left arrow to head back to the sink view

  • Be a rebel and leave the water running and the light on (No reason…you can turn ‘em off if ya wanna. Neither way has any effect on the game)

  • Click on the door to leave the Mens restroom

  • Click on the sign to enter the Womens restroom

  • Note one stall with an open door and one stall with a closed door

  • Note the strings above the stall door on the right. Click on the string on the left to cut it or you'll get a severe case of heartburn when you open that stall door

  • Click on the crowbar BUT, BE CAREFUL: You MUST click on the bottom left of the crowbar to pick it up. Clicking on the upper right will set off the arrows resulting in severe dread

  • Click on the right arrow to leave the Womens restroom

  • Click on the center of the screen with the red arrow streaming off into the distance to continue on to Platform 1

  • Nothing of significance on this next screen except a link to a game

  • Click on the red arrow to continue onward into the darkness. (Don't worry. I'll hold your hand)

  • Click the arrow to go up the stairs

  • Click the opening between the brick columns just left of center

  • You're now on the tracks, you brave soul you

  • Note the green light meaning track is active/unlocked and the room off to the right with a sign saying Signal Box

  • Also note the wire running across the track just ahead. Click on this wire to cut it. (I click on the right end of it, personally. Not sure it makes any difference where ya cut it)

  • The first time I played this game I didn't cut it and didn't stop going forward either. I was extremely unhappy with the result

  • Click on Inventory and Use the magnetic key card on the slot just to the right of the Signal Box room

  • Click on the door to enter

  • Click on the near side of the box that is now in front of you

  • Click on Inventory and Use the fan belt the corpse so generously provided for us back in the Ticketmaster's Office

  • Click on the wheels

  • Click on the lever furthest from you until it's toward the right

  • If you did this correctly, the lights on the panel above will display 2 green lights on the right

  • Click on the right arrow to go back out into the tunnel

  • Click on the left arrow to leave this area

  • Click on the stairs at the far right

  • Click in the dark area on the right

  • Click the left side to go back to the main concourse

  • Click the arrow to head up the stairs to Platform 2

Chapter: Exposure (Pt 3)

  • You're now looking at a train

  • The left doors on the train ahead are locked tight

  • The right doors on the train ahead "appear slightly ajar" and "can be pried apart fairly easily using something as a lever"

  • or you "can use your powers"

  • You can click on Inventory and Use the crowbar on the doors or click on Powers and use Telekinesis to open them

  • Click the open doorway

  • You're now on the train

  • Note the four corpses all smiling at you

  • Click on the corpses leaning on each other (the left of the two) to get a coin pouch

  • Click on the red arrow in the aisle to continue on to the driver's compartment

  • None of the pretty lights and buttons do anything except for two…but only one for now: The center control labeled "Speed/braking"

  • Click on it

  • You're now driving a train!

  • Note the "Big Red Button" which is the emergency brake, just left of center

  • Aaaaaaaand we're driving down the traaaaaaaaacks

  • Longer ride than ya thought, huh?

  • What's that sound?? (If you have sound. If not, read the screen! It ain't sayin your coffee's ready!!)

  • The tunnel's caved in ahead! Hit the BRAAAAAAAAKES!

  • Phew!

  • Click on the right arrow to leave the driver's compartment and return to the first train car

  • Click on the left arrow to leave the train altogether

  • You can't go forward so you'll have to go left

  • You see a door with a "strange color-coded keypad", a Don't Walk sign and some graffiti.

  • Click on the "strange color-coded keypad"

  • A light lit up (and a sound played)

  • If you're my age, or thereabouts, you likely remember an electronic game called Simon. If not, it was a game where you had to mimic the color/sound pattern the game did. First the game does it, then you. Once you get it right on one step, it adds a step. It continues to do so until it reaches 10 steps. This puzzle is like that. Watch and listen to the lights and sounds, mimic them on the colored keypad and try and keep up until you've solved it completely. (What I sometimes do here, because it's just easier, is write down what each one is on a piece of paper. For example: R for Red, G for Green, Y for Yellow and B for Blue. The game gets up to 10 tones (steadily increasing speed) before being complete and one can lose track. If you do it my way, you end up with something like GYBBRYYRGG. Get it? Hope so. Unfortunately, this game does NOT use the same pattern every time you play. (Hence why I started doing it my way) You can enter these patterns as fast or as slow as you want. If you get the puzzle wrong 3 times, you fall to your death in a pit of spikes.

  • When you solve it, the Don't Walk sign changes to Walk

  • Click on the door to enter

  • You're now in a room with body parts on hooks and on the table, a knife rack, a headless corpse sitting at the table, a large, black metallic door, a cast iron oven and a guy sharpening a knife

  • You've gotta take care of this guy sharpening the knife in order to move on. There's only one way to do so and that's Telekinesis

  • This will then lift him by the neck and make him curse your existence

  • Question/speak with him to get the information you need

  • Decide to either spare or kill him

  • The power of Destruction is now added to your Powers

  • Click on the arm hanging on the hook, off to the left a bit, and take the pocket watch

  • Click on the large, black metallic door to continue

  • Click on the bright light at the end of the tunnel

  • Click on the red arrow on the tracks

Chapter: Exodus (Pt 1)

  • You see two stone pillars with a sign saying Hobbs Junction

  • Note that on the left pillar, a letter R circled in red. If you've read notes and letters you'd know that this means The Resistance is associated with this place

  • Click the red arrow to enter Hobbs Junction

  • You'll come to a path with a large tree on the left

  • Click on the limb at the base of the large tree to reveal a 4-digit numerical code there (7249) Remember it or write it down (This code never changes)

  • Continue down the path

  • You come to an elevated walkway with a guard walking left and right, back and forth

  • As you've seen, it's foggy out so you're able to be as close as you are without being seen (Ironic, seeing as how we can see him!)

  • A building is on the right and a "skip-bin" (dumpster, for us American folks) is on the left

  • Ya don't wanna be spotted so you've got to find a way to distract the guard

  • Click on the furthest door on the skip-bin/dumpster to open it

  • Click inside and a sandstone rock is added to your inventory

  • Click Use for that sandstone

  • Aim at the center under the walkway and click. This will throw the sandstone rock, thus distracting the guard

  • When the guard turns to face where the sound came from, click on the rusted and corrugated sheet of metal

  • This will lay it over and reveal a broken window

  • Through the break in that window you will see a red button

  • Click on that button

  • This sets off an alarm which makes the radio traffic go wild and the guard run off to assist

  • Click the path to continue past the elevated walkway

  • Click on the door in the center of the screen

  • Upon hovering your cursor over the door and parts of it, you can see that the fortified iron door has "stakes" and "notches"

  • Clicking on these stakes moves them one notch further

  • When hovering over the stakes, the text at the bottom tells you "this stake is currently at notch number" and a number between 1 and 9 is given

  • Here's where the code we found etched into the tree trunk comes in

  • To solve the door puzzle, do the following:
    Click the 2nd stake until the 1st stake is in notch 7
    Click the 3rd stake until the 2nd stake is in notch 2
    Click the 4th stake until it is in notch 9
    Click the 2nd stake until the 3rd stake is in notch 4
    Click the 1st notch until it is in notch 7

  • Voila! The door opens!

  • You're now standing in a dark place with a darkened light bulb dangling in front of you, as well as a string

  • Pull the string to turn the light on

  • Immediately a sign saying "Gas masks to be worn at all times" stares back at you (NOW ya tell me!)

  • There are two vents on the left and right of the wall facing you and they're now belching forth some kind of gas into the room with you. You cough, gasp and black out. (There's no way to get past this. Just roll with it)

  • You wake up in front of a house. It's YOUR house

  • Click on the mailbox

  • Click on the front door

  • Click either the left door or the right door. The center door won't do anything. For purposes of following along with me, click on the left door

  • You see 3 grids on the wall in front of you, one on the floor and hear a little girl crying and screaming

  • Try to see a pattern from one grid to the next from left to right. (This puzzle never changes)

Chapter: Exodus (Pt 2)

  • The pattern is this: The arrow-shaped symbol moves down and to the right one space as well as rotating once clockwise. The round symbol moves down and to the right one space and then starts again at the top and repeats. Therefore, to complete the puzzle, do the following:
    Hover over the the arrow-shaped symbol on the floor until you see arrows going around it and the text at the bottom of the screen saying Click to Rotate. Click on it until its point is aimed upward. Then click on the center of it (when circling arrows are not present) and then click on the far right bottom square (4th over, 4th down) to place that tile there. Next, click on the tile with the round symbol on it and place it two squares above the other (4th over, 2nd down)

  • When done correctly, the room will shake and a symbol written "in the language of the Ancients" meaning Offspring, will appear

  • Click on the right side of the screen to go back out into the area you were before

  • Click on the right door to enter that room

  • Here we have another puzzle as well as the sounds of a woman crying

  • The purpose of this puzzle is to rotate the discs until you have connected all the lines in some way. You will notice there are one to several light areas on the edge(s) of the puzzle. Each of these will need a line connected to it as well. Each disc rotates clockwise a quarter of a turn every time you click on it. Some will need clicked upon multiple times. I don't believe this puzzle is always the same but I reserve the right to be incorrect here

  • When solved, the room will shake like the last one did and a symbol written "in the language of the Ancients" meaning Lover, will appear

  • Click the left side of the room on the red arrow that appears to go back into the previous area

  • When you arrive in the previous room, you hear an evil laugh (Vlaew's) and the room shakes. It then falls apart and reveals what is, in all likelihood, Hell

  • The room comes back together but is a different room now

  • In the center hangs a portrait or mirror with a once-human "Reader" in/on it who begins speaking to you. Follow along and ask/speak with him. You'll learn that Lord Vlaew "bestowed the power to alter reality as he sees fit" upon him

  • When you are finished speaking with him/it, you will be left with a choice. Forget that choice…there's more. (I played this game twice before I realized there was an option after the ugly dude spoke)

  • Click on the curtains just to his left

  • Click on the curtain rod

  • It will be added to your inventory

  • Click Use

  • Click on the Reader to impale him!

  • When the screen comes back, click on the letter and file in front of you

  • On the far right there's a glass of water. Drink it. It replenishes you a bit

  • There's nothing more for you here. Teleport at the window

  • You're now on the outside. Ahhhhh. The fresh air!

  • Well, it would have been fresh if not for the bodies stinkin' it up!

  • Click on the broken window to the left

  • Click the keys on the wall. Jeep keys! Woot!

  • Click the document on the table and read it (or not). I always like to read everything in case it gives a subtle hint for something later. That or it makes something make sense….possibly….sometimes.

  • Click on the rolled up map

  • Click to the right to go back outside

  • Click forward

  • Click on the sniper rifle on the ground. (NOW we're talkin'!)

  • Click on your Inventory and Use the Jeep keys then click on the Jeep

Chapter: Execution (Pt 1)

  • Click on the bell tower to the right

  • You'll see some guard towers in the distance

  • Click on your Inventory and Use your new sniper rifle

  • There are 2 guards you need to kill on the left guard tower

  • They are apparently wearing body armor or can take a shot really, really well. Aim for their heads. (You get 500 points for head shots too)

  • If you fail to kill these 2 guards now, you will regret it later

  • Once they're dead, click on Powers and then on Teleportation. Teleport to the church

  • Click on the church's door to enter

  • In the lower left corner there is a sledge hammer, click on it to add it to your Inventory

  • (Note: From a few places I've read, there's supposed to be a preacher's diary on the floor to click on as well. Having played the game twice [after learning to kill the reader and move further in the game], there has been no such diary. A glitch? Perhaps. Perhaps it will show up on a later playing-of-the-game for me)

  • Click the rope that is running from the ceiling, over a hook and down the left wall

  • This will drop what was covering a window up above on the back wall

  • If it isn't too late (one of my attempts was too late for this part because of taking too long looking for the diary), notice the moon shines through the window at the top center and shines on the floor

  • Click where it hits and a previously-hidden door will open

  • Click in the opened doorway

  • Click on the Kriss Blade (wavy sword) to add it to your Inventory

  • Click on Inventory and Use the sledgehammer on the wall

  • Click on the hole in the wall

  • If you need it, the water running down the middle of the screen will be clickable. Click on it to replenish a bit. If it isn't needed, then it's not clickable

  • Click ahead

  • Use the sledgehammer on the lock

  • Click on the winding path to the right

  • A new puzzle! Oh goody!

  • There are 4 plaques with options for either a solid circle or the outline of one. Your task, should you wish to accept it (and move on), is to guess which should be which to get through. Click on a plaque to change it.

  • Once you've done what you think the solution is, click on the lever to the right. This will either open the gate or reveal a number.

  • This number reveals how many you have correct. I've gotten lucky and gotten it on my 2nd attempt every time so far. The code for me was outlined, solid, outlined, outlined. This changes each game. My 2nd time doing it was solid, outlined, solid, solid

  • You get 4 chances to get the code right or it resets

  • Once the gate has opened, click on the barely-visible corpse just to the right and get the C4 pack

  • Click ahead

  • You can either use Telekinesis or the C4 pack to blow the gate that is now in front of you. It will also take out the guards that are there

  • After you do, a pistol comes sliding out of the carnage. Click on it to add it to your Inventory. (A Glock! SWEET!)

  • When you click on it and it's added to your Inventory, note that it says hitting the G key on your keyboard will arm the gun. (It will also put it away so you can continue without shooting at directional arrows)

  • Click ahead

  • Hit the G key on your keyboard now or prepare to use Telekinesis

  • Take out the 3 guards. (Remember: Headshots if using the Glock)

  • Click on the stairs

  • Take out the 2 guards there

  • Go to the lift (elevator, for us American folks)

  • Click on the button to the left and either press G now or prepare to use Telekinesis

  • Take out the guard that comes down with the lift/elevator

  • Click in the lift/elevator

Chapter: Execution (Pt 2)

  • When the doors open, a pretty cool building is in front of us

  • Just off to the right there is a stone thing. Click on that

  • Click on Inventory and Use the Kriss Blade/wavy sword on it

  • Click outside of it to return to the previous view

  • Click on the big, scary doors

  • Nothing happens in this view. Click ahead

  • Click on the door at the end of the hallway and take a deep breath

  • There sits Vlaew on his throne. (If you've done any amount of reading in the first 2 versions of Exmortis, or read around in this game, you'll know who this is). He's not known for his gentle demeanor

  • Click on Vlaew to have a chat

  • He's giving you the first shot. Use it wisely

  • Click on Powers and use either Telekinesis or Destruction on him. (Note: Using Destruction is a little bit harder simply because the red area you have to catch the slider in is much smaller than you've been used to)

  • Vlaew will go flying out of the window behind him

  • Where did he go?

  • Either click on Powers and use Teleportation to go outside or click and go back the way you came. (I give all of these choices but I tend to try not to use powers when the chance is given [and there's another option], because using powers lowers health)

  • Click on the ladder to go down

  • Ah! Theeeeeeere he is! He's using some kind of force field to protect him. (Hey! Where's OURS?!?)

  • Yet another chat

  • The quicker you do these next steps, the better for your health. Remember, for speed's sake, you can hit the 1 and 5 keys on your keyboard to switch between Telekinesis and Destruction Powers

  • Use Telekinesis on the orange spots at the tops of either side of the force field. It will drop momentarily

  • (If he gets a stone thrown at you, Use Telekinesis on those as well)

  • When the force field drops, hit the 5 key on your keyboard to switch to Destruction and use it on him

  • Repeat the above steps until, finally, Vlaew (again) flies through the wall behind him

  • Click where the fella just flew through

  • He's on his knees now. (Weakening?)

  • Another chat starts

  • After the chat ends (Which you'll know because you clicked on End Conversation or clicked on Skip because you've been there, done that already), prepare for more battle

  • Use Telekinesis(1) to lift him up

  • After you click on him and he drops back down, Use Destruction(5) on him (and his balls of fire, as needed)

  • Repeat until he, yet again, flies through the wall. (Awful flighty, isn't he?)

  • Click on the hole he created to go ahead

  • He is now baaaaaaaaarely dragging himself forward…away from you

  • He opens a portal

  • Once again, Use Telekinesis to pick him up

  • He speaks

  • When he's done…Destroy him!!

  • Click on the portal

  • Congratulations! You've just finished the game!

[Merged comments and added tags. Thanks so much! ~Kero]

44 Comments

Sara Natasha September 13, 2009 9:02 PM

Anyone playing yet?

I'm having trouble

figuring out the logic to connecting the wires on the circuit matrix. Does it have something to do with the "registers", or do I need to find more than the original 6 wires to restart the power?

Reply
Bloatedsack September 13, 2009 9:04 PM

Hmm, I clicked through to the flash demo page.
The URL is fizzy.com, but once it loads it throws a message "Pirated domain! You must play this at fizzy.com" with a 'go there now' button.

Reply

I'm stumped. I can't figure out the wiring pattern on the electrical panel! I know that I'm probably the only one. Any help?

Reply
Sara Natasha September 13, 2009 9:15 PM

Me too, louie. Don't see a clear pattern to follow. Also, be careful not to

pull the cord above into the scene. at least don't click it until you've solved the wiring, since it electrocuted me.

Reply

Kay. So. There's a very much armed and counting down suitcase nuke and any advice as to how the hell out of town would be much appreciated!! @.@;;;

Reply

Sarah Natasha and fatlouie,

Look around in the maintenance room.

Go through the door at the back of the lobby (beside the stairway).

In the maintenance room you should find a note with some numbers and letters on it.

These are coordinates to connect the wires.

Connect B0 to G2, etc.

Reply

it sucks that its only being sold by fizzy, I paid for the game, took me 2 hours to download it and then it won't run! Not to mention my inbox is being spammed with fizzy stuff yet they are still "working" on getting my refund for the game after three days despite a 48 hour promise and a 7 day refund promise, this has made me hate fizzy and turned me off to this series, even through the game is sound

Reply

I solved the electrical box and now do not know where to go

used the key and collected items from room 23

any hints?

Reply

Nailbunny, you'll need to do some exploring in the other buildings and gather a few more items. Pay attention to the letters and communication gathered in Room 23, they indicate where you will need to go, then you have to figure out how to get there.

Reply

I chose to pay for a Fizzy.com subscription ($6), which I will cancel before the end of the month. The game takes forever to load, but stays in the cache, so loads quickly if you need to reload later. I personally didn't think it was worth the full price of $20.

It is absolutely gorgeous and full of atmos-fear. Great sound design. Very polished. However, I have to agree with the review here: way too much blah blah blah (and ALL IN CAPS), one item to do one task, illogical or forced puzzles, etc. Except for the first chapter which allows for some exploration, the rest is basically a linear series of scenes which you are railroaded through, and the object needed to solve the next "puzzle" is often provided in the previous screen.

The worst is the inventory screen, which makes a suspenseful crescendo noise EVERY SINGLE TIME YOU OPEN IT. The inventory is a text list, which shows a small picture of the item when you click it, and then to use something you must click a 15x15 pixel "USE" button. These interface screens are too "shiny" and overdone, don't seem to match the rest of the game, and completely fill the screen, taking you out of the game.

I did like the powers and the health, that allows for some variety, but the later chapters rely almost completely on reflexes and skill rather than just point-and-click (or offering multiple solutions, one clicky, one reflexy). I'm no slouch, but I needed to use CPUkiller to slow things down enough for one part. This kind of breaks the game.

Reply

I bought the game and I love it.
I think it's AWESOME. The overall atmosphere is unsettling, dark and gloomy. I think the lighting is great, it sure does give you the feeling of walking about in a threathening, ruined world.
It fits in very well with Exm. 1& 2.

But...

@ Strangelander:

I totally agree with your last 2 paragraphs.
I'm having a hard time to finish the later chapter where you have to fight

Vlaew, who's throwing stones from behind a force shield. After deactivating the light bolds I can't hit the demon quick enough. Clicking slows down considerably in that scene. The game just seems to hang in there, and I get killed... :(

Reply

Awsome game play. The addition of powers was an excellent idea. Amazing story line. However, unlike to the other Exmortis games, there was only 1 scare part. Granted, the mens bathroom scene made me jump. but it was the only one. Those types of scares are why we fell inlove with the exmortis series. Not for all the bells and whistles.

Reply

I am missing one achievement and it's annoying me. I checked the walk through after i beat it. I believe it is the priests diary on the floor of the church. I have a point saved there. I'm looking at it as we speak. I see no diary. I've clicked the entire screen. How am i missing it? any help?

Reply

Does anyone know how to combine items? I can't seem to figure it out.

Reply

Drag one of the list items on top of the other. If you don't get a "Do you want to combine?" box, then they can't be combined.

Reply

I played through the whole game and didn't see anything like the second screenshot (red lighting). Is it a death scene or something?

Reply

Same problem as "Bloatedsack": "Hmm, I clicked through to the flash demo page.
The URL is fizzy.com, but once it loads it throws a message "Pirated domain! You must play this at fizzy.com" with a 'go there now' button."

I tried in Firefox 3.5.3 and in Safari 4.0.3. I'm on Mac OS X 10.5.8. Help, anyone? Thanks!

Reply

consult walkthrough, call shenanigans on solution, throw tantrum

But that's my favorite part!

Reply
zbeeblebrox September 16, 2009 3:43 AM

Haha! I love how Fizzy.com thinks its own site is a pirated domain. Nice one. :p

Too bad the full version isn't available for the Mac, or I would totally buy this. Wouldn't even bother with the demo (at this point, that's sort of a moot point anyway. Has ANYONE gotten that silliness to work?). Exmortis has been a top-notch series and $20 is well-within the admission price for that kind of quality.

I gotta get me some of that bootcamp, I think.

Reply

I haven't had problems with Fizzy not recognizing itself using Firefox on Mac or PC (Bootcamp).

I have Bootcamp, like it a lot. I tried using the online version of Exmortis 3 on Mac, but the Flash plugin for Mac is very inefficient (boo on Macromedia), and if you load a game that big, it runs way too slowly. On my PC side, it worked just fine.

Reply

Does anyone know all the different endings for the full version and how to get them?

Reply

Different endings? Yes, there are different endings, but I can't cope with the final ending. It's HARD. Just too hard. Wish there was someone to guide me!! I can't beat the game!!
Am I the only person who runs the full version?? HELP!

Reply

Seaflower, I wouldn't count on there being too many different endings after the final confrontation.

I beat it using a thing called CPUkiller 3, which is available free on the internet. It slows your computer down, making using the powers pretty easy. I slowed things down 80% or so.

If anyone has more on the multiple endings, I'd like to know, too. I don't feel like playing through the ending again if I don't have to.

Reply

Well the game is made well and looks good but it only took 2 hours to play it through.

I have to say that I am really dissapointed with the content I got for the money.

It still was a good horror game but a serious price check would be in order.

Reply

(Spoiler alert) not to be mean, but If you can't beat the end with out some cheat, you have 0 hand-eye coordination.

You use telekineses on the the 2 orbs above window thing, then use it on vlaew. you can also use it on the boulders he throws, or just hit vlaew to destroy them, depending on your timing.

Another thing, the more you use your powers through out the game, the higher your power bar goes up. the higher the bar goes up, the faster the meter moves when you use the skill, making it easier to use. Howevere, I beat him the first time with an extremely slow meter.

Reply

@ Jay:

Nothing wrong with my hand-eye coordination. It's just that the game hangs after I've deleted the orbs. Can't even MOVE the telekineses.

You must be right about making more use of the powers. I didn't use them all that much during game play, so that might be the culprit.

@ Strangelander: Thanks for the tip.:)

Reply

I haven't had much of a chance to get online over the last summer...so today was the first time I had time to really pay attention to JIG. And I see Ben Leffler is back. With EXMORTIS 3, no less.

Before I even start playing, I'd like to say THANK YOU, Ben. I love the horror genre (even worked in FX in several films), and your work is top-end. You've really made my year.

Reply

This walkthrough can be found elsewhere but I assure you it was posted there BY ME. I've removed the profanity from where I originally posted it and this walkthrough will be broken down by chapters and, in some cases, even more broken down for character limit's sake:

Chapter: Extinction

  • Nuclear blast

  • Then these words appear:
    Upon the wings of fire and devastation
    I return. Reborn into a world that I once knew.

    Strange archaic powers, foreign
    and twisted, surge through me.

    How I came to be here, as more than
    human, I remember not.

    But I promise this - I will have my
    revenge upon the ancient enemy Vlaew…

    and my people will taste freedom once again.

  • Click Continue

  • Either click on P (Powers) and use Telekinesis on crane or Grab cable hanging down and hook on the ground to the right, combining them by dragging one onto the other in your Inventory list

  • If you chose to use the items rather than Telekinesis, on your Inventory list, click Use and tether the combined cable and hook to the pipe on the upper right of the crater's rim

  • Climb out of the crater

  • See the Broughton City sign in bad condition

  • Ignore the staff on the right unless you're playing the demo version. If you're playing the demo version, you'll see a preview of the Full Version. If you're playing the Full Version, clicking on the right staff will merely say "The Future Is Undetermined"

  • Click on the left staff

  • These words will appear:
    I remember the endless prison.
    A crimson prison without bars.

    Removed from my world
    and flung into limbo.

    Condemned to roam
    forever alone…

  • Click Continue

Chapter: Exile (Pt 1)

  • Click on the summoning totem

  • Click on the left summoning totem

  • Get the Power Cube

  • Click on the summoning totem

  • Click on the summoning totem

  • Middle torch is lit

  • Click on the right summoning totem

  • Click on the left summoning totem

  • Click on the summoning totem

  • Get the Hatred Cube

  • Click on the summoning totem

  • Left torch is lit

  • Click on the right summoning totem

  • Click on the right summoning totem

  • Get the Vengeance Cube

  • Click on the summoning totem

  • All 3 of the torches are now lit

  • Click on the pit

  • See one of the 3 cubes "unfolded" in the red light above

  • Click on I (Inventory), or press the I key on your keyboard, click on the cube that was "unfolded" on the list to the left and check the little red "Use" box

  • It will now be hovering over the left pedestal

  • See another cube "unfolded"

  • Click on I (Inventory), or press the I key on your keyboard, click on the cube that was "unfolded" on the list to the left and check the little red "Use" box

  • It will now be hovering over the middle pedestal

  • See yet another cube "unfolded"

  • Click on I (Inventory), or press the I key on your keyboard, click on the cube that was "unfolded" on the list to the left and check the little red "Use" box

  • It will now be hovering over the right pedestal

  • (There seems to be a bug in the game that can make the same "unfolded" cube show up sometimes. Just go with it and go to the Inventory and get which one it says…again if need be)

  • A portal forms and shoots chains at you

  • Meet Azrael

  • Listen, talk and ask or skip altogether

  • Azrael transfers his powers to you as a portal forms

  • The power of Telekinesis is added to your Powers (Even though we already had it in the opening sequence)

  • Spare him or use Telekinesis to destroy him

  • Back to the Broughton City sign you've come

  • Click on arrow to enter what's left of city

  • The power of Perception has now been added to your Powers

  • Click the far right arrow (pointing exactly right)

  • Click on the car

  • Click on the corpse and get the car keys and wallet

  • Click Use box for keys when you get them

  • Use those keys on the glove compartment and get the map

  • Click to the right to leave the car

  • The power of Teleportation has now been added to your Powers

  • Click on Market City (Sign on building) above car

  • Get the batteries off of the counter on the left

  • Note the cash register right of center - Needs code (We'll come to that)

  • Click the back of the store to leave

  • Click on the arrow pointing left

  • Click on the arrow pointing around the "5 o'clock" position

  • Click on the rope swinging near the right edge

  • On the far left is a kiln. Click on it

  • Get the fire poker which is leaning on the left side of the kiln

  • Click the bottom right skull's teeth and get the gold tooth

  • Combine the rope and the fire poker in your Inventory list (You'll use it later)

  • Click the left arrow

  • Click the right arrow

  • Click the building on the far left - apartment building

  • Click on the door in the center

  • Get the Post-It note from the right side (on the side of the shelving)

  • Click on the first aid box below that to open it, get the health pack (Use it or not. You shouldn't need it at this point but if you don't use it before the end of the next chapter, you lose it)

  • Click the center of the gaping hole in the wall to get a note to Jim which reads, "If you're alive and you're reading this, I've moved ‘the package' to room 13. We're gonna send these ****** all back to Hell! Tucker"

  • Get the radio on the counter to the left

  • Combine the batteries and the radio in your Inventory list

  • Get the fire extinguisher just below where the radio was

  • Click the left arrow to leave

Chapter: Exile (Pt 2)

  • If you mess up, click on the wire(s) that you messed up on or, if you've finished the puzzle, click outside of the immediate circuit board area to start over

  • When you're finished placing the wires, click on the black wire to plug it in

  • If it's done wrong, you'll get a shock. Use the health pack (or not, and if you didn't use it earlier)

  • If it's done right, the security gate at the counter opens revealing a room key (BA Apartments Key) - Room 23

  • Click the arrow at the "10 o'clock" position to go up the stairs

  • Click the arrow that continues up the stairs. You can't move the door to level 1, even with Telekinesis, so don't bother

  • Click on the door on level 2

  • Click on Inventory and Use the BA Apartments Key

  • Click on the door to Room 23

  • Click on the curtains in the center of the room for some light

  • Click on the wooden cupboard on the upper left to get letters to Michael. Read them or not. (Click on Use to do so)

  • Click on the paper in the dot matrix printer. (Read it or not)

  • Click on the pencil in the center of the table and click Use

  • Click on tablet just to the lower right of where pencil was

  • Click and hold to drag the pencil to reveal a code: 2670 (This code never changes)

  • Hmmmmm. What needed a code?

  • Click outside the paper area to put it down. It's then added to your Inventory

  • Use the fire extinguisher in your Inventory, or you can use Telekinesis, on the window to break it

  • Use the rope and fire poker you combined earlier to anchor to the window frame. We're gonna swing down to room 13 which is right below us.

  • Surprise! Room 13, but…what's that beeping?

  • Click on the roll of wire (center right - in front of some kind of case)

  • Click on the plunger/detonator (back left corner)

  • Click on the explosive pack (between the boxes left of center and down a bit)

  • Click on the case that the wire was sitting in front of, to open it. Uh oooooooh!! That's what that beeping was!

  • Depending on time left, (clock will count down in upper left of screen) click on the door to the right

  • Click on the rifle & Scope and click on the right cable holding the corpse up, off to the right. It cuts it.

  • Either Go out through that door to go down the stairs or, if time allows, click on Powers and use Teleportation to go to Market City (map will appear). Click on Market City then click on the white portal that forms) and click on the sign again to enter the market

  • Use the code you got from the tablet (2670) on the cash register and get a gold Rolex

  • If time still allows it, go off into the distance away from you to the marina area

  • Click on Inventory and Use rifle & scope

  • Click on the tall building to the left

  • Hear bullets whizzing by you?

  • The sniper is in the upper right balcony area of the building

  • See Vlaew on top of the building (the building sniper is shooting from) and hear Vlaew's evil laugh

  • The sniper's below him a few floors

  • Muzzle flashes give the sniper's location away

  • Aiming is somewhat slow and cumbersome (Due to old, outdated rifle and scope?)

  • Shoot the sniper

  • If you miss and still have some time left, try again. Don't take too long here. You'll need some time for the next task

  • Win or lose, get out of there

  • Use the health kit you got earlier if you got shot (and didn't use it earlier)

  • Go to the Subway on the right

  • Click on Inventory and Use the explosive pack - Place it on the gate (Telekinesis can be used but doesn't work. Just shakes the gate)

  • Click on Inventory and Use the fuse wire coil

  • Click on arrow pointing at 7 o'clock to back up once (Ya don't wanna be right there when it blows)

  • Click on Inventory and Use the plunger/detonator

  • Click on the detonator to detonate the explosive pack, blowing the subway gate

  • Click to go back to the right after the debris lands…and fast!

  • Click the doorway that has now been revealed to the subway

  • Phew! You made it! (Or did you?)

  • Witness a nuclear explosion

Chapter: Exposure (Pt 1)

  • Click on the escalator to go down

  • You hear a little girl crying. Sounds like your daughter! :o(

  • Click on "jerry can" (gas can, for us American folks) just left of the blood trail, lying on its side

  • Click on the green rubber hose on the soda machine up and to the left (after security gates)

  • Click on the door at the end of the concourse - the Ticketmaster's Office

  • Click on the dead dude to get a fan belt (I know. Why does some corpse have a fan belt, right?)

  • Click on the upper left of map and get the key to the Maintenance room

  • Note the computers to the left. One is beyond help, the other has no power.

  • Click the left arrow to go back out to the concourse

  • Click on Inventory and Use the Maintenance Key on the door to right

  • That's your daughter!

  • Click on her

  • Things go haywire and she pixelates into oblivion (Bye, sweetie! Don't forget to pray for daddy!)

  • When that's all over, click on the door at the end of the corridor - the Systems Room

  • Click around and you'll see that there's two generators and a switch

  • The generator on the left (Active Main) is empty of fuel

  • The generator on the right (Inactive Reserve) is full

  • The lever on the circuit cabinet to the right does nothing but reset when you click on it

  • Click on Inventory and Use jerry can/fuel can

  • Click between the two generators to place it - Can be touchy - Click just to the right of the closest end of the left generator. Eventually, it will set down

  • Click on Inventory and Use the green rubber hose

  • Click on the top of the jerry can/fuel can, and the hose connects and you hear liquid moving (provided you have sound)

  • The can is now full. Click on it to add that full can to your Inventory then click Use

  • Click on the left generator (Active Main), the far end on the top of it, to fill it with the fuel

  • Click on the switch on the circuit cabinet on the right to power it up

  • Alriiiiiiiiight! Power! B-b-but why's the light red?

  • *Sigh* It has to be configured (rerouted)

  • Click on the handle below the lever you flipped

  • A puzzle to solve. The goal to this puzzle is to use the levers around the edges to drag the O rings around until each of the 10 O rings is hovering over a LIT light. (This puzzle changes light locations each time, unfortunately) What I do is draw a quick sketch of 20 circles on a piece of paper, put an X over each light that DOESN'T light and leave the lights that DO light, alone. After you've figured out which lights light and which don't, you won't waste as much time. You can just concentrate on moving the O rings to the correct places.

  • Once you solve it, the light on the circuit cabinet turns green. The power has been configured/rerouted correctly.

  • Click the right arrow to leave the Systems Room

  • Click the left door to go back out to the main concourse

  • Go ahead to the Ticketmaster's Office again

  • Click on the computer just below the bottom left of the map

  • Click on the power button (The power button for the computer, not to use powers)

  • Eureka! We've got power!

  • Switch the Forced Radio Broadcast to Yes

  • Switch the Platform Lighting to On

  • Switch the Ticket Security Gate Status to Open

  • None of the other systems will stay switched

  • Click the power button on the computer to turn it off and return to the main view

  • Click the left arrow to leave the Ticketmaster's Office

Chapter: Exposure (Pt 2)

  • The security gates on the left are now open

  • Click on the turn styles there to head to the platforms

  • You'll see a few signs: From left to right, we have a sign with an arrow above some stairs (to platform 2), a sign with an arrow and a 1 (to platform 1) and two symbols representing Mens and Womens restrooms

  • Click on the Mens restroom sign

  • Click the slowly-blinking red light on the left side to turn the light on

  • A big scary man comes outta the mirror for a moment then goes away (If you're jumpy, we'll ALL wait for you to go change your pants)

  • Click on the paper towel dispenser

  • Click on the paper towel to add it to your Inventory

  • Do this two more times until you have a total of 3 paper towels in your inventory

  • Click on Inventory and Use the 3 paper towels on the drain for the sink on the right

  • Click on the top of the faucet and turn the water on

  • It overflows

  • Click on the right arrow and see where the water has gone into a drain and caused its contents to float to the surface

  • Click on the Magnetic Key Card to add it to your Inventory

  • Click on your daughter, Steph's, toddler shoes hanging in the stall

  • Click the left arrow to head back to the sink view

  • Be a rebel and leave the water running and the light on (No reason…you can turn ‘em off if ya wanna. Neither way has any effect on the game)

  • Click on the door to leave the Mens restroom

  • Click on the sign to enter the Womens restroom

  • Note one stall with an open door and one stall with a closed door

  • Note the strings above the stall door on the right. Click on the string on the left to cut it or you'll get a severe case of heartburn when you open that stall door

  • Click on the crowbar BUT, BE CAREFUL: You MUST click on the bottom left of the crowbar to pick it up. Clicking on the upper right will set off the arrows resulting in severe dread

  • Click on the right arrow to leave the Womens restroom

  • Click on the center of the screen with the red arrow streaming off into the distance to continue on to Platform 1

  • Nothing of significance on this next screen except a link to a game

  • Click on the red arrow to continue onward into the darkness. (Don't worry. I'll hold your hand)

  • Click the arrow to go up the stairs

  • Click the opening between the brick columns just left of center

  • You're now on the tracks, you brave soul you

  • Note the green light meaning track is active/unlocked and the room off to the right with a sign saying Signal Box

  • Also note the wire running across the track just ahead. Click on this wire to cut it. (I click on the right end of it, personally. Not sure it makes any difference where ya cut it)

  • The first time I played this game I didn't cut it and didn't stop going forward either. I was extremely unhappy with the result

  • Click on Inventory and Use the magnetic key card on the slot just to the right of the Signal Box room

  • Click on the door to enter

  • Click on the near side of the box that is now in front of you

  • Click on Inventory and Use the fan belt the corpse so generously provided for us back in the Ticketmaster's Office

  • Click on the wheels

  • Click on the lever furthest from you until it's toward the right

  • If you did this correctly, the lights on the panel above will display 2 green lights on the right

  • Click on the right arrow to go back out into the tunnel

  • Click on the left arrow to leave this area

  • Click on the stairs at the far right

  • Click in the dark area on the right

  • Click the left side to go back to the main concourse

  • Click the arrow to head up the stairs to Platform 2

Chapter: Exposure (Pt 3)

  • You're now looking at a train

  • The left doors on the train ahead are locked tight

  • The right doors on the train ahead "appear slightly ajar" and "can be pried apart fairly easily using something as a lever"

  • or you "can use your powers"

  • You can click on Inventory and Use the crowbar on the doors or click on Powers and use Telekinesis to open them

  • Click the open doorway

  • You're now on the train

  • Note the four corpses all smiling at you

  • Click on the corpses leaning on each other (the left of the two) to get a coin pouch

  • Click on the red arrow in the aisle to continue on to the driver's compartment

  • None of the pretty lights and buttons do anything except for two…but only one for now: The center control labeled "Speed/braking"

  • Click on it

  • You're now driving a train!

  • Note the "Big Red Button" which is the emergency brake, just left of center

  • Aaaaaaaand we're driving down the traaaaaaaaacks

  • Longer ride than ya thought, huh?

  • What's that sound?? (If you have sound. If not, read the screen! It ain't sayin your coffee's ready!!)

  • The tunnel's caved in ahead! Hit the BRAAAAAAAAKES!

  • Phew!

  • Click on the right arrow to leave the driver's compartment and return to the first train car

  • Click on the left arrow to leave the train altogether

  • You can't go forward so you'll have to go left

  • You see a door with a "strange color-coded keypad", a Don't Walk sign and some graffiti.

  • Click on the "strange color-coded keypad"

  • A light lit up (and a sound played)

  • If you're my age, or thereabouts, you likely remember an electronic game called Simon. If not, it was a game where you had to mimic the color/sound pattern the game did. First the game does it, then you. Once you get it right on one step, it adds a step. It continues to do so until it reaches 10 steps. This puzzle is like that. Watch and listen to the lights and sounds, mimic them on the colored keypad and try and keep up until you've solved it completely. (What I sometimes do here, because it's just easier, is write down what each one is on a piece of paper. For example: R for Red, G for Green, Y for Yellow and B for Blue. The game gets up to 10 tones (steadily increasing speed) before being complete and one can lose track. If you do it my way, you end up with something like GYBBRYYRGG. Get it? Hope so. Unfortunately, this game does NOT use the same pattern every time you play. (Hence why I started doing it my way) You can enter these patterns as fast or as slow as you want. If you get the puzzle wrong 3 times, you fall to your death in a pit of spikes.

  • When you solve it, the Don't Walk sign changes to Walk

  • Click on the door to enter

  • You're now in a room with body parts on hooks and on the table, a knife rack, a headless corpse sitting at the table, a large, black metallic door, a cast iron oven and a guy sharpening a knife

  • You've gotta take care of this guy sharpening the knife in order to move on. There's only one way to do so and that's Telekinesis

  • This will then lift him by the neck and make him curse your existence

  • Question/speak with him to get the information you need

  • Decide to either spare or kill him

  • The power of Destruction is now added to your Powers

  • Click on the arm hanging on the hook, off to the left a bit, and take the pocket watch

  • Click on the large, black metallic door to continue

  • Click on the bright light at the end of the tunnel

  • Click on the red arrow on the tracks

Chapter: Exodus (Pt 1)

  • You see two stone pillars with a sign saying Hobbs Junction

  • Note that on the left pillar, a letter R circled in red. If you've read notes and letters you'd know that this means The Resistance is associated with this place

  • Click the red arrow to enter Hobbs Junction

  • You'll come to a path with a large tree on the left

  • Click on the limb at the base of the large tree to reveal a 4-digit numerical code there (7249) Remember it or write it down (This code never changes)

  • Continue down the path

  • You come to an elevated walkway with a guard walking left and right, back and forth

  • As you've seen, it's foggy out so you're able to be as close as you are without being seen (Ironic, seeing as how we can see him!)

  • A building is on the right and a "skip-bin" (dumpster, for us American folks) is on the left

  • Ya don't wanna be spotted so you've got to find a way to distract the guard

  • Click on the furthest door on the skip-bin/dumpster to open it

  • Click inside and a sandstone rock is added to your inventory

  • Click Use for that sandstone

  • Aim at the center under the walkway and click. This will throw the sandstone rock, thus distracting the guard

  • When the guard turns to face where the sound came from, click on the rusted and corrugated sheet of metal

  • This will lay it over and reveal a broken window

  • Through the break in that window you will see a red button

  • Click on that button

  • This sets off an alarm which makes the radio traffic go wild and the guard run off to assist

  • Click the path to continue past the elevated walkway

  • Click on the door in the center of the screen

  • Upon hovering your cursor over the door and parts of it, you can see that the fortified iron door has "stakes" and "notches"

  • Clicking on these stakes moves them one notch further

  • When hovering over the stakes, the text at the bottom tells you "this stake is currently at notch number" and a number between 1 and 9 is given

  • Here's where the code we found etched into the tree trunk comes in

  • To solve the door puzzle, do the following:
    Click the 2nd stake until the 1st stake is in notch 7
    Click the 3rd stake until the 2nd stake is in notch 2
    Click the 4th stake until it is in notch 9
    Click the 2nd stake until the 3rd stake is in notch 4
    Click the 1st notch until it is in notch 7

  • Voila! The door opens!

  • You're now standing in a dark place with a darkened light bulb dangling in front of you, as well as a string

  • Pull the string to turn the light on

  • Immediately a sign saying "Gas masks to be worn at all times" stares back at you (NOW ya tell me!)

  • There are two vents on the left and right of the wall facing you and they're now belching forth some kind of gas into the room with you. You cough, gasp and black out. (There's no way to get past this. Just roll with it)

  • You wake up in front of a house. It's YOUR house

  • Click on the mailbox

  • Click on the front door

  • Click either the left door or the right door. The center door won't do anything. For purposes of following along with me, click on the left door

  • You see 3 grids on the wall in front of you, one on the floor and hear a little girl crying and screaming

  • Try to see a pattern from one grid to the next from left to right. (This puzzle never changes)

Chapter: Exodus (Pt 2)

  • The pattern is this: The arrow-shaped symbol moves down and to the right one space as well as rotating once clockwise. The round symbol moves down and to the right one space and then starts again at the top and repeats. Therefore, to complete the puzzle, do the following:
    Hover over the the arrow-shaped symbol on the floor until you see arrows going around it and the text at the bottom of the screen saying Click to Rotate. Click on it until its point is aimed upward. Then click on the center of it (when circling arrows are not present) and then click on the far right bottom square (4th over, 4th down) to place that tile there. Next, click on the tile with the round symbol on it and place it two squares above the other (4th over, 2nd down)

  • When done correctly, the room will shake and a symbol written "in the language of the Ancients" meaning Offspring, will appear

  • Click on the right side of the screen to go back out into the area you were before

  • Click on the right door to enter that room

  • Here we have another puzzle as well as the sounds of a woman crying

  • The purpose of this puzzle is to rotate the discs until you have connected all the lines in some way. You will notice there are one to several light areas on the edge(s) of the puzzle. Each of these will need a line connected to it as well. Each disc rotates clockwise a quarter of a turn every time you click on it. Some will need clicked upon multiple times. I don't believe this puzzle is always the same but I reserve the right to be incorrect here

  • When solved, the room will shake like the last one did and a symbol written "in the language of the Ancients" meaning Lover, will appear

  • Click the left side of the room on the red arrow that appears to go back into the previous area

  • When you arrive in the previous room, you hear an evil laugh (Vlaew's) and the room shakes. It then falls apart and reveals what is, in all likelihood, Hell

  • The room comes back together but is a different room now

  • In the center hangs a portrait or mirror with a once-human "Reader" in/on it who begins speaking to you. Follow along and ask/speak with him. You'll learn that Lord Vlaew "bestowed the power to alter reality as he sees fit" upon him

  • When you are finished speaking with him/it, you will be left with a choice. Forget that choice…there's more. (I played this game twice before I realized there was an option after the ugly dude spoke)

  • Click on the curtains just to his left

  • Click on the curtain rod

  • It will be added to your inventory

  • Click Use

  • Click on the Reader to impale him!

  • When the screen comes back, click on the letter and file in front of you

  • On the far right there's a glass of water. Drink it. It replenishes you a bit

  • There's nothing more for you here. Teleport at the window

  • You're now on the outside. Ahhhhh. The fresh air!

  • Well, it would have been fresh if not for the bodies stinkin' it up!

  • Click on the broken window to the left

  • Click the keys on the wall. Jeep keys! Woot!

  • Click the document on the table and read it (or not). I always like to read everything in case it gives a subtle hint for something later. That or it makes something make sense….possibly….sometimes.

  • Click on the rolled up map

  • Click to the right to go back outside

  • Click forward

  • Click on the sniper rifle on the ground. (NOW we're talkin'!)

  • Click on your Inventory and Use the Jeep keys then click on the Jeep

Chapter: Execution (Pt 1)

  • Click on the bell tower to the right

  • You'll see some guard towers in the distance

  • Click on your Inventory and Use your new sniper rifle

  • There are 2 guards you need to kill on the left guard tower

  • They are apparently wearing body armor or can take a shot really, really well. Aim for their heads. (You get 500 points for head shots too)

  • If you fail to kill these 2 guards now, you will regret it later

  • Once they're dead, click on Powers and then on Teleportation. Teleport to the church

  • Click on the church's door to enter

  • In the lower left corner there is a sledge hammer, click on it to add it to your Inventory

  • (Note: From a few places I've read, there's supposed to be a preacher's diary on the floor to click on as well. Having played the game twice [after learning to kill the reader and move further in the game], there has been no such diary. A glitch? Perhaps. Perhaps it will show up on a later playing-of-the-game for me)

  • Click the rope that is running from the ceiling, over a hook and down the left wall

  • This will drop what was covering a window up above on the back wall

  • If it isn't too late (one of my attempts was too late for this part because of taking too long looking for the diary), notice the moon shines through the window at the top center and shines on the floor

  • Click where it hits and a previously-hidden door will open

  • Click in the opened doorway

  • Click on the Kriss Blade (wavy sword) to add it to your Inventory

  • Click on Inventory and Use the sledgehammer on the wall

  • Click on the hole in the wall

  • If you need it, the water running down the middle of the screen will be clickable. Click on it to replenish a bit. If it isn't needed, then it's not clickable

  • Click ahead

  • Use the sledgehammer on the lock

  • Click on the winding path to the right

  • A new puzzle! Oh goody!

  • There are 4 plaques with options for either a solid circle or the outline of one. Your task, should you wish to accept it (and move on), is to guess which should be which to get through. Click on a plaque to change it.

  • Once you've done what you think the solution is, click on the lever to the right. This will either open the gate or reveal a number.

  • This number reveals how many you have correct. I've gotten lucky and gotten it on my 2nd attempt every time so far. The code for me was outlined, solid, outlined, outlined. This changes each game. My 2nd time doing it was solid, outlined, solid, solid

  • You get 4 chances to get the code right or it resets

  • Once the gate has opened, click on the barely-visible corpse just to the right and get the C4 pack

  • Click ahead

  • You can either use Telekinesis or the C4 pack to blow the gate that is now in front of you. It will also take out the guards that are there

  • After you do, a pistol comes sliding out of the carnage. Click on it to add it to your Inventory. (A Glock! SWEET!)

  • When you click on it and it's added to your Inventory, note that it says hitting the G key on your keyboard will arm the gun. (It will also put it away so you can continue without shooting at directional arrows)

  • Click ahead

  • Hit the G key on your keyboard now or prepare to use Telekinesis

  • Take out the 3 guards. (Remember: Headshots if using the Glock)

  • Click on the stairs

  • Take out the 2 guards there

  • Go to the lift (elevator, for us American folks)

  • Click on the button to the left and either press G now or prepare to use Telekinesis

  • Take out the guard that comes down with the lift/elevator

  • Click in the lift/elevator

Chapter: Execution (Pt 2)

  • When the doors open, a pretty cool building is in front of us

  • Just off to the right there is a stone thing. Click on that

  • Click on Inventory and Use the Kriss Blade/wavy sword on it

  • Click outside of it to return to the previous view

  • Click on the big, scary doors

  • Nothing happens in this view. Click ahead

  • Click on the door at the end of the hallway and take a deep breath

  • There sits Vlaew on his throne. (If you've done any amount of reading in the first 2 versions of Exmortis, or read around in this game, you'll know who this is). He's not known for his gentle demeanor

  • Click on Vlaew to have a chat

  • He's giving you the first shot. Use it wisely

  • Click on Powers and use either Telekinesis or Destruction on him. (Note: Using Destruction is a little bit harder simply because the red area you have to catch the slider in is much smaller than you've been used to)

  • Vlaew will go flying out of the window behind him

  • Where did he go?

  • Either click on Powers and use Teleportation to go outside or click and go back the way you came. (I give all of these choices but I tend to try not to use powers when the chance is given [and there's another option], because using powers lowers health)

  • Click on the ladder to go down

  • Ah! Theeeeeeere he is! He's using some kind of force field to protect him. (Hey! Where's OURS?!?)

  • Yet another chat

  • The quicker you do these next steps, the better for your health. Remember, for speed's sake, you can hit the 1 and 5 keys on your keyboard to switch between Telekinesis and Destruction Powers

  • Use Telekinesis on the orange spots at the tops of either side of the force field. It will drop momentarily

  • (If he gets a stone thrown at you, Use Telekinesis on those as well)

  • When the force field drops, hit the 5 key on your keyboard to switch to Destruction and use it on him

  • Repeat the above steps until, finally, Vlaew (again) flies through the wall behind him

  • Click where the fella just flew through

  • He's on his knees now. (Weakening?)

  • Another chat starts

  • After the chat ends (Which you'll know because you clicked on End Conversation or clicked on Skip because you've been there, done that already), prepare for more battle

  • Use Telekinesis(1) to lift him up

  • After you click on him and he drops back down, Use Destruction(5) on him (and his balls of fire, as needed)

  • Repeat until he, yet again, flies through the wall. (Awful flighty, isn't he?)

  • Click on the hole he created to go ahead

  • He is now baaaaaaaaarely dragging himself forward…away from you

  • He opens a portal

  • Once again, Use Telekinesis to pick him up

  • He speaks

  • When he's done…Destroy him!!

  • Click on the portal

  • Congratulations! You've just finished the game!

[Merged comments and added tags. Thanks so much! ~Kero]

Reply

A couple of comments and a question or two:

1) I tend to do better when the meter moves real slow. Apparently my reflexes are going away with age.

When Vlaew starts to move a boulder or starts to throw a fireball in the later battle, it slows down for a bit. Well, it does on my dinosaur of a PC.

2) I have played this game umpteen times and have YET to see a dang preacher's diary. Can someone do a dang screen shot of it, even circle the dang thing so I can see if I just have a glitch?

3) Also, I just heard from someone that there's some boat keys somewhere. HUH?

4) I have tried and tried to record a video walkthrough of this game but even with hardware acceleration on "none", it's still too jumpy and an hour long game takes an hour and a half. Fizzy is having trouble helping me understand why this game won't activate on my Vista laptop too. It's got a better processor and more RAM. I've done everything they've said but I get an error message saying that there's no account associated with the data I've entered. It's already installed and activated on another computer with the same info (but with XP). :o( (Only mentioning this in case anyone has any advice).

HELP!

Reply

I'm playing it yet again but have never gotten over 31 of 34 achievements.

Like Jay, I'm sure the priest's diary that I can NOT find is one of them, but what are the other two I'm missing?

Here's the 31 I always get:

  • Got Power Cube

  • Got Hatred Cube

  • Got Vengeance Cube

  • Killed Azrael

  • Found way back to Earth

  • Found gold tooth

  • Used Post-It note

  • Got candlestick holder

  • Broke window (used fire extinguisher)

  • Tried to disarm nuke in case

  • Added batteries to radio

  • Got gold watch from cash register

  • Saw Vlaew on rooftop through rifle scope

  • Killed sniper

  • Found and clicked on boat at marina

  • Turned forced radio broadcast on

  • Turned platform lighting on

  • Got toddler shoes

  • Left water running in mens room (Which I failed to think of when I wrote the
    walkthrough saying turning it off or leaving it on didn't matter)

  • Got crowbar from womens restroom

  • Defused Platform 1 trap

  • Got coin pouch

  • Got pocket watch

  • Clicked on mailbox

  • Drank the water in the cell

  • Got sniper rifle

  • Made guard fall to his death

  • Revealed hidden passage entry with moonlight/ruby

  • Used sledgehammer on wall

  • Clicked on Latin phrase

Also...has anyone found a use or a place to use the working radio??

Reply

Update: Someone told me of one more achievement:

Using Telekinesis instead of the C4 pack on the gate with the guards.

I've now got 32 of 34

Still looking for the other 2. Thanks.

Reply

Update:
Achievement 33

Before using the Jeep keys on the Jeep to drive off, click on the barely-visible head impaled on a spike on the far right of the screen.

Still looking for the elusive 34th.

Reply

At last...the final achievement:

Empty the paper towel dispenser in the men's restroom

Reply

Is there one available for the free demo version? I can't click on any of the staffs, it will only let me go forward. It says it's chapter Extinction because

I found the gold tooth and the achievement says that it was found in the Extinction chapter

This walkthrough doesn't tell me at all how to

get past the sniper in the marina

Is there something I'm missing? Besides the funds to buy the full version?

Reply
Anonymous January 31, 2010 2:12 PM

I think it really sucks that to finish the story we have been faithfully playing for years, we now have to pay £10.

I was looking forward to playing this, but I'm not paying £10 off a site that sends spam.

Dissapointed :(

Reply

@Chalikun: The walkthrough above indeed does tell how to

get past the sniper.

It's located in the part labeled "Chapter: Exile (Part 2)" above.

To get past the sniper at the marina, first you need to get the rifle and scope. That can be found just outside the room in the apartment building where the nuke-in-a-case was found.

I did a video version of this walkthrough as well. Search for it on YouTube under my username: CliffyTX (The New & Improved version - 4 parts)

Reply
Anonymous March 2, 2010 9:24 PM

dude...you need to make a little walkthrough on where to place the wires I GOT KILL 6 TIMES TRYING TO FIGURE IT OUT...but of course im playing the demo...

Reply

How long is the free trial?

Reply

help the walkthrough doesn't tell you how to re-wire the circit board, (i apologise if i have missed it)

Reply

Brilliant!!!!!! BUT! What a lot of faffing about, did the inventory really need to open up like that every bloody time i pick something up? i really enjoyed the first chapter as i could run around and explore where i wanted but after that i had to go where the game sent me.
i do however hope there is a 4th episode,
i really want to know where the portal you go through after killing Vlaew comes out!

Reply

i cant get a proper walkthrough..........i like this game so pls help meeeeeeeeeeeee...!!!

Reply

how to pass throgh the sniper at the marina

Reply
XxEmo_PaganxX December 1, 2011 2:16 PM

The part in the beginning where you go into the house that the man killed his family then himself, you figure out that you don't have much time after the cellar. What do you do after that?
I'm completely clueless!!!

Reply

^ Scroll Up | Homepage >

Leave a comment [top of page]

Please consider creating a Casual Gameplay account if you're a regular visitor here, as it will allow us to create an even better experience for you. Sign-up here!
  • PLEASE UNDERSTAND SITE POLICIES BEFORE POSTING COMMENTS
  • You may use limited HTML tags for style:
    (a href, b, br/, strong, em, ul, ol, li, code, spoiler)
    HTML tags begin with a less-than sign: < and end with a greater-than sign: >. Always. No exceptions.
  • To post spoilers, please use spoiler tags: <spoiler> example </spoiler>
    If you need help understanding spoiler tags, read the spoiler help.
  • Please Preview your comment before posting, especially when using spoilers!
  • No link dropping, no domains as names; do not spam, and do not advertise! (rel="nofollow" in use)
chrpa Jayisgames needs your help to continue providing quality content. Click for details Welcome to the Roundup 66 - Retro with four games! After you find the ten monkeys in the chapter, look in the inventory. You will find a...  ...
chrpa Jayisgames needs your help to continue providing quality content. Click for details Welcome to the Roundup 65 with three games! As mentioned in the previous roundups, only odd-numbered episodes are featured since even-numbered are for Robin Vencel's patrons (the...  ...
chrpa Jayisgames needs your help to continue providing quality content. Click for details Hi! Weekday Escape and Weekday Puzzle are here! First we have two new cans from tomoLaSiDo and then two small rooms from isotronic. That's all for this...  ...
6,365 Views
0 Comments
chrpa Jayisgames needs your help to continue providing quality content. Click for details Welcome to Mobile Monday! We have another beautiful game from Nicolet and it's a winter game as it should be. Tasuku Yahiro have released another of their...  ...

HELP Jayisgames.com

Recent Comments


Display 5 more comments
Limit to the last 5 comments

Game of the week


Dark Romance: Vampire Origins Collector's Edition

Your Favorite Games edit

add
Save links to your favorite games here. Use the Favorites editor.

Monthly Archives