JayisGames.com is now available ad-free!
Jay is Games recommends Cheat Happens with 8,000+ games and 35,000+ trainers!

Hungry


  • Currently 3.9/5
  • 1
  • 2
  • 3
  • 4
  • 5
Rating: 3.9/5 (101 votes)
Comments (29) | Views (11,696)

Weekday Escape

GrinnypFor those who are room escape aficionados, the cravings can hit any time of the day or night; the gnawing sensation of wanting just a nibble, something to satisfy the yearning for a tasty and delicious puzzle. Well, hanker no more for Robamimi is back, and that fabulous designer of some of the best room escapes available has brought a nutritious treat in the form of Hungry, an amusing little point-and-click room adventure that will satisfy one craving while substituting another.

Hungry
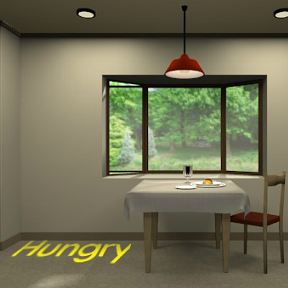
Yes, food is the theme this time around and it is on display in this sparse yet beautiful little room just waiting for someone to come along and take a bite. Or several bites, because there's more than one consumable present. Everything we've come to expect from Robamimi is here: elegant puzzles and solutions, mellow music, an easy inventory, and even a save function. All you have to do is use the arrows on the sides of the screen to wander around and taste the challenge (and the food) as you try to solve your way out, using both the amazing built-in hint feature, the changing cursor (to indicate hot-spots worth investigating), and your own imagination. This is one of Robamimi's smaller efforts, but welcome nonetheless as a perfect snack.

Feeling a bit peckish? Want to sate the late-night cravings? Hungry is definitely the way to satisfy your hunger for a fun, logical room escape. Just be warned, though, because while Hungry may conquer your escaping hunger, it may also cause a bad case of the munchies for something more substantial than instant cup-o-noodles. Time to take a bite!

Note: The game comes in two languages, Japanese and English. To play the English version, make sure it says "Japanese" on the title screen when you begin, and vice versa. Also, if you have trouble connecting you can also try the alternate site.

Play Hungry

Walkthrough Guide


(Please allow page to fully load for spoiler tags to be functional.)

Preamble

Before you begin, make sure the initial screen says >>Japanese if you want to play in English and >>English if you want to play in Japanese. Robamimi's interface here is slightly counter-intuitive. I think it's intended to mean "Click here to switch to this language" instead of "This is the language you will be playing in." Now you're ready to hit "Start."

Escape!

Door Scene

We begin facing a door, a wall safe, a clock, and a plant.

If we try to investigate the clock, it tells us that we can't reach it. Looks like we'll be needing something here.

If we investigate the plant, we can see something gleaming in the soil.

It's a gold key!

Cabinet Scene

Turn right from the door scene to the cabinet scene.

I don't know about you, but the first thing I notice is the lock on the left side of the left drawer.

It's gold. How convenient for escape games to color-code things!

Mm-mm! Soup!

The right drawer is stuck. We'll have to get back to it.

The left cabinet has something on the inside of the door.

It's a pointer! Click it to extend it.

Now we can investigate the right drawer.

Use the extended pointer on the little gap where the drawer is slightly opened.

Get the leaflet. Click it again to un-crumple it.

We know how to eat soup. Must be a hint. Click the drawer again to get a spoon. (Not in the face! Not in the face!)

Investigating the rest of the cabinet reveals three things we're not ready for yet: a 9-button code box, a thing that resembles a bread box, and a 3-digit code on the right cabinet. We'll come back later.

Table Scene

Turn right from the cabinet scene to the table scene.

Hey, you can get the chair! That should come in handy elsewhere.

There's actually quite a bit going on here on the table.

Directly in front of us is an omelet sauced with ketchup, which sits on a plate, which sits on a bigger plate. To the upper left is a smaller plate with the number 84 written on it. To the upper right is a glass of water sitting on a coaster.

We can move the medium plate off of the big plate to reveal the number 97. We can also move the glass off of the coaster and then click the coaster to reveal a hint.

At first blush, the coaster hint seems pretty straightforward: Use the plates in order from small to big to middle. Ooh, hey, that would imply there's information on the middle plate.

Are you hungry? Good thing we have a spoon! Prepare for omelet-nom!

The middle plate says 51.

Now would be an excellent time to ask Robamimi for a hint.

"It is not double-digit, single and single."

In other words, it's not eighty-four, ninety-seven, and fifty-one; it's eight and four, nine and seven, five and one.

This hint combined with the coaster hint should get us the numbers we're looking for.

The smaller number of 8 and 4 is 4; the larger number of 9 and 7 is 9; the number right in the middle of 5 and 1 (that is to say, the average) is 3. So our number is 493.

Cabinet Scene

Go left from the table scene back to the cabinet scene.

Unlock the right cabinet with 493.

Get the cup.

Door Scene

Go left again from the cabinet scene back to the door scene.

Use the chair to get to the clock.

Get the batteries from the back of the clock.

TV Scene

Go left from the door scene to the TV scene.

Open the left drawer and get the remote.

Turn the remote around and insert the batteries.

Use the remote on the TV. Take note of everything it says, because it's all important.

Channel 1; News; square 5
Channel 3; Weather; squares 6 and 8
Channel 5; Sports; squares 1 and 2

Table Scene

Turn left from the TV scene to return to the table scene.

Use the cup on the water glass.

Cabinet Scene

Turn left from the table scene to return to the cabinet scene.

That bread box-y thing is actually a microwave. Use the cup of cold water on it and get a cup of hot water.

Use the hot water on the cup of soup. (You may need to open the lid if you haven't already.)

Now use the spoon on the cup of soup.

The clue says SNWx2.

S for sports: that's channel 5. N for news: that's channel 1. W for weather: that's channel 3.

513x2 = 1026. We saw a 4-digit combination somewhere, didn't we?

TV Scene

Turn twice in either direction to return to the TV scene.

Unlock the right drawer with 1026.

Get the magnet.

Cabinet Scene

Turn twice in either direction to return to the cabinet scene.

Remember the 9-button code box? This is where we use the clues from the TV. Combine the squares indicated on all three channels.

Press buttons 1, 2, 5, 6, and 8. Press the bar underneath to open it.

Get the clothes pin.

Table Scene

Turn right from the cabinet scene to return to the table scene.

The left side of the bay window looks like it's open. Click to investigate.

There's a key down there, but we can't reach it! I'm sure we can MacGyver something, though.

View the pointer. Now use the magnet and the clothes pin. Close it down and use it on the key.

Get the silver key.

Door Scene

Turn twice in either direction to return to the door scene.

Use the silver key on the wall safe.

A 4-button code. Have we seen a clue for that anywhere?

The leaflet!

Press buttons 1 4 2 3 4 1, then press "OK"

It should say "unlocked" now.

Well, what are you standing around for? You're free!

29 Comments

Quick and easy. I hope there's a meaty escape soon. I'm getting famished.

Reply

Yeah, I was out in just a few minutes with no walkthrough -- nearly always I miss something and need some walkthrough help.

Except that I can't seem to find the Happy Coin anywhere.

Reply
nerdypants February 22, 2012 1:06 AM

Stuck.

I've used the chair, the remote, the gold key, and the batteries. Still have: clothes pin, instant soup, pointer, soup paper, and spoon.

I have no idea what the numbers on the table mean, or the note under the glass.

Help? Please?

Reply
nerdypants February 22, 2012 1:17 AM

Ah! Nevermind.

I didn't know I could use the spoon on that whatever-it-was on the table.

Reply
justforfun February 22, 2012 1:21 AM

good escape except for this one which is problem for nerdypents also:

493 - small - 4, large - 9, center 3 (135 from the tv, if I understood correctly)

hope it will help

Reply

@David:

Tesshi-e does the Happy Coin, not Robamimi.

@nerdy:

I assumed it was a delicious blood-soaked twinkie.

Reply

Excellent game as always. I did trip up once though:

For the code regarding the plates, I assumed 'small', 'large', and 'center' referred to the plate sizes, therein losing necessary information for solving the puzzle. I didn't think to look closer until reading justforfun's comment.

Reply

@justforfun Thank you for the solution -- for some reason I don't think I would have gotten that without hours of head-beating. Now that I know it, though, I think that "middle" just refers to

the number that's in between the two numbers on the medium-sized plate. Coincidentally, they're the same as the low and high numbers on the TV...

Reply
lavamuffin February 22, 2012 2:35 AM

@ justforfun, bluemoose19

spoiler tags for safety . . .

could you explain how you got that particular code? i'm rather perpuzzled about how that worked.

thanks in advance!

Reply

Does it take a while to load for anyone else? I've been sitting here for about 5 minutes now (Mac, Chrome) and in place of where the game's supposed to be I've just got a big white block of bupkis. :[

Reply

@ An Onyx Mouse

same here, firefox.

this has been a trend lately. i wonder if robamini needs a better host?

Reply

Excellent little game, got stuck on the three circles for a while before the eureuka moment. Congratulations Robamimi!!!

Reply

The greatest problem once you're out, is that this little appetizer leaves you craving for more. Hope the fish course, meat course, dessert and digestive come along soon.

Reply

I noticed that little problem with loading, too. Reloading the page fixed it.

Now, I'm having trouble with what to do next.

I've used the spoon, chair, remote, batteries,heat-resistant cup and opened the 3x3 grid box and the three-number combination cupboard.

Also, that yellow thing with red on it on the table is actually scrambled eggs and ketchup

Reply

A delectable nibble! A pleasant nosh! I am tempted to write up a walk-through, unless someone else is already planning one.

Reply

@Tenzhi

Pretty sure he was making a joke.

Reply

walkthrough, please :)

Reply

Preamble

Before you begin, make sure the initial screen says >>Japanese if you want to play in English and >>English if you want to play in Japanese. Robamimi's interface here is slightly counter-intuitive. I think it's intended to mean "Click here to switch to this language" instead of "This is the language you will be playing in." Now you're ready to hit "Start."

Escape!

Door Scene

We begin facing a door, a wall safe, a clock, and a plant.

If we try to investigate the clock, it tells us that we can't reach it. Looks like we'll be needing something here.

If we investigate the plant, we can see something gleaming in the soil.

It's a gold key!

Cabinet Scene

Turn right from the door scene to the cabinet scene.

I don't know about you, but the first thing I notice is the lock on the left side of the left drawer.

It's gold. How convenient for escape games to color-code things!

Mm-mm! Soup!

The right drawer is stuck. We'll have to get back to it.

The left cabinet has something on the inside of the door.

It's a pointer! Click it to extend it.

Now we can investigate the right drawer.

Use the extended pointer on the little gap where the drawer is slightly opened.

Get the leaflet. Click it again to un-crumple it.

We know how to eat soup. Must be a hint. Click the drawer again to get a spoon. (Not in the face! Not in the face!)

Investigating the rest of the cabinet reveals three things we're not ready for yet: a 9-button code box, a thing that resembles a bread box, and a 3-digit code on the right cabinet. We'll come back later.

Table Scene

Turn right from the cabinet scene to the table scene.

Hey, you can get the chair! That should come in handy elsewhere.

There's actually quite a bit going on here on the table.

Directly in front of us is an omelet sauced with ketchup, which sits on a plate, which sits on a bigger plate. To the upper left is a smaller plate with the number 84 written on it. To the upper right is a glass of water sitting on a coaster.

We can move the medium plate off of the big plate to reveal the number 97. We can also move the glass off of the coaster and then click the coaster to reveal a hint.

At first blush, the coaster hint seems pretty straightforward: Use the plates in order from small to big to middle. Ooh, hey, that would imply there's information on the middle plate.

Are you hungry? Good thing we have a spoon! Prepare for omelet-nom!

The middle plate says 51.

Now would be an excellent time to ask Robamimi for a hint.

"It is not double-digit, single and single."

In other words, it's not eighty-four, ninety-seven, and fifty-one; it's eight and four, nine and seven, five and one.

This hint combined with the coaster hint should get us the numbers we're looking for.

The smaller number of 8 and 4 is 4; the larger number of 9 and 7 is 9; the number right in the middle of 5 and 1 (that is to say, the average) is 3. So our number is 493.

Cabinet Scene

Go left from the table scene back to the cabinet scene.

Unlock the right cabinet with 493.

Get the cup.

Door Scene

Go left again from the cabinet scene back to the door scene.

Use the chair to get to the clock.

Get the batteries from the back of the clock.

TV Scene

Go left from the door scene to the TV scene.

Open the left drawer and get the remote.

Turn the remote around and insert the batteries.

Use the remote on the TV. Take note of everything it says, because it's all important.

Channel 1; News; square 5
Channel 3; Weather; squares 6 and 8
Channel 5; Sports; squares 1 and 2

Table Scene

Turn left from the TV scene to return to the table scene.

Use the cup on the water glass.

Cabinet Scene

Turn left from the table scene to return to the cabinet scene.

That bread box-y thing is actually a microwave. Use the cup of cold water on it and get a cup of hot water.

Use the hot water on the cup of soup. (You may need to open the lid if you haven't already.)

Now use the spoon on the cup of soup.

The clue says SNWx2.

S for sports: that's channel 5. N for news: that's channel 1. W for weather: that's channel 3.

513x2 = 1026. We saw a 4-digit combination somewhere, didn't we?

TV Scene

Turn twice in either direction to return to the TV scene.

Unlock the right drawer with 1026.

Get the magnet.

Cabinet Scene

Turn twice in either direction to return to the cabinet scene.

Remember the 9-button code box? This is where we use the clues from the TV. Combine the squares indicated on all three channels.

Press buttons 1, 2, 5, 6, and 8. Press the bar underneath to open it.

Get the clothes pin.

Table Scene

Turn right from the cabinet scene to return to the table scene.

The left side of the bay window looks like it's open. Click to investigate.

There's a key down there, but we can't reach it! I'm sure we can MacGyver something, though.

View the pointer. Now use the magnet and the clothes pin. Close it down and use it on the key.

Get the silver key.

Door Scene

Turn twice in either direction to return to the door scene.

Use the silver key on the wall safe.

A 4-button code. Have we seen a clue for that anywhere?

The leaflet!

Press buttons 1 4 2 3 4 1, then press "OK"

It should say "unlocked" now.

Well, what are you standing around for? You're free!

Reply

*headdesk*

What a time to notice a typo in my walk-through. I know better than that! Really, I swear I do!

[I took a glance through but couldn't see anything, though I didn't read every word for context. If you include what you'd like changed in a comment, most of the time we can fix it for you when we skim through the comments for content. :) -Jay]

Reply

I waited and refreshed and waited and refreshed and the game never loaded in WinXP / Chrome after 15 minutes, I give up. Maybe some other day.

Reply

Any help getting

the key from outside? I have the clothespin and assume it--or part of it?--goes with the pointer, but I can't get it to work

Reply

tjhen77,

Do you have the magnet yet? Once you combine the magnet and clothes pin with the pointer, you should be able to use it to pick up the key.

Reply

Nice little game, although I think it would have been a bit better if the

word clues for the 3-digit code (small, middle, and large) hadn't lined up with the plate sizes... if it had said "middle" for the small plate, for example,

I think there would have been much less head-banging.

Reply

I probably should have spoilered that, shouldn't I? I didn't even occur to me until afterward. Sorry about that. :\

[Spoilered! Thank you for considering the other players :) -Trinn]

Reply

luthy

That's the thing, though: The clue pulls a double duty. It refers to both the numbers and the plate sizes. That said, I confess I was a bit confused at first by the word "center." I chalk that up to "Engrish."

Jay

It's in the last Table Scene, the first sub-spoiler. It says

"The left side of the bay window looks like its open." -- Obviously, that ought to be "it's."

[OMG. HOW. COULD. YOU. xD ...fixed. :) -Jay]

Reply
VoxPopuli42 February 24, 2012 10:26 PM

I have to say, even with the game's provided hints, I never would have understood

that we were supposed to split the numbers up and using that for the plate code.

without the walkthrough. Sometimes tricky puzzles just get a little too obtuse- without justforfun I would have resorted to blunt force.

Reply

Easy, except for circles puzzle.

Reply

Oh, that is a FINE use of animation to hide a clue. It's that little innovative detail that in any other format would look like an escape game trying to cheat you with its mechanics. Hopefully that catches on with other designers.

Reply

^ Scroll Up | Homepage >

Leave a comment [top of page]

Please consider creating a Casual Gameplay account if you're a regular visitor here, as it will allow us to create an even better experience for you. Sign-up here!
  • PLEASE UNDERSTAND SITE POLICIES BEFORE POSTING COMMENTS
  • You may use limited HTML tags for style:
    (a href, b, br/, strong, em, ul, ol, li, code, spoiler)
    HTML tags begin with a less-than sign: < and end with a greater-than sign: >. Always. No exceptions.
  • To post spoilers, please use spoiler tags: <spoiler> example </spoiler>
    If you need help understanding spoiler tags, read the spoiler help.
  • Please Preview your comment before posting, especially when using spoilers!
  • No link dropping, no domains as names; do not spam, and do not advertise! (rel="nofollow" in use)
chrpa Jayisgames needs your help to continue providing quality content. Click for details Welcome to the Roundup 66 - Retro with four games! After you find the ten monkeys in the chapter, look in the inventory. You will find a...  ...
chrpa Jayisgames needs your help to continue providing quality content. Click for details Welcome to the Roundup 65 with three games! As mentioned in the previous roundups, only odd-numbered episodes are featured since even-numbered are for Robin Vencel's patrons (the...  ...
chrpa Jayisgames needs your help to continue providing quality content. Click for details Hi! Weekday Escape and Weekday Puzzle are here! First we have two new cans from tomoLaSiDo and then two small rooms from isotronic. That's all for this...  ...
6,365 Views
0 Comments
chrpa Jayisgames needs your help to continue providing quality content. Click for details Welcome to Mobile Monday! We have another beautiful game from Nicolet and it's a winter game as it should be. Tasuku Yahiro have released another of their...  ...

HELP Jayisgames.com

Recent Comments


Display 5 more comments
Limit to the last 5 comments

Game of the week


Dark Romance: Vampire Origins Collector's Edition

Your Favorite Games edit

add
Save links to your favorite games here. Use the Favorites editor.

Monthly Archives