
Kaptain Brawe: A Brawe New
World - Episode II
Platform: Mac, Windows

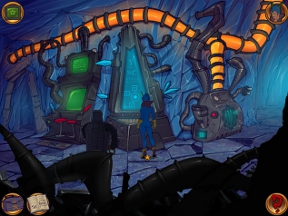
![]() Brawe is back! Not long after the first episode of Kaptain Brawe: A Brawe New World was released, Episode II of the retro-styled adventure series hit and picked up where the original left off. It's more pointing and clicking, more humor, more epic red beards, and more smart puzzles, all for you, starving adventure game fan!
Brawe is back! Not long after the first episode of Kaptain Brawe: A Brawe New World was released, Episode II of the retro-styled adventure series hit and picked up where the original left off. It's more pointing and clicking, more humor, more epic red beards, and more smart puzzles, all for you, starving adventure game fan!
 Kaptain Brawe: A Brawe New World - Episode II is, in addition to being a fine modern-day revival of a classic adventure game, a game with a mouthful of a title. You take on the role of Kaptain Brawe (and a few others), a space-loving police officer who, in Episode I, got into a little trouble. According to him, he followed every rule and regulation in the book as he rampantly destroyed a planet and stole a walking stick from an old man. According to everyone else, the man is off his rocker. So, to keep our hero in line, a watcher is assigned to keep track of him throughout the adventure. Not fun.
You'll spend much of your time playing other characters in this episode, but each one controls with the mouse in a manner any gamer will be familiar with. Slide the cursor around to interact with objects, to walk, and to speak with characters. Right clicking calls up your inventory, and you can use, inspect, or combine items from this handy little menu. Depending on which mode you choose at the beginning (casual or hard), the cursor will change depending on which action is best suited for an object.
And the rest of the game? It's difficult to discuss details without laying on the spoilers. Just know that this episode has more quests, conspiracies, plot twists and general wackiness than the first, and the continuation is so seamless, you won't be able to bat an eye in-between.
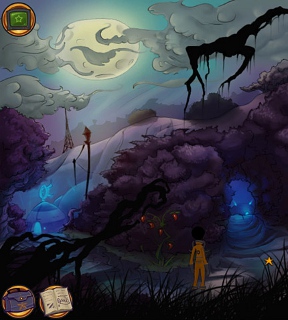
Analysis: What can you expect from Kaptain Brawe: Episode II? More of exactly what you had in Episode I, which is a good thing. Spectacular hand-drawn artwork is the most noticeable boon, but then the smart writing comes into play, introducing the game's subtle humor that will remind more than one gamer of the Monkey Island series. After that, the point-and-click gameplay takes control, allowing you to experience tons of dialogue and solve puzzles that are just to the left of completely logical. There's a good level of challenge to be had in this game.
 Setting Kaptian Brawe apart from the glut of other adventure games is its choice of modes available from the beginning: casual or hard. Casual is designed to give you an easier time, providing more cursor-based hints and less dialogue, while hard mode is for adventure gamers who are accustomed to the rigmarole the genre tends to offer. Choose either one you like, the game is great either way.
Have you played the first episode of Kaptain Brawe? You really should before you dive into this one. In fact, some online shops sell the series as one download. Sure, it's technically possible to play Episode II without touching the first, but then you'd miss out on all the cool in-jokes and references, and you don't want to be one of those people, do you?
Kaptain Brawe: A Brawe New World - Episode II is a fine conclusion to the episodic series that never stalls, never stutters, and always provides a good, smirk-inducing puzzle-solving time.
![]() Windows:
Windows:
Download the demo
Get the full version
![]() Mac OS X:
Mac OS X:
Download the demo
Get the full version


Walkthrough Guide
(Please allow page to fully load for spoiler tags to be functional.)
Kaptain Brawe Episode 2 - walkthrough
For a walkthrough of the first part of Kaptain Brawe, click here.
Instructions and Tips
When you select a new game, you can choose between Casual and Hardcore mode. Casual mode features more extensive hints than Hardcore mode.
Navigate with the left mouse button. Left-clicking also lets you interact with objects and characters. You can then either examine an object or character, or you can talk to a character or use an object.
Remember to talk to everyone and be thorough in your conversations. You never know when an important hint will be revealed. Sometimes there will be new conversational options after you learn something or do something important, so you may have to talk to the same character twice.
Often you will need to have a character examine some part of a scene before you can make use of it.
Your inventory is in the lower left corner. To access it, you can either click on it, or right-click anywhere on the screen. You can combine objects in your inventory, or click to select an object and move your mouse away from the inventory to use that object in the environment.
To dismiss a selected object, right-click.
Use the magnifying-glass tool to examine objects in your inventory.
Use the hand tool to use objects in your inventory. Using objects in your inventory is important when you want to do something to an object without combining it with another item or with the environment.
Don't overlook the objects that are in your inventory without you collecting them. This includes using Rowboat, the helpful robot.
Your journal is also in the lower left corner, next to your inventory. It keeps track of larger tasks you need to complete.
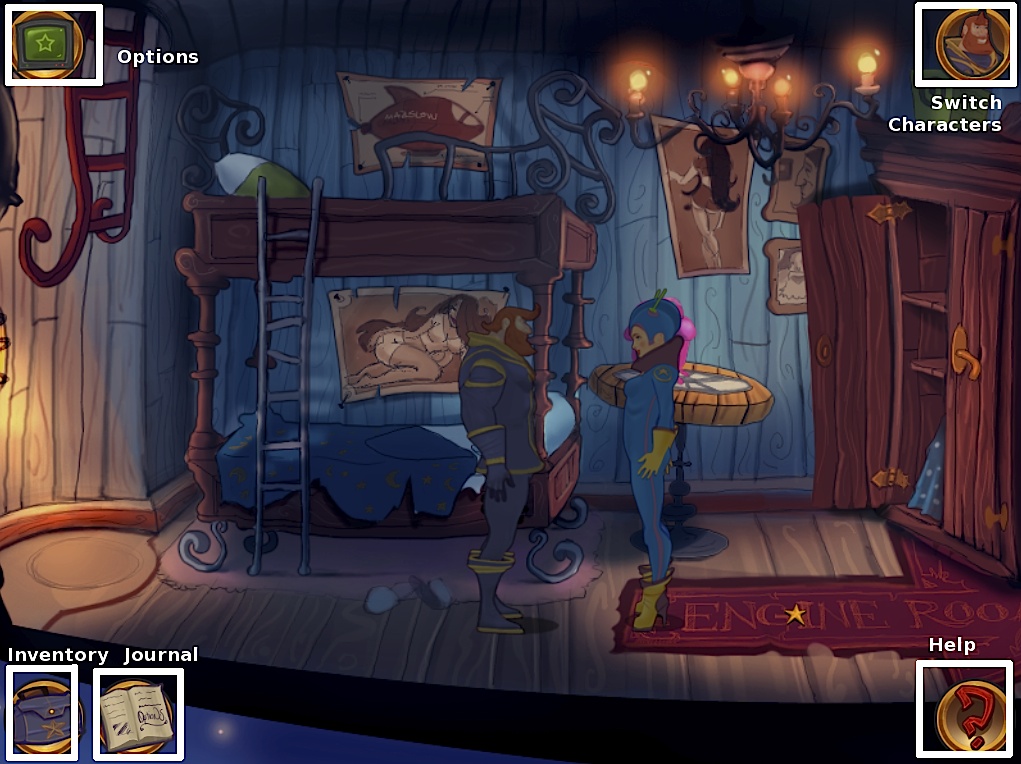
For most of this episode, you have the option to control various characters. To switch which character you control, use the button on the upper right hand corner of the screen.
The help tool is in the lower right corner. It shows clickable areas on your screen for a short time.
You can access the menu to save and load games, and for other options, with the button in the upper left corner.
Screenshot
Aboard the Mazslow
Watch the cutscenes. Head left, then down to the Kargo room to talk to Agent Zero, who is really Luna. You have to neutralize Kralek and set a course for Schminkell 7.
Switch to Luna. Go back to the cockpit and ask Kralek about the ship's router (not the engines).
Have Brawe sneak to the right, behind Kralek in the engine room. Use your hammer with Kralek to knock him out.
Send Brawe to the cockpit to look at the star chart. Find Schminkell 7 and click to get its coordinates.
7715-882
Screenshot
Use the instrument panel to the right to enter the code.
Take the navigation pattern and use it with the navigation computer.
Use the navigation computer again to set a course for Schminkell 7.
Screenshot
Schminkell 7
Watch the cutscenes. Luna is trapped, and Brawe has been abducted.
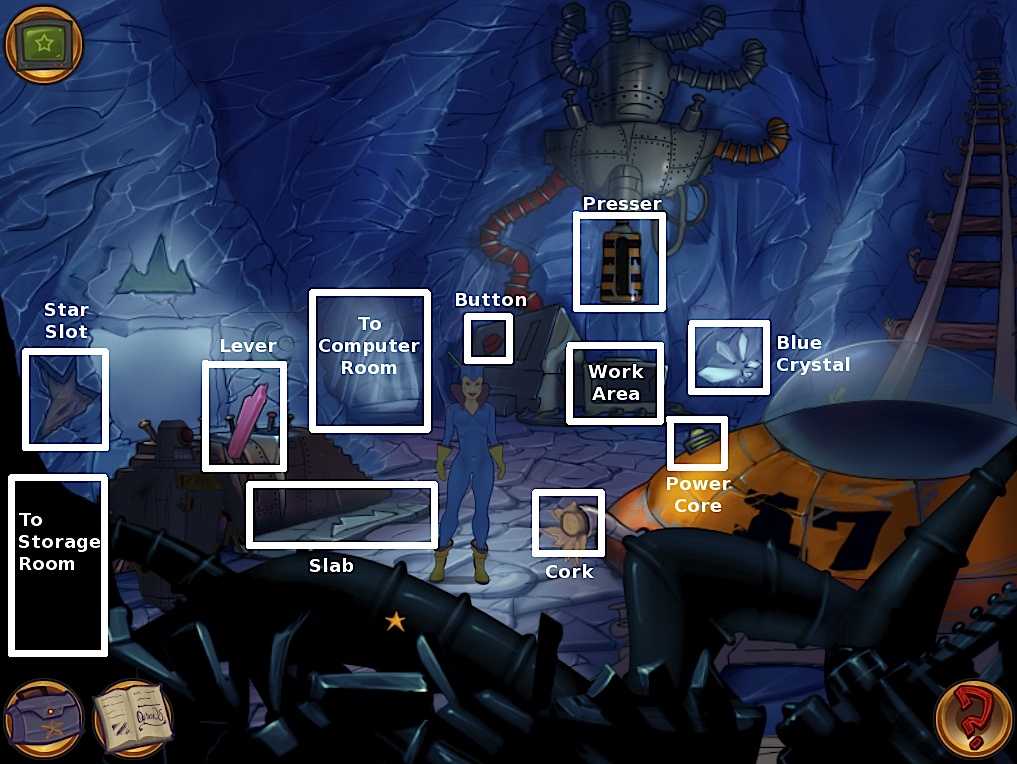
Map of the lab at Schminkell 7.
Restart the power
Head right to the replicator. Note that it doesn't work because there is no power. Also note the mud near the stairs, in the lower left corner. Take some mud.
Screenshot
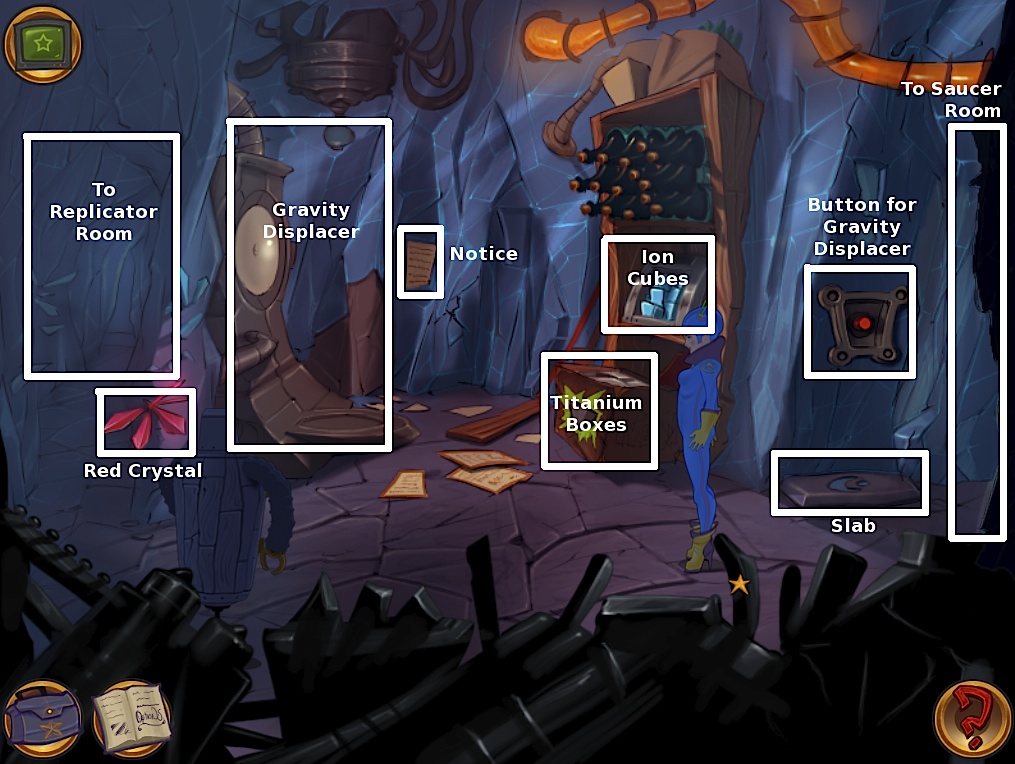
Head left to the storage room. Read the note in the back of the room about the gravity displacer. Look at the gravity displacer, ion cubes, titanium boxes, button, and slab. Take an ion cube and a titanium box.
Screenshot
Head right to the saucer room. Note the computer with the lever, the pressing machine, and the saucer.
Take the fuel canister from the saucer, and the cork from its exhaust pipe.
Screenshot
Head right into the computer room. Examine the two computers and the generator.
Use the ion cube with the hatch for fuel.
Use the cork from the saucer with the button hole on the generator, then use the hammer with the cork to start the generator.
Screenshot
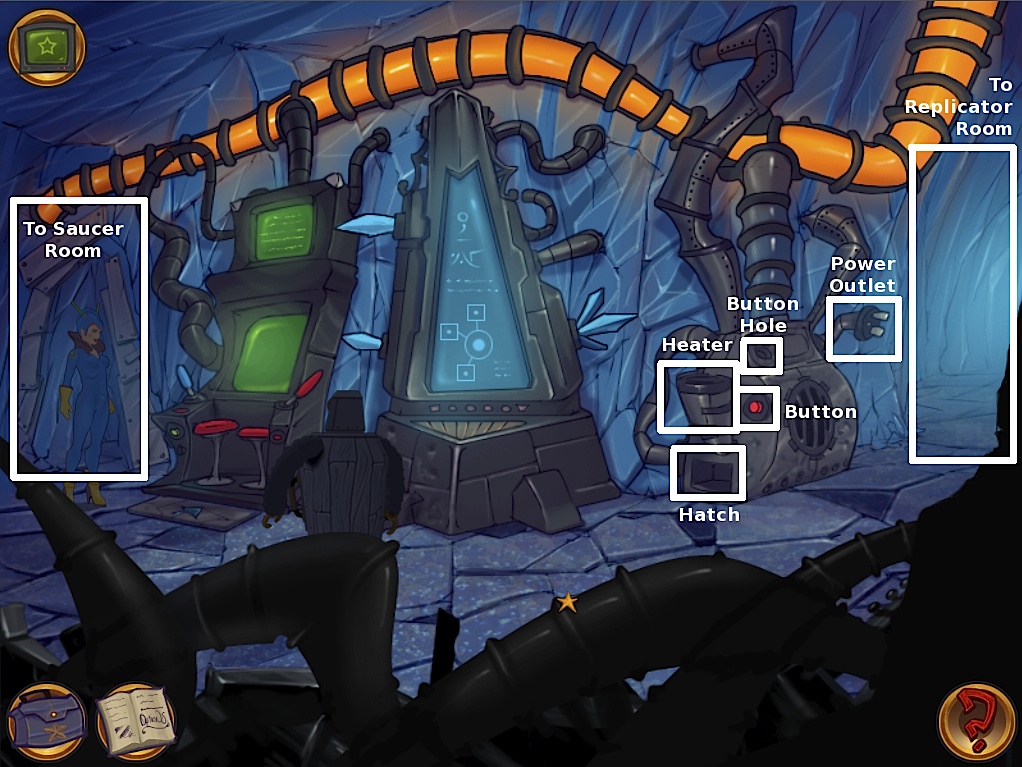
Find the computer panel
Recall that the computer terminal in the saucer room was missing a shape.
Head back the replicator room. Note that the machine works, but one of the crystals doesn't work. Take some mud from near the stairs if you haven't already.
Screenshot
Head up to the bridge. Examine the strange fence. Use the star-shaped piece to take it.
Screenshot
Go to the saucer room. The star-shaped piece won't quite fit in the slot.
Use the star-piece with the work area for the pressing machine. Don't smash it with the machine; instead, use the hammer with the work area to break off a piece of the star.
Put the piece in the slot near the terminal; it doesn't seem to work quite right. Take it back.
Screenshot
Go to the storage room. Take another ion cube and a titanium box if you haven't already.
Screenshot
Put the clay from the replicator room into the box, then put the star-piece in.
Go to the computer room. Use the box with the heater on the generator and press the button. Take the box. You now have a star-shaped mold.
Screenshot
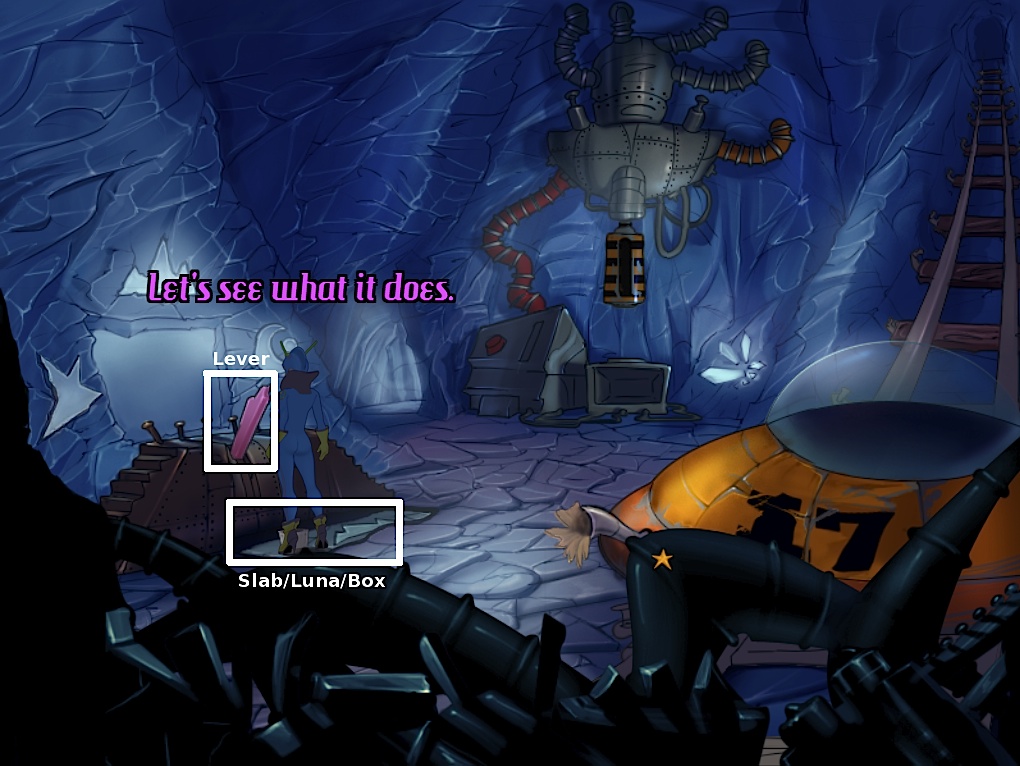
Go to the saucer room. Use the ion cube with the work area for the presser, then press the button. You now have an ion plate.
Use the mold with the presser (not the work area). Use the ion plate with the work area, then press the button. You now have an star-shaped ion computer panel.
Use the star panel with its slot on the terminal. It works! But if you throw the lever, nothing happens. Looks like you'll need some help.
Screenshot
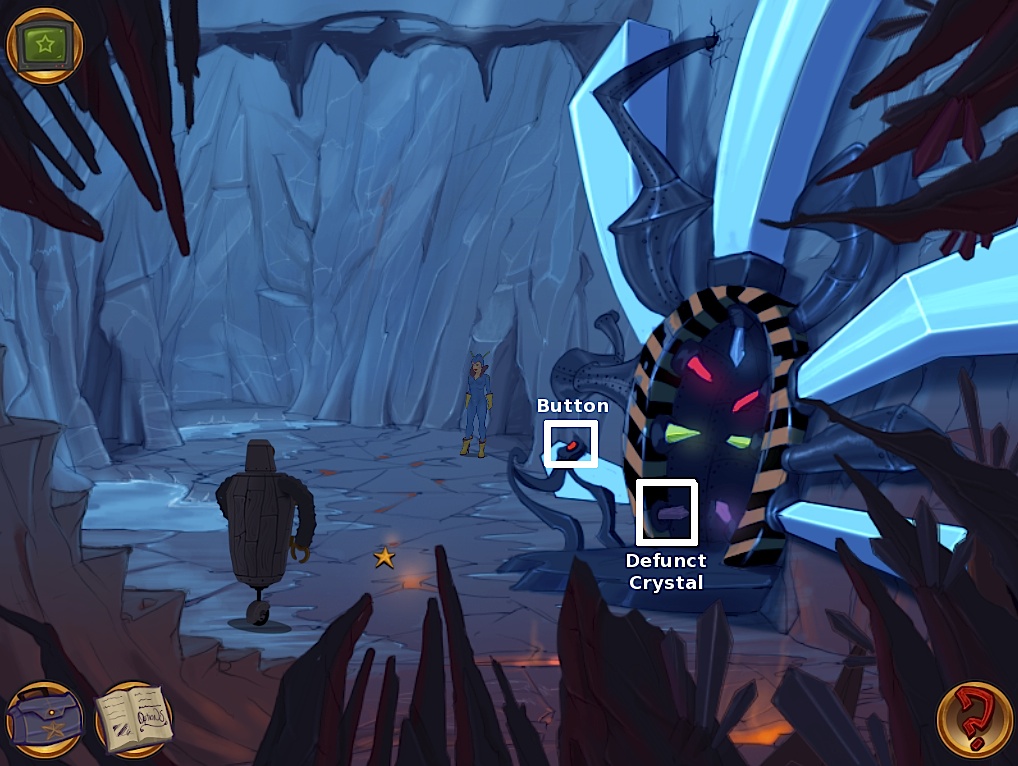
Make a clone
If you've looked at the replicator machine, you know that it has a busted crystal. Take the crystal. Take some more mud while you are in the replicator room.
Screenshot
Go to the storage room and take another titanium box. Put the mud in the box, then put the defunct crysal inside.
Screenshot
Go to the computer room. Use the box with the heater on the generator and press the button. You now have a crystal mold.
Screenshot
You can make a new crystal out of other crystals in the lab. Find other crystals in these locations:
Yellow crystal: bridge
Red crystal: storage room
Screenshot
Blue crystal: saucer room
Screenshot
Use your hammer with the crystal to take it. You only need two colored crystals, based on the color of the crystal you need to replace.
Red + Blue = Purple
Blue + Yellow = Green
Yellow + Red = Orange
I'm pretty sure that the broken crystal is purple every time you play, so you should only need to collect the red and blue crystals.
Go to the saucer room. Use one of your crystals with the work area for the presser machine and press the button. Do the same with the other crystal.
Put both colors of crystal dust into the mold.
Screenshot
Go to the computer room. Use the mold with the heater and press the button.
Go back to the replicator and replace the crystal.
Use the ashes you've been carrying around with you with the replicator, then press the button.
Screenshot
It's Danny, the reluctant space pirate from Episode One! If you want you can switch to Danny and have him ask Luna about where he is and what the situation is. You'll learn about the planet Varion. Switch back to Luna.
Open the hatch, fix the saucer
You should have encountered three floor slabs in the lab: one in the storage room, one in the saucer room, and one in the computer room. You can't trigger most of them because you are not heavy enough. Go to the storage room to fix this.
Use Rowboat with the gravity displacer and press the button. Rowboat is now very heavy.
Take another titanium box and use it with the gravity displacer. Then press the button.
Screenshot
Use Rowboat with the now-heavy box so he picks it up.
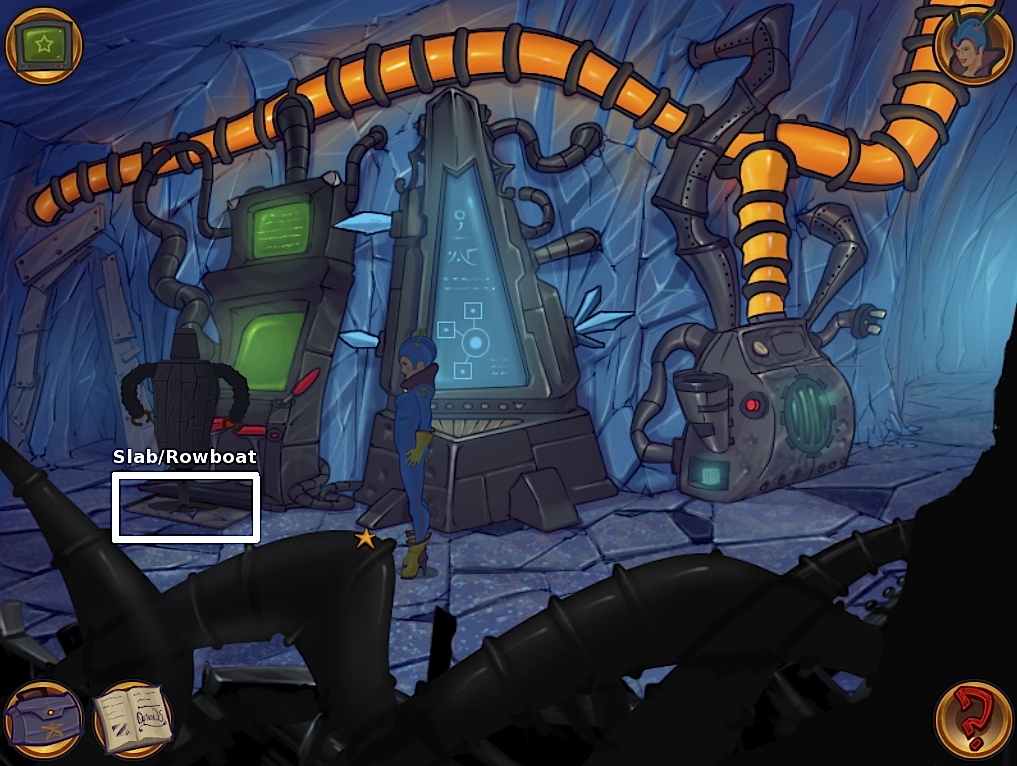
Go to the saucer room. Use the box with the slab, and Rowboat will place it for you.
Go to the computer room. Use Rowboat with the slab in front of the computer on the left so he stands on it (if you need him to move again, use the slab again).
Screenshot
Switch to Danny. Go to the storage room and use the slab to stand on it.
Screenshot
Switch back to Luna. Go to the saucer room and use the switch. Your weight combined with the box is enough to trigger the slab, and Danny and Rowboat are triggering the other two. The hatch is open!
Screenshot
If you haven't already, take the fuel cannister from the saucer. Go to the computer room and use the cannister with the power outlet on the generator to charge it.
Go to the saucer room and use the charged cannister with the saucer. Then use the saucer. You are now ready to go to Varion.
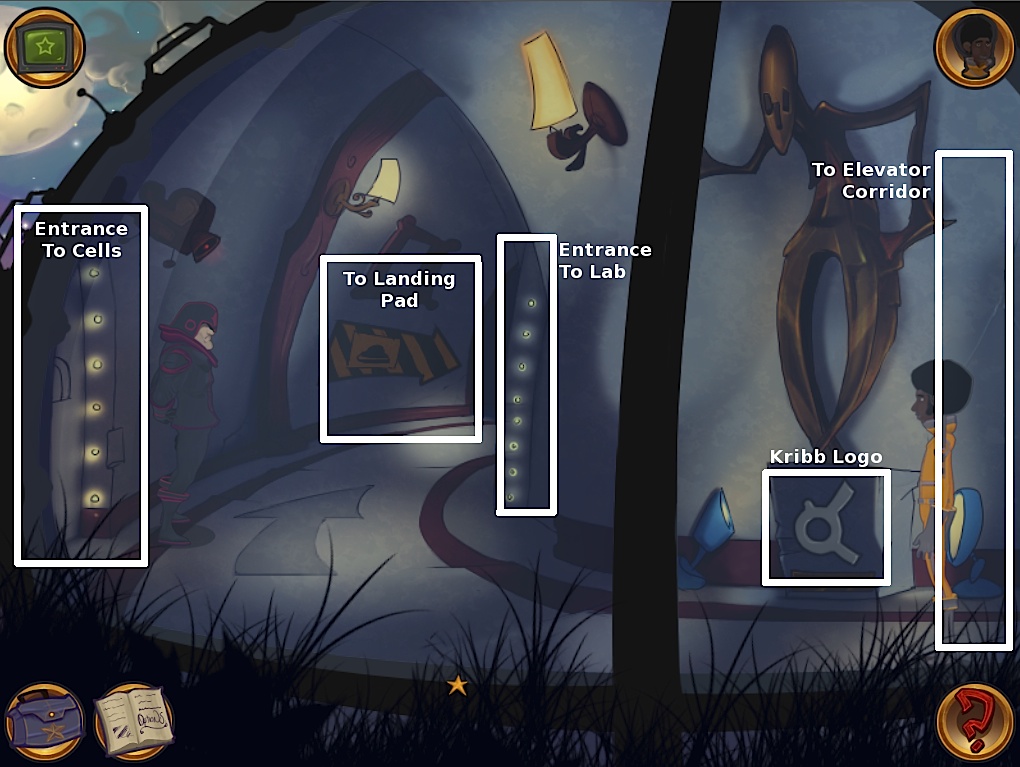
Varion
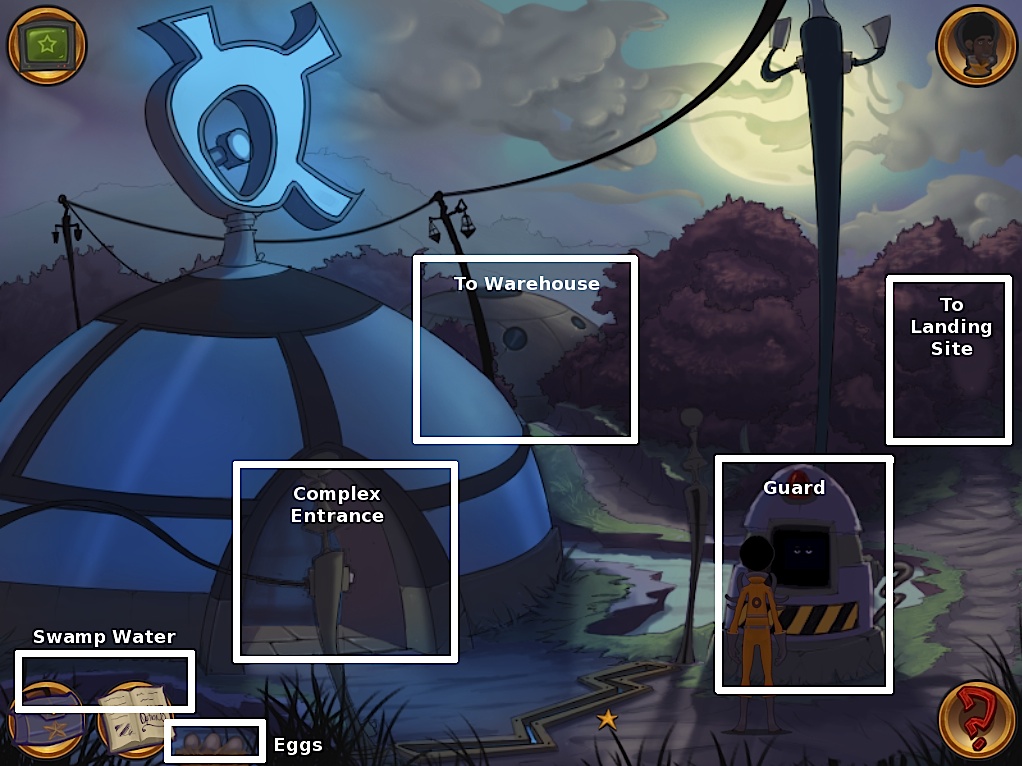
You need to rescue Kaptain Brawe and the scientists by infiltrating the complex via the warehouse.
Danny is the only one who can explore without raising alarm, so you'll be playing as him for the first few levels.
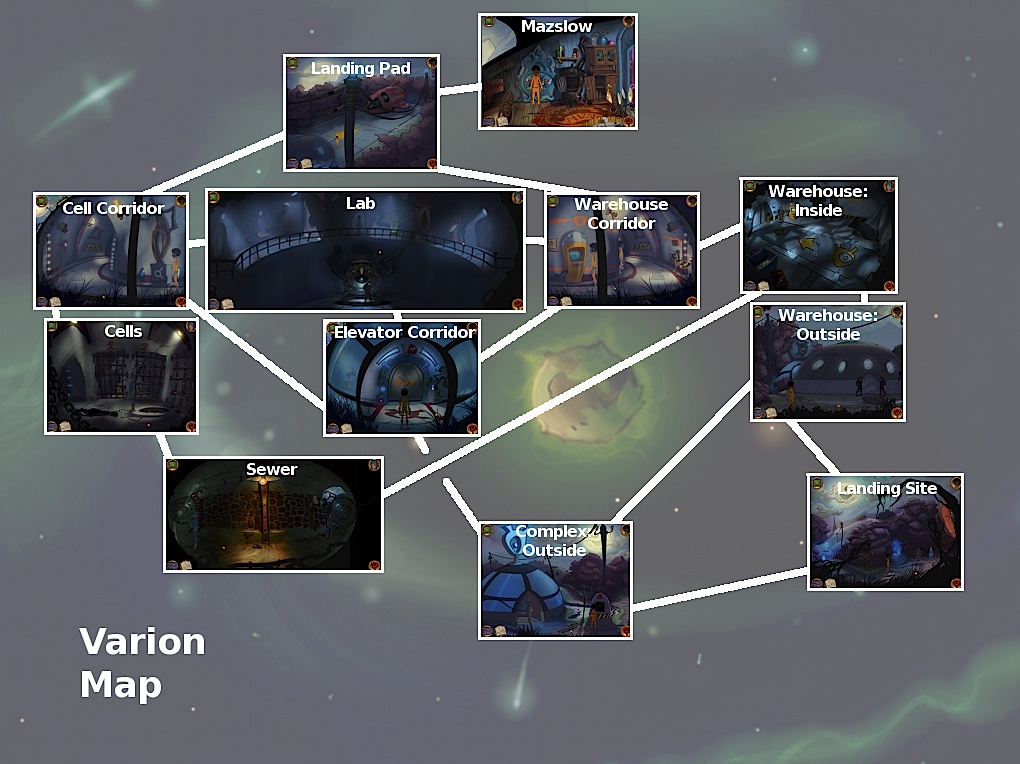
Map of the facilities at Varion. Note that not all pathways will be accessible at first.
Infiltrate the warehouse
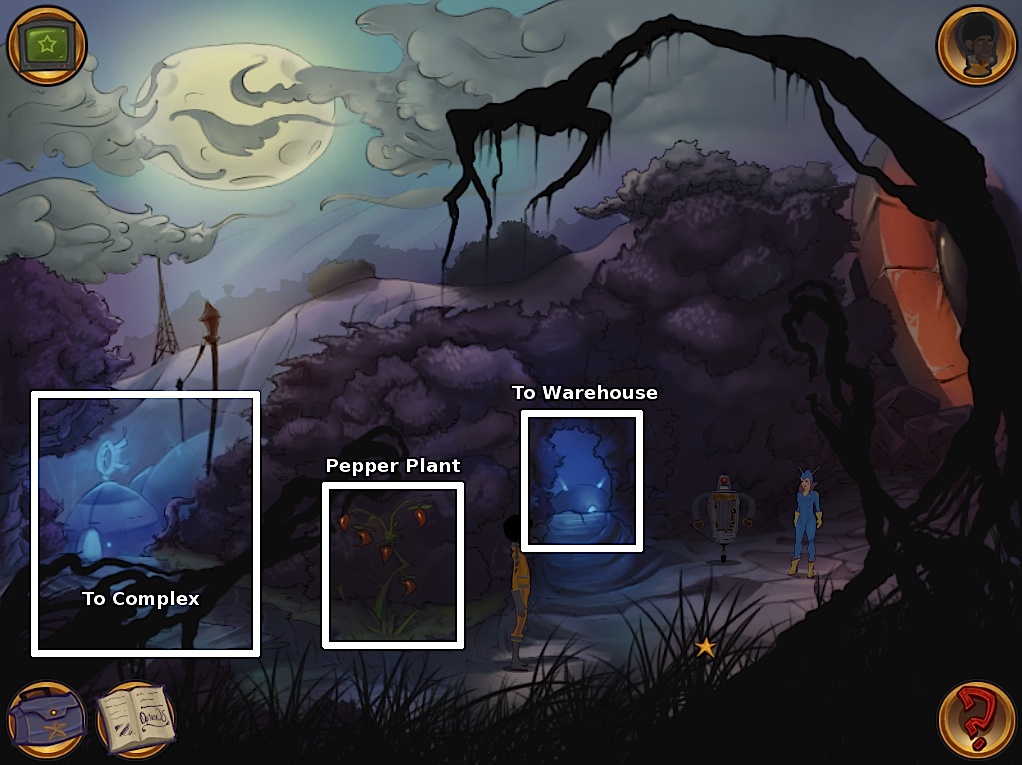
Take a look at the plant in front of you. It burns! Take a pepper.
Screenshot
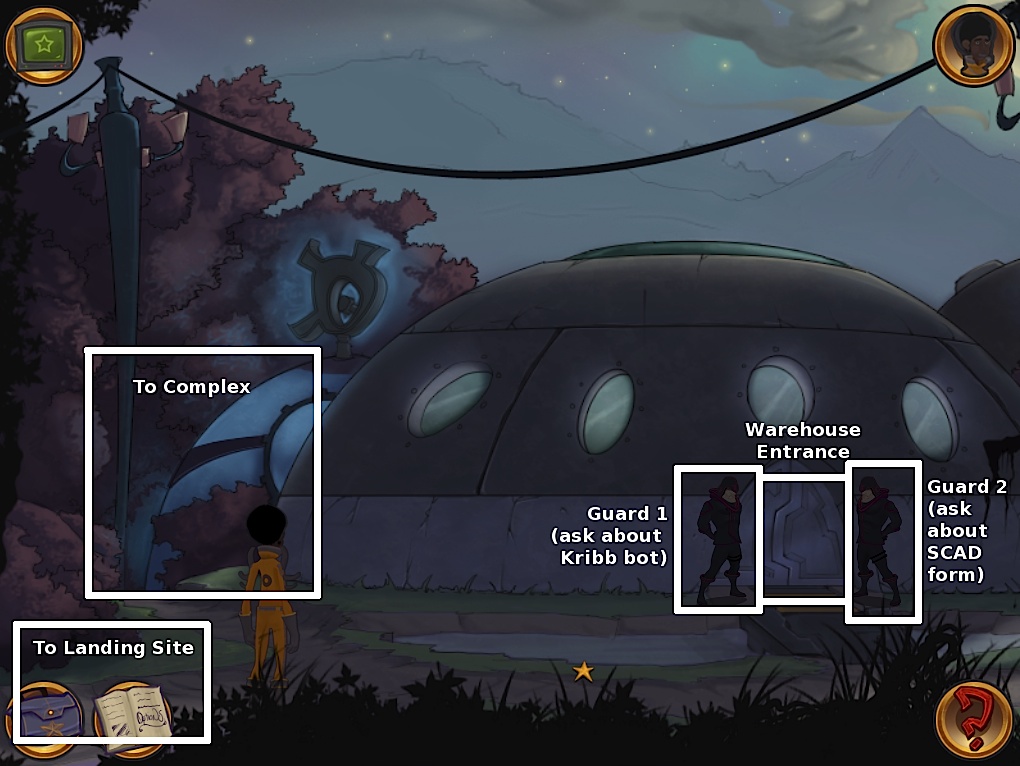
Go up to the warehouse. Talk to both guards individually to find what you need to get in: a Kribb Cargo Bot and a SCAD form.
Screenshot
Go left to the entrance of the complex and talk to the guard, being sure to exhaust all conversational options.
Screenshot
Learn several things: The guard authorizes SCAD forms, the clones are amok, the clones have headaches. Also, you need an ID to be allowed inside.
You have an ID, so give it to the guard. Admit that you are a clone, and he'll let you inside, though he thinks there is something fishy about your ID.
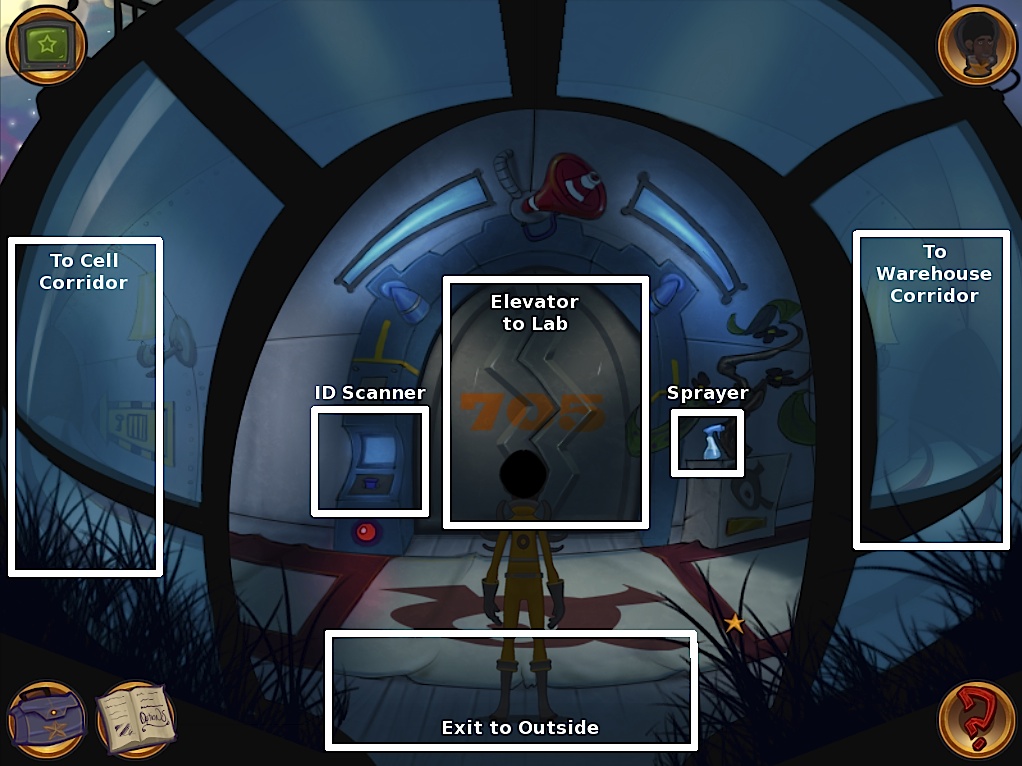
Enter the complex. If you try to use your ID with the elevator, it won't work. Take the spayer near the plant.
Screenshot
Go right to the warehouse corridor. It's you (sort of)! After the initial encounter, talk to your clone again, being sure to exhaust all conversational options.
Learn several things: The clone has his own ID, he's "better" than you, and he has a permanent hangover for complicated reasons. He'd be very grateful if you could cure his headaches.
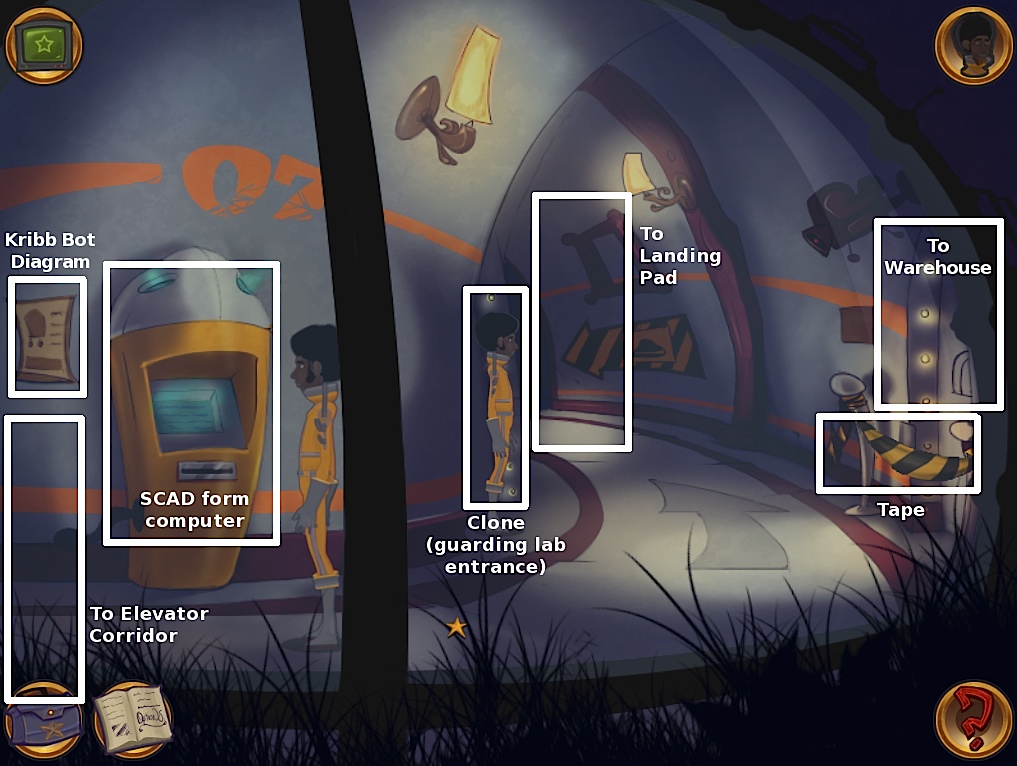
Use the computer to get an unsigned SCAD form.
Screenshot
Look at the diagram next to the computer, which delineates the standards for a Kribb Cargo Bot.
Screenshot
Try to take the striped tape blocking the warehouse entrance; your clone is not yet in the mood to let you.
Go back outside the complex. If you try to get the guard to sign the SCAD form, he balks because of your fishy ID.
Go right to return to the landing site. Talk to Luna about your plans. She happens to know a good hangover cure.
Helping the clone
You need water, soap, and an egg, mixed and boiled. Go to the guard post outside the complex. Note the water and eggs. You can't reach the eggs, and you have nothing to carry the water in.
Screenshot
Enter the compound, go to the right, then go up to arrive at the landing pad. It's the Mazslow!
There's a branch hiding in the trees below. Take it.
Screenshot
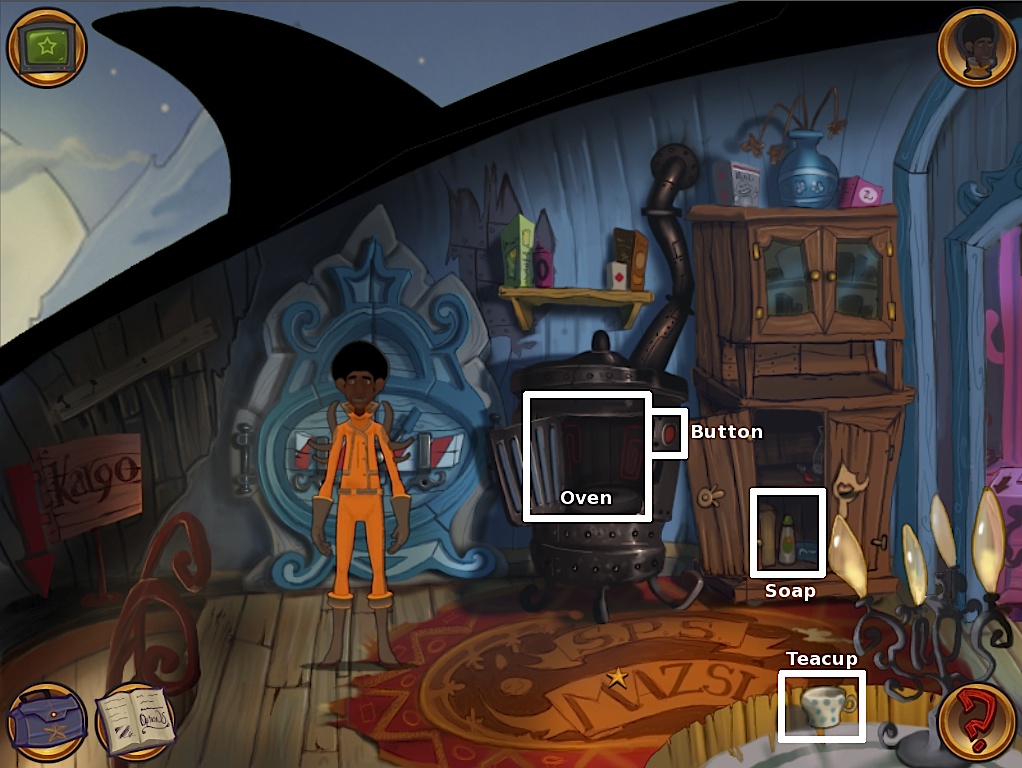
Enter the Mazslow. Take the teacup from the table in the lower right, and the soap from the open cupboard to the right (if you try to do this before this mission, Danny will voice his reluctance to steal).
Screenshot
Go back to the front entrance of the complex. Use the cup with the swamp water to collect it.
Use the branch with the eggs to bring them closer to you. Take an egg and use it with the cup.
Screenshot
Add soap to the cup.
Head back to the Mazslow. Put the cup in the oven and press the button to boil it.
Go down to the warehouse corridor. Give the cup to the clone. He leaves and gives you his ID.
Now that your clone is gone, you can explore the lab through the door he was guarding, if you'd like, but there is nothing to do there yet. Take the tape in front of the warehouse door instead.
Go to the elevator corridor. If you use the new ID with the ID panel, you get another view of the lab, but again, there is nothing to do yet.
Go left to the cell corridor. Talk to the guard to learn that there is an important interrogation going on inside.
Take the Kribb logo from the base of the statue.
Screenshot
Go outside the complex. Give the guard the SCAD form to sign.
Go back to the landing site. Use the tape and logo with Rowboat to disguise him as a Kribb bot.
After the cutscene, go up to the warehouse and enter.
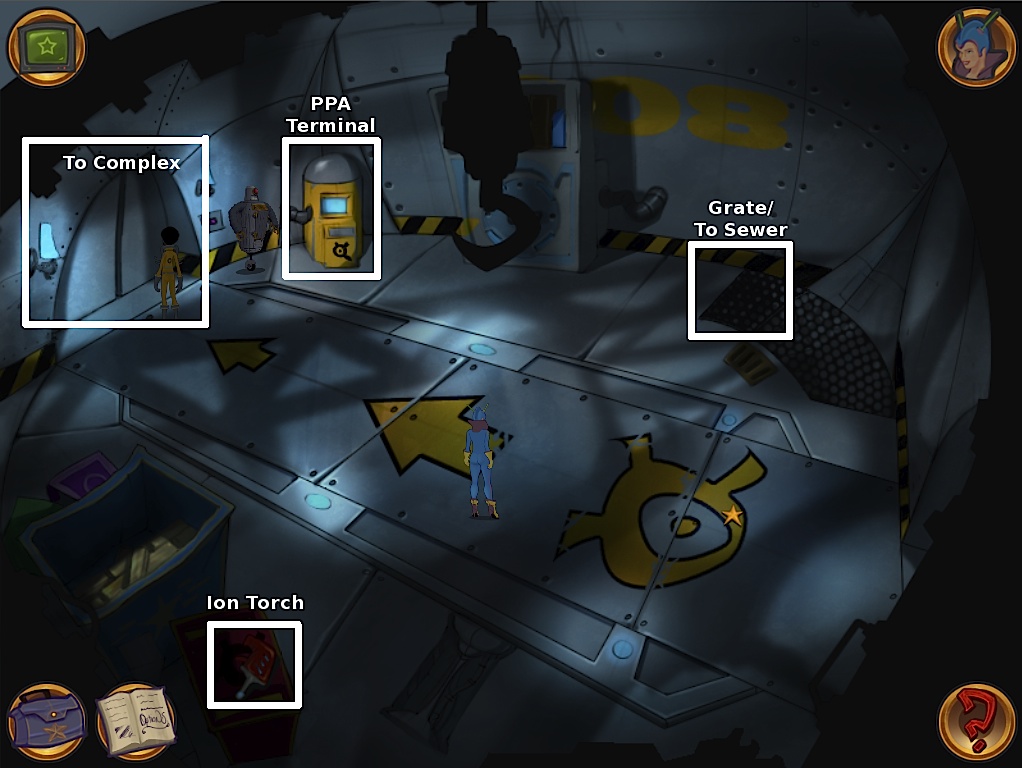
Rescue Kaptain Brawe
You are in the warehouse. Note the terminal, which says "PPA."
Switch to Danny. Combine the pepper from the plant near the landing site with the spray bottle from the elevator corridor. Have Danny give it to Luna.
Switch to Luna. Take the ion torch from the bottom of the screen and use it with the grate in the top right corner.
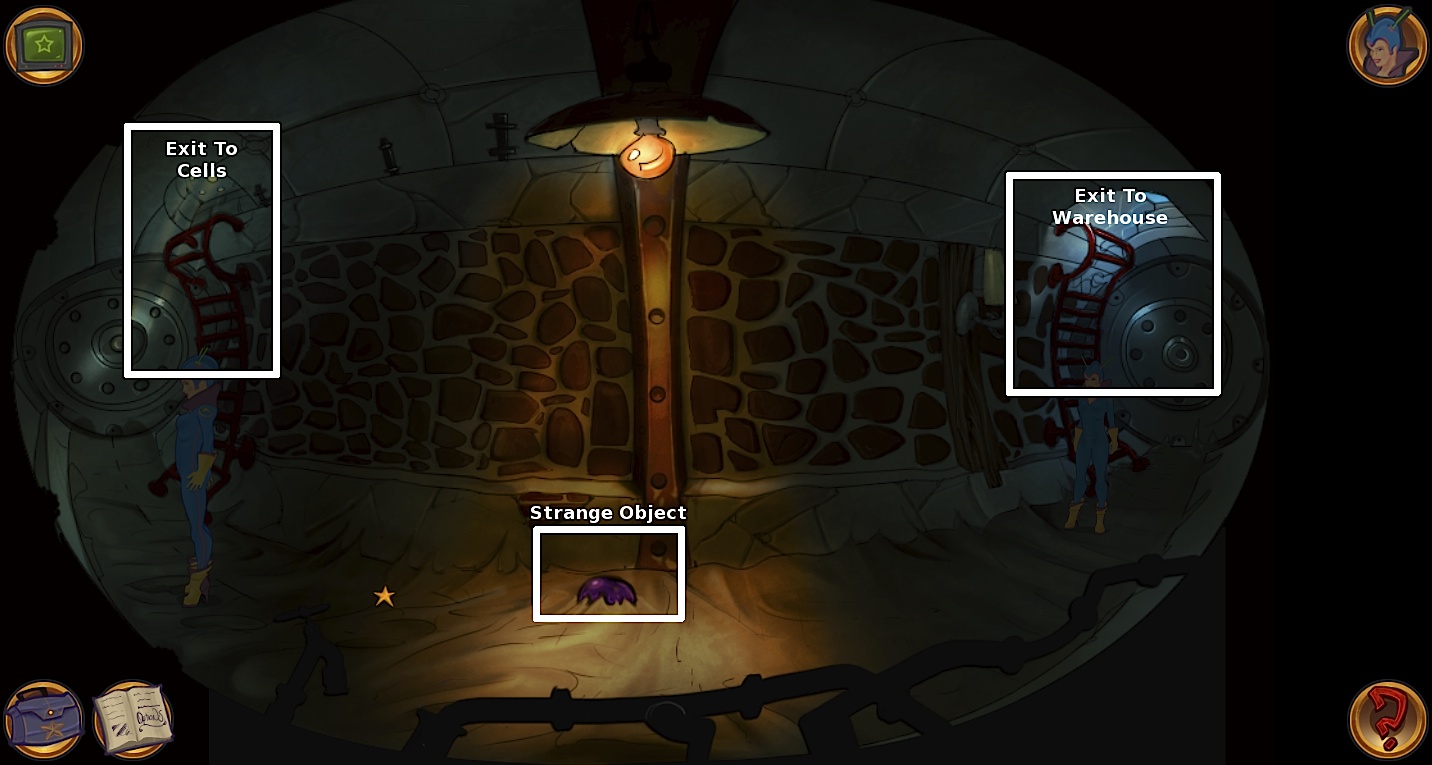
Use the grate to open it, then enter the sewer.
Screenshot
Luna doesn't want to pick up the strange purple object. Instead continue left. If you try to exit through the manhole on the left, you find that someone is standing on it.
Screenshot
Switch to Danny. Go to the cell corridor and tell the guard you have important information. SHE leaves the cell to talk to you.
Switch to Luna. You can now enter the cells.
Give the pepper spray to Brawe. SHE returns, but you escape in time.
Switch to Brawe. Use the pepper spray with SHE.
Switch to Luna. Go up the cells again.
Use SHE to get the keys to the cell, then use the keys to open the cell doors.
Screenshot
Stop the evil plan
Luna can pose as SHE, so leave the cells through the main door. Cross the corridor and enter the room on the right.
Screenshot
It's yet another view of the lab. Examine the replicator maching, which is labeled "Will Inducing Rotoscope." Examine the terminal, which requests a "strong will sample."
Screenshot
Go back to the cell. Ask Albert and Robert about PPA and the "Will Inducing Rotoscope."
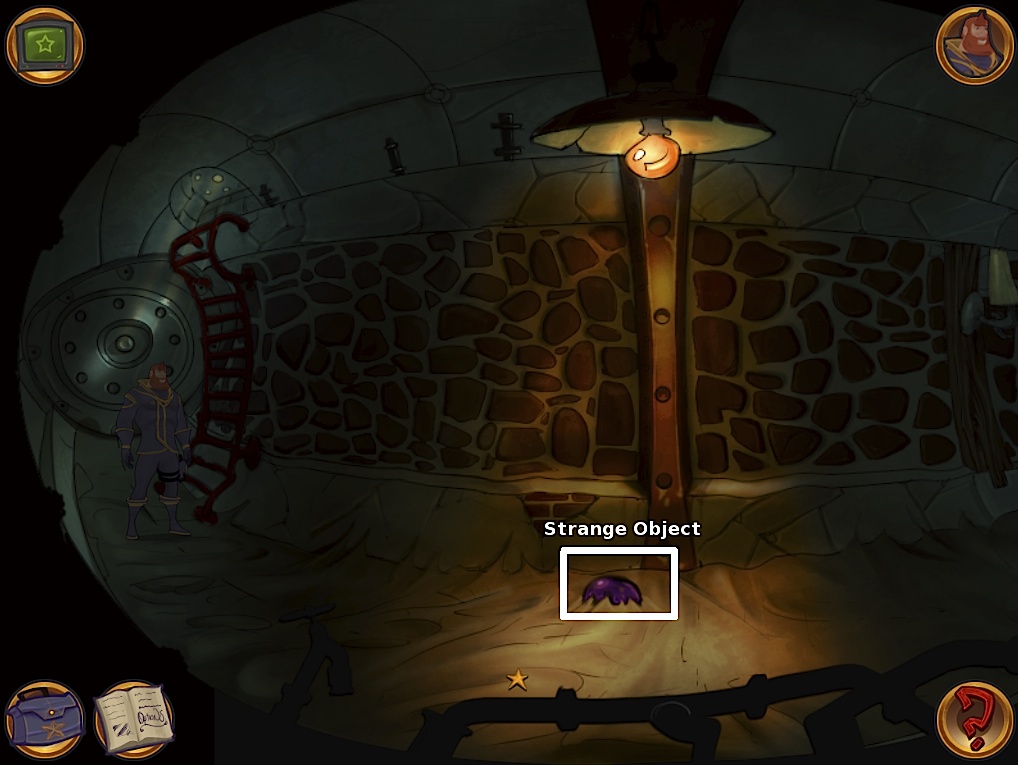
Switch to Brawe. Exit through the sewers. Brawe is much more insouciant about taking the strange object, so have him pick it up.
Screenshot
Continue right and exit to the warehouse, then enter the compound through the doors on the top left. Cross the hall to enter the lab.
Use the strange object with the terminal. This wipes the will of the clones.
Screenshot
Switch to Luna. Exit through the sewers and go to the warehouse.
Use the PPA terminal to get a Strong Will profile. Answer the questions as follows.
Question 1: 2
Question 2: 1
Question 3: 1
Question 4: 3
Question 5: 2
Head back to the cells via the sewer, then exit the cells through the main door and enter the lab through the door across the hall.
Use the Strong Will profile with the terminal.
Switch to Danny. Enter the lab through the elevator and examine the terminal, which requests a "Pacifistic sample."
Screenshot
Go to the warehouse. Use the PPA terminal to get a Pacifist profile. Answer the questions as follows.
Question 1: 3
Question 2: 2
Question 3: 1
Question 4: 3
Question 5: 3
Go back to the lab via the elevator. Use the Pacifist profile with the terminal.
Schminkell 7 again
Map of the lab at Schinkell 7.
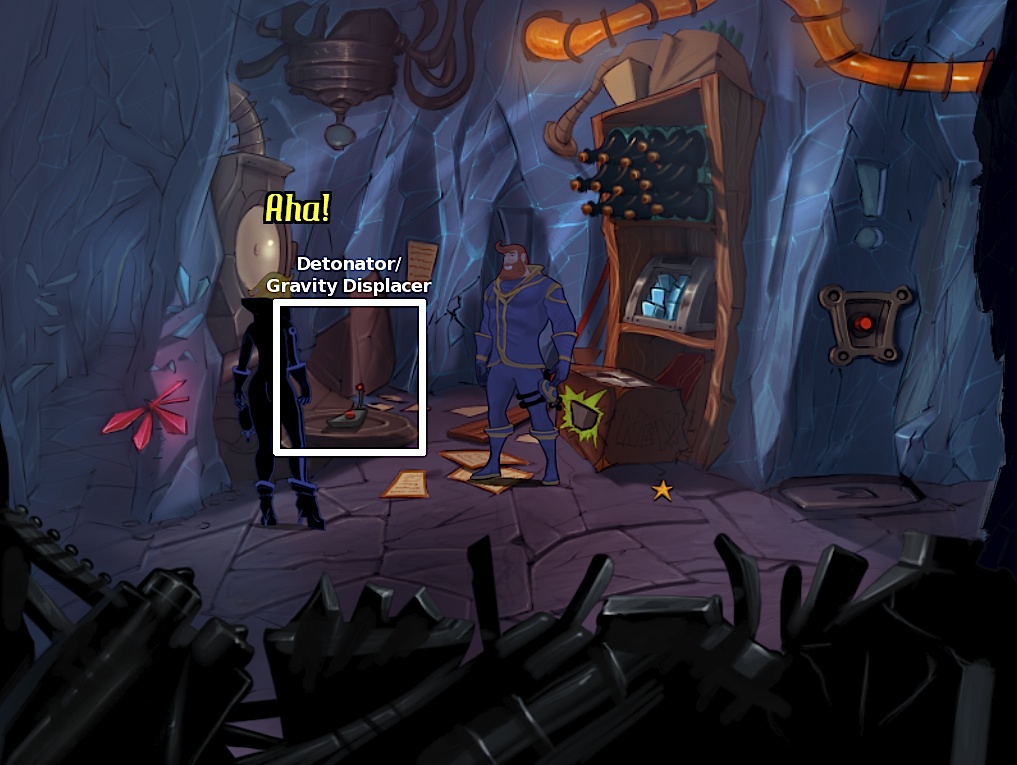
Outrun Kralek, who wants the detonator.
Go to the storage room. Use the detonator with the gravity displacer to trap Kralek.
Screenshot
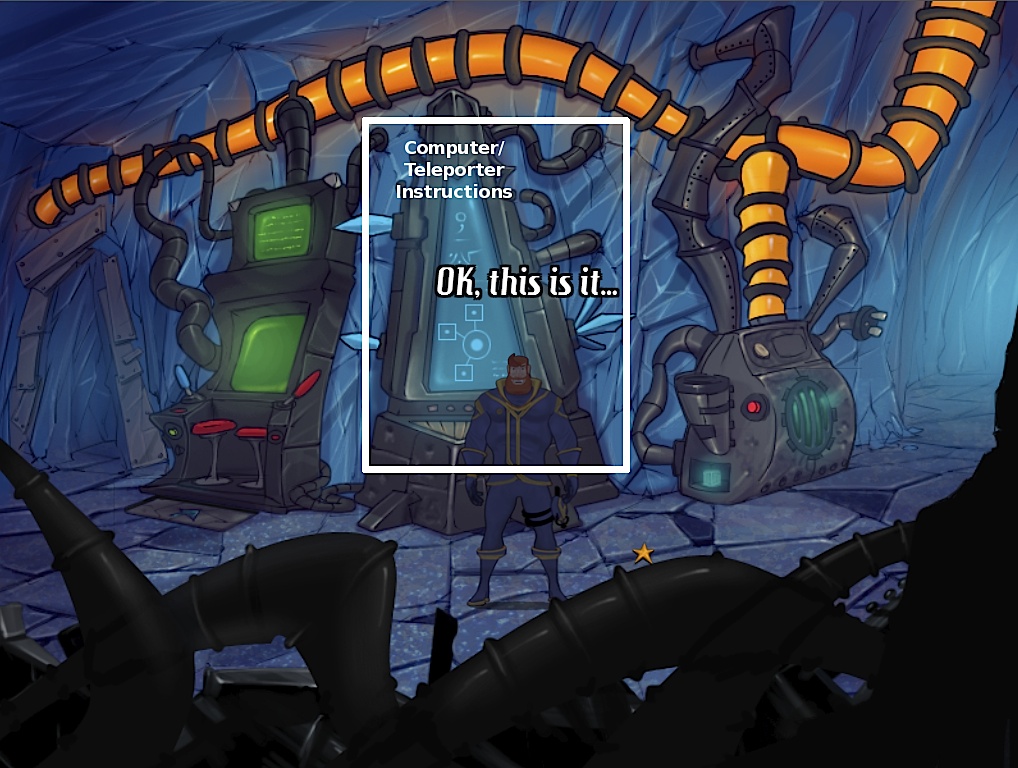
Go to the computer room. Read the instructions for teleporter suits on the central computer.
Use the computer to send Kralek away.
Screenshot
THE END!
Posted by: Mike |
February 16, 2011 5:50 PM
|
February 16, 2011 5:50 PM