
Kotatsu Escape
![]() If you were in Japan, to relax you might tuck your legs beneath a Kotatsu, one of those lovely table frames with a built-in heater and a quilt, then open your laptop and play a room escape game. After all, this is Japan, land of the room escape artists. But wait! The pleasing warmth from the Kotatsu combined with the lateness of the hour can mean dozing off, so you better go with a quick and easy escape like Tateita's Kotatsu Escape. Serendipity! Solve a few amusing puzzles, find the use of a few objects, and soon you will be out the door. Tateita has designed a cute, quick escape that shouldn't take more than a few minutes of your time, a great way to start or end a day. If there is any downside it is the lack of a changing cursor which might lead to some minor pixel hunting, a small complaint considering the entertainment this little gem brings. Sit down, power up, and let the warmth of Kotatsu Escape sooth away the stressful day.
If you were in Japan, to relax you might tuck your legs beneath a Kotatsu, one of those lovely table frames with a built-in heater and a quilt, then open your laptop and play a room escape game. After all, this is Japan, land of the room escape artists. But wait! The pleasing warmth from the Kotatsu combined with the lateness of the hour can mean dozing off, so you better go with a quick and easy escape like Tateita's Kotatsu Escape. Serendipity! Solve a few amusing puzzles, find the use of a few objects, and soon you will be out the door. Tateita has designed a cute, quick escape that shouldn't take more than a few minutes of your time, a great way to start or end a day. If there is any downside it is the lack of a changing cursor which might lead to some minor pixel hunting, a small complaint considering the entertainment this little gem brings. Sit down, power up, and let the warmth of Kotatsu Escape sooth away the stressful day.


Walkthrough Guide
(Please allow page to fully load for spoiler tags to be functional.)
Kotatsu Escape Walkthrough
General Information
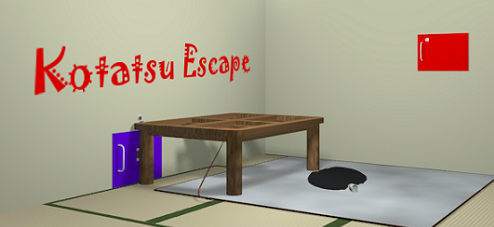
There are only two views, the door and the Kotatsu.
Push the button labeled "Move the Kotatsu" to...move the kotatsu.
There is only one ending.
Good luck!
Exploration
You begin facing the Kotatsu, which is a table frame with a heating unit underneath. Note the cord going from the table to the floor. Click on the cord for a close up.
You can see the on/off switch for the heater. There is also a red key on the floor by the table leg, take it and back up.
On the left wall is a purple safe behind the kotatsu frame. Click on it for a close up and you will see that the kotatsu is, for some reason, bolted to the wall. Back up.
On the floor mat to the right of the kotatsu is a large black stain, click on it for a close up.
You can see the word "start" just at the edge of the stain. You can also see the bottle of ink that caused the stain.
Hover your cursor over the bottle of ink, you will see that it is disappearing ink, you just need to heat it up. Back up.
On the wall to the right is a small red safe, click on it for a close up.
Looks like we need a key. Back up.
Turn right (or left, it doesn't matter, just turn around to face the door).
You are now facing the door, which is locked.
To the left of the door is some sort of panel. Click on it for a close up and you will see some sort of device under glass. The glass is locked with a padlock with a green key hole. Back up.
Underneath the panel is an electrical outlet.
To the left of the panel is a yellow door above a small bookshelf. Click on the yellow door for a close up.
The lock on this little door involves four buttons in a square pattern. Back up.
Click on the bookcase below the yellow door for a close up. Hmmm, this bookcase has four cubbies, and each one has a notch in a different corner. That might be significant...
Back up and turn to face the Kotatsu. Time to solve some puzzles!
The Red Safe
Click on the red safe to the right of the kotatsu for a close up.
This little door needs a key. Good thing we picked up the red key underneath the table.
Use the red key on the lock and open the door.
Inside you will find a wrench, take it.
You will also see a clue, the numbers 1 through six, each in a box with a notch in a corner.
Back up.
The Yellow Safe
Turn around to face the door.
Click on the yellow safe for a close up. Click again to pull up the buttons.
How do we figure out which buttons to push in which order?
There are two clues for this puzzle, the numbers found in the red safe and the bookcase below this safe.
You may have noticed that in the bookcase, each of the four cubbies had a notch in a different corner.
The numbers in the red safe also were in boxes with notches in the corners.
You need to match up the numbers with the notched cubbies.
For instance, the number 1 had a notch in the upper right. In the bookcase, the cubby with the upper right notch is the one in the lower left.
Number 2 had the notch in the lower right, that matches up with the cubby on the upper left.
Number 3 had the notch in the lower left (as does number 4). The cubby with the lower left notch is in the lower right.
Number 5 has the notch in the upper left, which matches the upper right cubby.
Number 6 has the notch in the lower left, which indicates the lower right cubby.
Therefore the pattern is: lower left, upper left, lower right, lower right, upper right, lower right.
Push the buttons in the correct order you should hear the click of the safe unlocking.
Click on the safe to open it. Inside is an electrical cord.
Take the cord and back up.
The Kotatsu
Click on the electrical outlet below that strange panel to the left of the door.
Use the electrical cord on this outlet, this plugs in the kotatsu.
Back up and turn around.
Click on the cord on the kotatsu for a close up (where you found the red key before).
Once in close up you click on the switch to turn on the Kotatsu. Do that and back up.
Click on the purple safe for a close up and use the wrench on the nuts holding the kotatsu to the wall then back up.
There is now a button with Japanese writing inside above the kotatsu. English lettering below says "move the kotatsu".
Click on the button to move the kotatsu. Note that the heat from the table has erased the ink blot.
Click on the button again to move the kotatsu to the wall. Click on the floor where the ink blot was for a close up.
You can now see a shape that has 12 sides and 12 lines. The number 12 is above the upper line.
Where we saw the word "start" before we now see a red line that goes from point to point on the shape.
What does it mean?
Imagine the shape is a clock face. The number 12 indicates the "top" of the clock, and each line goes to one of the numbers on the face.
Trace the path of the red line from start to finish, each point where it hits represents a number on the clock face.
The line starts at the 7 o'clock position, then goes to the 4 o'clock position, then to the 8 o'clock position, and finishes on the 1 o'clock position.
That gives us a code of 7481.
Back up from the close up of the floor.
Move the kotatsu again and click on the purple safe for a close up.
Enter the four digit code you just figured out from the floor clue.
Click on the door to open it and take the green key and the note.
The note has a white capital E, a lowercase black g, and a white uppercase G.
Back up and turn right.
Getting Out
Click on the panel to the left of the door.
Use the green key on the padlock.
Click on the glass panel to open it.
Click on the red panel for a close up.
There are six white switches here, along with the word EScaPe.
Click on one of the switches. Notice that in the down position it is black.
So what's the code?
The is a combination of the EgG note and the word EScaPe.
Note that some letters are capitalized, some are lowercase.
Also notice that in the note the uppercase letters were white, the lowercase letter was black.
That would indicate that uppercase means white, lowercase means black.
The word EScaPe has six letters, and there are six levers.
The pattern for the levers is up, up, down, down, up, down (from left to right).
Move the levers in the positions indicated by the clue.
You should hear the door unlock.
Back up and click on the door to open it.
Click on the open doorway to escape.
Congratulations!!!!
Thanks to grinnyp for the walkthrough!
Posted by: Mike |
February 6, 2013 3:35 PM
|
February 6, 2013 3:35 PM