
Monkey GO Happy Roundup 14
By Arceus
|
May 16, 2018
Comments (1) | Views (6,370)
 Time for another round of monkey madness: read below for the latest batch of puzzles.

First, you're going to explore a temple. But in order to do that, you'll have to diffuse some laser-
type beams!
A chieftain of some sort is waiting outside, and he looks like he won't be happy until you find
him his headband and 20 feathers! Run along and collect them if you dare.
Old McMonkey had a farm...just kidding, but if he did, it might look like this stage.
And witch predicament is our monkey in for this scene? You'll have to find out what the
tower has in store for you.


Monkey GO Happy Roundup 14 (Stage 177–180)
Stage 177: Number Temple
Exploration
The man outside this place asks for a gem that's missing from his turban. The doorway is surrounded by two columns which support a triangular button, and those are then surrounded by an arch carved into the walk with various clues and compartments carved into it. One of them is a rectangular tablet which seems to have even more numbers carved into it. The huge slab on the right is too heavy to move, but you can shift the rock on the left. Pick up all 3 Mini Monkeys.
Enter the doorway, and you find two humanoid sculptures firing red and yellow lasers between their faces, blocking your way to the door ahead. However, you can still look at the four stone faces which open their jaws really wide, and the banner on top with four letters. There's also a compass rose on the left wall (but not pointing the usual way), a stone slab in the left corner and a hexagonal hole in the ground. Pick up 2 Mini Monkeys.
Inverted
Use the number clues from the tablet to unlock the marked compartments outside.
The scale marking on the left of the rock tells you that 0 is the top position (mouth closed) and 4 the bottom.
After inverting the tablet clue, you find that the numbers read 4321, 2332, 1441.
So click each face until the mouth is shut, then click them 4, 3, 2, 1 times, then push the triangular button outside to open a compartment.
Repeat with each number on the clue until all three compartments are open. Take 3 blue marbles from them.
Removal
Insert a blue marble into each statue to deactivate the lasers, then place the last marble in the door.
Then use the clue above the door to unlock it.
The dashes in the clue are actually minus signs! So the code for the door is 4000−800−60−7=3133.
Close the mouths on each face, then click them 3, 1, 3, 3 times, then push the marble on the door to open it.
Exploration 2
The pathway opens into a small cavern with holes on the wall and another stone slab on the floor. Above the ceiling, there are three larger round holes and a clue. Pick up the sledge hammer and 2 Mini Monkeys.
Smash
Use the sledgehammer to break the stone slabs on each screen. You find another 3 blue marbles inside them.
Dot mania
Place the marbles in the small holes in the wall of the cave, then use the dot clues below them to unlock the panels.
The dots come in identical bunches of 1, 2 and 3.
So set each mouth to position 1, then push the marble on the left to open that panel.
Then repeat for 2 (center) and 3 (right). Pick up 3 eye ornaments and a Mini Monkey.
Vision
Place the eyes in the round holes in the cave ceiling, then use the clue above to solve the last puzzle.
The clue tells you to make the eyes face NE NW SE, and the compass clue tells you that those directions are towards the lower-left, lower-right, upper-left.
So click the eyes 7, 5, 1 times.
But that's not all! What are those dots above and between the letters?
They're actually really small 0s.
Which means you need to close each of the mouths.
The only button you can push is the triangular one outside, and pushing it makes a rumbling sound from inside.
So go back inside, where a pedestal rises from the hole in the floor so you can take a large box, a Mini Monkey, and 2 keys.
Double Unlock
Combine the box with each of the keys to get to the gem within.
Then give the gem to the man to finish the stage! The last Mini Monkey appears at his feet.
The bonus clue from this stage is (triangle with line across) = 4.
Stage 178: Feather Band
Exploration 1
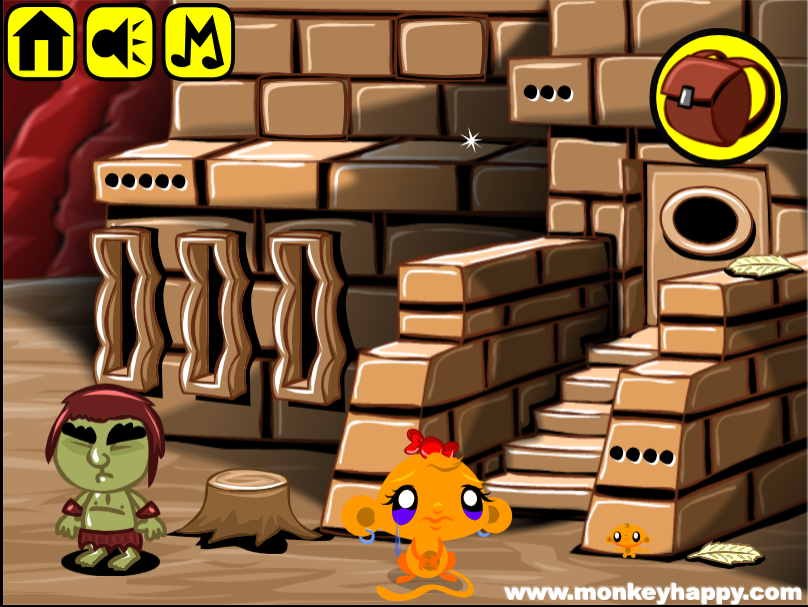
Let's start by picking up all the stuff this time: a saw, a lever, 6 feathers and 2 Mini Monkeys. Clearly those feathers aren't enough to satisfy the green-skinned man, who tells you to add 20 feathers to some sort of band. There's also a tree stump, three lever slots, a staircase leading up to a locked door with a hole, and rows of dots on three of the bricks.
Speaking of bricks, two of them near the top left look out of place, so click to remove them and take 2 levers.
Entry
Use the saw on the tree stump, then pick up the log and put it in the door.
Then place all three levers in the lever slots and use the dot clues to unlock the door.
The dot clues have (from left to right across the facade) 5, 3, 4 dots.
Since the lever slots only have 5 positions, the bottom position is 5 (and the top is 1).
So click the levers 4, 2, 3 times to move them to the correct positions, then click the log to open the door.
Exploration 2
Oh look, the giant statue's wearing the headband, how convenient! He's got dots under his eyes, and his mouth is a button. The locked doors on the left and right also have holes, and there are roman numerals beside them. Pick up 2 feathers and a Mini Monkey.
(You should now have 8 feathers and 3 Mini Monkeys.)
Deja vu
The dot clues under the statue's eyes have (1 1 1) and (2 2 2) dots.
So put all the levers in the top position, then push the mouth button to open one eye.
Then click all the levers once and then the mouth button again to open the other eye.
The eye sockets contain 2 orbs which are blue.
Roman
Place the orbs in the side doors, and then use the roman numeral clues to unlock them.
The roman numeral clue for the left door reads 1 2 5, and that for the right door reads 3 3 1.
So follow the same patterns on the levers and push the orbs to unlock the doors.
Exploration 3
Let's start with the left room. The statue's hand extends through the wall, and it has a formula and a compartment on it. The ceiling has a more complicated formula, along with a symbol that matches the one next to the left door. That left door, like all the ones before, is locked and has a hole. It also has a clue above it. Push the rock in the lower-right corner, then pick up 4 feathers and 2 Mini Monkeys.
Go over to the right room, which looks almost exactly the same except for the clues. Push the rock in the lower right, then pick up another 4 feathers and 2 Mini Monkeys.
Math
Work out the formulas on the statue hands to unlock the compartments there.
With the clues A=113, B=220, C=4, it's easy to work out that
A+B=333
B+B+C=444
So set the levers to each of those patterns and push the mouth button to unlock the hands. Take a total of 2 orbs (red) and 2 feathers from them.
More math
Place the red orbs in the remaining doors and do the remaining calculations to unlock them.
The same clues (A=113, B=220, C=4) let you work out that
B−A+C+C+C+C=123
B+B+B−A−A−A=321
So set the levers to each of those patterns and push the orbs to unlock the doors. Take a total of 2 feathers and 2 Mini Monkeys.
Crafting
Now that you have all 20 feathers, combine them with the head band.
Then give the finished band to the man, and the last Mini Monkey appears as he walks around.
Bonus clue from this stage: (circle with two dots) = 3.
Stage 179: Pinecone Farm
Exploration 1
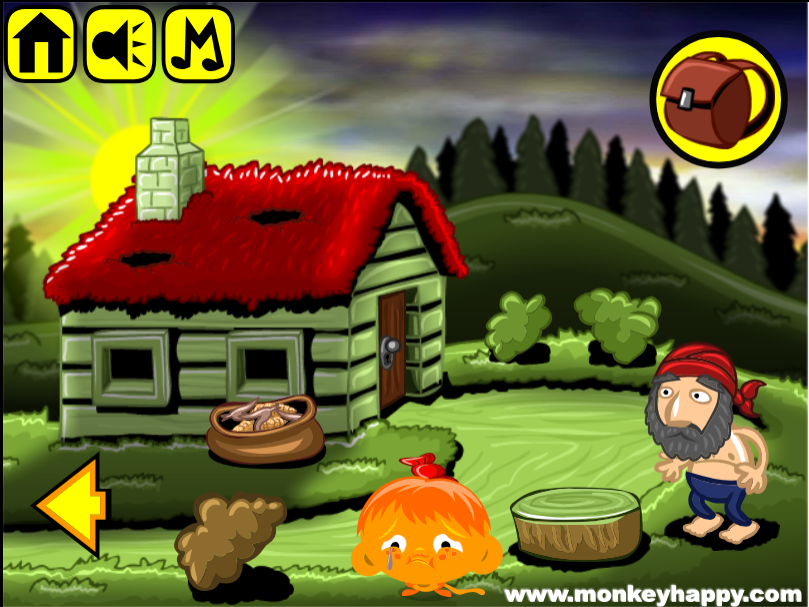
Start by picking up the 5 pinecones in plain sight, as well as the hanger, 2 Mini Monkeys and an ear of corn from the sack beside the house. The other things on this screen are woodcutter next to a tree stump, the locked door of the house, and patches on the roof and bushes that you can click to find another 4 pinecones.
Go left to find a hunter leaning against a tree, who points at a wooden frame. Push the bush aside, and then pick up 10 pinecones, a pair of pliers and 2 Mini Monkeys.
Trap
If you just place the corn on the wooden frame, it gets stolen by a boar and the hunter can't kill it.
(After using up the corn, you can get more from the sack where you found it.)
What else can you do?
Use the pliers to bend the hanger into a wire.
Use the corn on the frame and then the wire on the hunter when he's firing the gun.
Now you have his key!
Use the key on the door to enter the house.
Exploration 2
There's a device with a circle divided into quadrants at the back wall of the house, as well as two clues for it on the ceiling. The locked panels on the left and right walls have holes in them. The boy in front asks for 20 pinecones. Pick up a button, pinecone and 2 Mini Monkeys.
Collection
Give all 20 pinecones to the boy, who walks away, leaving the other button and a Mini Monkey behind.
Scramble
Place the buttons in the panels, then use the clues from the ceiling to open them.
Hint: Each quadrant on the device cycles through a slightly different set of markings, and the button beside rotates the entire circle.
By clicking each quadrant, you find that the diagonal line at the lower left of the first clue starts off at the upper right of the circle.
So click the button to rotate the circle twice, then click each quadrant until it matches the clue, then push the button on the left panel to open it.
Rotate the circle three more times, then do the same for the second clue to open the right panel. (The markings in the lower two quadrants should have straight edges.)
Take an axe head, axe handle and 2 Mini Monkeys from the panels.
Sharp
Combine the axe head with its handle, and give the axe to the woodcutter to finish the stage.
Pick up the last Mini Monkey from his feet.
Bonus clue from this stage: (triangle △) = 1.
Stage 180: Witch Gems
Exploration
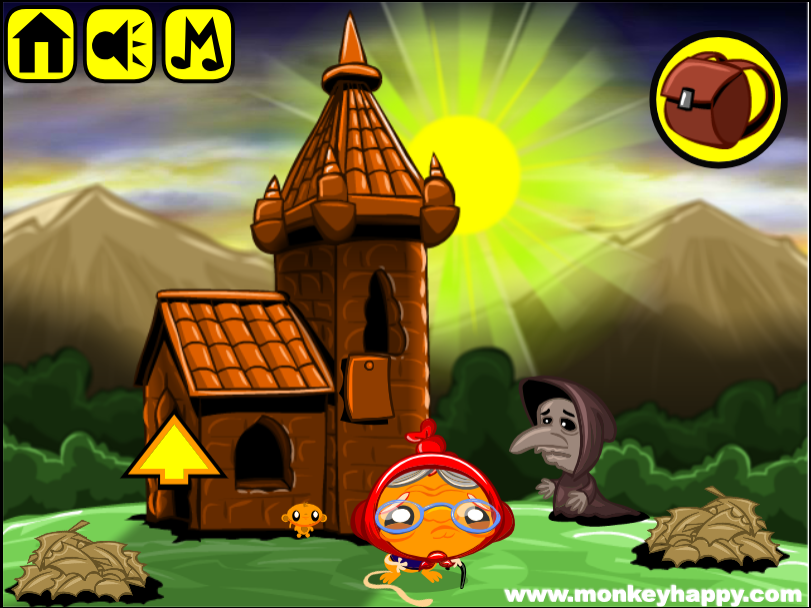
There's a small tower with leaf piles on both sides, and a witch outside asks for 30 gems. Beneath the high window, a note is covered with letters, numbers, lines, shapes… and of course, dots. Pick up 8 gems (don't miss those on the spire!), 2 Mini Monkeys and a rake head.
Entering the tower, you find more wall panels with holes, an arch of six letter buttons in the back wall, and a hole in the floor with a small pedestal beside. Pick up 8 gems, 2 Mini Monkeys and a weird-shaped button bit.
Going further into the tower, you find a ring of four digit buttons, with a button in the middle that rotates the ring. There's also a noose hanging from the ceiling. Pick up 9 gems, 2 Mini Monkeys, a triangular bit and a rake handle.
(You should now have 25 gems and 6 Mini Monkeys.)
Sweep
Combine the rake head with its handle, and use it to clear out each leaf pile.
Pick up the lower button bit and triangle bit, as well as 2 gems.
Handle
You still have the rake, so find another use for it.
Use the rake to pull on the noose, which opens up a hidden panel with a gem in it.
Fit
Combine the button bits to make a button, and the triangle bits to make a triangle button.
Then place them in the wall panels, and use the clue from the note to unlock them.
Notice that each digit button cycles through a different pair of digits, so you need to rotate them to get the ones you want.
The triangle clue has (clockwise from top left) 3, 6, 7, 2 dots, so rotate the ring 5 times and then enter the digits accordingly.
It also has a row of 6 m's, so click each of the letter buttons once to show that letter. Now you can push the triangle button to open that panel.
Similarly, the circle clue has (clockwise from top) 8, 1, 4, 5 dots, so rotate the ring 5 more times and enter the digits accordingly, then follow the letter clue (6 t's) by clicking each of the letter buttons four times, then push the circle button to open that panel.
Take 2 gems and 2 Mini Monkeys from the panels.
Jewelry
Give all 30 gems to the witch, who leaves a coin and Mini Monkey behind as she walks away.
Coin-operated
Use the coin on the pedestal, then use the remaining clues from the note to activate it.
Following the tangle of lines, you find that the digits 1 to 6 are connected to the letters
t e m p l e.So enter that in the letter buttons.
There's also a clue with four diamonds, so reset each of the digit buttons to their original state (showing a diamond).
Once you're done, push the coin, and a large monkey statue rises out of the ground with the last Mini Monkey perched atop!
Bonus clue from this stage: (rectangle and circle) = 3.
Bonus Stage 45
The bonus clues from each stage are 4, 3, 1, 3, so work out the equations (3+1=4, 3×4=12, 12÷4=3) to get the final code: 4123. Enter that in the box and open it!
Update