
 Welcome to another installment of the Monkey GO Happy Roundup! On this fine day, we'll unlock the secret of an old tower, help a gnome find music, travel to a futuristic city, and help a boy gather marshmellows!
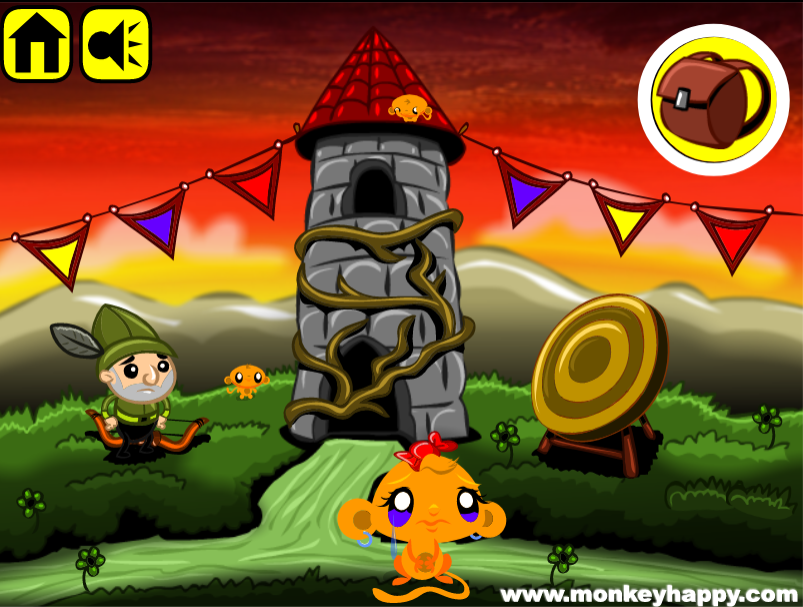
The first stop sees our monkey outside of an old tower seeking entry to search for something shiny within! That archer outside looks like he might grant you something useful, but first you'll have to find some way to cut down the vines blocking the tower entrance.
Happy that you helped the monkey find that shiny object? Good, now you can begin your quest for the next. Along the way you'll help a gnome make music and restore a crown to its rightful owner.
This stage features a futuristic scene, with some sort of vehicle zooming all around, and our lost and confused monkey friend in the middle of it all. Help him navigate through it, if you can!
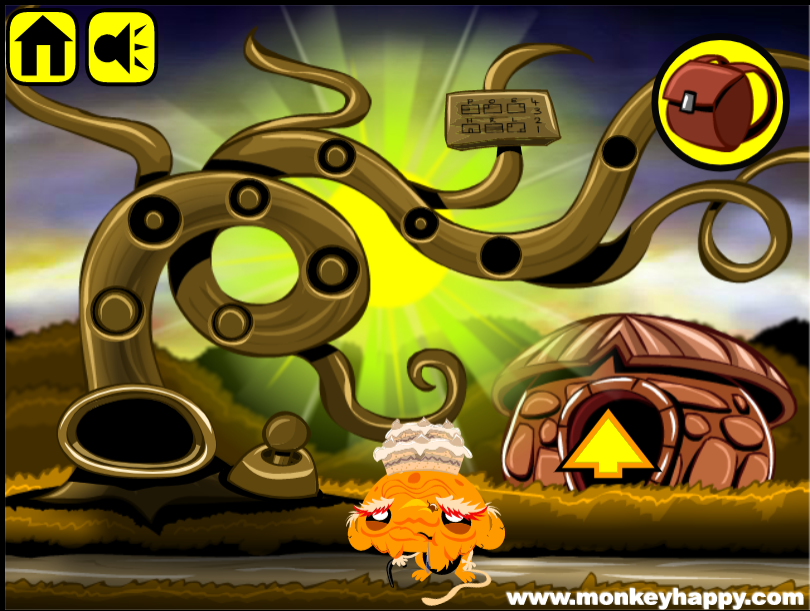
In the last stage for this time, you'll need to gather marshmallows along with your mini-monkeys. Crack the code and open a weird mechanism to complete it and make the monkey GO happy!


Be prepared to spend a little more time playing through this set, because some of its puzzles can get tricky.
Monkey GO Happy Roundup 3 (Stage 133–136)
Stage 133: Medieval Tower
Exploration
A giant stone tower stands along this path, with two lines of colored flags stretching off to each side. The tower itself has its entrance blocked by creeping vines, and an archer on the left looks at a target on the right, but he's missing a quiver. Pick up 6 flowers from the ground, each of which is green and has five petals. Also pick up the 2 Mini Monkeys on the ground and the tower.
The grass tuft on the lower-right looks different from the others, so click it to find a dagger hidden within.
Slash
Use the dagger to clear the vines, and then go into the tower.
A series of ladders climbs past rectangular and circular devices to the next room (pick up 2 Mini Monkeys first) at the top of the tower where a lady wants to trade an arrow for 7 flowers. There's another clue on the wall and a rectangular socket. Pick up 2 Mini Monkeys here.
Stab
Go back down the tower and use the dagger in the tall rectangular slot.
Then use the clue from the top of the tower to unlock this device.
The roman numerals in the circles read (clockwise from top) 3, 1, 6, 4.
The 3rd, 1st, 6th, 4th colored flags from the left on the first screen are red, yellow, red, purple.
So click the circles on the device (clockwise from top) 3, 1, 3, 2 times to match, and pull the dagger down to open up the window and get a quiver and Mini Monkey.
Trades
Give the quiver to the archer, who walks away so you can pick up a flower, bow and Mini Monkey.
Then go up and give all 7 flowers to the lady, and you can take the arrow from the ground.
Shoot
Combine the bow and arrow (using the Combine Items button), and use it to shoot the target.
It rolls off of its stand and you can take a rectangular block with four holes, as well as a Mini Monkey.
Gold
Place the block in the rectangular hole at the top of the tower, and adjust the device downstairs again to activate it.
I don't see a proper clue for this puzzle, so here's a hint: this last safe is full of riches.
Set all the circles to yellow, and push the block in. It slides aside to reveal a golden treasure and the last Mini Monkey.
Your bonus clue from this level is (backwards G) = 5.
Stage 134: Gnome Quest
Exploration
A gnome sitting in a tree has an interest in music. So pick up the metal piece, small skull, 2 coins and a Mini Monkey, and head forth on your adventure!
The adventure takes you to the right, where a pyramidal building with a barred entrance is guarded by a grunty man. Perhaps he wants the RENT indicated on the left sign, and the equations above tell you how much? Pick up the small skull above the doorway and the unlit oil lamp at the lower right, then click on the bush on the left to reveal a metal piece. Now pick up the 3 coins on the left of the screen and a Mini Monkey at the upper right.
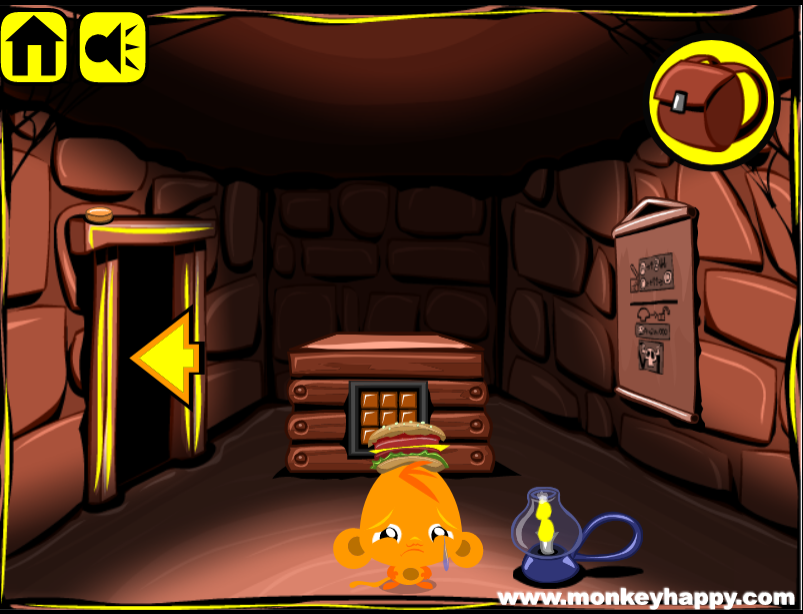
Return to the first screen and enter the cave on the left with two flaming skulls on the walls that drop their jaws when clicked. The doorway in front is locked and has a weird-shaped hole. There are some weird etchings in the ceiling above, and more graffiti on the right wall. Pick up the box of matches, 2 coins and a Mini Monkey around the room.
Jaws
Combine the metal pieces in your inventory, and use the resulting key in the cave door.
Use the clue from the signs above the pyramid's door to unlock the cave door.
From the signs, A is 111−51=60 and B is 17+1=18.
So A−B is 42.
Click the skulls on the walls 4 and 2 times (there should be that many lines in their mouths), and push the key to open that door.
Darkness
The doorway needs to a dark room, so combine the matches and lamp and then place the lit lamp on the ground to light the room up. (Because somehow it's not as bright when you're holding it? Video game logic.)
An ominous skull at the back of the room is surrounded by four sharp prongs along slots on the walls and the word TENT etched in the ceiling. Pick up 2 small skulls, 2 coins and a Mini Monkey.
Levels
Place the four small skulls on the wall prongs, and set their heights according to the letter clues.
According to the RENT sign, TENT would be 3, 1, 2, 3 levels down from the top.
So click the skulls (from left to right) that many times, and then the large skull which lights up and opens up. Take a golden crown, and then the coin behind that, and then the Mini Monkey behind that.
Now that you're done here, you can pick up the oil lamp again.
Upgrade
Go back to the grunty man, and give him the crown. Now pleased, he lets you into the building, with sunlight flooding in through the left and right windows.
Here, a chalice rests on a platform with three lights under a skull button (no, a knob!) and a note next to it describes a ritual of some sort, or perhaps just potion brewing. Pick up the dagger and apple next to it, the red and green potions from the corners of the screen, 2 coins on the windows and a Mini Monkey.
Magic
The note asks for a yellow potion, a leaf and half an apple.
Have you seen a leaf around?
Go back to the first screen and use the dagger on the plant at the fork to get the leaves.
Combine both colored potions to get the yellow potion.
Combine the dagger and apple to get an apple half.
Then go back to the cauldron and add all three ingredients in any order, then turn the skull knob, and the whole platform sinks into the ground.
Exploration 2
A monk sits at the bottom of the ladder. He wants 30 coins but you only have 12… well, 15 after you pick up the 3 coins from the left sconce and the base of each doorway.
Go left to another room with a metal door at the end and a vertical slot in the wall. (No, your dagger will not work here.) Pick up the 3 coins and Mini Monkey from the left side of the room.
Go right twice to another room, sort of. The entire floor is missing except for a small bit that you're standing on. Stones with letters in front of a spiral float over the chasm. Pick up the 3 coins throughout the room.
Crossing
Use the clue that you saw in the cave to cross the gap.
Bridge the gap by spelling BRIDGE with the stones. Click them in that order, and a golden bridge materializes and falls across the gap. So go right to another dark room.
Placing the oil lamp down, you find a goblin with a dagger guarding a wooden crate. A piece of parchment hanging on the wall has some clues. Pick up the wooden wheel and 3 coins.
Conquer
The goblin looks a little sleepy, so fight him with your dagger, and he falls off the crate. You can now see that the crate has a grid of buttons with the middle one labeled A.
Moves
Use one of the clues from the wall parchment to unlock the crate.
Follow the instructions to find B, C, D:
-DB

-A-

--C
So press those four buttons in alphabetical order, and the crate opens so you can pick up 3 coins and a Mini Monkey.
Shutter
Go back to the left room and use the wheel on the vertical slot.
Then spin it and pick up the bamboo section from behind before the shutter closes.
Woodwind
Carve the bamboo by combining it with the dagger, then give the finished flute to the gnome on the first screen.
He silently plays some music, and you can pick up the branch that he dropped.
Prop
Go back to the wheel, and right after you spin it use the branch beneath it. (Tap the branch to hold it in your hand, then tap the wheel and then the door.)
With the shutter held up, you can proceed to the final room where a demon sits on a throne, pitchfork in hand. Pick up 4 coins, two from the bones across the ceiling and walls, and two from the torches on the left and right.
Rich
You should now have 30 coins, so give them to the monk to get a glass of holy water and a Mini Monkey.
Vanquish
Use the holy water on the demon, who flees into the ceiling. Then stick a dagger in his throne.
You can wriggle the dagger, but that accomplishes nothing. Perhaps you should check the parchment again.
Deeper
The parchment tells you to set the small skulls to A+51+1000, or 1111.
So (bring your oil lamp and) go back into the cave and set each small skull to the top position.
It also tells you to set the horned skulls to (jagged line), but that jagged line forms a V and I on each side of the skull.
So set the horned skulls to 5 and 1 lines in their mouths.
Then go back to the throne (where the demon's roar still lingers), and click the dagger.
The throne opens up and releases a floating gold star and the last Mini Monkey.
Bonus clue from this stage: (long G)=1.
Stage 135: Red City
Exploration
After you get over the visual shock from the all-red color scheme, the flying ship, and the metal-limbed devices, you notice that those limbs can rotate to reach the unfilled circles. A piece of paper in the lower-right tells you how to operate those limbs, and one of its letters, X, matches a box on a tube on the left of the screen. Pick up the spider bot which isn't currently working, the 2 blue orbs and the 2 Mini Monkeys, and then click on the door where a spinning circle is divided into sectors.
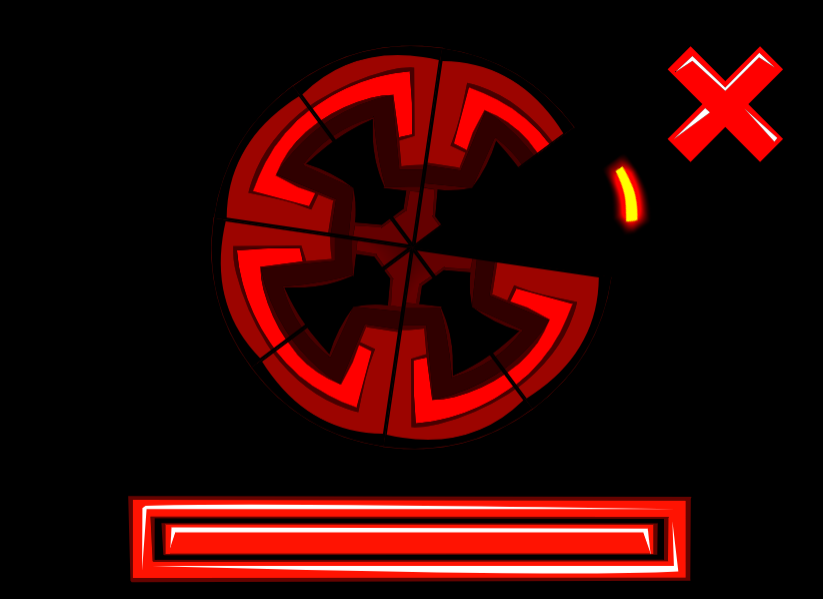
Space Pizza
Click the dark sector to momentarily light it up, and then click the other sectors to change their patterns so that they match.
Clockwise from the dark sector, the others have to be clicked 2, 4, 1, 3, 6, 2, 5 times. (The second-last sector starts with a different pattern.)
So click them accordingly and then click the big button to unlock the door to a room with round devices in the ceiling and floor each having four sockets. There's also three boxes on tubes labeled with different letters, and a rectangular vent on the right wall. Pick up a battery, 3 pegs, 2 blue orbs and 2 Mini Monkeys.
Reach
Combine the spider bot and battery, then use the powered bot on the vent. Out pops a peg and a Mini Monkey.
Constellation
Click the upper-left, upper-right, lower-left and lower-right limbs 6, 5, 4, 4 times to match the X clue, and then place a peg on the X box and push it to open the box. Inside, there's a blue orb and a Mini Monkey.
Do the same with the Y box (1, 2, 7, 5 more times), the Z box (0, 6, 0, 3 more times) and the W box (7, 2, 1, 6 more times) to get another 3 blue orbs and 3 Mini Monkeys.
Zap
You should now have all 8 orbs, so place them in the floor and ceiling sockets to summon the final Mini Monkey.
Bonus clue from this stage: (paper clip, sharp end up) = 5.
Stage 136: Tree Attack
Exploration
A boy wants marshmallows, and two slanted pillars in his house have sets of four things, forming a clue on the right and a four-letter lock on the left. There's also a hole in the back wall. Pick up 3 marshmallows and 3 Mini Monkeys.
Back out of the house to find a twisted tree towering over it. The tree has a panel on its base that's locked by a nearby device, and a sequence of 9 holes on its trunk that can be clicked to make small circles appear and grow, and a clue panel near the top. The clue panel has clues with lettered squares, a column of digits and lots of circle patterns. Pick up a thick branch, a dark red (clay?) head, 5 marshmallows and 4 Mini Monkeys.
Flag
Use the head on the back wall, and use the square clues to unlock it.
From top to bottom, the numbers on the clue panel are 4, 3, 2, 1, and the corresponding square panels on the right pillar appear under the letters H, E, L, P on the clue panel.
So enter that in the left pillar, and push the head to open up the back wall and get a chisel, marshmallow and Mini Monkey.
Aggregate
Combine the chisel and branch to get a lever, and place it in the tree's device.
Then use the circular clues to unlock the tree.
The circle patterns have 3, 1, 2, 2, 3, 2, 1, 3, 3 circles in them.
So click the holes along the trunk (from base to tip) that many times, and push the lever to get the last marshmallow and a Mini Monkey.
Comfort
Give all 10 marshmallows to the boy, and the last Mini Monkey appears at his feet.
Bonus clue from this stage: (paper clip, sharp end down) = 3.
Bonus Stage 34
The bonus clues from each stage combine to form the code 5153, so enter that in the box to open it.
Update