JayisGames.com is now available ad-free!
Jay is Games recommends Cheat Happens with 8,000+ games and 35,000+ trainers!

Monkey GO Happy Sci-Fi


  • Currently 4.5/5
  • 1
  • 2
  • 3
  • 4
  • 5
Rating: 4.5/5 (192 votes)
Comments (9) | Views (21,578)

Monkey GO Happy Sci-Fi

DoraI warned you about mini monkeys, bro! I told you dog! I've always maintained that there's something sinister about the itty-bitty monkeys in the Monkey GO Happy games by Pencil Kids. They stare at you with their soulless little eyes, forcing your terrified and sobbing monkey to solve point-and-click puzzles to get them toys, or even just for their own amusement. You thought I was crazy, but in Monkey GO Happy Sci-Fi, you're being held at laser pistol-point by a pair of uniformed mini monkeys, forced to do their bidding by repairing warp drives, busting into secret bases, and more. Sure, you can claim it's a rescue mission all you want, but since when does a rescue mission need weaponry to keep its rescuer in line? Click to interact, and drag items from your inventory at the top of the screen to wherever you want to use them. As with many Monkey GO Happy games, this one will require you to keep your eyes out for the instructions you need to solve lock codes, and they're often hiding in plain sight.

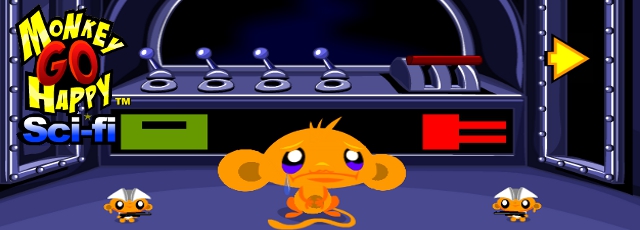
Like the rest of the series, Monkey GO Happy Sci-Fi is short and on the easier side, best suited to a snack-sized break rather than a meaty meal of a challenge. It's actually slightly longer than its predecessors with multiple stages and a mild ramp in complexity, but only slightly. While some of the stages are bigger than others and require some backtracking and exploration, the things you can interact with tend to be so limited that figuring out what to do won't keep you stymied for long. Its overall design, however, is fantastic, with more visually interesting environments than we usually see from the series, and the puzzles themselves are logical and smart in their execution. While a lot of players will find this one over before they know it, and without breaking a sweat, Monkey GO Happy Sci-Fi is clean and well-made, and for people (not just kids!) who want something cute and engaging for just a short while, just the right size.

Play the entire Monkey Go Happy series:
Monkey GO Happy!Monkey GO Happy 2Monkey GO Happy 3Monkey GO Happy 4Monkey GO Happy 5Monkey GO Happy 6Monkey GO Happy MarathonMonkey GO Happy Marathon 2Monkey GO Happy Marathon 3Monkey GO Happy Marathon 4Monkey GO Happy: Mini MonkeysMonkey GO Happy: Mini Monkeys 2Monkey GO Happy: Mini Monkeys 3Monkey GO Happy: ChristmasMonkey GO Happy: The CastleMonkey GO Happy ElevatorsMonkey GO Happy Elevators 2Monkey GO Happy MayhemMonkey GO Happy AdventureMonkey GO Happy EasterMonkey GO Happy TalesMonkey GO Happy Tales 2

Play Monkey GO Happy Sci-Fi

Walkthrough Guide


(Please allow page to fully load for spoiler tags to be functional.)

Walkthrough
(I know there's a video walkthrough provided, but I find those hard to use.)

  • Scene 1

    1. Pick up the fuse on the right.

    2. Go into the right-hand room.

    3. Get the two fuel cells (labeled "1" and "2").

    4. Get the fusebox key from the top of the bend in the chimney.

    5. Note the warp instructions on the sign on the right.

    6. Go back to the middle room, then go into the left-hand room.

    7. Open the fusebox on the left with the fusebox key.

    8. Put the fuse into the fusebox.

    9. Charge the fuel cells by putting them into the spot in the middle, then pulling down the handle on the right.

    10. Go back to the right-hand room and put the charged fuel cells in place.

    11. Go to the middle room. Set the switches and the two shapes as indicated on the wall of the right-hand room. Pull down the big red lever.

  • Scene 2

    1. Go left. Get the screwdriver from the ground on the left.

    2. Go back right to the spaceship.

    3. Note the patterns on the ramp of the spaceship. Go into the spaceship.

    4. Put the three patterns into the panel (in the same order as they're depicted). Get the glue.

    5. Use the screwdriver to pry off the top of the box. Get the wire cutters.

    6. Go out of the spaceship, then go right.

    7. Get the lift lever from the ground next to the fence.

    8. Use the wire cutters on the fence in front of the breaker box.

    9. Open the breaker box and push the switch down.

    10. Go left twice. Put the lift lever onto the semicircular base on the right. Press the lever to call the lift.

    11. Before you go up, click on the horizontal box on the wall. Note the colors.

    12. Go up. Put the glue on the floor in front of the guard.

    13. Enter the color code into the panel on the left.

      Black, yellow, yellow, purple. That's three clicks, one click, one click, and two clicks.

    14. Press the big red button. Wait for the guard to turn it off and put his gun in the glue. Press the big red button again.

  • Scene 3

    • Part I

      1. Get the coffee cup from the left corner.

      2. Click on each of the critters to see what they want. (The first one is just angry. The second one is hungry. The third one wants coffee.)

      3. Go right. Fill the cup with the free coffee.

      4. Go left and give the coffee to the third critter. Get the coin.

      5. Go right and use the coin to get a sandwich.

      6. Go left and give the sandwich to the big guy. Get his hat.

      7. Put the hat onto the angry critter. Get the I.D. card.

      8. Use the I.D. card on the slot on the left. Go into the door.

    • Part II

      1. Open the hatch on the ceiling. Get the spoon.

      2. Open the panel on the right. Put the spoon in the missing wire's spot.

      3. Press the bottom button twice to go to floor B. Press the top button to open the gate. (The bottom button alternates between the two floors, and the top button opens and closes the gate.)

      4. Remove the white paper on top of the trash can and get the key.

      5. Go to floor A. Get a hot pepper from the basket.

      6. Remove the items from the shelf to find the spanner.

      7. Use the key to unlock the box on the right. Get the sleeping serum.

      8. Go back to floor B. Put the sleeping serum and the hot pepper into the monster's cup.

      9. Use the spanner to remove the bolts holding the panel in place. Open the panel.

  • Scene 4

    1. Go left, then up. Get the wheel.

    2. Go down, right, up, and left. Put the wheel on the knob. Turn the wheel to light up the D.

    3. Go right, down, left, and down. Get the laser charge. Click the robot and note the color and its location.

    4. Go back to the wheel panel (up, right, up, left) and turn the wheel to light up the E.

    5. Go right, down, left, and up. Get the laser head. Click the robot and note the color and its location.

    6. Go down. Click the robot and note the color and its location.

    7. Go back to the wheel panel (right, up, left) and turn the wheel one more time to light up the F.

    8. Click the robot and note the color and its location.

    9. Go right. Get the cord from the fan.

    10. Go right. Put your items into the contraption on the left. Click the robot on the right.

    11. Click the panel in the middle. Put in the color code from the little red robots.

      Middle center, bottom center, top center, middle left.

9 Comments

https://www.google.com/accounts/o8/id?id=AItOawnrLT_DgOiK7Leoj0eRHY69GNEFT33XtTU June 12, 2014 10:54 AM

Being expected to be able to tell at least 2 of those "reds" apart at the end was a bit tough for those less colour savvy.

Reply

Bug.

If you don't get the glue down before clicking the guard too many times, you can no longer get him to drop his gun. I've tried every way I can think to reset this, but nothing works and I am stuck.

Reply
shjack180 June 12, 2014 12:08 PM

Dawww, I really liked this one! Maybe it's because I like sci-fi, or maybe it's because I liked that each level was part of a greater story/mission, but this is prolly my favorite Monkey GO Happy game to date.

Reply
chipmunk June 12, 2014 12:17 PM

Is anyone else having this problem? I can't interact with the left side of the game. I can't pick a hat from the left two columns, I can't go through doors on the left, I can't pull the three left-most levers, etc. And clicking on the Side or Home buttons registers on the Walkthrough button instead.

Reply

Hi Kurt,

Thanks for the heads up. The bug has been fixed now. I released a new version 1.1 on pencilkids.com :)

Robin Vencel
www.pencilkids.com

Reply

Hi chipmunk,

This sounds very strange, I cannot imagine what could be causing this. Please try using a different browser or updating flash. If the problem persists please email me directly through pencilkids.com and I'll try and investigate further.

Robin Vencel
www.pencilkids.com

Reply
chipmunk June 13, 2014 11:56 AM

Robin,

I've upgraded Flash from 13.0.x to the latest version, but the problem still persists, in Mac Firefox. However, the game works fine in Mac Chrome.

Reply

Hi Chipmunk,

Thanks for the feedback and I'm glad it at least works in Chrome for you :) I'll try to look at this issue for future games.

Thanks again for playing :)
Robin Vencel
www.pencilkids.com

Reply

Walkthrough
(I know there's a video walkthrough provided, but I find those hard to use.)

  • Scene 1

    1. Pick up the fuse on the right.

    2. Go into the right-hand room.

    3. Get the two fuel cells (labeled "1" and "2").

    4. Get the fusebox key from the top of the bend in the chimney.

    5. Note the warp instructions on the sign on the right.

    6. Go back to the middle room, then go into the left-hand room.

    7. Open the fusebox on the left with the fusebox key.

    8. Put the fuse into the fusebox.

    9. Charge the fuel cells by putting them into the spot in the middle, then pulling down the handle on the right.

    10. Go back to the right-hand room and put the charged fuel cells in place.

    11. Go to the middle room. Set the switches and the two shapes as indicated on the wall of the right-hand room. Pull down the big red lever.

  • Scene 2

    1. Go left. Get the screwdriver from the ground on the left.

    2. Go back right to the spaceship.

    3. Note the patterns on the ramp of the spaceship. Go into the spaceship.

    4. Put the three patterns into the panel (in the same order as they're depicted). Get the glue.

    5. Use the screwdriver to pry off the top of the box. Get the wire cutters.

    6. Go out of the spaceship, then go right.

    7. Get the lift lever from the ground next to the fence.

    8. Use the wire cutters on the fence in front of the breaker box.

    9. Open the breaker box and push the switch down.

    10. Go left twice. Put the lift lever onto the semicircular base on the right. Press the lever to call the lift.

    11. Before you go up, click on the horizontal box on the wall. Note the colors.

    12. Go up. Put the glue on the floor in front of the guard.

    13. Enter the color code into the panel on the left.

      Black, yellow, yellow, purple. That's three clicks, one click, one click, and two clicks.

    14. Press the big red button. Wait for the guard to turn it off and put his gun in the glue. Press the big red button again.

  • Scene 3

    • Part I

      1. Get the coffee cup from the left corner.

      2. Click on each of the critters to see what they want. (The first one is just angry. The second one is hungry. The third one wants coffee.)

      3. Go right. Fill the cup with the free coffee.

      4. Go left and give the coffee to the third critter. Get the coin.

      5. Go right and use the coin to get a sandwich.

      6. Go left and give the sandwich to the big guy. Get his hat.

      7. Put the hat onto the angry critter. Get the I.D. card.

      8. Use the I.D. card on the slot on the left. Go into the door.

    • Part II

      1. Open the hatch on the ceiling. Get the spoon.

      2. Open the panel on the right. Put the spoon in the missing wire's spot.

      3. Press the bottom button twice to go to floor B. Press the top button to open the gate. (The bottom button alternates between the two floors, and the top button opens and closes the gate.)

      4. Remove the white paper on top of the trash can and get the key.

      5. Go to floor A. Get a hot pepper from the basket.

      6. Remove the items from the shelf to find the spanner.

      7. Use the key to unlock the box on the right. Get the sleeping serum.

      8. Go back to floor B. Put the sleeping serum and the hot pepper into the monster's cup.

      9. Use the spanner to remove the bolts holding the panel in place. Open the panel.

  • Scene 4

    1. Go left, then up. Get the wheel.

    2. Go down, right, up, and left. Put the wheel on the knob. Turn the wheel to light up the D.

    3. Go right, down, left, and down. Get the laser charge. Click the robot and note the color and its location.

    4. Go back to the wheel panel (up, right, up, left) and turn the wheel to light up the E.

    5. Go right, down, left, and up. Get the laser head. Click the robot and note the color and its location.

    6. Go down. Click the robot and note the color and its location.

    7. Go back to the wheel panel (right, up, left) and turn the wheel one more time to light up the F.

    8. Click the robot and note the color and its location.

    9. Go right. Get the cord from the fan.

    10. Go right. Put your items into the contraption on the left. Click the robot on the right.

    11. Click the panel in the middle. Put in the color code from the little red robots.

      Middle center, bottom center, top center, middle left.

Reply

^ Scroll Up | Homepage >

Leave a comment [top of page]

Please consider creating a Casual Gameplay account if you're a regular visitor here, as it will allow us to create an even better experience for you. Sign-up here!
  • PLEASE UNDERSTAND SITE POLICIES BEFORE POSTING COMMENTS
  • You may use limited HTML tags for style:
    (a href, b, br/, strong, em, ul, ol, li, code, spoiler)
    HTML tags begin with a less-than sign: < and end with a greater-than sign: >. Always. No exceptions.
  • To post spoilers, please use spoiler tags: <spoiler> example </spoiler>
    If you need help understanding spoiler tags, read the spoiler help.
  • Please Preview your comment before posting, especially when using spoilers!
  • No link dropping, no domains as names; do not spam, and do not advertise! (rel="nofollow" in use)
chrpa Jayisgames needs your help to continue providing quality content. Click for details Hi! Weekday Escape and Weekday Puzzle are here! First we have two new cans from tomoLaSiDo and then two small rooms from isotronic. That's all for this...  ...
6,365 Views
0 Comments
chrpa Jayisgames needs your help to continue providing quality content. Click for details Welcome to Mobile Monday! We have another beautiful game from Nicolet and it's a winter game as it should be. Tasuku Yahiro have released another of their...  ...
6,161 Views
2 Comments
chrpa Jayisgames needs your help to continue providing quality content. Click for details We've got a new game from Rinnogogo's magical world and this time it really is magical.. Not only do you get to meet cute animals that express themselves...  ...
chrpa Jayisgames needs your help to continue providing quality content. Click for details After a few weeks of patient waiting, we have been rewarded - the new game from Ichima Coffeedo is here. We got a wonderful new game - it's...  ...

HELP Jayisgames.com

Recent Comments


Display 5 more comments
Limit to the last 5 comments

Game of the week


Dark Romance: Vampire Origins Collector's Edition

Your Favorite Games edit

add
Save links to your favorite games here. Use the Favorites editor.

Monthly Archives