JayisGames.com is now available ad-free!
Jay is Games recommends Cheat Happens with 8,000+ games and 35,000+ trainers!

Room Delta


  • Currently 4.7/5
  • 1
  • 2
  • 3
  • 4
  • 5
Rating: 4.7/5 (146 votes)
Comments (25) | Views (43,699)

Room Delta

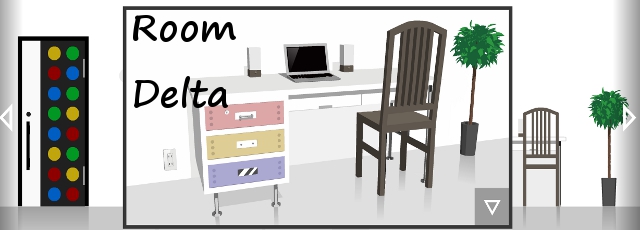
Room Delta, sneakily playable as the banner image on Kotorinosu's site or free for iOS and Android, is an escape game with a presentation so sleek, you're almost afraid to get your smudgy fingers all over it. Once you've click the banner to start it up, playing is as simple as clicking around to interact with things, though there's no changing cursor to tell you what is interactive and what isn't. Items in your inventory at the top of the screen can be examined up close by double-clicking them, which may lead you to uncover new things. As you navigate around the room using the arrows at the left and right of the screen, you'll realise that there's a lot more than initially meets the eye, and some of it is more straightforward than the rest. Room Delta strikes a nice balance between needing to bang your inventory against the screen and using your brain to spot clues to solve puzzles in order to progress, with every inch of it as elegant as you'd expect. Room Delta is trickier than it seems at first blush, so fire up your brain and get cracking!

Play Room Delta

Download on the AppstoreRoom Delta (iPhone, iPod Touch, iPad)

Google PlayAndroid:
Room Delta

Thanks to William, Questioner, and Iceninexp for sending this one in!

Walkthrough Guide


(Please allow page to fully load for spoiler tags to be functional.)

Room Delta Walkthrough

Collecting items

Under the third red pillow (from the left) lies a blue 5 coin.

In the bookshelf to the left of the computer is a red book. Inside of it is a bookmark with a code.

In the left drawer on the computer table is a black cylinder.

If you zoom in on the bottom left part of the blue cabinet, you can remove the books, and move the left compartment to the right, revealing a red cylinder.

By moving the picture of a feather in the alcoves (right end of the room), you can find a handle

On the stick in the SE alcove is also a toy head.

The cylinders

By putting the handle on the middle yellow drawer, you can get a blue cylinder from an alcove in the drawer.

If you look closely on the ground under the mirrors that sits in 3x3 patterns (over the t-shirts),
you can see that there is a strange spot that is not white on the right side of the ground.

Zoom in, and you will se a "x10" on the ground. If you push the mirror that reflects on this spot (the one in the bottom right corner) 10 times,
you can get a yellow cylinder.

Examine the shirts closely. They can be moved, revealing a third shirt, and an alcove with a strange device inside. The third shirt is striped in a pattern.

From Bottom to Top: Black Yellow Blue Red

This is the order you shall use when putting the cylinders on the stick where you found the toy head. If you arrange them right,
and put the toy head on top, you should get a key.

The 4x4 code

The key from the cylinders can be used on the green door to get a 4x4 code.

0100
1001
0110
0101

(0-light, 1-dark)

This code can be used on the "switches" box, in the right part of the chamber. (Light-Not pressed, Dark-Pressed)

If you enter it right, you should be able to open the box and get a golden 100 coin.

The bookmark code

The bookmark consists of a number that is mirrored.

This number is 4627, and can be entered in the right alcove on the blue cabinet.

In the alcove, you should find a purse. This purse can be opened, and reveals another golden 100 coin.

The coins/The eye puzzle

You should now have 2 golden 100 coins, and 1 blue 5 coin.

You can put the 2 golden coins in the safebox in the NE corner of the blue cabinet, and twist the handle.

The box can now be opened, revealing a wrench, and you should have gotten back a silver 50 coin, and a brown 10 coin from the compartment.
(If you put the blue 5 coin in together with the 100 coins, it should also be there.)

Now you can put the coins in the eye sockets of the "robot heads" in the room. The silver 50 coin goes in the silver robot (in the blue cabinet),
the brown 10 coin goes in the brown robot (in the right end of the room), and the blue 5 coin goes in the blue robot (in the left end of the room).

If you move the shirts under the mirrors, and press the button on the final robot, you should get another key.

The clock code

The key from the robot unlocks the top red drawer. In the red drawer is a blue hintbook.

The blue hintbook contains a code:
1 Dot - 6
2 Dots - 9
3 Dots - 4
4 Dots - 12

The wrench from earlier can unlock the picture in the left end of the room. By unscrewing the 4 bolts,
you should be able to open the picture and get a cog.

If you turn the clock around and open it, you can insert the cog.

Turn it back, and push the button. The hand should start spinning.
When you press the button again the number of dots in the middle increases from 1 to 4, and the clock stops until you press it again.

Here you can use the code from the hintbook.

Firstly, click when it reaches 6 (it points downwards).
Then, stop it when it reaches 9 (it points leftwards).
Then, stop it when it reaches 4 (one step more than when it points right)
And finally, stop it when it reaches 12 (it points upwards)

Now the hand should rotate a little, and then stop and release itself from the clock.
You can pick it up, revealing that it is yet another key.

Obtaining pliers

The key you got from the clock fits in the brown closet lock. (Note the symbol over the closet) The box in the SW corner can be moved,
revealing a ninja star.

You should also examine the picture, which shows a red cross to the left of the big plant in the right end of the room.

The bookshelf to the left of the computer has a bolt in the bottom that you can use the wrench on, to remove the bookshelf from the wall.
It can be placed in the right end of the room, under the grate in the ceiling.

If you climb the bookshelf, you can examine the grate better, revealing a lock consisting of 7 circles.

Use the ninja star on the circles to open the grate, revealing a magnet which you can pick up.

The magnet can be used to open the bottom blue drawer, revealing a pair of pliers.

The second coin puzzle

Get back all the coins from the robot heads, if you haven't done so already.

In the right drawer in the blue cupboard, there is a nail that can be removed with the pliers.

In the now unlocked left drawer, you can find a magnifying glass and another golden 100 coin.

If you look to the lefto of the plant in the right end of the room (suggested by the picture),
you can find 4 dots.

The magnifying class can be use to enlarge the dots, showing a code:

10 -> 60 -> 160 -> 165

There is another nail on the right lamp on the computer table, that can be found by zooming in on the right side of the lamp.

By pulling it out, you can remove the top of the lamp, revealing a coin slot.

You will have to use the code from the left of the plant to solve this puzzle.
After you put in a coin, the total value of all coins inside the lamp shall be the same as in the code.

First you put in the brown 10 coin (10), then the silver 50 coin (10+50=60), then the golden 100 coin (60+100=160), and then the blue 5 coin (160+5=165).

When you press the button, you should get another key.

The music code

The key fits in the top right locker in the right end of the room.

In the locker is a cord, that you can plug into the socket to the left of the computer to power it up.

In the computer is two things: a document with musical notes, and a "labyrinth" of files in different colors.

In the document with notes is a symbol, which matches the symbol over the closet, but rotated 90 degrees to the left.

The notes after the symbol are arranged on 5 different lines, and there are 5 ropes in the closet.

The ropes shall be pulled according the the notes after the symbols.

The order is:
2532341

(Left is 1, and Right is 5)

If you pull the ropes in that order, a "key block" should fall down in the closet. Pick up the block.

The digital lockbox

The key block can be placed in the little alcove in the middle yellow drawer, making it possible to open the whole drawer.

In the drawer is a pair of scissors.

The scissors can be used on the box in the brown closet (revealing a digital lockbox that you can take),
and on the chair in front of the computer (by zooming in on the right side of it).

By releasing the chair, you can move it and open the right drawer, revealing another cog.

Get back the first cog from the clock, and put both of them in the device in the left end of the room, where you found the first cog.

Now you can pull the lever to the left of the cogs, which will move the wall upwards, revealing a grid with colored and empty rectangles.

This is the code for the file labyrinth in the computer.

The code:
G - - - - -
- - - B - -
- - - - - Y
- R - - - -

(R-Red, B-Blue, Y-Yellow, G-Green)

Now open the files according to the code. (Choose the file that is on the same spot on the computer as it's color on the grid)

You should find a file looking like a key. If you click on it, a new program will install itself on the starting menu.

This program can lock and unlock the digital lockbox, but only if it is plugged in.

Zoom in on the left side of the computer, plug in the lockbox, and press the "unlock" button in the program.

The lockbox can now be opened, revealing a screwdriver.

The safe

The screwdriver can be used on the picture of the 3 shapes over the computer table.

If you unscrew the 4 screws, you can open the frame.

By shaking the picture 3 times, 3 puzzle pieces should fall out of the picture.

Zoom in on the computer table, and take them.

By turning them around, you can reveal a code.

The code is:

1 - Up and Left are pointing outwards, Down and Right are pointing inwards.

2 - Left and Down and Right are pointing outwards, Up is pointing inwards.

3 - Up and Down are pointing outwards, Left and Right are pointing inwards.

You can use the screwdriver on the safe in the left side of the room, and press the button in the middle to unlock the puzzle mechanism.

Now you can input the code from the puzzle pieces.

Firstly, click the bar that is pointing downwards, and the one that is pointing rightwards to push them into the safe, and click the button again.
Then you should click the one that is pointing upwards, and then click the button.
To the end click the one that is pointing rightwards, and the one that is pointing leftwards, and then the button.

After opening the safe, you should get a big cog.

The final puzzle

Go back to the device with the two cogs, and remove them. Put in the big cog, and pull the lever again.

Now the wall should move upwards instead, revealing a new mechanism.

This mechanism consists of a left arrow button, a right arrow button, and a key button.

The left and right arrow buttons moves the black wall behind everything else. (From the beginning it is aligned to the left side)

Push the right arrow button to move the wall.

Now all compartments that opens up to the black wall behind shows puzzles and switches.

- The compartment with the robot head behind the shirts
- The brown closet
- The upper right alcove in the right end of the room
- The device whith the lever that moved the wall.

The goal of this puzzle is to connect all colors with their other end through certain pipes.

Each color can only connect with pipes of the same color, so you will have to make circuits of only a certain color through the puzzle,
from red to red, and green to green, and so on.

Each puzzle can only connect a single color at a time, and most puzzles cannot connect certain colors.

The alcove can only connect orange.

The compartment behind the shirts can connect red or orange.

The closet can connect red, orange, or blue.

The lever device can connect all 4 colors.

Since the alcove can only connect orange, it should connect orange.
(Turn the middle circle until the orange cable runs from orange to orange.)

Then the compartment must connect red (since we need all puzzles to connect different colors).
(Switch the plates until the straight red line is in the upper right, and the turn is in the upper left.)

And then the closet must connect blue.
(You can shift the three rectangles. Push the middle one to the right, and the lower one to the left. The upper one doesn't matter.)

Finally, the lever device must connect green.
(Click the green cables so they connect to each other.)

Now you can click the key symbol in the middle of the mechanism in the left end of the room,
and all of the colors should send white lines into the middle.

(If one color doesn't send lines, none of the machines have connected that color, and two or more of the machines are connecting the same color.)

If everything works, the machines should open the doors, and reveal the final key.

This key unlocks the door with the colored circles in the middle of the room, and allows you to leave it.

25 Comments

Patreon Contributor Questioner October 27, 2015 9:25 AM

Room Delta Walkthrough

Collecting items

Under the third red pillow (from the left) lies a blue 5 coin.

In the bookshelf to the left of the computer is a red book. Inside of it is a bookmark with a code.

In the left drawer on the computer table is a black cylinder.

If you zoom in on the bottom left part of the blue cabinet, you can remove the books, and move the left compartment to the right, revealing a red cylinder.

By moving the picture of a feather in the alcoves (right end of the room), you can find a handle

On the stick in the SE alcove is also a toy head.

The cylinders

By putting the handle on the middle yellow drawer, you can get a blue cylinder from an alcove in the drawer.

If you look closely on the ground under the mirrors that sits in 3x3 patterns (over the t-shirts),
you can see that there is a strange spot that is not white on the right side of the ground.

Zoom in, and you will se a "x10" on the ground. If you push the mirror that reflects on this spot (the one in the bottom right corner) 10 times,
you can get a yellow cylinder.

Examine the shirts closely. They can be moved, revealing a third shirt, and an alcove with a strange device inside. The third shirt is striped in a pattern.

From Bottom to Top: Black Yellow Blue Red

This is the order you shall use when putting the cylinders on the stick where you found the toy head. If you arrange them right,
and put the toy head on top, you should get a key.

The 4x4 code

The key from the cylinders can be used on the green door to get a 4x4 code.

0100
1001
0110
0101

(0-light, 1-dark)

This code can be used on the "switches" box, in the right part of the chamber. (Light-Not pressed, Dark-Pressed)

If you enter it right, you should be able to open the box and get a golden 100 coin.

The bookmark code

The bookmark consists of a number that is mirrored.

This number is 4627, and can be entered in the right alcove on the blue cabinet.

In the alcove, you should find a purse. This purse can be opened, and reveals another golden 100 coin.

The coins/The eye puzzle

You should now have 2 golden 100 coins, and 1 blue 5 coin.

You can put the 2 golden coins in the safebox in the NE corner of the blue cabinet, and twist the handle.

The box can now be opened, revealing a wrench, and you should have gotten back a silver 50 coin, and a brown 10 coin from the compartment.
(If you put the blue 5 coin in together with the 100 coins, it should also be there.)

Now you can put the coins in the eye sockets of the "robot heads" in the room. The silver 50 coin goes in the silver robot (in the blue cabinet),
the brown 10 coin goes in the brown robot (in the right end of the room), and the blue 5 coin goes in the blue robot (in the left end of the room).

If you move the shirts under the mirrors, and press the button on the final robot, you should get another key.

The clock code

The key from the robot unlocks the top red drawer. In the red drawer is a blue hintbook.

The blue hintbook contains a code:
1 Dot - 6
2 Dots - 9
3 Dots - 4
4 Dots - 12

The wrench from earlier can unlock the picture in the left end of the room. By unscrewing the 4 bolts,
you should be able to open the picture and get a cog.

If you turn the clock around and open it, you can insert the cog.

Turn it back, and push the button. The hand should start spinning.
When you press the button again the number of dots in the middle increases from 1 to 4, and the clock stops until you press it again.

Here you can use the code from the hintbook.

Firstly, click when it reaches 6 (it points downwards).
Then, stop it when it reaches 9 (it points leftwards).
Then, stop it when it reaches 4 (one step more than when it points right)
And finally, stop it when it reaches 12 (it points upwards)

Now the hand should rotate a little, and then stop and release itself from the clock.
You can pick it up, revealing that it is yet another key.

Obtaining pliers

The key you got from the clock fits in the brown closet lock. (Note the symbol over the closet) The box in the SW corner can be moved,
revealing a ninja star.

You should also examine the picture, which shows a red cross to the left of the big plant in the right end of the room.

The bookshelf to the left of the computer has a bolt in the bottom that you can use the wrench on, to remove the bookshelf from the wall.
It can be placed in the right end of the room, under the grate in the ceiling.

If you climb the bookshelf, you can examine the grate better, revealing a lock consisting of 7 circles.

Use the ninja star on the circles to open the grate, revealing a magnet which you can pick up.

The magnet can be used to open the bottom blue drawer, revealing a pair of pliers.

The second coin puzzle

Get back all the coins from the robot heads, if you haven't done so already.

In the right drawer in the blue cupboard, there is a nail that can be removed with the pliers.

In the now unlocked left drawer, you can find a magnifying glass and another golden 100 coin.

If you look to the lefto of the plant in the right end of the room (suggested by the picture),
you can find 4 dots.

The magnifying class can be use to enlarge the dots, showing a code:

10 -> 60 -> 160 -> 165

There is another nail on the right lamp on the computer table, that can be found by zooming in on the right side of the lamp.

By pulling it out, you can remove the top of the lamp, revealing a coin slot.

You will have to use the code from the left of the plant to solve this puzzle.
After you put in a coin, the total value of all coins inside the lamp shall be the same as in the code.

First you put in the brown 10 coin (10), then the silver 50 coin (10+50=60), then the golden 100 coin (60+100=160), and then the blue 5 coin (160+5=165).

When you press the button, you should get another key.

The music code

The key fits in the top right locker in the right end of the room.

In the locker is a cord, that you can plug into the socket to the left of the computer to power it up.

In the computer is two things: a document with musical notes, and a "labyrinth" of files in different colors.

In the document with notes is a symbol, which matches the symbol over the closet, but rotated 90 degrees to the left.

The notes after the symbol are arranged on 5 different lines, and there are 5 ropes in the closet.

The ropes shall be pulled according the the notes after the symbols.

The order is:
2532341

(Left is 1, and Right is 5)

If you pull the ropes in that order, a "key block" should fall down in the closet. Pick up the block.

The digital lockbox

The key block can be placed in the little alcove in the middle yellow drawer, making it possible to open the whole drawer.

In the drawer is a pair of scissors.

The scissors can be used on the box in the brown closet (revealing a digital lockbox that you can take),
and on the chair in front of the computer (by zooming in on the right side of it).

By releasing the chair, you can move it and open the right drawer, revealing another cog.

Get back the first cog from the clock, and put both of them in the device in the left end of the room, where you found the first cog.

Now you can pull the lever to the left of the cogs, which will move the wall upwards, revealing a grid with colored and empty rectangles.

This is the code for the file labyrinth in the computer.

The code:
G - - - - -
- - - B - -
- - - - - Y
- R - - - -

(R-Red, B-Blue, Y-Yellow, G-Green)

Now open the files according to the code. (Choose the file that is on the same spot on the computer as it's color on the grid)

You should find a file looking like a key. If you click on it, a new program will install itself on the starting menu.

This program can lock and unlock the digital lockbox, but only if it is plugged in.

Zoom in on the left side of the computer, plug in the lockbox, and press the "unlock" button in the program.

The lockbox can now be opened, revealing a screwdriver.

The safe

The screwdriver can be used on the picture of the 3 shapes over the computer table.

If you unscrew the 4 screws, you can open the frame.

By shaking the picture 3 times, 3 puzzle pieces should fall out of the picture.

Zoom in on the computer table, and take them.

By turning them around, you can reveal a code.

The code is:

1 - Up and Left are pointing outwards, Down and Right are pointing inwards.

2 - Left and Down and Right are pointing outwards, Up is pointing inwards.

3 - Up and Down are pointing outwards, Left and Right are pointing inwards.

You can use the screwdriver on the safe in the left side of the room, and press the button in the middle to unlock the puzzle mechanism.

Now you can input the code from the puzzle pieces.

Firstly, click the bar that is pointing downwards, and the one that is pointing rightwards to push them into the safe, and click the button again.
Then you should click the one that is pointing upwards, and then click the button.
To the end click the one that is pointing rightwards, and the one that is pointing leftwards, and then the button.

After opening the safe, you should get a big cog.

The final puzzle

Go back to the device with the two cogs, and remove them. Put in the big cog, and pull the lever again.

Now the wall should move upwards instead, revealing a new mechanism.

This mechanism consists of a left arrow button, a right arrow button, and a key button.

The left and right arrow buttons moves the black wall behind everything else. (From the beginning it is aligned to the left side)

Push the right arrow button to move the wall.

Now all compartments that opens up to the black wall behind shows puzzles and switches.

- The compartment with the robot head behind the shirts
- The brown closet
- The upper right alcove in the right end of the room
- The device whith the lever that moved the wall.

The goal of this puzzle is to connect all colors with their other end through certain pipes.

Each color can only connect with pipes of the same color, so you will have to make circuits of only a certain color through the puzzle,
from red to red, and green to green, and so on.

Each puzzle can only connect a single color at a time, and most puzzles cannot connect certain colors.

The alcove can only connect orange.

The compartment behind the shirts can connect red or orange.

The closet can connect red, orange, or blue.

The lever device can connect all 4 colors.

Since the alcove can only connect orange, it should connect orange.
(Turn the middle circle until the orange cable runs from orange to orange.)

Then the compartment must connect red (since we need all puzzles to connect different colors).
(Switch the plates until the straight red line is in the upper right, and the turn is in the upper left.)

And then the closet must connect blue.
(You can shift the three rectangles. Push the middle one to the right, and the lower one to the left. The upper one doesn't matter.)

Finally, the lever device must connect green.
(Click the green cables so they connect to each other.)

Now you can click the key symbol in the middle of the mechanism in the left end of the room,
and all of the colors should send white lines into the middle.

(If one color doesn't send lines, none of the machines have connected that color, and two or more of the machines are connecting the same color.)

If everything works, the machines should open the doors, and reveal the final key.

This key unlocks the door with the colored circles in the middle of the room, and allows you to leave it.

Reply
ginganinja63 October 27, 2015 2:27 PM

I thought Kotorinosu had given up on room escape games. This was a really fun one. I would never have gotten it without Questioner's help on the last puzzle though. It was easy once I knew the objective, but that was the rub.

Reply

I can't find the

wrench

Can anybody help?

Reply
Coffeeteamix October 27, 2015 3:48 PM

@Jazzer,

did you put the coins in the safebox yet? It's in there.

Reply
Dingding321 October 27, 2015 4:47 PM

Definitely more content than I expected! An enjoyable escape.

Reply
Patreon VIP abfdrumz October 27, 2015 5:46 PM replied to Dingding321

"Definitely more content than I expected!"...I think Kotorinosu's fairly amazing "ROOM Γ" might still be the longest escape game out there, yes? Does anyone know of a longer one?

Reply

@abfdrumz

Yes! Have you played Neutrals new escape game, Elements? It was released earlier this year and has blown the roof off all other escape games. Its long, but not too long that it gets tedious. If you love escape games like i do, PLAY IT NOW!

http://neutralxe.net/esc/elements.html

Reply
Patreon VIP abfdrumz October 27, 2015 6:45 PM replied to NeonOpal

Ah, of course! Somehow I managed to forget about Elements. It's great, and you're right that it's longer as well.

Reply

Speaking of Neutral, she has just released a new one! It's much, much shorter than 'Elements', but still great!

:)

Reply

So I'm curious, even after solving and escaping,

the left door was never opened.

Could there be a secret ending? I poked around a little and didn't find anything, but then I needed the guide a few times in the main game.

Reply

@BlueBird

What new game? I can't find it.

Reply

Never mind, I found it. So excited!! Thxs!

Reply
Patreon Crew SonicLover October 27, 2015 8:32 PM

Since I've figured out how to read most of the "writing" used in this game and Room Gamma, I took a stab at decoding the text from the book you find the bookmark in.

I'm almost certain it's an excerpt from the game's code. Not a lot of documents begin with "PACKAGE G.VIEW.ROOM{".

Reply
Patreon Donator Reka October 27, 2015 9:04 PM replied to NeonOpal

That's just mean. What new game???

Reply

@Reka

Sory, heres the link.

http://neutralx0.net/room/wickedroom.html

Its on Neutrals japanese site. Its another one of their "Riddle room" games.

Reply
Patreon Donator Reka October 27, 2015 11:01 PM replied to NeonOpal

Unfortunately, Wicked Room has a pretty large language barrier for the last puzzle, which means JIG is unlikely to feature it until/unless Neutral makes a translated version. :(

Reply

The Flash icon is greyed out when I click through on Firefox or Chrome. Is there actually a flash version of this game? :-/

Reply
Patreon Donator Reka October 28, 2015 12:21 AM replied to JCS

Click the banner. (I played it in Firefox without any trouble.)

Reply
Jazzer October 28, 2015 2:34 AM replied to Coffeeteamix

@Coffeeteamix

Yeah, I did, but still I can't find it.

For the first time I put two 100 coins and got the change back. After solving the coin-in-the-eye-of-the-statue puzzle, I can't put the coins in the safe again.

Maybe I'm missing something obvious.

Reply
Jazzer October 28, 2015 2:35 AM replied to Coffeeteamix

Aaaand PoP!

So you have to "open" the safe :)

Reply
BlueBird October 28, 2015 4:43 AM replied to Reka

Sorry all, I didn't think we were allowed to post links in here.

Glad you were able to find it NeonOpal :)

Reply
CJTressler October 28, 2015 12:27 PM

I can't get 'Delta' to load as a flash game. On their site, 'Gamma' is the only flash game from the 'Room' series. Am I doing something wrong, or have they taken it down for some reason?

Reply
Patreon Donator Reka October 28, 2015 1:21 PM replied to CJTressler

As noted in the review, the game is the site banner. As in, see that colorful clock above a bench, between the polka-dot door and the desk with three pastel-colored drawers? Click it.

Reply
CJTressler November 2, 2015 11:16 AM replied to Reka

Thanks, Reka. The one time I don't read the review and dive blindly into playing the game...

Reply

For those who care: Kotorinosu is "Bird's nest" in Japanese.

Reply

^ Scroll Up | Homepage >

Leave a comment [top of page]

Please consider creating a Casual Gameplay account if you're a regular visitor here, as it will allow us to create an even better experience for you. Sign-up here!
  • PLEASE UNDERSTAND SITE POLICIES BEFORE POSTING COMMENTS
  • You may use limited HTML tags for style:
    (a href, b, br/, strong, em, ul, ol, li, code, spoiler)
    HTML tags begin with a less-than sign: < and end with a greater-than sign: >. Always. No exceptions.
  • To post spoilers, please use spoiler tags: <spoiler> example </spoiler>
    If you need help understanding spoiler tags, read the spoiler help.
  • Please Preview your comment before posting, especially when using spoilers!
  • No link dropping, no domains as names; do not spam, and do not advertise! (rel="nofollow" in use)
chrpa Jayisgames needs your help to continue providing quality content. Click for details Hi! Weekday Escape and Weekday Puzzle are here! First we have two new cans from tomoLaSiDo and then two small rooms from isotronic. That's all for this...  ...
6,365 Views
0 Comments
chrpa Jayisgames needs your help to continue providing quality content. Click for details Welcome to Mobile Monday! We have another beautiful game from Nicolet and it's a winter game as it should be. Tasuku Yahiro have released another of their...  ...
6,161 Views
2 Comments
chrpa Jayisgames needs your help to continue providing quality content. Click for details We've got a new game from Rinnogogo's magical world and this time it really is magical.. Not only do you get to meet cute animals that express themselves...  ...
chrpa Jayisgames needs your help to continue providing quality content. Click for details After a few weeks of patient waiting, we have been rewarded - the new game from Ichima Coffeedo is here. We got a wonderful new game - it's...  ...

HELP Jayisgames.com

Recent Comments


Display 5 more comments
Limit to the last 5 comments

Game of the week


Dark Romance: Vampire Origins Collector's Edition

Your Favorite Games edit

add
Save links to your favorite games here. Use the Favorites editor.

Monthly Archives