
Sometimes Cloudy Challenge

![]() It is a real (and rare) pleasure here at Weekday Escape to be able to introduce a new room escape designer to our line-up of favorites, to be able to say "check this one out, with some practice and a few tweaks this designer is going places!" Sometimes Cloudy Challenge is a wonderful and tricky new escape game by Haretoki, a Japanese designer that has created something fresh, fun, and fabulous.
It is a real (and rare) pleasure here at Weekday Escape to be able to introduce a new room escape designer to our line-up of favorites, to be able to say "check this one out, with some practice and a few tweaks this designer is going places!" Sometimes Cloudy Challenge is a wonderful and tricky new escape game by Haretoki, a Japanese designer that has created something fresh, fun, and fabulous.
 The space in Sometimes Cloudy Challenge is small and cramped, less a room and more of a large closet. Crammed within the confines are a plethora of strange and wonderful devices, each one more mysterious than the last. This amazing little escape is packed with a fantastic mix of use of found objects, visual cues, and logic, all of which combine to make one exciting little point-and-click puzzle game. The graphics are pretty minimal, basic 3D rendering, and there's no music. The inventory controls are pretty intuitive and even though there is no save feature one is not really needed as there is only one way to escape, albeit in a rather surprising way. Haretoki has taken a lot of room escape conventions and literally turned them on their head in this amazing little escaping gem.
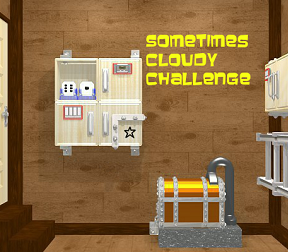
So take the plunge and enjoy a small yet meaty escape that is sure to tickle your logic circuits and prompt at least one "wow, cool!" out of you before you're done. Let's give a warm Weekday Escape welcome to Haretoki!


Walkthrough Guide
(Please allow page to fully load for spoiler tags to be functional.)
Sometimes Cloudy Challenge Walkthrough
General Information
Just click the title page of the game to begin.
Remember to examine everything you pick up, objects may hide other objects.
Don't forget to try and combine objects as well, the sum may be greater than the parts.
There is only one way out, it just may not be the one you expect.
Good luck!
Exploration
You begin facing a wall with a chest on the ground. On the wall to the left of the chest is a panel of some sort. There is also a door on the wall to the left.
Click on the chest for a close up.
The chest lid appears to be clamped down. Click around the base of the chest on the right side and the left side of the chest will flip up, revealing a small yellow object. Take the object and back up.
Click on the panel on the wall for a close up.
Note that the panel has four sections: The upper left section is open and has two dice, showing a six and a one.
The upper right section is locked and has a notch in it in a plug shape.
The lower left section needs a four digit code.
The lower right section appears to be bolted down and has a picture of a star on it.
Back up and turn right.
On this wall is a ladder that appears to be clamped sideways on the wall. Look at the bottom of the right clamp, there's a small red object there, take it (magnet).
Above the ladder on the wall is a small cabinet, click on it for a close up.
The left door of the cabinet appears to need a three digit code.
The right door of the cabinet is unlocked! Click on it to open it and take the object (note).
While the rolled up note is in close up, click on it to open it. It's a clue!
Close down the note and back up.
Turn right.
It gets weirder each time you turn, doesn't it?
On the floor in front of you is some sort of concrete block with a handle. You can click on it for a close up, but you can't lift it.
Above the concrete block is some sort of device. If you push the white button on the device it turns, but doesn't appear to do anything else.
On the right side of the wall is a panel of some sort, click on it for a close up.
The picture on the panel appears to be an infinite repeating picture of the screen you are looking at. Look closely, the hand in the picture is a clue to hover the cursor near the top of the screen.
Hover the cursor near the top of the screen and a navigation bar appears. Click to see a trap door in the ceiling. Pity we can't reach it.
Back up once to the panel with the inifinte picture. Notice another, smaller panel beneath it, which appears to be bolted down.
Back up.
Below the infinite picture panel is a small garbage can, click on it for a close up.
Click on the garbage can a couple of times to turn it over. There's a panel on the bottom! Does that star look familiar?
Back up and turn right.
This wall has a door (locked, of course) and a very strange device on the wall.
Click on the strange device for a close up.
Notice the panel above the device needs a key. There's also some strange stuff in the device itself, but we can't get in.
Back up and turn right.
You should now be back to the wall with the four door panel and the chest.
Time to solve some puzzles!
The Rolled Note
Click on the four-door panel for a close up, then click on the lower left panel code key for a close up.
Play with the numbers on the lock. Do those shapes look familiar?
Pull up the note from your inventory.
Look closely at the shapes on the note. These look really familiar.
The shapes on the note are the numbers on the lock, the segments have just been moved around a bit.
Think of the numbers as segments (long and short) connected at certain places.
If you look closely you can see which numbers each shape on the note would make.
The first shape could make a 4, the second a 1, the third a 7, and the fourth a 3.
Therefore the code is 4173.
Close down the note and enter the code into the lower left code lock.
Once the code is entered click the long white button below the numbers. If you entered the code correctly they should now read "open".
Back up once and open the lower left door of the panel.
Inside you will find an odd yellow device (take it), as well as another die (showing the number 3), and a pattern on the back of the alcove in white and green dots.
Okay, now what?
The Upper Right Cabinet Door
Pull up that strange yellow device you just got from the lower left cabinet.
Notice the blue thing sticking out of the bottom? Click on it to remove it (can opener).
Close down the can opener and pull up the yellow device again (the new one you just got from the lower left cabinet).
There are two holes in the bottom, and the color red. Maybe something can be plugged into it?
Use the magnet on the strange device and you get something that looks like a plug. Hey, that shape looks familiar!
Close down the device, then click on the upper right cabinet door for a close up.
Yes, that plug shaped hole in the door matches the shape you just created with the magnet and the yellow thing!
Place the magnet/yellow thing plug into the hole.
Back up once and click on the upper right door to open it.
Inside is another die, showing the number 4 (are you sensing a theme here?) as well as two other objects. Take the objects (chain and yet another yellow thing).
Close the upper right door, then take back the plug. You should now have 3 yellow objects. Maybe they fit together?
Back up twice.
The Chain
Turn right (or left) twice to face the wall with the concrete block and the garbage can.
This seems easy, we have a chain, and a machine that turns, and the concrete block has a handle. Maybe we can lift it?
Click on the concrete block for a close up, then use the chain on the handle.
Once the chain connects the block to the turning machine, click on the white button.
Okay, it's not strong enough to lift the block completely. Rats!
Back up for now.
The Garbage Can Puzzle
Click on the garbage can for a close up.
That strange panel on the bottom of the can looks familiar, as does that star.
You know, the buttons could represent the four doors on the four-door panel. And the lower right panel of the four door panel has a star, just like the one on this puzzle.
Maybe the dice in the openings of the actual panel are a clue?
But that lower right panel is bolted down and we can't open it!
Think of this as a variation on the old classic, the wobbly picture puzzle.
The numbers on the dice indicate which button to push. Rather like figuring out which corner to push on a wobbly picture puzzle.
Although we haven't seen what is hidden in the lower right panel of the four-door panel, we can infer it from the dice clue.
There are only six numbers on a die, and we've already seen four of the six possible numbers.
The upper right cabinet had a 4, the upper left cabinet had a 1 and a 6, and the lower left cabinet had a 3.
That would mean, by process of elimination, that the lower right cabinet would have the 2 and the 5.
The numbers are the clues as to which buttons to push in what order.
Going from 1 through 6, you would push the upper left button (1), the lower right button (2), the lower left button (3), the upper right button (4), the lower right button (5), and the upper left button (6).
Push the buttons on the panel on the bottom of the garbage can in the proper order.
Once they are pushed, click on the panel and it will rise up, revealing a fourth yellow object. Take the object.
Back up.
The Yellow Objects
Pull up one of the yellow objects from your inventory.
If you examine them closely, it looks like they might fit together.
Start using the yellow objects on each other. Assemble all four pieces to get a single object.
Once all four pieces are in place, the object will open up and you can take a silver key.
Turn right to face the wall with the door and the strange device.
Click on the device for a close up. There's that panel above the device that needs a key.
Use the silver key on the panel and it will slide to the right, revealing a red button.
Yes, push the red button. I'm sure nothing bad will happen.
When you push the button, a lid on the device opens up. Place the yellow object (it looks like the yellow submarine from "Yellow Submarine", doesn't it?) in the open tube.
The yellow object will fall down the tube and attach itself to the strange thing inside. The panel will also slide to the left, revealing a small crowbar. Take the crowbar and back up.
The Infinity Picture Panel
Turn left to face the wall with the garbage can and the concrete block.
Click on that panel above the garbage can, the one with the infinity picture.
Notice below the larger panel is a smaller one that is bolted down.
Use the crowbar on the smaller panel to remove it.
Looks like we need a four digit code here, and the numbers are green.
Have we seen the color green in the room somewhere?
We have, in the dots in the lower left door of the four-door panel.
Go back and look at the pattern of dots.
If you use the dots as a guideline, you can "draw" the shapes of numbers.
The dots appear to form the numbers 5042.
Therefore this is the code.
Enter the code into the smaller panel and push the large white button below the numbers.
If you've entered the code correctly the numbers will change to "open".
Click on the infinity panel picture to open it.
Inside is a lever, click on it to pull.
Brace yourself!
"You Spin Me Right Round, Baby, Right Round..."
Now that was cool, the room just rotated!
The trap door that was in the ceiling is now on the wall in front of you. Looks like we need a yellow key.
Turn right.
You are now facing the wall with the door and the strange device. Notice that the yellow object has done something inside the device when the room turned.
There is now a clue there, the number 673.
You can also see that the garbage can has turned over. Click on the garbage can for a close up.
Take the three dice that are on the floor next to the garbage can.
Click on the garbage can to move it and take a fourth die.
Back up.
Turn right.
Notice that the concrete block is still chained to the device. Click on the device for a close up, then click on the white button. This time, the device will work and the block will open!
Behind the concrete block is a panel that needs a screwdriver. Great.
Back up.
Finding a Screwdriver
Turn right to face the wall with the ladder.
Click on the panel that is now to the right of the ladder and click again on the door that needs the three digit code.
We have this code, it was in the strange device by the door.
Enter the three digit code then click the large white button below (to the left) of the numbers.
Back up once and open the door. Yay, a screwdriver!
Take the screwdriver and back up.
Getting Out
Turn left to face the concrete block and the machine.
Click on the wall where the concrete block was. This is the panel we just found that is screwed down.
Use the screwdriver on the panel to remove it.
Underneath are four notches. Good thing we have those four dice from the garbage can, isn't it?
But which die goes where?
Use the dice on the panel, and the four dice will appear above it, ready to be slotted in.
Look closely at the lines around each notch.
You want the lines to lead to a dot on the die. This is the indicator as to which die goes where.
In the upper left, there are two lines coming in from the top and bottom, and two coming in from the side. This would indicate 4 dots, so place the 4 die in this slot.
In the upper right, there is a single line coming in from all sides, so this would indicate the 1 die, place that one there. Note that when you place the dice the lines each lead to a dot.
In the lower right there are three lines coming in from the top and bottom, and three from each side. These would line up with the 3 die.
In the lower left there are two lines coming in from the top and bottom, and three from the sides. These line up with the dots on the 6 die.
Once you've placed the last die, click on the panel and it will open, revealing a...can?
Take the can.
Good thing we have a can opener, isn't it?
Pull up the can from your inventory, then use the can opener on it.
Take the yellow key and back up.
Turn left or right twice to face the wall with the trap door.
Use the yellow key on the trap door and you've escaped!
Posted by: grinnyp |
January 11, 2012 2:10 AM
|
January 11, 2012 2:10 AM