
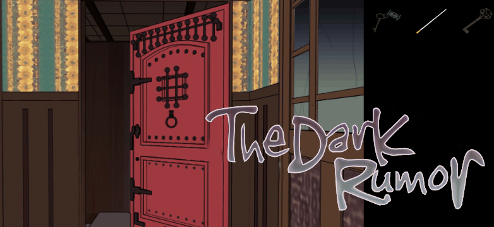
![]() "The Dark Rumor" sounds like a really tawdry romance novel title, something with a lot of heaving and red sateen on the cover, but it's actually an escape game by Gotmail, and that's fine too. In it, you play a contender for the all-time Darwin Awards who really wants to buy a house whose owner will only sell it to you if you can uncover the truth about all the bodies that are rumoured to keep showing up there. Yes, it seems you think buying a house locally known as the freaking Cannibal House is an awesome idea, and you're very surprised when the door slams shut behind you and locks you inside. Click around to hunt for clues to solve the puzzles you'll encounter (remember to examine your items closeup!), and maybe rethink your life choices a little.
"The Dark Rumor" sounds like a really tawdry romance novel title, something with a lot of heaving and red sateen on the cover, but it's actually an escape game by Gotmail, and that's fine too. In it, you play a contender for the all-time Darwin Awards who really wants to buy a house whose owner will only sell it to you if you can uncover the truth about all the bodies that are rumoured to keep showing up there. Yes, it seems you think buying a house locally known as the freaking Cannibal House is an awesome idea, and you're very surprised when the door slams shut behind you and locks you inside. Click around to hunt for clues to solve the puzzles you'll encounter (remember to examine your items closeup!), and maybe rethink your life choices a little.
 Though The Dark Rumour features a lot of puzzle solving that relies on combining and interpreting clues and codes scattered around, the most difficult part for some is going to be the lack of a changing cursor to denote interactive areas, since the fact that not every such spot has any real visual indicator means you'll have to click around everything to find them all. Some people would say this adds to the difficulty, but arguably The Dark Room is hard enough without needing to strip out a more user-friendly UI. The puzzles are actually very clever, but require a lot of figuring out how clues fit together and what they apply to rather than just where to use a key or other item. (Although oddly, the game refers to one item as a "screwdriver" when it's clearly a turnkey.) It makes for a quite stylish game, but one whose gameplay design won't appeal to everyone, which is a shame since its tricky clue combination and more cerebral puzzle design is actually quite refreshing. Don't let the morbid premise fool you... there's nothing scary or gory about The Dark Rumor, and the ending is actually quite sweet. If you love a challenge, despite its missteps in design The Dark Rumor is a surprisingly lovely game that's worth checking out.
Thanks to Chiktionary for sending this one in!


Walkthrough Guide
(Please allow page to fully load for spoiler tags to be functional.)
The Dark Rumor Walkthrough
General Information
Choose your language before you begin.
There is a save feature if you want to leave and come back later.
There is no changing cursor, so beware of pixel hunts.
Many solutions involve combining more than one clue.
There will be directions for the colorblind.
There is only one ending.
Good luck!
Exploration
You begin facing the door out which is locked.
Just to the left of the door out is another door (red), set in an alcove. It is locked as well.
To the left of the red door is a large cabinet with six small drawers in the middle. Click on the cabinet for a close up.
Click on the drawer on the top left. Inside you will find a notebook.
Click on the notebook to open it. The first clue you will see is a heart shape that equals four colors, red, green, yellow, and blue.
Click on the right page of the notebook and you will see a primer on Morse code numbers.
Click on the right page of the notebook and it will close.
Click on the upper right drawer to open it. Inside is a box with a ying-yang symbol and a four digit code lock.
Click on the middle left drawer to open it. Inside is a blue book.
Click on the book to open it. The first clue you see is an hour-glass and four chess symbols, black king, white queen, white king, and black queen.
Click on the right of the book and you will see an 8 x 8 grid that features numbers and letters. The grid is a chessboard.
Click on the bottom right drawer to open it. Inside you will find a note which is another 8 x 8 grid, this one with a picture of an hourglass and numbers inside the grid.
Back up once, then click below the cabinet to see underneath. There is a key there, but you can't reach it.
Back up and turn right.
You are now facing a wall with two upright, glass-fronted cabinets. The cabinet to the left is larger and brown, the cabinet to the right is smaller and red.
Click on the left cabinet for a close up.
Click on the cabinet door to open it.
Inside on the middle shelf you will find two things, a box with a four-digit code sitting next to an hourglass, and a large snail.
Click on the snail for a close up and click again to lift it up. Beneath the snail are some lines.
Back up twice, then click on the smaller right cabinet for a close up.
Click on the cabinet door to open it.
On the top shelf is a locked book with a four digit code (there's a lot of those, aren't there?). There is a treble clef symbol on the book.
On the middle shelf is a cat figurine. If you lift the cat you see a clue that is the number 3 in a triangle, the number 8 in a circle, the number 4 in a diamond, and the number 2 in a square.
On the bottom shelf is a small gramophone device. There is a hole for a screw in the gramophone.
Back up twice and turn right.
You are now facing a sofa and a small glass covered display table.
Click on the display table for a close up. You are looking at a chess game in progress. Notice the positions of the kings and queens.
Back up, then click on the marble bust behind the sofa for a close up.
Next to the bust is a note, click on it for a close up. The note appears to be a ying-yang symbol, with an arrow pointing to two other symbols. The two other symbols are a snail and a fish, but they are upside down.
Back up and turn right.
You are now facing a dining room table. On the right wall is a fireplace and another small cabinet. On the left wall are double doors which are, of course, locked.
Click on the wall with the fireplace.
Now you should see the fireplace and the small cabinet head-on. Click on the fireplace to discover that it is obscured with soot. Back up.
Click on the low cabinet for a close up and you will see that it has a four digit padlock. Note the word "Cat" on the cabinet.
Back up twice.
Click on the chair closest to you for a close up (click twice).
Note that the upholstery has been repaired. Looks like we need a sharp object.
There are two white cylinder-shaped objects on the table. If you click on them for close ups you will see that the one closest to you has a star at the bottom, and the one further away has a heart shape in the bottom.
On the left side of the table is a shallow drawer. Click on the drawer for a close up.
Yep, locked.
Back up and turn right. Time to solve some puzzles!
The Hourglass Box and the Shallow Drawer
We have all the clues we need to open that box next to the hourglass.
Turn right to face the two glass-fronted cabinets.
Click on the left (larger) cabinet for a close up, then open it.
Click on the box on the middle shelf. Now we just need the four digit code.
The answer to this code is in three different places.
The first clue was in the blue book, the hourglass and the four chess pieces (black king, white queen, white king, black queen).
The second clue was the 8 x 8 grid in the lower right cabinet, the one with numbers in all of the boxes.
The third clue is the chess game in the display table.
Look at the game and compare it to the grid with the numbers.
The black king is sitting four squares from the left and four squares from the top. In the number grid that square is number 7.
The white queen is sitting on number 2, the white king is number 8, and the black queen is number 9.
This gives us the code 7289.
Enter the code and the box will open. Inside is a key with a small hourglass attached.
Take the key and back up twice.
Turn left (or right) twice to face the table.
Click on the shallow drawer on the left side of the table for a close up.
Use the hourglass key on the shallow drawer. Inside you should find a metal rod. Take it and back up twice.
Turn right to face the doors.
Click on the cabinet with the six drawers for a close up, then click beneath the cabinet to see the key that is under there.
Use the metal rod to retrieve the key.
Back up twice.
The Music Room (Exploration)
Click on the red door (the one to the left of the door out) for a close up.
Use the key you just got from underneath the cabinet on the door, this should unlock it.
Click on the door to open it and again to enter.
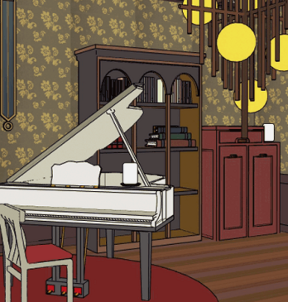
You are now facing a white baby grand piano.
Click on the piano for a close up. The keyboard is, of course, locked.
On the piano is another of those white cylinder things. Inside is what looks like a triangle shape. Back up.
There are some narrow wall hanging things on the left, click on them for a close up.
Once they are in close up you can see an object at the top of the middle hanging. Too bad you can't reach it. Back up.
Behind the piano is a tall bookshelf, click on it for a close up.
On the left of the second from the top shelf are some red books, click on them to see a clue, a candle symbol with an arrow pointing to a music note.
To the right of the red, standing books are some books that are lying on their side. Click on them for a close up.
Click on the books to move them and you will see yet another four digit code lock. This one has a picture of a heart next to it. Back up twice.
On a lower shelf is a small object, click on it and you will see that it is a fish. Note the lines on it.
Back up.
To the right of the bookshelf is a cabinet, click on it for a close up.
This cabinet has two doors. It also has another cylinder thing on top, this one with a square.
Open the right door and you will find a note with a 4 x 4 grid filled with numbers and symbols. There are math equations below the grid which also feature numbers and symbols. The bottom line of the note shows that clubs, spades, hearts, and diamonds point to a treble clef.
Open the left door and you will find two things. The first is another note with numbers in a grid and a clue that star = QHCX.
The second thing in that side of the cabinet is another box, this one with a fleur-de-lis pattern. This box has four dials.
Back up.
Click on the wall hangings to the left of the piano for a close up. Use the metal rod from your inventory to get the item that you can't reach.
You've just picked up a blue triangular shaped candle. Note the pictures on the candle, a cat and four symbols, circle, square, diamond, and triangle.
Back up three times to go back to the main room.
The Cat Cabinet
Turn left to face the dining room table.
Click on the fireplace for a close up, then click on the cabinet to the left of the fireplace for a close up.
We should now have the clues to open this cabinet.
We saw the first clue in the red cabinet beneath the cat figurine, the numbers inside symbols, 3 in a triangle, 8 in a circle, 4 in a diamond, and 2 in a square.
The second clue is the triangular candle we just picked up, with the symbols circle, square, diamond, and triangle.
Placing the numbers in the order of the candle symbols, you get the code 8243.
Enter the code into the padlock.
Click on the lock to open it, then click on the cabinet doors to open them.
Inside is a pile of firewood. Click to move the top piece and get a lighter.
Back up twice.
The Ying-Yang Box
Turn right to face the door out.
Click on the cabinet with the 6 drawers for a close up.
Click on the upper right drawer to open it. Inside is the box with a four digit code lock and a ying-yang symbol.
We should now have the code to unlock this box.
The first clue for this is the snail figurine in the cabinet. Beneath the figurine were some lines.
The second clue is in the music room, the fish figure on the bookshelf which also had some lines on it.
The third clue is the note next to the bust behind the sofa. The note showed a ying-yang symbol, and the snail plus the fish. However, notice on the note that the snail and the fish are upside down.
Take the symbols from beneath the snail, then turn them upside down, aka rotate them 180 degrees.
Take the symbols from the fish and again turn them upside down.
Now place the symbols from the fish on top of the symbols from the snail (both sets should be upside down). Notice that the lines now form block numbers.
They form the numbers 5682, which is the code.
Enter the code into the lock and open the box.
Inside is a green star-shaped candle, take it.
Also inside are some letters: NE, SSW, a fleur-de-lis symbol, NNE, and ESE.
Back up three times.
The Treble Clef Book
Turn right to face the two glass-fronted cabinets.
Click on the smaller cabinet to the right for a close up.
Click on the book on the top shelf for a close up.
Now we need the code to open the book.
The code is the note we found in the music room, the one with the 4 x 4 grid with the numbers and symbols in it.
The grid is a magic square, which means that each row, column, and diagonal add up to the same number.
Going by the two math problems below the grid, the magic number is 34.
If you solve for the top row, 16 + 2 + club + 13 = 34. This makes the club a 3.
If you solve for all the symbols, you get club = 3, diamond = 5, heart = 8, star = 9, spade = 7, moon = 6, and snowflake = 4.
Note the bottom line on the note, club, spade, heart and diamond with an arrow to the treble clef.
This shows the order the code goes in, 3785.
Enter the code into the book, then back up once and open the book.
It's not a book but a box! And inside is a red heart candle. Take it and back up twice.
The Fleur-De-Lis Box
Turn left to face the door that goes out.
Click on the red door to the left of the out door, open it, and enter the music room.
Click on the cabinet to the right of the bookshelves for a close up.
Open the left cabinet door and click on the box inside.
Here's the box with the dials and the fleur-de-lis symbol.
But how do we solve it?
The clue was in the Ying-Yang box.
Remember the letters, NE, SSW, NNE, and ESE?
Those are compass directions.
And the knobs on the happen to have 16 settings, like a compass.
The trick is to turn the knobs to match the compass setting.
Remember, the knobs start with the arrow going up, which is north.
They then turn NNE, NE, ENE, E, ESE, SE, SSE, S, SSW, SW, WSW, W, WNW, NW, NNW, and back to N.
The first knob should be NE, which is two clicks past the top.
The next knob is SSW, which is nine clicks past the top.
The third knob is NNE, which is one click past the top.
The last knob is ESE, which is five clicks past the top.
Once you enter the correct code back up once and open the box.
Inside you will find a yellow square-shaped candle, take it.
The Candles and the Heart Safe
We now have four colored candles of various shapes.
Remember those white cylinder things? They have the same shapes in them.
They must be candle holders.
Back up once until you can see the candle holder sitting on top of the cabinet.
Click on the candle holder until you can see inside. This is the square holder.
Place the square (yellow) candle inside. Use the lighter on the candle.
Back up once and you will see a code on the side of the candle holder, two dots and three dashes.
Back up twice until you can see the piano.
Click on the piano for a close up, then click on the candle holder on the piano until you can see the shape inside (triangle).
Place the triangle (blue) candle inside, and light it.
Back up once to see the code (dash, dash, dot, dot, dot).
Back up four more times until you are in the main room.
Turn left to face the dining room table.
Click on the table for a close up, then click on the candle holder nearest you until you can see the shape inside (star).
Place the star-shaped candle (green) and light it.
Back up once to see the code (dash, dash, dash, dash, dot), then back up again.
Click on the farthest candle holder for a close up until you can see the inside (heart).
Place the heart-shaped candle (red) and light it.
Back up once to see the code (dot, dot, dot, dot, dot), then back up twice more.
Turn right to face the door going out.
Click on the door to the left, the red door, open it, and go into the music room.
Click on the bookshelves behind the piano for a close up.
Click on the pile of books on the right side of the upper shelf.
Click on the books to move them. You should now be facing a save with a heart symbol and a four digit code.
But what is the code?
Remember the book we found in the upper left drawer of the six-drawer cabinet? The one with the heart symbol, the colors, and the Morse code for numbers?
The other clues we just got from lighting the candles. Each candle holder showed the Morse code for a unique number.
The heart (red) candle showed the symbol for 5, the star (green) candle had the symbol for 9, the square (yellow) candle had the code for 2, and the triangle (blue) candle showed the code for 7.
Place the numbers in the order of the colors in the book, red, green, yellow, and blue and you get 5927, which is the code to the wall safe.
Enter the code and the bookshelf will move aside.
Enter the alcove behind the bookshelf. Inside is a creepy doll in a wheelchair. Keep clicking on the figure until you see that it is holding an object. Take the object (key with a note).
Back up and you can see something on a shelf to the left of the wheelchair. Click on it for a close up.
It's a safe, it seems to need a four digit code. Note the stars on the dials.
Back up three times until you are facing the piano.
Getting Out
Click on the piano for a close up, then use the key with the note on it on the keyboard cover.
Lift the cover and take the object inside (envelope).
Pull the object up from your inventory (double click) and click on it once to open it. Notice the holes.
Click again to pull out the letter and read it. Once you have finished reading the letter you will see a razor blade, take it.
Close down the envelope and back up three times to the main room.
Turn left to face the dining room table.
Click on the closest chair for a close up, then use the razor on the upholstery where it has been mended.
Inside you will find a key, take it and back up twice.
Click on the double doors behind the table.
Use the key to unlock the doors, then click on them to open them.
Behind the doors is a sturdy steel grate. Notice the object on the floor.
Use the metal rod to get the object (scraper).
Back up once.
Click on the fireplace for a close up.
Click again on the fireplace for a close up. Use the scraper on the soot to reveal a clue.
Click on the clue for a close up. Note that there are nine letters and a star.
What now?
Use the envelope (with the holes) on the clue, it gives you the clue DOGS.
Back up three times and turn right.
Click on the red door (music room), open it, and enter.
Looks like all we need is the safe in the secret room and we can get out.
But where have we seen the clues?
The first clue is the one from the fireplace grate and the envelope, star equals DOGS.
The second clue is that note we found in the cabinet in the music room.
Click on the cabinet to the right of the bookshelves for a close up.
Open the left cabinet door and click on the note inside.
Notice that star = QHCX.
Combine the two clues, the QHCX down the side, the DOGS across the top.
Find the place where the letters intersect.
The Q and the D meet at the number 8.
The H and the O meet at the number 6.
The C and the G meet at the number 3.
The X and the S meet at the number 2.
Thus the clue is 8632.
Back up twice, then enter the secret space next to the bookshelves.
Once inside, click on the safe on the left shelf for a close up.
Enter the code, then back up and open the safe.
Take the item inside. The game calls it a screwdriver, but it is a wind-up key.
Back up five times to the main room.
Turn right to face the two glass-front cabinets.
Click on the smaller right cabinet and open it.
Click on the gramophone machine on the bottom shelf for a close up.
Use the wind-up key on the gramophone.
Inside you will find a gold key. Take it and back up twice.
Turn left to face the door out.
Click on the door out for a close up, then use the gold key on the door to unlock it.
Congratulations, you have escaped!
Posted by: grinnyp |
November 27, 2013 3:55 AM
|
November 27, 2013 3:55 AM