
![]() Miss Libellule's been enjoying a bit of well-earned rest and relaxation after dealing with The Queen of Snakes, but in jo99's latest point-and-click adventure, she's not staying still for long when a letter literally falls in her lap, begging her to come rescue two star crossed lovers... and be rewarded with a lot of treasure, but that's if she can deal with The Earl Octopusor. All you have to do to play is click to move and interact, and keep your eyes open for clues, since spotting and deciphering codes for locks is a big part of playing. This time around, the game comes with two difficulty options, and if you're playing on "easy", the cursor will not only change when it crosses over interactive zones, it'll highlight important clues in when you place your cursor over them. Place your cursor over the four dots at the right side of the screen to open options for saving, loading, and sound, and use the arrows to either side of your inventory at the bottom of the screen to scroll through it, since some items will be placed on different "pages". If you want to combine items you're carrying, just click on one, and then the object you're trying to combine it with, but be aware that some items with more than one component need to be used in a specific order!
Miss Libellule's been enjoying a bit of well-earned rest and relaxation after dealing with The Queen of Snakes, but in jo99's latest point-and-click adventure, she's not staying still for long when a letter literally falls in her lap, begging her to come rescue two star crossed lovers... and be rewarded with a lot of treasure, but that's if she can deal with The Earl Octopusor. All you have to do to play is click to move and interact, and keep your eyes open for clues, since spotting and deciphering codes for locks is a big part of playing. This time around, the game comes with two difficulty options, and if you're playing on "easy", the cursor will not only change when it crosses over interactive zones, it'll highlight important clues in when you place your cursor over them. Place your cursor over the four dots at the right side of the screen to open options for saving, loading, and sound, and use the arrows to either side of your inventory at the bottom of the screen to scroll through it, since some items will be placed on different "pages". If you want to combine items you're carrying, just click on one, and then the object you're trying to combine it with, but be aware that some items with more than one component need to be used in a specific order!
SEE ALSO ON JAYISGAMES: Humanoid 47
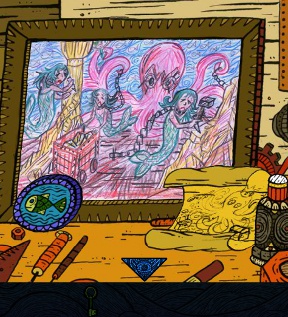 Like every jo99 game, The Earl of Octopusor is a wonderfully creative and unique game with an eye-catching and distinct visual style, but unlike jo99's previous titles, it also takes a lot of steps towards more user-friendliness in its design. Because the art in any jo99 game is always so lavishly, intricately detailed, it used to be an occasionally frustrating challenge to pick out by sight alone what you could and couldn't interact with, and the inclusion of a changing cursor into "easy" difficulty makes the whole experience play a lot more smoothly, with the other difficulty setting allowing your more hardcore point-and-clickers to still play the classic way without help. The puzzles you'll encounter all tend to come down to figuring out how to decipher a particular code or finding keys, and for the most part they tend to be logical affairs, apart from some instances where you may need to retrieve a key you've already used or take something apart. It's finding things that might be tricky for some, especially since even on easy difficulty it's still, well, easy to miss something if you don't pass your cursor over every nook and cranny. If you're the sort of person who knows to examine everything, however, you'll find The Earl Octopusor satisfyingly challenging and a wonderful treat to behold. The ending implies that this isn't the last we'll see of Miss Libellule, and if all her adventures are this exciting and weird, we have no problem with that whatsoever!
Thanks to Nicosite for sending this one in!


Walkthrough Guide
(Please allow page to fully load for spoiler tags to be functional.)
The Earl Octopusor walkthrough
You start on a screen with a sunken boat to the left, and a cave to the right.
The boat:
1.
Zoom in on the boat and enter it.
2.
Pick up the blue cap from the ground.
3.
Zoom in on the grey cabinet on the left and open it.
4.
Get the net from the ground, and the green brush from the bottom part of the cabinet.
5.
Zoom out and open the middle drawer. Get the compass and the right half of the green amulet.
6.
Zoom out and open the top drawer. Drag the sea creature away and pick up the left half of the green amulet.
7.
Zoom out to the point where you started, and enter the cave to the right.
8.
Zoom in on the little device to the right of the door and rotate the pieces of the picture so that they fit. Turn the wheel and enter the door.
The cave:
1.
Zoom in on the left chamber and remember the three symbols over the picture.
2.
Back out, and zoom in on the middle chamber. Enter the three symbols and pull the lever.
3.
Get the statue, back out and enter the left chamber again.
4.
Put the statue on the pedestal to the left of the picture.
5.
Move the mouse over the face, and remember the color of the eyes.
6.
Back out and enter the right chamber. Enter the right color combination in the two circles, and rotate the wheel. Enter the door and watch the cutscene.
In and out of water:
1.
Turn around and zoom in on the chest in the lower right part of the screen.
2.
Push the robot, and grab the green key inside it. Back out and turn around.
3.
Unlock the chamber to the right with the green key, and enter it.
4.
Zoom in on the bench to the right, and grab the fish amulet.
5.
Push the white button, and remember the lights that flashes to the right. Zoom out.
6.
Zoom in on the chest on the left, and enter the color code. Get the small cog, and back out to the pool.
7.
Dive in the pool, and pick up the big gear in the upper right. Move the mouse over the painting in the lower right and remember the color of the fish and the three circles.
8.
Zoom in on the prison cell and click on the compass in your inventory. Open it and get the middle piece of the green amulet. Put all pieces together as the compass says, and put the amulet in the lock.
9.
Enter the prison cell and zoom in the mechanism to the right. Use the brush on it and move the mouse over the gems. Remember the code.
10.
Pull the lever, zoom out, and retrieve the jewels. The red one will be swallowed by a fish.
11.
Back out of the prison, and catch the yellow fish with the net. Open his mouth and get the red jewel.
12.
Back out twice, and swim up to the pool. Turn around and zoom in on the chest in the lower right.
13.
Insert the fish amulet, and get the eye amulet. Take the fish amulet back.
14.
Back out, zoom in on the door, and insert the eye amulet.
The Lair of The Earl Octopusor:
1.
Zoom in on the left part of the lair, and zoom in once again on the red treasure chest to the left of the mermaid.
2.
Insert the fish amulet, and get the rhombus stone. Get the fish amulet back if you want. (Doesn't affect anything that i know)
3.
Back out twice, and zoom in on the right part of the lair. Zoom in on the stone statue of a man riding two seahorses on the left, and insert the rhombus stone in the lock.
4.
Zoom in on the destroyed sphere and get the pink octopus stone. Move the mouse over the fish painting on the left side and remember the color of the fish and the three circles.
5.
Back out twice, and zoom in on the throne. Zoom in on the statue on the left, and pick up the handle.
6.
Back out three times, and zoom in on the left part again. Zoom in on the painting, insert the pink octopus stone, and get the red key.
7.
Back out three times, and put the big gear, the little gear, and the handle together. Put the finished device in the pillar to the left of the door.
8.
Zoom in on the old man, give him the blue cap, and get the note in his hand.
9.
Back out all the way to the starting screen, and zoom in on the ship.
10.
Zoom in on the safe to the left, and input the code from the note. Get a flask, and then go all the way back to the old man.
11.
Give the bottle to the old man, unlock the treasure chest with the red key, and get the triangle stone. Move the mouse over the fish painting to the right, and remember the color of the fish and the three circles.
12.
Back out, and enter the lair. Zoom in on the right part of the lair, and then on the fish statue.
13.
Input the three codes from the fish paintings, turn the wheels, and get the three keystones.
14.
Zoom out once, and zoom in on the throne. Enter all of the keystones and the triangle stone in the slots on the left and right side.
15.
Zoom in on the treasure, insert the jewels as mentioned in the prison, turn the valve and enjoy the ending.
Thank you VERY much for your fantastic walkthrough! - Dora
Posted by: Questioner |
April 17, 2014 11:33 AM
|
April 17, 2014 11:33 AM