
The Holidays are Over
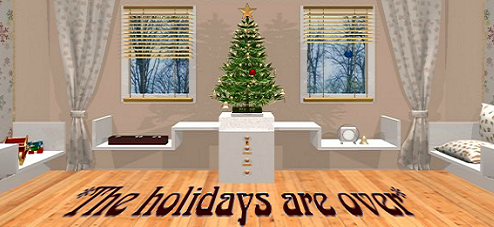
![]() While the winter holidays like Christmas are a riot of brightness and warmth to offset the lengthiest night of the year, eventually the celebration is over and it becomes time to take down the decorations, extinguish the twinkling lights, and face the long, dark wait until spring. After the holidays is a contemplative interval, and a perfect setting for one of Tomatea's quiet, Zen-like room escapes. Isn't it nice that they've filled the void with their latest, The Holidays are Over?
While the winter holidays like Christmas are a riot of brightness and warmth to offset the lengthiest night of the year, eventually the celebration is over and it becomes time to take down the decorations, extinguish the twinkling lights, and face the long, dark wait until spring. After the holidays is a contemplative interval, and a perfect setting for one of Tomatea's quiet, Zen-like room escapes. Isn't it nice that they've filled the void with their latest, The Holidays are Over?
 Click your way around this calm, quiet room aided by the glow-top cursor that highlights areas of interest. A wide variety of interesting puzzles await the intrepid explorer and gives a quiet last hurrah and fare-thee-well to the season of lights. The Holidays are Over features logical puzzles and a fantastic control structure including an easy to use inventory and the ability to save your game and come back later. The glowing cursor eliminates most pixel hunting, and the only potential downside is the many color-based puzzles which may not be accessible to all. Entertaining whatever the time of year, The Holidays are Over is another exquisite escape from the fertile mind of Tomatea. Let's Celebrate!
Thanks to Celli for sending this one in!


Walkthrough Guide
(Please allow page to fully load for spoiler tags to be functional.)
To apologize for my spam, a colorblind-friendly walkthrough.
You start off facing a table with a CHRISTMAS TREE on it. We'll call this the NORTH WALL.
Zoom in on the CHRISTMAS TREE. Note the hot spots. Take the STAR.
Examine the STAR. It's a puzzle we don't yet know how to solve. Close out of item view.
Zoom out and back in to the table. Right now, the only drawer we can open is the bottom one, so do that and get an ORNAMENT (1/9).
Navigate right to the EAST WALL.
Zoom in on the chair to the left and get an ORNAMENT (2/9).
Check out the PICTURE to the right of the chair. We'll have to come back once we have a SCREWDRIVER.
Zoom out, then in on the SNOWGLOBES to the right.
Lift each snowglobe. From left to right, the symbols are a blocky "u", "c", "n", and "backwards c".
Zoom out and in to the table in the middle. How can we apply the clues from the SNOWGLOBES?
Top middle, right middle, bottom middle, left middle. Now click the button below to enter the code.
Take the GNOME and the BLUE SQUARE, and flick the switch. The tabletop is now BLUE.
Navigate right to the SOUTH WALL. I see the Fifth Doctor was in charge of decorations here. :)
We don't yet know the solutions to the table-door codes, but take a good look at the candles and the posters.
The poster on the left shows two BIG CANDLES, two MEDIUM CANDLES, and two SMALL CANDLES. The poster on the right shows a BIG SNOWFLAKE, a MEDIUM SNOWFLAKE, and a SMALL SNOWFLAKE.
On the left table, take ORNAMENT (3/9) and note that the BIG CANDLE is BLUE, the MEDIUM CANDLE is YELLOW, and the SMALL CANDLE is RED. On the right table, note that the BIG CANDLE is RED, the MEDIUM CANDLE is BLUE, and the SMALL CANDLE is YELLOW. On both tables, you are reminded that yellow and blue make green, red and blue make purple, and red and yellow make orange.
Navigate right to the WEST WALL.
Zoom in on the table and bring up the puzzle. It's a jumbled picture, and it's missing a piece. Good thing we have it in our inventory. Put the BLUE SQUARE in the jumble, and it's ready to be solved (by swapping pieces). Get ORNAMENT (4/9) and a WIND-UP KEY.
Examine the WIND-UP KEY to discover that it has numbers on its back: 986. Close out of item view and flick the switch to make the tabletop GREEN.
Zoom in on the box to the left. There are three snowflakes, and we need to fill in the colors. This is where we put together the clues from the SOUTH WALL.
We combine the colors of the two BIG CANDLES (BLUE and RED make PURPLE) for the first snowflake, the two MEDIUM CANDLES (YELLOW and BLUE make GREEN) for the middle snowflake, and the two SMALL CANDLES (RED and YELLOW make ORANGE) for the right snowflake. For the colorblind, that's 4 clicks on the left, 6 clicks on the middle, and 2 clicks on the right.
This looks like something we'll have to come back to later, but we can certainly make note of the symbols as long as we're here. On the left, there's a large circle circumscribing a medium diamond circumscribing a small square. In the middle, there's a large diamond circumscribing a medium square circumscribing a small circle. On the right, there's a large square circumscribing a medium circle circumscribing a small diamond. And the box is divided into a 3x3 grid.
Zoom out and in to the table on the right. It's a SLEIGH!
Touch the SLEIGH and use the WIND-UP KEY on it. Take back the WIND-UP KEY and press the button to watch the runners move: L L R L R L.
Navigate right back to the NORTH WALL.
Zoom in on the table to the right. There's a CLOCK, but the little light is red. Turn it around and use the WIND-UP KEY on it. Take the WIND-UP KEY back if you like, and turn the clock back around. The little light is now green. Push the button by the light and watch the hands move: Just past 10:00, 6:00, 3:00, just past 7:00.
Zoom out and in on the table under the CHRISTMAS TREE. Select the drawer with the four circles as the puzzle.
Click each circle so that the blue dot on the edge is about where the CLOCK hand was.
Collect the SCREWDRIVER.
Navigate to the EAST WALL.
Zoom in on the left side and select the PICTURE.
Use the SCREWDRIVER on the PICTURE. You only have to click one screw, and it will animate the rest. Now remove the back and get the WRINKLED PAPER.
Examine the WRINKLED PAPER and click it to unfold it. It shows one RED square at the top, one square each on the left and right, and two squares on the bottom. Surely this is a clue to something.
Navigate to the SOUTH WALL. We now know how to solve the table-door puzzles.
Zoom in on the table to the left. It wants 3 numbers.
Remember the WIND-UP KEY? Input 986.
Get the HAPPY DWARF and flick the switch so the tabletop turns YELLOW.
Now go to the table to the right.
Remember the SLEIGH? Press L L R L R L, then enter.
Get the WAVING DWARF.
Examine the WAVING DWARF. Is that a KEY he's holding? Get the KEY. Close out of item view and flick the switch so that the tabletop turns PURPLE.
Navigate back to the NORTH WALL.
Zoom in on the table under the CHRISTMAS TREE. Use the KEY from the WAVING DWARF to unlock the top drawer. Get the SCISSORS. Flick the switch and turn the tabletop RED. Hmm. How did we guess that it would be RED?
Select the SCISSORS. Zoom in on the CHRISTMAS TREE and get ORNAMENT (5/9) and ORNAMENT (6/9). Zoom out and in on the right-hand window. Get ORNAMENT (7/9). Sorry, it's not a Borg drone. Navigate to the SOUTH WALL and zoom in on the exit door. From the decoration on its left, get ORNAMENT (8/9). Allons-y!
What's left? We still have one more ORNAMENT to find and we still haven't solved the STAR that's sitting in our inventory. But maybe now we can!
Compare the WRINKLED PAPER to the tabletops around the room. Starting with NORTH and traveling clockwise, we've got RED, BLUE, YELLOW, PURPLE, GREEN.
Bring up the STAR. Make the top arm RED (3 clicks), the right arm BLUE (5 clicks), the bottom right arm YELLOW (1 click), the bottom left arm PURPLE (4 clicks), and the left arm GREEN (6 clicks). Now click the button in the center.
The STAR opens up and we get a CUT-OUT PAPER with stars on it. Since that's usually a hidden-message decoder, let's find a thing that has words on it. Navigate to the SOUTH WALL and zoom in on the snowflake poster on the right. Select the CUT-OUT PAPER and overlay it on the poster. Four letters are highlighted.
We can either intuitively un-scramble them into a word, or we can count the number of points each star has and order the letters that way: SNOW. Rather fits with the theme, doncha think?
Navigate to the NORTH WALL.
Zoom in on the table under the CHRISTMAS TREE. There's one last drawer we haven't opened yet, and it wants letters. Gee, I wonder what they could be.
Take ORNAMENT (9/9).
But what do we do with these ornaments?
Zoom in on the table to the left of the CHRISTMAS TREE. Put the WAVING DWARF in the first spot, the GNOME in the middle, and the HAPPY DWARF in the third spot.
They give us colors and symbols! Make a note that BLUE is SQUARE, RED is CIRCLE, and GREEN is DIAMOND.
Where have we seen those shapes before?
Navigate to the WEST WALL.
Zoom in on the table on the left and open the snowflake box. Select the ORNAMENTS and place them in the box. For the colorblind, the initial placement is GREEN on the left, RED in the middle, and BLUE on the right.
We're almost done! We just need to arrange the ORNAMENTS according to the shape clues. Top row is all large, middle row is all medium, and bottom row is all small, so that makes things slightly easier.
CIRCLE is RED, so swap top middle for top left. GREEN is DIAMOND and BLUE is SQUARE, so that's it for the top row.
In the middle row, swap the center and right.
In the bottom row, swap left and right.
A SNOWFLAKE KEY should pop out from the side of the box. TomaTea doesn't do multiple endings, so you're all ready to escape!
That's a lot of spoiler tags. This is River Song, signing off.
Posted by: ray9na |
February 19, 2014 5:14 PM
|
February 19, 2014 5:14 PM