
![]() The Japanese are known for a lot of things, two of which are escape games and surrealism. Today we introduce you to yet another Japanese developer whose work falls into both of those categories. The artist is Kung Fu paradise, and the art is Tsuregemu 4. You're in the three-room house of an animated white stick figure named Shirojin, whose only housemate is his cat. Obviously, your task is to escape from the house by any means necessary, even if you have to solve a hundred puzzles to do it. Click around to inspect and interact with things and pick up inventory items, and use or examine things from your golden inventory bar at the bottom. There's also an "About item" button for when items need further inspection, and a musical note that toggles the insanely catchy soundtrack.
The Japanese are known for a lot of things, two of which are escape games and surrealism. Today we introduce you to yet another Japanese developer whose work falls into both of those categories. The artist is Kung Fu paradise, and the art is Tsuregemu 4. You're in the three-room house of an animated white stick figure named Shirojin, whose only housemate is his cat. Obviously, your task is to escape from the house by any means necessary, even if you have to solve a hundred puzzles to do it. Click around to inspect and interact with things and pick up inventory items, and use or examine things from your golden inventory bar at the bottom. There's also an "About item" button for when items need further inspection, and a musical note that toggles the insanely catchy soundtrack.
 Tsuregemu 4 won't be winning any awards with their 3D graphics, but you can tell what you're looking at most if not all of the time. The game's true meat, however, is its puzzles, which are original and cleverly designed without being too nonsensical, and many of them require interacting with Shirojin and his cat in various ways. There's even a memo containing optional hints should you need them. The lighthearted atmosphere is just the icing on the cake; in how many escape games can you catch yourself wondering how you're going to get that afro-wearing weirdo to stop doing the pelvic thrust in front of the picture you want to look at? If you haven't smiled enough today, Tsuregemu 4 is a good way to put one on your face. Have fun!


Walkthrough Guide
(Please allow page to fully load for spoiler tags to be functional.)
Tsuregemu 4 Walkthrough
The First Room
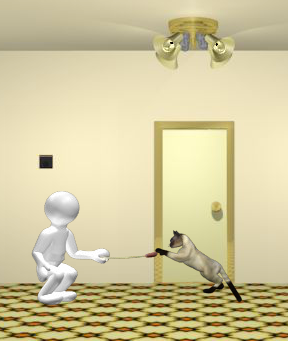
You'll start out facing Shirojin, a door, and a pet carrier. You can't do anything with Shiro, but it looks like he's standing in front of something. You can't get to it with him in the way, though. The door, naturally, is locked, with no visible opening mechanism.
The pet carrier has a weird lock on it. Make a note of that shape, as well as the checkerboard pattern of holes in the front.
Back away and turn right. There's a shelf with a bowl on it. The bowl contains some chicken jerky, yum! Take one (just one). Note the word "Small" you can see in the bowl after you do. Huh...
Turn right again. An arrow points up to a hole in the ceiling you can't see up for lack of light. What's that on the table? A box? And it's locked. You possess the clues necessary to open it, though.
Remember the pet carrier? The orange shape on the box resembles the keyhole. Let's copy the positions of holes to the buttons here: make it up like a checkerboard, with the left corners untouched, then click OPEN.
Ta-da! Take the white thing inside. Note that you can zoom in on the metal bar holding the mirror... and considering how it struggles if you click, our life would probably be easier without it. Zoom out and turn right.
Nothing on this wall... wait, I think I see something in the lower left. There's a hidden panel... and it needs a four-digit combination we don't have. Oh, well... we'll come back to that one later.
Back where we started, check out the pet carrier again. Examine the white thing you got from the box on the table. Its nine sections pop out and in when you click on them. Make it look like the keyhole, flipped horizontally: up-down-up, down-up-down, down-up-up.
That done, put the white thing in the keyhole. The carrier will unlock, the cat will come out, and Shirojin will be smitten and start playing with it. Hey, there's a slip of paper in the carrier; check it out.
Now that Shirojin's bent down, you can check out the black panel that was behind his head. Zoom in on it and mouse over... a pawprint? Wait, I think this is what the green-bordered memo was talking about!
So what does it mean? Mouse over the second "toe" from the left and leave your cursor there for ten seconds. Don't click or hold the mouse button or anything, just keep the cursor there.
If you did it right, the door will unlock. Shirojin will give you his cat toy ("Setaria"?) and proceed into the next room. Follow him.
The Second Room
Another door. Let's zoom in; this one has a keyhole. It also has an arrow to the right of it... and it wants you to look at it from a distance. What?!
Anyways, check out the hatch to the left of the door. It needs a four-digit combination, and there's a hint about "All members". We have no idea yet what that means, so back off and turn right.
A shelf of figurines of various colors! Neat! Note that a few of them are golden and have G's marked on their heads. Huh. Looking on the right side of the shelf will yield a clue: powers of ten related to the shelves.
That's enough of that. Back away and turn right again to reveal the door we just came from and a nonsense painting. I think the last time I saw something like that in an escape game I held a card with holes cut in it up to it in order to decipher a hidden message. It's probably a similar deal here.
Turn right one more time to find Shirojin's cat on a sofa... and a memo beside him. The memo contains a bunch of hints, but you won't need them since you're reading a walkthrough.
Now, let's look at that safe over the sofa. The numbers are partially covered, but I think I can guess what they are: 4 right, 2 left, 3 left, 8 right.
How do we interpret that? Well, note that the safe's dial has 12 positions, just like a clock. Turn it right until it points to where 4 o'clock would be, then left until 2, then further left to 3, then right to 8. You'll get some longnose pliers for your trouble.
Go back to the first room and check out the box you opened earlier. Disassemble the metal arms holding the lid by using the pliers. Now you can tilt the mirrored lid as far back as you want? Tip it back as far as it'll go and... huh? What's it reflecting? Something about a G?
Keeping the mirror in that position, back away and look up again. The mirror is sending in enough light for you to see! It looks like the G dolls equal 5. That MUST be a clue for that shelf in the second room!
Let's see... there are golden dolls on the first, third, and fourth shelves. Taking the gold dolls as 5 and every other color as 1, sum up all the dolls on each shelf, multiply each total by the corresponding power of ten on the right side, and the grand total is... 9,599. Wow.
Go try 9599 on the hatch by the second door. Click! You'll open a window... which the cat immediately disappears through. Let's take a peek through and see where it went.
It's playing with a key! I bet it opens the door, but how do we get the cat to give it to us? Hmm... maybe it could pass it under the door. Tease it under the door with the Setaria and it'll toss the key through.
Get the key and use it to unlock the door. Presto!
The Third Room
So, here we are in the third room. Look closely at the door; it looks like it has some sort of screw-lock. Well, we don't have a screwdriver, so let's forget about it for now. Check out those cats on the shelves.
One's the real cat and one's just a figurine. We wouldn't want to handle one the wrong way; there's got to be a smarter way to figure out which is which. Offer them the chicken jerky and the real cat reacts! Now take the figurine.
Back away and turn right to find a painting with nothing on it. There's also a black thing you can pick up: a "foot massage seat". I'm guessing it has a particular texture. Well, we don't need a foot massage, but maybe we can use it for something else.
We're facing the door we came in. Hey, look at the shutter on that window! I bet if we closed it, it'd frame a specific part of that painting in the second room... or it WOULD if that clown wasn't in the way.
There's one more wall, but all it contains is a window that's locked with a bar. Your pliers don't help, either. Go back to the second room; we're done here for the moment.
Let's take care of Shirojin's mischief. Drop the foot massage seat under him. Oops, looks like his feet are too sensitive for it. Don't worry, he didn't die; he just fell over.
Go back to the third room and look through the window again. The way's clear, so close the shutter (hold the mouse button) and you'll be able to read a four-digit number: 7-8-5-3. Do we know of anyplace that could use a four-digit number?
Yes, we do: the hidden hatch in the first room! Go back there and find the hatch (it's in the lower left corner of the area with no centerpiece). Enter the number and you'll get access to a screwdriver and a lever. Take the driver and trip the lever.
Oops! The lever unlocked the shutters in the third room, but it locked the door between the first and second rooms! Reset the lever to unlock the door again; we need to figure out a way to trick that locking mechanism.
Say, while we're here, why not put the cat figurine in the carrier? With a resident, the cat carrier will be lockable, so close it and take the white key-piece back.
Say... when you're in the first room and open the door to the second, that arrow in the background looks like it's pointing to the door frame. Inspect that area of the door frame to find the latch. Maybe we can jam it open with something.
Modify the white key-piece again. This time, the code is down-down-down, up-up-up, down-down-down. Then put it in the doorframe.
Go trip the lever in the hidden compartment again and watch the door lock give up the ghost. Now you can go to the third room and open the shutters.
Um...? Those holes in the wall beyond the shutters look kind of like something in your inventory. Examine the pliers up close, disassemble them with the screwdriver, and stick the disassembled pliers in the wall. The painting across the room will turn over.
This puzzle's a clever one. There are 26 icons, each one a stylized letter of the alphabet: the top row is GSTCAHU, then LEN-ZOB, then KQX-YVM, then PDFRIWJ. Click the letters in alphabetical order, starting at A and ending at Z.
When you finish, something will unlock. You can now lift the painting and look around in a cubby-hole behind it. There's nothing there but a "Magical oven"... what the heck are you supposed to do here?
Oh, I almost forgot! You've got a screwdriver, and the exit door was locked with a screw! Go try it... what do you mean the screwdriver's too large?! Well, we've still got it... maybe we can make the end smaller somehow.
Wait! Those four letter buttons on the oven door can be used to spell the word "SMALL", like from the bowl in the first room. Maybe it can be used to make things smaller? Put the screwdriver into the oven, then push S-M-A-L-L.
It worked! The screwdriver's smaller now! Go use it to turn the screw on the door. With the door unlocked, open it and be on your way!
Thanks to SonicLover for the walkthrough!
Posted by: Dora Breckinridge |
February 19, 2013 1:22 PM
|
February 19, 2013 1:22 PM