
 Hi, this week is time for games from the past!
Vitamin Hana takes you for a walk in the woods and wants you to repair found bike. Rokunohako prepared a set of cunning puzzles for you and right after you escaped their room, you get locked by Tototo Room in a fancy garden full of strange statues and devices. The closing game of this WE is by Esc-Forest and not the easiest one. But fun!
Have a good time and enjoy!
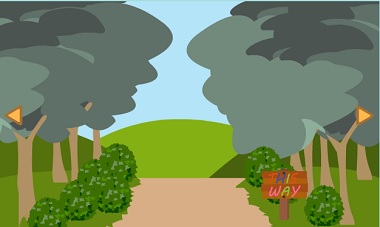
On a sunny day, you set out for a walk in Vitamin Hana's forest. Your red backpack became too heavy soon - no wonder, there are three big boxes in it (wonder how they fit in) - so you decided to take a rest at a nice clearing. You look around and...oh look - a bike frame! That would be marvellous to ride a bike on a back journey...if only it had wheels. Maybe if you carefully explore the clearing you'd find something interesting, maybe even the wheels!
The cursor isn't changing, no save button, one ending.
P.S. Helpful birds turn up - and they look familiar, we've met them before, here in Free the Birds.
The second (and the last) game by Rokunohako has two scenes only but don't underestimate it since puzzles could be more complicated than they seem and few hotspots hard to find. The changing cursor is your good friend, if stuck, try to recheck both scenes whether you haven't overlooked some active area. Not sure about endings, there is one unused area and two used but still active items left in your inventory at the end of a game...
The cursor is changing, no save button, one ending (?).
P.S. Their first escape you find in WE N°91.

Tototo Room created a short series of 3D games (the links to the previous parts you find below) and this is the third and the last one. You find yourself in a very well kept garden with locked gate. Birds are singing, the sun is shining, someone finally removed that ugly shrub which they grew earlier (viz. prequels)...well, it's a perfect day for solving several puzzles. Start with exploring, you'll be out soon...if you find the key, of course.
The cursor isn't changing, no save button, one ending.
P.S. Previous parts of this little serie are here: Garden in WE N°121 and Garden 2 in WE N°127.
First, I apologize for inconsistence in posting Esc-Forest's games. The problem is, as usual, the way browsers handle ending Adobe Flash Player. The developers created four games only (high-quality in all aspects) but the playability isn't the same nowadays, and it changes. This game and Esc-04 (WE - RE N°31) can be played directly (on my PC in Edge and Firefox - I just need to allow Adobe Flash) but they weren't some time ago. Esc-02 and Esc-03 (the links below) are automatically downloaded but the second one was recently directly playable...it's a mess.
These games definitely worth playing though, so here is their first escape game, as classic as it can be, with many interesting puzzles...can you escape?
The cursor isn't changing, no save button, one ending.
P.S. Here is link to Esc-02 (download only), and Ecs-03 (in WE-RE N°23) appears to be downloadable only, too.
We love escape games, and our readers love talking about them and sharing hints! How about you? Let us know what you think, ask for clues, or help out other players in the comments below.


Looking forward to these.
Out of the Forest
This is the only game this week that can be played without Flash… and the only one I didn't need to look up hints for. Retro really was a scarier time.
Exploration
A red backpack rests on the floor, but it has a four-color padlock.
Turn right to find a path out and a helpful sign pointing you to it. For some reason, this is not sufficient to let you out of the forest.
Turn right to find a bicycle frame which already has a basket but no wheels, so it's more of a no-cycle. To its left, a break in the bushes is occupied by tall grass instead.
Four colors
For the backpack, use the clue from
the sign
to unlock it:
The letters on the sign are red, blue, green, red, pink, green, pink.
⌟⌝ ⌞⌟ ⌜⌞⌜
Inside, you find three colored boxes and some bread shreds. There's a box with three color buttons, a box with nine buttons in a grid, and a box with three digit buttons.
It seems that you don't have clues, so maybe just look around a bit more.
Specifically, back out and turn around, then turn back to the backpack and you'll find three birds eating the bread.
From bread to grass
Use the clue from
the birds
to unlock the left box:
Click the buttons 5, 2, 4 times to make them green, blue, orange.
Inside, there's a hammer you can use on
the sign.
After removing the bicycle chain, you find a clue with a grid of numbers.
Use that to unlock the middle box:
8 3 6
5 1 9
2 7 4
Following the clue, start on the middle button, then bottom-left, then top, and so on up to the right (position numbered 9).
Inside, you find a pair of garden shears.
Use the shears to cut the tall grass, revealing a crate with three colored shape buttons, a flashlight and a bicycle gear.
Hidden circles
Examine the flashlight and turn it on, then use it on
the open backpack
to find a clue with three circles.
Use this clue to unlock the three-digit box:
The positions of the circles represent numbers on the post, which from left to right form the code 534.
Inside, there's a wheel with some shapes formed in colored wire.
Use that clue to unlock the box in the grass:
The black, green, yellow shapes on the wheel are the
triangle, circle, square.
Inside, you find the other wheel and a spanner.
Fixup
Attach both wheels and the pedals to the bicycle, then the chain, then use the spanner to fix it all in place.
Pick up your completed bicycle, place it on the path out of the forest, and click to leave!
Pretty sure I missed a hidden spot in this game, but apparently not everything is used anyway.
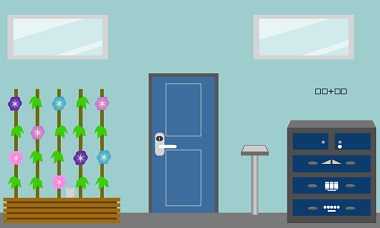
Escape 2 Asagao
The text below the game mentions that there's only one ending. So yes, you may get confused along the way but as long as you get out you're good.
Exploration
You start off facing the locked door. On the left are some flowers and leaves, and you can pick up an empty coffee cup. To the right of the door, a pedestal has a dial which moves a rectangular thing behind a glass pane (or back).
The chest of drawers has some math above it on the wall. The top-left compartment contains a folded note with three circles, while the top-right compartment is locked. Under that, a drawer has two triangular buttons, a drawer has a three-digit lock after an equals sign, and a drawer has a five-digit lock with flower and leaf markings.
Back out and turn around (click the bottom of the screen). At the left, two keys hang from chains in a hole in the wall with a metal grate between them. Under that, you can see behind the glass some kind of hole over a square receptacle on a pole.
To the right, look at the horizontal rails, where the cupboard mounted on them has colored doors. The left one has four green sliders, the middle one has four shape buttons, and the right one is unlocked and contains a metal piece that looks like a lighter (but you can get a better idea by examining it).
Above that, a fish tank has several plants and a goldfish. There's a compartment to the left with a thin slit you can't use, and another compartment on top with a keyhole.
On the right side are three pictures. The ladybug and grasshopper picture look quite normal, but the dragonfly picture has an array of numbers with the middle column replaced by digit buttons. Above the pictures, a wall shelf has a chest on it that's way too high to reach.
Starting out
You might have several guesses for some of the puzzles, but some of them are wrong!
The clues you can trust are
the plants in the tank, the grasshopper picture, and the dragonfly picture.
For the left cupboard door:
The plants in the tank have 4, 5, 2, 3 pairs of leaves.
Click the sliders 3, 4, 1, 2 times.
Inside, you find a folded note with a face on it.
Perhaps this note might inspire you to solve the dragonfly picture. Or perhaps you might just be able to guess it.
The first sequence is even numbers, which have a constant difference of 2.
The second sequence is Fibonacci numbers, where the difference between each pair of numbers is the number before that pair.
For the third sequence, the differences are
+13 ? ? -11
where the missing numbers add to -2. This suggests that you can fill in the missing numbers with +13 and -11, getting
+13 -11 +13 -11
with the result that the missing value is 8.
(Alternatively: if you interpret the numbers as times on a 24-hour clock, then all the differences are just +13.)
Or you could just notice that the missing values are the average of numbers equally spaced to the left and right, and must be from 0 to 9.
The sequences are
2 4 6 8 10
1 1 2 3 5
6 19 8 21 10
Enter 6 2 8 into the buttons.
Push the green button to reveal a blue key, which unlocks the
top right compartment of the chest of drawers.
Inside, there's an eraser and metal part.
For the top (two-button) drawer:
The hanging golden key has the same pattern as the grasshopper, and when you lift it you realize that the blade is an arrow and the triangles form the same shape as the grass in the picture.
The only thing those picture has that could be a clue is…
The "feet" of the grasshopper look like the flat right triangular buttons on the drawer.
From left to right (across the picture) they point in the LLRLRR directions.
Inside, there's a panel with a flower-and-leaf design.
Rounded
You'll need the
eraser and note with circles.
You can find a hidden spot by
reading the note and noticing that it matches the spots on the ladybug except for the top-left one.
Use the eraser on the top left spot.
This gets you a four-digit code. But you have no four-digit lock, so where does it go?
Use the code to unlock the four-button cupboard door:
The shapes with 5, 0, 3, 6 sides are the pentagon, circle, triangle, hexagon.
Inside, you find a cross piece. Examine and click it to rotate, and you'll find that the back of it is also a cross.
Math
You might notice that the sum on the wall doesn't unlock the second drawer. Instead, you'll need to
place the cross piece in the + shaped slot.
This turns it into a × sign, and makes light lines appear around it.
And then, you can solve the puzzle by
reading all lines regardless of color, and working out
06×80 = 480
After entering that into the drawer, open the drawer to find a screwdriver.
Missing
Hmm, there are no screws around here.
Use the screwdriver to pry open the compartment to the left of the fish tank.
Hmm, there's nothing in it but a square outline!
Pick up the panel from the floor.
Paired
You'll need the clues from the
plants beside the door, and both panels.
At this point, you might be expecting to
hang the metal pieces somewhere and then place the panels on them
but I couldn't find a place to do this, so you just have to imagine it.
For the bottom drawer,
The combined picture on the panels shows you
1 1 5 1 4
objects.
And if you count the flowers/leaves beside the door as indicated on the drawer, you get
2 3 2 1 2
Combining both clues gives you a total of
3 4 7 2 6.
Inside, you find a square block divided into three colors.
Moving house
Place the
block into the pedestal beside the door, and turn the dial.
You hear a rumbling behind you, which is the cupboard moving across the rails, letting you reach the chest on the wall shelf.
Unlock the chest
using the silver hanging key
to find a black key, which unlocks
the compartment above the fish tank.
Hmm, this is also empty.
Down the grate
Use the
coffee cup in the fish tank to fill it,
and then
pour it down the grate between the hanging keys.
This makes
the square area in the narrow compartment rise up
so you can take a blue key from it. Use that to open the door and escape!
Garden 3
The bird sounds will get annoying, but thankfully there's a mute button for them. The text beside just tells you that if you need to examine an item you should double-click.
Exploration
After you finish admiring the statue, back out to face a familiar-looking clock and a fountain which asks for a coin.
Turn right to face a building. A small panel on the side facing you has lots of squares. On the right, a neatly trimmed tree has some sort of tag attached to it.
While looking at the tree, click the building again to view the tiny window on that side. There are two holes under the window.
Back out thrice until you can see a bench with a violin case on it. The case has a small keyhole on its side.
Back out once more to get an overview of the garden, then go forward to look at double wooden doors with a keyhole.
Turn left to find three busts. Under them, there's a blue star above a four-letter lock, a hole above a panel you can't open, and a black star above a grid of nine buttons.
Turn left to find a round pavilion with a picture of dice faces over a die mounted next to a golden button. Under that are two cupboard compartments (although it's made out of marble), where the top one is locked and the bottom has seven buttons that turn black and gold.
Back out until you can see a round table. A box on it has six buttons.
(Back out once more, and you reach the screen facing the door once again.)
Dice
Use the clue from
the dice picture
to unlock the dice piece. (The arrow beside the die reads "to back", and it rotates the die.)
Leave the faces with 2 and 4 dots alone. For all the others, push the buttons on the middle row.
After pushing the gold button, back out and open the top cupboard to find a handle.
Use the handle
on the tiny window of the right building
to get a key that unlocks
the violin case.
Left and right pedestals
The only clue you have is the
violin.
For the left (bust) pedestal,
Hover over the strings of the violin to find that they are tuned to
G D A E.
Inside it, you find a spiraling arrow clue above a golden button that raises a flag above the right building.
Now you can unlock the right pedestal:
Push the buttons in the order shown by the arrow:
5 4 3
6 1 2
7 8 9
Inside, you find a pair of binoculars.
Look
The clue from the
flag on the right building
doesn't count unless you
examine the binoculars and extend it before using on the flag.
You know it's correct if you see a button that turns off the flag fluttering.
For the bottom cupboard under the dice:
Click the top three buttons and the bottom button once each, and the other three buttons twice each.
Inside, you find a clue with colored letters, and a round piece with a star marking.
Place the round piece into the middle pedestal, and now you can use the clue you just found to do something:
The busts now rotate when you click the arrows beside them.
The first letter is a blue L, which tells you to click the button on the Left side of the pedestal with the blue marking.
Doing this for all the letters, you find that you need to click the 1st, 4th, 5th, 3rd, 2nd, 6th buttons form the left.
This unlocks the middle pedestal, which contains a golden button that makes a pair of hedge trimmers appear in front of the dice puzzle.
Greenery
Use the hedge trimmers on the tree on the right side, and you get the envelope from it.
Inside the envelope, you find a note with letters and dots, which you can use to unlock the box on the table:
To spell out GARDEN, click the buttons in the middle row from left to right, then the top and the bottom button.
Inside, you find a coin. Use it
on the fountain.
Now the right building has a puzzle on its front! You can read the hint, or just try solving it:
Work out 6+1−5+4 = 6, and then enter it as a dice face.
(This equation works on the dot level: the dots that appear in 5 are just those that appear precisely once in 1 and 4 combined.)
Push all six buttons except the middle one, and then the button below.
This gets you a balloon bear with a key in its pouch that unlocks the door so you can leave!
Thanks Killo. can;t wait for the last one.
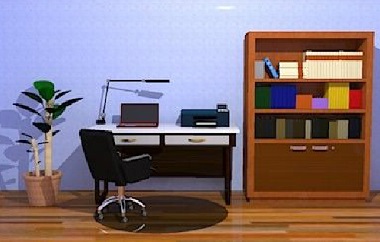
Esc-01
This series starts simple with no story and no saving. But one piece of advice still holds: 先に (first) means you need to find a clue for the puzzle, and 既に (already) means you've already solved the puzzle for the clue.
Exploration
You start off facing a potted plant, a desk and a bookcase.
On the desk, you see a laptop (or a notebook computer) which gives you a clue. To its right, you can open up the printer and take a note from the scanning area. Both desk drawers are empty.
Click the right edge of the computer to find its (empty) disc drive.
(Click the left edge of the screen to return.)
On the bookshelf, in between a novel and several files you see a light blue book with a card suit marking on its sleeve. It contains two sets of clues. The bookshelf also has six sets of colored books, and two locked doors at the bottom.
Turn right to find a cupboard with three drawers. The cupboard part has a four-letter lock while the drawers don't have locks. The top two drawers are empty but you can't open the bottom one. Beside the potted plant on top, you see a weird blue clock that never seems to give you the correct time.
Click beside the bottom drawer to find screws hidden in the side.
There's also a pink shelf with several items here. At its top left is a wooden panel with four card suit pieces in the corners, but one of the pieces is missing. The apple in the bottom right of the shelf contains half a key.
Turn right to face a couch. The game tells you that most of this screen is uninteresting, so just search the couch to find a metallic treasure box which has a keyhole. Next to the locked door, there's a device with four buttons and a card reader.
But surely there's more than that! Clicking around, you find a hole in the ceiling on the left.
Turn right. Once again, the left side of the screen is uninteresting, but next to the closet there's a lock with blue, red and orange buttons as well as a framed picture of colored circles.
Color puzzles
Use the clue from the
note
to unlock the closet (click the buttons under the colored squares):
The markings that the arrow passes through are the letters B, R and O.
Since those are the initials of Blue, Red and Orange, you need to push the
BORBRROB buttons
(LRCLCCRL)
Once done, you can open the left side of the closet to find a blue four-digit safe, and the right side of the closet to find a stack of storage compartments, which are completely empty except for a small platform in the top one.
Use the clues from the
framed picture and book
to solve the compartments in the closet:
Each column of the picture has the same three colors. Among those three, one is special.
Purple is a combination of the other two. Tracing its position across the picture from left to right gives you the code
BMBMTBTMBT
(3232131231 from the top)
Open the compartments in that order.
You find another half a key. Now you can
combine both halves and then use the key to unlock the chest
to get a club piece.
Four pairs
After placing the club piece into the puzzle on the pink shelves, you can use the clues (marked with card suits) from the
computer and book
to solve it:
The clue on the computer tells you the meaning of N, S, W and E.
Each word in the back of the book contains exactly one of N or S, and exactly one of W or E.
Reading only those letters, the words indicate quadrants:
SE NE SW NE NW SW NW
The middle compartment is now open! And it contains a compact disc.
Digital
Insert the disc into the computer (from its right side), which adds another clue to the screen.
Use that clue to unlock the safe in the cupboard. Hint:
You're adding and subtracting, but not in a normal way.
Solution:
What you're adding and subtracting are segments of the display.
For example, the last digit is 9+1, but since there's only one segment missing the +1 just fills in the last segment to give 8.
One way to speed up the calculation is to note that the digits
0 1 2 3 4 5 6 7 8 9
are represented with
6 2 5 5 4 5 6 3 7 6
segments, so for example "0-4" needs 2 segments and therefore must be 1.
Similarly, "1+3" needs 5 segments, so it must be 2, 3, or 5, but only 3 includes the two segments that are already in 1.
"4+2" must be 0, 6 or 9 but only 9 includes 4 in it.
Putting all those digits together gives you the code
9318.
Inside, there's a note with picture and text, a key and a yellow star piece which has a Y on its back.
Lights
Use the key to unlock
the bottom of the bookcase
where you find a device with six columns of lights controlled by red buttons.
Use the clues from
the note and the bookcase (and maybe the star piece)
to unlock it:
The letters on the note are the initials of
Purple Blue Red Orange Green Yellow
which are the 1st, 5th, 3rd, 2nd, 4th, 6th shortest sets of books by height.
Push the buttons 0 4 2 1 3 5 times.
Inside, there's a screwdriver. Use it to unscrew
the bottom drawer near the clock
which contains a clue panel and a white star piece.
Letters
Use the clues
from the bottom drawer you just opened, and the clock
to unlock the four-letter cupboard:
The time shown on the clock shifts whenever you push the red button, and the letters on the clue panel tell you which of the clock hands to look at.
When the counter reads 1, the Second hand points to G.
When the counter reads 2, the Hour hand points to A.
When the counter reads 3, the Minute hand points to M.
When the counter reads 4, the Second hand points to E.
The code is GAME.
Inside, there's a remote control.
Vertical / Exploration 2
Zoom in on
the ceiling at the top left of the couch screen
and use the remote control
on the sensor there, which lowers the ladder so you can climb up.
A spotlight shines on a semicircular piece of furniture with a locked compartment on top.
Turn right to find a stack of crates, as well as a three-letter box with shape buttons next to a shape clue.
Turn right to find the ladder back down.
Turn right to find a small table with a book on it. You can flip through the pages to view more clues, including an unusual skiing picture.
Turn right to find a grid of letters above a pedestal with a grid of star-shaped holes next to a rather complicated clue board.
Upstairs puzzles
You'll need
all the clues upstairs, as well as two star pieces.
For the three-letter box, hints:
The pattern of letters looks like that on the first page of the book (upstairs).
And the shapes tell you something about the code you need to enter.
and solution:
You'll need to find six words starting with B C F H T W and having the same last three letters. (So for example, you can't reuse AKE from the book because HAKE is not a word.)
The shapes also tell you that the last two letters must be the same. (So for example, you can't use ARE.)
The most common doubled letters in English are LL, EE and SS, and it's easy to get a solution after trying these with various vowels for the second letter.
Both ALL and ELL are accepted answers.
You find a purple star piece.
Now you can put all three pieces into the pedestal under the letter grid. Hint:
You'll need three different (sets of) clues to solve this.
and solution:
Each star piece is marked on the back with the initial of its color.
Together with the letters in the grid, that gives you twelve letters. Each letter is made up of a certain number of strokes.
Z=F tells you that the direction of strokes doesn't really matter: both have three lines.
But the book warns you that you should treat letters with (left-right) symmetry different from those without.
(yellow) Y: 3 lines, symmetry
(purple) P: 1 line and 1 curve, asymmetry
(white) W: 4 lines, symmetry
The letters on the grid that match the same descriptions are A, D, M.
Place the yellow piece at the top right, the purple at the bottom middle, and the white at the top left.
Pushing the red button releases a golden key with a shiny red gem. Use it to unlock
the metal cover
and find a card key.
Evening
Use the card key on the reader beside the room door, and use the remaining clues from the game:
the red book and clock
to unlock it.
The letters SKI appear on the clock where 9, 5, 4 should be.
But since the book tells you that the code is S:KI pm, on a 24-hour clock it would be
2154
Open the door and leave!
Esc-02 — Underground Warehouse
In case the creepy Papyrus font on the title screen isn't a strong enough warning, the text tells you there's some horror in this. It's not too intense, so I'll let you find the scares yourself.
Intro summary
(Very condensed summary because the prologue is super long!)
Working late alone at the office you ran out of coffee and then ran out of paper for your reports. The printer trays are all empty, and the stash in the storage locker is missing, so you accept your abysmal luck and head to the basement.
Instead of the warehouse, the open door welcomes you into a moldy cellar and then slams shut locking you in. Where's all this wind coming from anyway?
Your key doesn't work, and there's no cell reception. To top it all off, you now recall the old rumors of an employee gone missing followed by some supernatural incidents.
After pinching yourself to confirm that you aren't his ghost, you set about finding the correct key for the door.
Exploration
You start off facing a short pedestal with three letters in a square, a four-letter safe above it, some pipes with a red valve that has been bolted on too tight, and a corridor on the left.
At the end of the corridor, you find a locked panel, but its lock is actually a clock controlled by three buttons.
Back out and turn right. The shelf on the left has a toolbox with a letter panel, as well as four paint cans. The wall in the middle has some kind of machine hidden behind iron bars, as well as a hexagonal bit of metal under it. On the right, you see a mirror that gives you a clue when you look in it, a sink that only works for a short while, and a completely empty cardboard box.
Turn right. There's stairs leading up and a corridor on the right, and in between them a table has a three-digit lock, the calendar above it is really old, and there's a keypad with a grid of buttons that the game won't let you use yet.
Go up the stairs to the entrance, or as the sign tells you, the exit. The door lock has buttons that don't work at all.
(Click the bottom of the screen to turn around, then click where the pipes are visible to climb down, then turn right twice to return to the bottom of the stairs.)
Go into the dark corridor. The game tells you it's too dark and you should back out.
Turn right to face three arched stone corridors. The left one ends at a small crack in the wall with something behind, next to which you find a hint book beside some detective novels and philosophy books. (The hint book is completely optional and you can try working out the puzzles without it for a real challenge.) The middle corridor ends at a patterned metal board fastened by four screws. The right corridor has a fleshy locked box with a tiny keyhole.
Water and Fire
Use the clues from
the mirror (and the book)
to unlock the box under the calendar. You can get a hint in Japanese by
clicking on the mirror clue.
The game points out that writing only the letter a in lowercase is weird.
Solution:
You need to view the clue in the mirror in a mirror.
The mirror image of SEa gives you the digits 632.
You get a lighter. Since it's too weak to light anything up, you can only use it
on the calendar.
It doesn't burn at all, but you get a clue with a circled number.
Use the clues from
the blood calendar (and the book)
to unlock the keypad nearby:
There doesn't seem to be enough space to write 24, but the book tells you how to do it.
Write 2 in two columns and 4 in three, then merge the right side of 2 with the left side of 4:
R R - R

- R - R

R R R R

R - - R

R R - R
After pushing Enter, you hear something move, and you find it in
the dark corridor.
Dark and Light
That looks like a dead end, but then you might realize that
the game hasn't marked the puzzle as complete
which means you need to
Push Enter on the grid keypad again.
The game confirms your solution with lights and a cutscene. You can now enter the dark corridor to reach the gate at the end, which has a four-digit lock. You can also pick up a jeweled key at the bottom right corner.
Use that key to unlock
the flesh box
and get a flashlight.
Use the flashlight
after examining and turning it on,
on the crack near the bookshelf (in the left archway).
Use the clue you just got to unlock the gate:
The book shows you how the text is encoded.
It's not just a substitution cipher/Caesar shift, it's the most popular one: ROT13!
Write the alphabet in two rows as shown: A to M and then N to Z:
ABCDEFGHIJKLM

NOPQRSTUVWXYZ
Replace each letter in the clue with the one above or below it in this arrangement.
The clue decodes to words spelling out 5748.
Click above the rightmost button on the padlock to open it, then back out and open the gate.
The only thing in this room is a screwdriver! Use it
to remove the metal panel in the second archway.
You find a red pointy piece and a hint note.
Moving the needle
Use the
red pointer and note (and book)
to unlock the clock panel in the corridor (on the pipe screen). First:
Place the pointy piece into the clock, where it becomes another clock hand.
A hint:
You're looking for three numbers, one for each hand.
Solution:
The positions of the clock hands are indicated by roman numerals (if you don't know them, the book shows you), and if you read carefully enough you can find those numerals on the hint note.
The names of the clock hands (hour, minute, second) also appear on the note as their initials H, M, S.
Combining those clues, you find that you need to press the red, blue, green buttons
5, 6, 9 times.
Open the cabinet to find a wrench.
Use the wrench to remove the valve from the pipes, then attach the valve to the wall under the iron bars and turn it.
This weird machine has a coin slot!
Check behind the left side of the machine to find another letter panel.
Letter grid
Place both letter panels into the pedestal where you started, which makes an additional clue appear on it.
Then use the clues
from the letter grid/pedestal (and the book)
to unlock the safe above:
The pedestal tells you to start with E and end with E, spelling out something you can't do.
There aren't many options for such words, but the book helpfully gives you the answer: ESCAPE.
However, the safe panel only needs a four-letter word.
The book tells you to consider shapes and their English names.
Spelling out ESCAPE in the grid forms a five-pointed star shape.
The code is STAR.
Inside, you find a coin with a crescent moon symbol, as well as a hint note with colors and numbers.
Enumeration
Place the coin you got into the machine, then use clues from the
new hint note (and book)
to unlock it. Hint:
Each group of numbers refers to a specific color, and the book gives you a hint for the logic involved.
Solution:
The numbers are the positions of the letter E in the color names. For example, 34 represents Green because E is the 3rd and 4th letter of Green.
Translating each group of digits to its color, you get the code
O G B R G R O
(push the 3 2 4 1 2 1 3 buttons from the left)
After pushing Enter, you get a key. As you back out, all the lights in the room dim.
Lost
Spend too much time in the dark and you get a Game Over! Thankfully, you can just continue where you left off, and it doesn't happen again.
Make your way up the stairs to the door, and use the key to unlock it.
It didn't work! Now you have to solve the four-digit lock on the door.
The only clue you have left is the key. Do you see any digits on it?
The red arrows near the tip of the key tell you to mentally move the top half of its pattern down and the bottom half up.
(But not too far! If you look at the third symbol on each half, you'll see that they must combine to form the digit 0. The top half is still above, and the bottom half is still below.)
The code is 3507.
Open the door and leave to end the game.
Ending summary
After making a quick call to your senior before rushing home, your supervisor invites you to his office the next day.
He explains that the previous director had kept all the company secrets in a secret vault, where the basement is now, and protected them with traps.
It actually worked to trap an intruding employee, but he took his own life in the vault to avoid being caught. The investigation revealed his suspicious activities, but the director managed to cover it up.
At the supervisor's request, you kept this story a secret, and nothing weird happened afterward.
Update