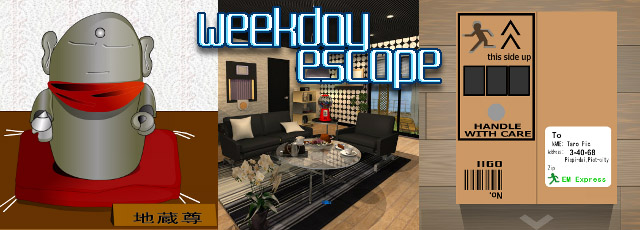
JayisGames.com is now available ad-free!
Jay is Games recommends Cheat Happens with 8,000+ games and 35,000+ trainers!

Weekday Escape N°32


Comments (42) | Views (15,389)

Weekday Escape

elleIn this spot is where I introduce our weekly episode of Weekday Escape, a choice selection carefully culled from the burgeoning crops of free escape games along the internet landscapes. Here you might get a brief idea of what's in store for you, and as you've come to expect, you'd see there's another quest for five sweet treats in FunkyLand's Candy Rooms, or a package to dismantle in another episode of Find the Escape-Men, as well as something new, a "handmade escape game" from Tototo Room in which you must find 11 buttons. Or maybe you just see the colorful banner, think "Awesome sauce! More escape games," and skip straight to the fun stuff. Hey, it's cool, I get it. Go play. Have a good time! We can always chat it up later...

Candy Rooms 13: Black Modern
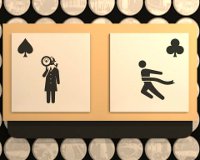
Candy Rooms 13: Black Modern - FunkyLand brings fabulously swanky elegance and cheeky whimsy to the scene in one fell swoop. This episode of the series seems to be aptly named in more than one way, as it is as full of contrast as black and white. On one hand we have incredibly fun visuals, with a playful method of puzzles presentation that exceeds expectations. Yet, on the other, there is an action the relies heavily on inference—or, rather, what some might rightly call randomness—which might prevent access to part of that fun. Despite that particular...flaw? I hereby vote this the most grin-bringing FunkyLand creation thus far!

Button Escape 22
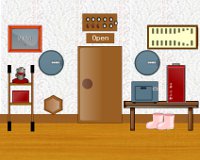
Button Escape 22 - Ehem. There's a button. Who's got it? Eleven times, in fact. But, with some pretty cool puzzles to go along with it. Tototo Room's hand-drawn artwork has its own quiet charm that can draw you in as well as any FunkyLand oeuvre. This single one-walled scene is packed with lots to do and, although it's mostly all Japanese, language knowledge is not needed. Just look for and click on the little grey circles, keeping count above the door. When you've collected all, you're free to go. It's a teensy bit like Yuri's Chick Hide-and-Seek yet distinctly its own thing. Let me know how you like it—as this is number 22, perhaps next time we'll play some others together while awaiting the 23rd.

Find the Escape-Men 112: EM ExpressFind the Escape-Men 112: EM Express - Huh. A package arrives in the mail. But you've ordered nothing. Let's rip this open and see what's inside! Well, it's not so simple as that, actually. All these little green men are stuck to it. Appears to be a puzzle of some sort or other. It's more tricky than trying to extract your new Radio Disney Zip Clip from the volumes of Costco plastic packaging that consumes it. You really want to see what surprise gift No1Game has sent you though. So, with some trial-and-error, careful examination, and a few deciphers, you eventually have all ten escape-men in hand and a conquered package to gloat over. When the thrill of all that is over, no need to slink back into doldrums—there's a whole Dismantlement series you can tackle.

We love escape games, and our readers love talking about them and sharing hints! How about you? Let us know what you think, ask for clues, or help out other players in the comments below.

Walkthrough Guide


(Please allow page to fully load for spoiler tags to be functional.)

Button Escape 22 Walkthrough

Button numbering (see indicator panel above the door)
1 2 3 4 5
          11
6 7 8 9 10

Buttons, listed in the order I found them.

  • These don't need any puzzle solving, so get them first.

    7.

    Move the right rainboot.

    8.

    Move and shake the left rainboot.

    6.

    Open the hexagon door and look closely at the mouse.

    2.

    Forehead of statue.

    5.

    Statue's right hand.

    1.

    Inside incubator.

    4.

    Just to the left of food box (the red rectangle on the table on the right).

    10.

    On food tray, behind the card on the lower left.

  • These are behind locked doors or panels - follow the "solving" steps below to access them.

    11.

    Open the back of the left-hand round door.

    9.

    Back of RAIN picture.

    3.

    In red box.

Solving

Right-hand round door

The clue is the food tray. The semicircles are the tomatoes and thus red, the long thin rectangles are the pasta and are yellow, the elongated ovals are the green beans, and the parallelogram is on the chopstick wrapper and is blue.
Colorblind: 6 clicks, 3 clicks, 1 click, 2 clicks

Left-hand round door

  • Get the black item from behind the hexagon door. Double-click it in your inventory and open it up to reveal the binoculars.

  • Look at the duck behind the right-hand round door. Use the binoculars to look at the bars of the cage. Note the numbers and the red stripes.

  • If you haven't already, collect the red panel that was the cover of the food box.

  • Look at the long panel on the right wall, the one with the stripes. Look at the right end; notice that there's a slot. Try the panel from the food box; yup, that fits. Note the red stripes.

  • Look at the card on the food tray: it has a series of bars labeled 1, 2, ..., 9, 0.

  • Match up the red stripes you saw on the cage bars with the panel on the wall, and use the hint from the food tray to decode the numbers.

    5976

  • Use the numbers to open the left-hand round door.

Incubator

  • Get the net from the floor on the right (it's that stick in the foreground).

  • Open the left-hand round door and use the net to retrieve the egg. (You can try giving it to the duck, but she says it's too cold and rainy.)

  • While at the left round door, notice the thing sticking into view on the top right; click it to get the small key.

  • Notice the keyhole on the back of the round door. Use the small key to open it. Get the decorated staff.

  • Put the decorated staff in the statue's hand and click the statue so it turns around. Note the symbols. Also, take a closer look at the card at lower right; flip it around to see more of the same symbols.

  • Put the egg into the incubator. Turn it on using the code from the statue.

    1232321

  • Retrieve the hatching egg and give it to the duck.

Red box (below statue)

  • Now that it has stopped raining, take another look at the left-hand round door. Use the net to get whatever it is that's shining in the water: it's a gold key.

  • Use the gold key on the RAIN picture.

  • Move your mouse over the box on the top left for a hint: a picture of an umbrella and "blank blank I N". The obvious letters to fill in the blanks are "R A" (to form the word RAIN). Find the R and A on the grid, and note the numbers between them.

    8471

  • Use the RA code to open the red box. Peel back the paper (where it's a bit ragged-looking on the left) to reveal the last button.

Candy Rooms 13: Black Modern Walkthrough

Round hard candy

Look through the frog's¹ items.

It's all the way to the right.

Flat lollipop

Inspect the plant next to the sliding-glass doors.

Round lollipop

Examine the lamp in the corner.

Flat hard candy

Check under the coffee table.

Gumball

Get the coin from the frog¹ and use it in the gumball machine.

The coin is all the way to the left.

 
¹ The Frog

  1. Get the slider from the bench along the back left wall (below the curtained alcove).

  2. Look at the two big white squares to the left of the sliding-glass doors. Put the slider in the middle of the gray area on the bottom.

  3. Move the slider back and forth and notice how the pictures change.

    Spade = 8, Club = 1

  4. Examine the clock (on the wall to the right of the door). Notice the symbols.

    Heart = 4, Diamond = 6

  5. Look at the box on top of the shelves to the right of the door. Put in the code you found. Get the key.

    8461

  6. Use the key to get the tablet out of the box below the wolf picture (on the far left).

  7. Put the tablet into the slot above the curtained alcove. Click the arrows in both directions to see what sort of interesting things you can give the frog.

  8. When you find a useful item, zoom out from the tablet and look at the alcove. Press the button below it to raise the curtain and get the item from the frog.

Find the escape men 112: EM Express

Initial view

Note the number adress: 3-40-68 and the number upsidedown 0911 with the barcode
Take the first escape men the side of Em Express

The code number side

Of the initial view go down and right. There's a barcode and we have tu put 4 number on the left. Remember the initial view with the numer and barcode?

Put 0911.

Take the pink paper. Click the upper left side of the barcode until it shows a escape men.

EM Express Side

Go right note the bar code with the numbers 101011 and the word star. Go right again.
Click bottom right of EM express until it goes out. Take the escape men.
Click the left side of the new stick and take another escape men.
Zoom the pink paper and see the morse code. Click the audio figure and listen it carefully. Will use it later.
Now let's see the figures code.

Remember the numbers 3-40-68. Put it according to the number of side of each figure. 3= TRIANGULE; 4= SQUARE; 0= CIRCLE; 6= HEXAGON; 8= OCTAGON. Click the white circle.

The stars side

Go right. There's 6 stars that turns black or white.

Remember the bar code with the numbers 101011.
number 1 means black and 0 white. So it goes b-w-b-w-b-b.
Take the escape men of the black circle.

The big and black square side

Go left twice. Take the escape men of the black square.Wait
a while and another escape men will appear passing through the black square.

The bottom view of the box

Go left twice an click the bottom of the box. Take the escape men.

The final

Go up twice, to the initial view again.
Click The ss of the EM Express and take the escape men.
Zoom the morse pink paper and turn it to take it another escape men.
Take the escape men and put it on his place.

There's a code with three words. Remember the morse code that you've listened. It Goes S-O-S. Click The white button.

42 Comments

I always love FunkyLand games, they're clean and simple. Though I see what you mean about the sorta random puzzle... I think I only got it because I was expecting something to work in an odd way after reading your review. Otherwise, fantastic as always. I actually really enjoyed the Button Escape! Not as polished graphics wise as something like FunkyLand, but the puzzles were fun with the right balance of difficulty and logic. And a really clever outing from Escape Men, very much reminded me of the Dismantlement games. There was one last man that took me ages to find because

you don't have to solve any puzzle to find him.

but it was probably one of my favourites of the series! Hooray for Weekday Escape :D

Reply
stupidcheeseboy July 16, 2014 4:55 AM

So I'm stuck with an egg I can't hatch, a key that won't open the only lock I can find and am missing 3 buttons...help?

Reply
dfjones1981 July 16, 2014 4:59 AM replied to stupidcheeseboy

There is another key hole

Reply
iLLuSioN_MooN July 16, 2014 5:35 AM

In Candy Rooms 13: Black Modern, I actually don't understand the logic of spade and club picture, especially the spade one. The club picture make some kind of sense, but I still can't figure out the logic behind the spade picture. For those stuck, The numbers you got from those two pictures are...

8 and 1, respectively. I still don't know why 8. I just try the number for spade slot on the box one by one.

Other than that, the graphic is nice, though the room is rather limited. I was so used to steering around the room by clicking left or right that I was trying to do so at the beginning. It's not the game's fault though. As Squiddly said above, the game is clean and simple. You could finish this game in 10 minutes or less.

Reply
shanisek July 16, 2014 5:44 AM

@iLLuSioN_MooN:

When you add the slider (the first item, like a grey slab) to the bottom of the spade/club pictures, you can drag it forward and backward. It makes the numbers apparent.

Reply
krt1994 July 16, 2014 6:51 AM

2 men on/under front label, 1 under bar code label, 2 under 2-layer label, 1 on the other side of the box, 1 from star puzzle, 1 from shapes puzzle, 1 on the other side of the Morse code sheet

What am I missing?

Reply
manutius July 16, 2014 7:49 AM replied to stupidcheeseboy

for the key:

there's another keyhole on the inside of the lefthand circular door

you wouldn't have been able to hatch the egg without doing the last bit, but if you're still stuck:

there's a metal rod-type thing inside the unlocked door (or should that be sub-door?)

try putting it in the statue's hand

A-ha! He turns, and where have I seen those symbols before..

click on the label next to the statue and you'll the same three symbols..

imagine the incubator buttons have those symbols and input the code on the statue's back reading from top to bottom

Reply

I have 9 Escape Men, a clue, and a place to use the clue, but nothing happens when I click anything.

I have the Morse code sheet, which I suspect is to be used in the three black boxes on the top of the package. I know the code is

SOS

but have no way to enter it.

A bump in the right direction would be appreciated.

Reply

For the last Escape Man.

In these games there is always one you have to click a bunch for and one you have to wait on a screen for.

Reply

@Kurt

I was stuck in the same spot. There's another escape man hiding behind something that you have to find before the letter code can be input. Don't read the next spoiler if you want to figure it out on your own.

The last escape man is behind the banner where the audible clue was found.

Reply
mrjprive July 16, 2014 10:29 AM

@kurt

under speaker sticker

under box, turn from star panel

Reply

@grander and @mrjprive

I already have all the ones you are pointing to. Should be able to use the final clue, but all the clicking in the world is getting me nowhere.

Reply
manutius July 16, 2014 11:01 AM replied to kurt

@Kurt

the combined ten escape men let you activate the morse code panel -- you're missing one

Reply
mrjprive July 16, 2014 11:05 AM

@kurt

did you get the one you wait for?

at the black rectangle

did you scratch every sticker?

Reply
mrjprive July 16, 2014 11:08 AM

I'm having a devil of a time with the tototo dot room.
how do these work:

I can see the back of the statue

and the three symbols behind the sign

I'm hoping they're the clues to the red door code...

Reply
manutius July 16, 2014 11:09 AM replied to kurt

@Kurt
Further to the last comment, I'd look in these places:

1. next to EM Express label on top of box
2. Under bottom right corner of EM Express label
3. On bottom of box
4. By inputting star puzzle
5. On the back of the morse code paper
6. Underneath the barcode on the four digit face of the box, you need to click repeatedly
7. By inputting the zip code puzzle
8. Underneath the green em express logo on the sides puzzle face of the box
9. Underneath the sound clue label that you've just revealed
10. If you go back to the star barcode clue face, a green man will mosey on past you after a few seconds in the same black rectangle you got another green man from for answering the sides puzzle

Reply
manutius July 16, 2014 11:13 AM replied to mrjprive

@mjprive
re: the statue/symbols

these aren't for the red book..

they're for the incubator, once you have something you might want to hatch

Reply

Thought I got one from

the black rectangle

but it seems

another one is running around inside the box and you have to wait for him to come around.

Out now. Thanks all!

Reply
mrjprive July 16, 2014 11:17 AM

@manutius thanks, I hadn't thought of it that way

Reply
icvotria July 16, 2014 11:28 AM

I'm stuck on the last puzzle of the buttons game.

The one on the back of the Rain picture.

Any hints would be greatly appreciated! Thanks in advance.

Reply

How long do you wait?

I had to look. According to one of the above hints, we are supposed to wait for one at the black rectangle. I have been staring at the black rectangle for several minutes. Is there another black rectangle I don't know about?

Reply
manutius July 16, 2014 12:08 PM replied to 4red3s

I think it only appears once you've already got the first green man from the same place (the one you get for solving the zipcode puzzle)

Reply
manutius July 16, 2014 12:10 PM replied to icvotria

@icvotria
I have no idea why it's the answer but

input the code between the letters R and A

Reply

AH HA

You have to solve the shape puzzle

look at the zip code

AFTER you solve the shape puzzle THEN go back and wait a few seconds. He is quick so be ready with your cursor

Reply
icvotria July 16, 2014 12:30 PM

@manutius - Thanks!

Maybe the mouse hint means 'In RA'?

Reply
manutius July 16, 2014 12:47 PM replied to icvotria

@icvotria

I thought about that, but I guess I've come to the conclusion that it's just slightly more illogical than the rest of the puzzles. For one, I'm not sure that wordplay would translate into Japanese, and also why go to all the trouble of a code grid (not to mention one that includes N but omits I)? I only ended up putting in that combination after realising that the 16 squares / 16 external letters meant that there couldn't be a number that corresponded to the I in RAIN..

Reply

I finally had to give up. I never got the 4 digit puzzle. I saw the numbers in the cage using the "viewer" thing. I saw the paper beside the food. But nothing made sense. I didn't see anymore hints regarding this puzzle other than it took two clues.

Very cute otherwise. I like the little buttons that turn into smiles. :)

Reply
shjack180 July 16, 2014 6:02 PM

I was able to finish them all without help...though I did get stuck and try looking for help to no avail. :P I loved Button Escape 22. I forced open the box with the number code in Candy Room 13. I did not figure out how to decode the detective and runner clue (the runner one was easy to guess though) until near the end of that adventure. The green men escape one was quite diverting, but I thought it was a little finnicky in some places.

Reply

I had a little trouble with that puzzle, as well.

If you look at the right picture, you'll see it has a slit on the right. Place the red cover into it and you'll see a change. Combine what you see with the cage clue and you'll get the code for the left circular safe

Reply
stuckinabasement July 16, 2014 6:40 PM replied to manutius

@manutius and icvotria, for the final code in button escape 22, i think ...

the bit that says "On mouse hint!" literally means roll your mouse here to get a hint. i dont think it has anything to do with the mouse in the hole, which initially had me frantically clicking like a madman on the mouse, but the only thing that happened was the door was opening and closing.

when you mouse over the hint, the umbrella comes up with circle, circle, I, N. i think the circles tell you which letters you need from the grid.

that was my take on it, anyway.

Reply

Button Escape 22 Walkthrough

Button numbering (see indicator panel above the door)
1 2 3 4 5
          11
6 7 8 9 10

Buttons, listed in the order I found them.

  • These don't need any puzzle solving, so get them first.

    7.

    Move the right rainboot.

    8.

    Move and shake the left rainboot.

    6.

    Open the hexagon door and look closely at the mouse.

    2.

    Forehead of statue.

    5.

    Statue's right hand.

    1.

    Inside incubator.

    4.

    Just to the left of food box (the red rectangle on the table on the right).

    10.

    On food tray, behind the card on the lower left.

  • These are behind locked doors or panels - follow the "solving" steps below to access them.

    11.

    Open the back of the left-hand round door.

    9.

    Back of RAIN picture.

    3.

    In red box.

Solving

Right-hand round door

The clue is the food tray. The semicircles are the tomatoes and thus red, the long thin rectangles are the pasta and are yellow, the elongated ovals are the green beans, and the parallelogram is on the chopstick wrapper and is blue.
Colorblind: 6 clicks, 3 clicks, 1 click, 2 clicks

Left-hand round door

  • Get the black item from behind the hexagon door. Double-click it in your inventory and open it up to reveal the binoculars.

  • Look at the duck behind the right-hand round door. Use the binoculars to look at the bars of the cage. Note the numbers and the red stripes.

  • If you haven't already, collect the red panel that was the cover of the food box.

  • Look at the long panel on the right wall, the one with the stripes. Look at the right end; notice that there's a slot. Try the panel from the food box; yup, that fits. Note the red stripes.

  • Look at the card on the food tray: it has a series of bars labeled 1, 2, ..., 9, 0.

  • Match up the red stripes you saw on the cage bars with the panel on the wall, and use the hint from the food tray to decode the numbers.

    5976

  • Use the numbers to open the left-hand round door.

Incubator

  • Get the net from the floor on the right (it's that stick in the foreground).

  • Open the left-hand round door and use the net to retrieve the egg. (You can try giving it to the duck, but she says it's too cold and rainy.)

  • While at the left round door, notice the thing sticking into view on the top right; click it to get the small key.

  • Notice the keyhole on the back of the round door. Use the small key to open it. Get the decorated staff.

  • Put the decorated staff in the statue's hand and click the statue so it turns around. Note the symbols. Also, take a closer look at the card at lower right; flip it around to see more of the same symbols.

  • Put the egg into the incubator. Turn it on using the code from the statue.

    1232321

  • Retrieve the hatching egg and give it to the duck.

Red box (below statue)

  • Now that it has stopped raining, take another look at the left-hand round door. Use the net to get whatever it is that's shining in the water: it's a gold key.

  • Use the gold key on the RAIN picture.

  • Move your mouse over the box on the top left for a hint: a picture of an umbrella and "blank blank I N". The obvious letters to fill in the blanks are "R A" (to form the word RAIN). Find the R and A on the grid, and note the numbers between them.

    8471

  • Use the RA code to open the red box. Peel back the paper (where it's a bit ragged-looking on the left) to reveal the last button.

Reply
MrsRavoon July 17, 2014 2:50 AM

Button puzzle: The LH door is refusing to open for me, even with the correct code. (The one I came up with agrees with the walkthrough that was just posted.) Oh well, bedtime anyway.

Reply
korvarthefox July 17, 2014 12:45 PM

Okay, I'm having a strange thing with the Escape Men games, where it keeps restarting. Using Chrome, Adblock disabled on that page. Anyone else having something similar?

Reply
korvarthefox July 17, 2014 12:59 PM replied to korvarthefox

Okay, the Escape-Men game is not restarting on Firefox. Good to know.

Reply
Patreon Donator Reka July 17, 2014 2:40 PM replied to korvarthefox

I get that bug occasionally, too. I think it might be caused by one or more of the ads on the page, so doing a hard refresh (Ctrl+F5) will sometimes help, as the selection of ads changes. Otherwise, I generally have to resort to using a different browser.

Reply
Patreon Donator Reka July 17, 2014 2:48 PM replied to korvarthefox

Candy Rooms 13: Black Modern Walkthrough

Round hard candy

Look through the frog's¹ items.

It's all the way to the right.

Flat lollipop

Inspect the plant next to the sliding-glass doors.

Round lollipop

Examine the lamp in the corner.

Flat hard candy

Check under the coffee table.

Gumball

Get the coin from the frog¹ and use it in the gumball machine.

The coin is all the way to the left.

 
¹ The Frog

  1. Get the slider from the bench along the back left wall (below the curtained alcove).

  2. Look at the two big white squares to the left of the sliding-glass doors. Put the slider in the middle of the gray area on the bottom.

  3. Move the slider back and forth and notice how the pictures change.

    Spade = 8, Club = 1

  4. Examine the clock (on the wall to the right of the door). Notice the symbols.

    Heart = 4, Diamond = 6

  5. Look at the box on top of the shelves to the right of the door. Put in the code you found. Get the key.

    8461

  6. Use the key to get the tablet out of the box below the wolf picture (on the far left).

  7. Put the tablet into the slot above the curtained alcove. Click the arrows in both directions to see what sort of interesting things you can give the frog.

  8. When you find a useful item, zoom out from the tablet and look at the alcove. Press the button below it to raise the curtain and get the item from the frog.

Reply

is anyone having overall issues with button escape? first time it froze and second time my anti-virus picked up a virus from it.

Reply

waiting on the escape men walkthrough. love the first 2. :)

Reply

Find the escape men 112: EM Express

Initial view

Note the number adress: 3-40-68 and the number upsidedown 0911 with the barcode
Take the first escape men the side of Em Express

The code number side

Of the initial view go down and right. There's a barcode and we have tu put 4 number on the left. Remember the initial view with the numer and barcode?

Put 0911.

Take the pink paper. Click the upper left side of the barcode until it shows a escape men.

EM Express Side

Go right note the bar code with the numbers 101011 and the word star. Go right again.
Click bottom right of EM express until it goes out. Take the escape men.
Click the left side of the new stick and take another escape men.
Zoom the pink paper and see the morse code. Click the audio figure and listen it carefully. Will use it later.
Now let's see the figures code.

Remember the numbers 3-40-68. Put it according to the number of side of each figure. 3= TRIANGULE; 4= SQUARE; 0= CIRCLE; 6= HEXAGON; 8= OCTAGON. Click the white circle.

The stars side

Go right. There's 6 stars that turns black or white.

Remember the bar code with the numbers 101011.
number 1 means black and 0 white. So it goes b-w-b-w-b-b.
Take the escape men of the black circle.

The big and black square side

Go left twice. Take the escape men of the black square.Wait
a while and another escape men will appear passing through the black square.

The bottom view of the box

Go left twice an click the bottom of the box. Take the escape men.

The final

Go up twice, to the initial view again.
Click The ss of the EM Express and take the escape men.
Zoom the morse pink paper and turn it to take it another escape men.
Take the escape men and put it on his place.

There's a code with three words. Remember the morse code that you've listened. It Goes S-O-S. Click The white button.

Reply
shipoopie July 19, 2014 12:03 AM replied to korvarthefox

On the Funkyland game I guessed what number you would get from

the running guy, but I brute forced the detective guy number. Then I figured out what that weird L-shaped object was for so I was no longer confused why the detective was that number.

The escape men game is super creative and innovative.

The Tototo game was fun but I don't know why they hid the hint for the last puzzle. Is there any way to figure that grid out without the hint?

Reply
Patreon Donator Reka July 19, 2014 1:06 AM replied to shipoopie

I dunno, that hint didn't seem hidden to me at all.

I mean, it said in pretty big letters, "point your mouse here!". (Well, OK, so that's what it *intended* to say; what it actually said was a bit more ambiguous, and I'm sure I wasn't the only one to spend quite a few superfluous clicks on the poor innocent mouse behind the hexagonal door as a result.)

Reply

^ Scroll Up | Homepage >

Leave a comment [top of page]

Please consider creating a Casual Gameplay account if you're a regular visitor here, as it will allow us to create an even better experience for you. Sign-up here!
  • PLEASE UNDERSTAND SITE POLICIES BEFORE POSTING COMMENTS
  • You may use limited HTML tags for style:
    (a href, b, br/, strong, em, ul, ol, li, code, spoiler)
    HTML tags begin with a less-than sign: < and end with a greater-than sign: >. Always. No exceptions.
  • To post spoilers, please use spoiler tags: <spoiler> example </spoiler>
    If you need help understanding spoiler tags, read the spoiler help.
  • Please Preview your comment before posting, especially when using spoilers!
  • No link dropping, no domains as names; do not spam, and do not advertise! (rel="nofollow" in use)
chrpa Jayisgames needs your help to continue providing quality content. Click for details Hi! Weekday Escape and Weekday Puzzle are here! First we have two new cans from tomoLaSiDo and then two small rooms from isotronic. That's all for this...  ...
6,365 Views
0 Comments
chrpa Jayisgames needs your help to continue providing quality content. Click for details Welcome to Mobile Monday! We have another beautiful game from Nicolet and it's a winter game as it should be. Tasuku Yahiro have released another of their...  ...
6,161 Views
2 Comments
chrpa Jayisgames needs your help to continue providing quality content. Click for details We've got a new game from Rinnogogo's magical world and this time it really is magical.. Not only do you get to meet cute animals that express themselves...  ...
chrpa Jayisgames needs your help to continue providing quality content. Click for details After a few weeks of patient waiting, we have been rewarded - the new game from Ichima Coffeedo is here. We got a wonderful new game - it's...  ...

HELP Jayisgames.com

Recent Comments


Display 5 more comments
Limit to the last 5 comments

Game of the week


Dark Romance: Vampire Origins Collector's Edition

Your Favorite Games edit

add
Save links to your favorite games here. Use the Favorites editor.

Monthly Archives