An adventure of epic proportions. Perfect for young readers.

Weekday Escape N°33


Comments (35) | Views (13,410)

Weekday Escape

elleWhen you unwrap your Weekday Escape delivery this week, you're in for a bit of a variety. These three escape games have little in common but one thing: pure puzzling entertainment. You could dig into our weekly package of fun in any order you choose, or try it omakase-style, starting with a fruity dish of whimsy in a grapefruit dressing from FunkyLand, a mental palate cleansing course of puzzles from Yomino Kagura, then a No1Game and Sneedle fusion geared toward the more adventuresome minded. They come with a money-back guarantee to please while you look forward to next week's escapers' curation...
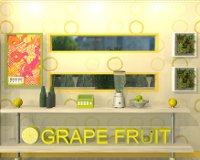
Fruit Kitchens No.9: Grapefruit YellowFruit Kitchens No.9: Grapefruit Yellow - Let's begin with a little FunkyLand. That's what she said. No, really, though: FunkyLand's series of find-the-somethings-sweet-and-colorful is always always the perfect escaping warm-up, stretching mental muscles just to the slightest while charming the funk out of you. This time out you're looking for 7 yellow grapefruits, some hidden in plain sight, others secured behind a coded puzzle. Since the uber whimsy of these kitchens would make any chef green with envy (Envy Green is an episode yet to be released), we can almost forget we're meant to be leaving.
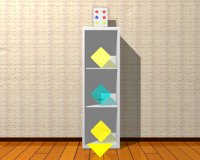
Escape from the Three Colored Diamonds RoomEscape from the Three Colored Diamonds Room - Keeping pretty much with their standard formula for escape game design, Yomino Kagura still manages to produce a neatly logical escaping experience, albeit perhaps a little too easy this go around. A changing cursor helps you find active areas and, even though it's without an English translation, navigation and exploration remains intuitive enough that language knowledge isn't needed. This is purely about puzzles—just enough to keep you thinking without spoiling the relaxing vibe of being locked in a room, forced to scramble about finding clues and hidden tools to procure your freedom.
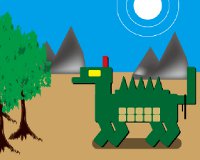
White NightWhite Night - by Sneedle tends more toward point-and-click adventure than escape the room game. It even has a cameo appearance from a star of the Reisen series. Although made in collaboration with No1Game, don't bother looking for any little green men. Instead, you're tasked with solving a series of puzzles in order to find you way out of this strange world. Knowing to look out for quirks, including a few pixel hunts and less-than-intuitive actions, will help you complete your quest without frustration. Despite those downsides, or maybe because of them, the quaint artwork and creative environment make this adventure a charmer.

We love escape games, and our readers love talking about them and sharing hints! How about you? Let us know what you think, ask for clues, or help out other players in the comments below.

Walkthrough Guide


(Please allow page to fully load for spoiler tags to be functional.)

Grapefruit Kitchen

1.

On the table, right of the jug.

2.

In the box on the left counter
a.

Open the fridge, take the can

b.

Use the can on the glass on the table, note the number code.

c.

Use the number code on the box on the counter on the left

3.

Behind the painting on the left

4.

In the can on the sink
a.

Note the number code on the painting on the left

b.

Use the number code on the frog cabinet

c.

Get the can opener from the frog

d.

Use the can opener on the can

5.

On the window sill next to the door

6.

In the cabinet above the sink
a.

Get the rolling pin from the right of the door

b.

Use the rolling pin on the cabinet above the sink

7.

From the “U” in Grapefruit
a.

Get the screwdriver from next to the cabinet above the sink

b.

Use the screwdriver on the “U”

Three Diamonds Walkthrough

1.

Open the right cabinet. Note the upside down code

2.

Use the upside down code from the cabinet on the draw to the right of the door. Take the wire cutters

3.

Use the wire cutters on the middle cabinet. Take the stick and the circle.

4.

Use the stick under the couch to get the blue button.

5.

Look at the bookcase and note the number of red, blue and yellow stars, and the position of the different diamond colours

6.

Use the blue button on the left cabinet and enter the code as indicated by the clue

7.

Get the square. Note the left/right clue for the picture

8.

Use the left/right code to remove the picture

9.

Use the diamond colour code to open the box and get the triangle

10.

Use the three shapes on the box on the glass table and get the key

11.

Use the key on the door

White Night Walkthrough

  1. Go into the hotel (the green building). Get the bow & arrow from the wall behind the receptionist. (Oddly, the receptionist doesn't have any problem with you taking his things.)

  2. Go back outside and click just to the left of the base of the tree. Get the key.

  3. Go into the cafe (the red building with the awning). Note the arrangement of items on the display case.

    X _ X X _
    X X _ X X

  4. Click just underneath the display case and get the mouse and the glass.

  5. Zoom all the way out and go right.

  6. Get the gear from the vendor's cart (the left wheel).

  7. Go right. Get the black thing hanging from the dragon's tail. This item will hereinafter be referred to as "the pronged thingy" (it's a technical term).

  8. Go back to the graveyard view. Use the key on the house behind the gravestones.

  9. Put the gear into the obvious spot. Click the panel on the wall and put the pronged thingy into the holes. Zoom out and fill the glass with water.

  10. Reclaim the pronged thingy, then go back to the graveyard.

  11. Click just to the left of the leftmost gravestone. Water the plant. Get the bone.

  12. Zoom out and give the dog the bone. Follow him to the right.

  13. Click the dog to get his leash. Use "about item" on the bow & arrow, then use the leash on it.

  14. Shoot the arrow at the dragon in the pattern indicated by the display case in the cafe.

  15. Whoa Nelly fire! Go left, then right again. Get the red baseball from the top of the now-charred tree. Poor tree.

  16. Go all the way left and into the hotel. Scare the receptionist away with the mouse. (He's a singularly ineffective receptionist: first he fails to even pretend to prevent outright theft, and then he's scared of an ordinary rodent. Sheesh.)

  17. Click the panel the receptionist was obscuring. Use your pronged thingy on the holes.

  18. Zoom out and note the diagram that appeared on the wall.

  19. Go outside and throw the red ball at the window indicated by the diagram.

    2nd floor of the hotel (or 1st floor for you European types), rightmost window.

  20. Click the scary-looking portal.

Three Colored Diamonds Room Walkthrough
As requested, this is more solution-explicit. Also, colorblind help is provided.

Exploring

Door view

Aside from the obvious door, the only thing here is a table with a drawer that needs a three-digit code. The numbers of the code are green, which might be significant.

Couch view

  • There's something under the couch, but you can't reach it.

  • On the small shelf, there's a picture of stars on top, and the titular three diamonds on the shelves.

    On the picture, there are three red stars, two yellow ones, and one blue one. The diamonds are yellow, blue, and yellow.

Back wall

There's a round table with a checkerboard box. The box has slots for three shapes (circle, square, triangle).

Cabinet view

  • There's a wobbly picture on the wall with a picture of an eighth note.

  • The left doors are missing a button (probably a blue one, knowing this game designer), and there's a star and some numbers.

  • The middle doors are wired shut.

  • The right doors are open, and there's a code. LOI? The letters are green. Hmm...

Solving

3-digit drawer

The code is the LOI in the right-hand cabinet, but it's not the right way up.

LOI turned upside-down becomes 107.

Enter the code and get the wire cutters.

Middle cabinet

Use the wire cutters to open the doors. Get the stick and the shape (red circle).

Couch

Use the stick to get the item you couldn't reach before. It's a blue cube.

Left cabinet

The blue cube is the missing button; put it in place. The code is written right on the doors, but you have to translate it first using the picture on top of the shelves.

3 means red, 2 means yellow, and 1 means blue.
Colorblind help: middle, right, left, right, left, middle.

Get the shape (blue square) and note the notes. Uh, I mean notice the notices. Wait, that didn't come out right either. Lemme try again. Get the shape (blue square) and look at the musical notes. There, that's better.

Wobbly picture

Click towards the sides of the picture as indicated by the musical notes in the left cabinet. (Don't click the frame edges, but the picture itself.)

Right, Left, Left, Right, Left, Right.

It's a box with a big white diamond on it.

Diamond box

Put in the colors as indicated by the diamonds on the shelf.

Remember, they were yellow, blue, and yellow.
Colorblind: from top to bottom (or bottom to top), two clicks, one click, two clicks.

Get the shape (yellow triangle).

Checkerboard box

Put the three shapes into the appropriate slots. Get the key.

Exiting

Use the key to open the door, silly!

35 Comments

https://www.google.com/accounts/o8/id?id=AItOawnsUk2AGEQi97qEj5i_i_HBcSFS6H260EU July 23, 2014 12:22 AM

Stuck in White Night! Have already

used all items except bow and arrow

Reply
lavamuffin July 23, 2014 12:58 AM

For the three colored diamond room, don't forget to

keep track of how many stars of each color there are, as it will be useful later on!

That little hiccup had me stuck for a few minutes. Duh.

Reply
lavamuffin July 23, 2014 1:21 AM

For White Night, it might help to

be friendly to a dog

in order for you to

have full bow functionality.

Also, in general, it helps to

click around at the bottoms of things

like trees

and restaurant display cases

and gravestones

and random taco (?) trucks

Reply
JudyJetson July 23, 2014 2:37 AM

White Knight: I can't figure out what to do with the little crosseyed guy in my inventory. I've done everything else.

Reply
JudyJetson July 23, 2014 2:51 AM

Nevermind. I had another inventory item that I hadn't used yet.

Reply
Kniggit July 23, 2014 2:52 AM replied to JudyJetson

You use the "little crosseyed guy" on the

clerk in the hotel, to scare him away.

Reply

For Fruit Kitchens No. 9

In the 'kitchen view' where you can see the frog on the fridge, you can click on the room door to get an entrance way view.

That might help you find something you're missing.

Reply

Grapefruit Kitchen

1.

On the table, right of the jug.

2.

In the box on the left counter
a.

Open the fridge, take the can

b.

Use the can on the glass on the table, note the number code.

c.

Use the number code on the box on the counter on the left

3.

Behind the painting on the left

4.

In the can on the sink
a.

Note the number code on the painting on the left

b.

Use the number code on the frog cabinet

c.

Get the can opener from the frog

d.

Use the can opener on the can

5.

On the window sill next to the door

6.

In the cabinet above the sink
a.

Get the rolling pin from the right of the door

b.

Use the rolling pin on the cabinet above the sink

7.

From the “U” in Grapefruit
a.

Get the screwdriver from next to the cabinet above the sink

b.

Use the screwdriver on the “U”

Reply

Three Diamonds Walkthrough

1.

Open the right cabinet. Note the upside down code

2.

Use the upside down code from the cabinet on the draw to the right of the door. Take the wire cutters

3.

Use the wire cutters on the middle cabinet. Take the stick and the circle.

4.

Use the stick under the couch to get the blue button.

5.

Look at the bookcase and note the number of red, blue and yellow stars, and the position of the different diamond colours

6.

Use the blue button on the left cabinet and enter the code as indicated by the clue

7.

Get the square. Note the left/right clue for the picture

8.

Use the left/right code to remove the picture

9.

Use the diamond colour code to open the box and get the triangle

10.

Use the three shapes on the box on the glass table and get the key

11.

Use the key on the door

Reply
shipoopie July 23, 2014 8:47 AM replied to elle

I had no trouble with the grapefruit game but the other ones are giving me troubles today I don't know why the diamond one did because it's stuff i've seen before. The dragon one I'm having no luck with at all.

There's only one house and I don't see any clues inside it.

Reply
shipoopie July 23, 2014 9:01 AM replied to elle

I got fed up with the dragon game and found a youtube walkthrough. :-(

@elle

The cafe isn't a house.

Reply
Leopardmask July 23, 2014 10:21 AM

I'm stuck on White Night. I think I'm literally on the last puzzle too.

My only usable item left is a red ball. I think I need to use it on that thing behind the hotel desk, but can't figure out how to get it to work. I mean, it's plugged in, but I don't know how to use the ball on it.

Reply
Patreon Crew SonicLover July 23, 2014 10:37 AM

Leopardmask:

You don't use the red ball on it. You use the red ball on something that looks like it, using it as a guide.

Reply
Leopardmask July 23, 2014 10:40 AM replied to SonicLover

Ooohhhh! Thank you, I got it now!

Reply

need help on 3 diamonds

the star puzzle is confusing. it shows red red blue red yellow yellow from left to right and a blue yellow blue diamond below. I don't know what's going on.

Please help.

Reply
VoxPopuli42 July 23, 2014 12:23 PM

Grapefruit and Three Diamonds were both easy little escapes.

White Night is just frustrating.

It's hard to tell what anything is because of the art, there are no labels, and no changing cursor.

I'm about to just give up.

Reply
Patreon Crew SonicLover July 23, 2014 3:00 PM

Paul:

You're suffering from information overload. The stars and diamonds are for two different puzzles, and you don't need to pay attention to the order of the stars, just how many of each there are.

Reply
shjack180 July 23, 2014 4:44 PM

I have no idea what the clue for the dragon puzzle means in White Night. :/

Reply
JudyJetson July 23, 2014 5:01 PM replied to shjack180


@shjack,

For the dragon puzzle

There are two steps. You will have to 'fix' an inventory item for it to work properly on the dragon. Secondly, note that the spots on the dragon's back form a 2x5 grid. There is one other place where you have seen a 2x5 grid.

Reply
JudyJetson July 23, 2014 5:08 PM replied to VoxPopuli42

@voxpopuli

I found the White Night game to be frustrating as well, especially compared to the other two games which were fairly straightforward. For the most part, the puzzles are fairly easy, the issue is simply finding all the items. My main frustration was the pixel hunting. You have to click in just the right spot to zoom in on certain areas. In particular:

The base of the tree
The gravestone
Inside the bakery shop, under the display case

On the other hand, the over-simplified graphics make it fairly easy to notice out-of-place objects that need collecting. :) Hope this helps.

Reply
shjack180 July 23, 2014 5:26 PM replied to JudyJetson

@JudyJetson

Yes, before I quit, I had a fully functioning bow and a 2x5 grid clue that I could not decipher. From earlier comments, I knew that this clue coincided with the dragon. However, I do not understand the clue.

The red baseball pointing to a certain button has no meaning for me whatsoever.

I do appreciate your trying to help through hints and not actual reveals though. However, it's looking like I am a lost cause for solving it through that route.

Reply

I still don't understand it. can someone post the solution?

Reply

I beat my own personal best with both Fruit Kitchens and 3 Diamonds (under 5 minutes each; Fruit Kitchens more like 2 minutes - I'm finally getting the hang of thinking like an escape room designer!) but I can't play White Night at all because it keeps defaulting back to the opening. I thought maybe it hadn't loaded, but no, there's a glitch that makes it unplayable. (I use Chrome with Windows for No1Game only, because they won't play unless I disable adblocker on my normal Firefox browser.) (Of course, it won't even open on my normal Firefox browser, but I know that is because I've got AdBlocker enabled.)

I've not had this problem with their Escape Man games, so I dunno.

Reply

anyone? I need the solution to that puzzle if anyone has time.

Reply
wolvesgobark July 24, 2014 11:07 AM replied to Paul

Check the bakery :)

x.xx.
xx.xx
where x marks the shot

Reply
wolvesgobark July 24, 2014 11:09 AM replied to wolvesgobark

Oh man, sorry, replied to the wrong comment.

Reply
Patreon Supporter Scaper July 24, 2014 12:05 PM replied to Paul

Is your problem with how to use the basketball?

You are supposed to go to the beginning view and throw the red basketball into one of the windows. If you are desperate for a solution, (it happens), do a search on you tube for a walkthrough for White Knight No 1 Game.

Reply
shjack180 July 24, 2014 5:21 PM

@wolvesgobark and @Scaper

Thank you so much. I have now successfully finished White Night. You guys rock! :)

Reply

i think you are thinking of the white knight game which coincidentally doesn't have a walkthrough. i need help with the 3 colored diamonds room.

Reply
shjack180 July 24, 2014 5:46 PM replied to Paul

@Paul

Okay, since I'm confused as to which puzzle you are referring, I will attempt to give you the solutions to both the star and diamond puzzles.

The Star Puzzle

When looking at the leftmost cabinet the scene right of the door, you will notice what is supposed to be a three-buttoned puzzle. However, the middle button is missing. You should also note the star symbol below the puzzle and the order of the numbers beside it. Okay, now let's try to solve this thing.

Before you can solve this puzzle, you will need the missing blue button located under the blue couch. To get this button, you must open the middle cabinet in the scene to the right of the escape door and retrieve the rod which will be used to reach the blue button.

After retrieving the button, examine the shelves to the left of the blue couch. Then, examine the glass frame with the stars. Notice that there is one blue star, two yellow stars, and three red stars. It by combining this clue with the leftmost cabinet star clue that you will open that cabinet door

Return to that cabinet and place the blue button in the empty middle slot. By combining the two star clues you will open the cabinet. It works this way:

The numbers correspond to the colored stars in the glass frame

Therefore, the blue button equals the number one, since there was only one blue star; yellow equals the number two; and red equals the number three.

Our solution becomes: Blue, Yellow, Red, Yellow, Red, Blue. The cabinet is now open!

The Diamond Puzzle

Opening the leftmost cabinet gives you the clue for removing the frame with the musical note. The solution for this puzzle is

right, left, left, right, left, right

At this point, we now have to open the box using the diamond clue. To do this, go back to the scene with the couch and examine the shelves. Take note of the colors of the diamonds on each shelf

Top shelf: Pale Yellow, Middle shelf: Light Blue, Bottom shelf: Yellow

Now return to the box with the diamond on it and change each dot to colors of the diamonds on the shelf. Again the solution is:

Top: Pale Yellow, Middle: Light Blue, Bottom: Yellow. Good luck and I hope this helped you.

Reply

White Night Walkthrough

  1. Go into the hotel (the green building). Get the bow & arrow from the wall behind the receptionist. (Oddly, the receptionist doesn't have any problem with you taking his things.)

  2. Go back outside and click just to the left of the base of the tree. Get the key.

  3. Go into the cafe (the red building with the awning). Note the arrangement of items on the display case.

    X _ X X _
    X X _ X X

  4. Click just underneath the display case and get the mouse and the glass.

  5. Zoom all the way out and go right.

  6. Get the gear from the vendor's cart (the left wheel).

  7. Go right. Get the black thing hanging from the dragon's tail. This item will hereinafter be referred to as "the pronged thingy" (it's a technical term).

  8. Go back to the graveyard view. Use the key on the house behind the gravestones.

  9. Put the gear into the obvious spot. Click the panel on the wall and put the pronged thingy into the holes. Zoom out and fill the glass with water.

  10. Reclaim the pronged thingy, then go back to the graveyard.

  11. Click just to the left of the leftmost gravestone. Water the plant. Get the bone.

  12. Zoom out and give the dog the bone. Follow him to the right.

  13. Click the dog to get his leash. Use "about item" on the bow & arrow, then use the leash on it.

  14. Shoot the arrow at the dragon in the pattern indicated by the display case in the cafe.

  15. Whoa Nelly fire! Go left, then right again. Get the red baseball from the top of the now-charred tree. Poor tree.

  16. Go all the way left and into the hotel. Scare the receptionist away with the mouse. (He's a singularly ineffective receptionist: first he fails to even pretend to prevent outright theft, and then he's scared of an ordinary rodent. Sheesh.)

  17. Click the panel the receptionist was obscuring. Use your pronged thingy on the holes.

  18. Zoom out and note the diagram that appeared on the wall.

  19. Go outside and throw the red ball at the window indicated by the diagram.

    2nd floor of the hotel (or 1st floor for you European types), rightmost window.

  20. Click the scary-looking portal.

Reply

Three Colored Diamonds Room Walkthrough
As requested, this is more solution-explicit. Also, colorblind help is provided.

Exploring

Door view

Aside from the obvious door, the only thing here is a table with a drawer that needs a three-digit code. The numbers of the code are green, which might be significant.

Couch view

  • There's something under the couch, but you can't reach it.

  • On the small shelf, there's a picture of stars on top, and the titular three diamonds on the shelves.

    On the picture, there are three red stars, two yellow ones, and one blue one. The diamonds are yellow, blue, and yellow.

Back wall

There's a round table with a checkerboard box. The box has slots for three shapes (circle, square, triangle).

Cabinet view

  • There's a wobbly picture on the wall with a picture of an eighth note.

  • The left doors are missing a button (probably a blue one, knowing this game designer), and there's a star and some numbers.

  • The middle doors are wired shut.

  • The right doors are open, and there's a code. LOI? The letters are green. Hmm...

Solving

3-digit drawer

The code is the LOI in the right-hand cabinet, but it's not the right way up.

LOI turned upside-down becomes 107.

Enter the code and get the wire cutters.

Middle cabinet

Use the wire cutters to open the doors. Get the stick and the shape (red circle).

Couch

Use the stick to get the item you couldn't reach before. It's a blue cube.

Left cabinet

The blue cube is the missing button; put it in place. The code is written right on the doors, but you have to translate it first using the picture on top of the shelves.

3 means red, 2 means yellow, and 1 means blue.
Colorblind help: middle, right, left, right, left, middle.

Get the shape (blue square) and note the notes. Uh, I mean notice the notices. Wait, that didn't come out right either. Lemme try again. Get the shape (blue square) and look at the musical notes. There, that's better.

Wobbly picture

Click towards the sides of the picture as indicated by the musical notes in the left cabinet. (Don't click the frame edges, but the picture itself.)

Right, Left, Left, Right, Left, Right.

It's a box with a big white diamond on it.

Diamond box

Put in the colors as indicated by the diamonds on the shelf.

Remember, they were yellow, blue, and yellow.
Colorblind: from top to bottom (or bottom to top), two clicks, one click, two clicks.

Get the shape (yellow triangle).

Checkerboard box

Put the three shapes into the appropriate slots. Get the key.

Exiting

Use the key to open the door, silly!

Reply

^ Scroll Up | Homepage >

Leave a comment [top of page]

Please consider creating a Casual Gameplay account if you're a regular visitor here, as it will allow us to create an even better experience for you. Sign-up here!
  • PLEASE UNDERSTAND SITE POLICIES BEFORE POSTING COMMENTS
  • You may use limited HTML tags for style:
    (a href, b, br/, strong, em, ul, ol, li, code, spoiler)
    HTML tags begin with a less-than sign: < and end with a greater-than sign: >. Always. No exceptions.
  • To post spoilers, please use spoiler tags: <spoiler> example </spoiler>
    If you need help understanding spoiler tags, read the spoiler help.
  • Please Preview your comment before posting, especially when using spoilers!
  • No link dropping, no domains as names; do not spam, and do not advertise! (rel="nofollow" in use)
chrpa Jayisgames needs your help to continue providing quality content. Click for details Hi! Weekday Escape and Weekday Puzzle are here! First we have two new cans from tomoLaSiDo and then two small rooms from isotronic. That's all for this...  ...
6,365 Views
0 Comments
chrpa Jayisgames needs your help to continue providing quality content. Click for details Welcome to Mobile Monday! We have another beautiful game from Nicolet and it's a winter game as it should be. Tasuku Yahiro have released another of their...  ...
8,746 Views
2 Comments
chrpa Jayisgames needs your help to continue providing quality content. Click for details We've got a new game from Rinnogogo's magical world and this time it really is magical.. Not only do you get to meet cute animals that express themselves...  ...
chrpa Jayisgames needs your help to continue providing quality content. Click for details After a few weeks of patient waiting, we have been rewarded - the new game from Ichima Coffeedo is here. We got a wonderful new game - it's...  ...

HELP Jayisgames.com

Recent Comments


Display 5 more comments
Limit to the last 5 comments

Game of the week


Dark Romance: Vampire Origins Collector's Edition

Your Favorite Games edit

add
Save links to your favorite games here. Use the Favorites editor.

Monthly Archives