
 Welcome back to Wednesday! Congratulations on surviving another turbulent week in style. You rock. As a reward, you have a choice of three fantastic getaways in this week's Weekday Escape.
Ichima's beautiful cabin in the snow, Funkyland's decadent European hotel and... Vitamin Hana's dingy old playroom/attic. I know, I know. It seems like an obvious choice, right? But even the more pleasing options come with a flood of locks and codes that will make you second-guess your choice of vacation spot.
Room 18's chilly festive theme will be a breath of fresh air to readers in Australia (where temperatures have soared over 40 degrees Celsius in recent weeks). While you may be tempted to recline on the bed and enjoy the soft snowflakes falling outside the window, you won't have time to enjoy the view - there's escaping to do!

The name of Funkyland's latest escape offering makes it seem like you'll hardly want to escape. Who wouldn't want to be stuck in a Parisian hotel? The room seems to be tastefully decorated, but you may be tempted to leave a zero star review of your stay once you realise that you need to crack some tough puzzles to access pretty much everything (including the free Wifi... the HORROR). Note that one puzzle has some Japanese text instructions, but is still decipherable for non-Japanese speakers.
Vitamin Hana's latest offering is a depressingly sparse playroom in someone's attic. All of the toys are cruelly locked away behind a series of locks and puzzles. You'll need to solve each one and creatively use some of the toys to escape from the room. You'll be thankful to escape the slightly claustrophobic space, and the children will thank you for releasing their playthings!
We love escape games, and our readers love talking about them and sharing hints! How about you? Let us know what you think, ask for clues, or help out other players in the comments below.


I don't want to be the bearer of bad news, but it's only Tuesday...
Not if you're in Australia! :)
It's an Aussie JiG takeover! We're taking your mind half a day closer to Friday. You're welcome.
First they came for our Tuesdays...
Anyway, a nice set of games, good job!
can't wait for the walkthroughs for these games :)
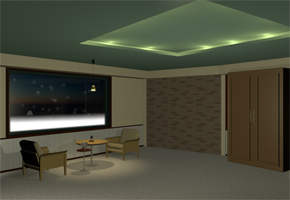
Ichima Room 18 (Snowy Day Room)
The usual interface help: you can change the volume and mute the music (but not sound effects) in the lower-right, as well as save the game. The button with アイテム見る is your About Item button.
Exploration
This time, there are only three screens in the room.
Window
You start facing one of the corners of the room, with a round table and two chairs next to a window, a brick wall, and a wardrobe. Simple enough.
Zoom in on the furniture. There's a gingerbread man on the left chair, an empty bucket on a stand next to the table, and an unlit candle on the table, next to two empty wineglasses.
The brick wall doesn't respond (no surprise) and the wardrobe is locked, so let's move to the next screen on the right.
Bed
This next view is a nicely made bed, with two bedside lamps, a painting on the wall, a side table with a frame on the wall over it, and a door. In this dark room, every spotlight counts, and Ichima has made sure to highlight the important things.
Beside the left lamp, there's a tablet with pretty large dimensions. Click on it to turn the screen on. There are three buttons marked with a rounded star, a pointed star, and a sunflower outline. I'll just pretend they are four, seven and sixteen-pointed stars.
The bed seems to have a storage drawer beneath. But with no handles, all you can do with the drawer is push it to the other side, and it returns to its original position once you let go. (You can walk around the bed to try the same thing on the other side.)
The painting is of a ski slope somewhere, and it would be rather uninteresting if it were not screwed down on both the left and right sides.
The table along the wall has a cardboard tree (but probably made of plastic) and reindeer figure with a crank handle. Turning the crank causes the word
winterto pop out of its belly in a physically improbable way.The table also has a drawer, locked with a 3-digit code. Above each digit is a different symbol: * 0 #.
The frame above the table seems to hold a gingerbread lady. It has two teardrop-shaped buttons below it and a smaller OK button.
The door is locked. (Why would you ever need to leave this warm room?) Turn right.
Desk
This screen has a desk with several items and drawers, a button in a case on the wall to its left, and a radiator to its right. On the far wall is a holly wreath, also spotlit so you know it's important.
Check out the button first. It looks significant, but it's in a locked box.
Zoom in on the desk. There's a red box with a yellow star on it. Actually, it's a star-shaped indentation colored yellow.
There's a drawer under it with a Christmas card. Open it up. It has a Christmas greeting, and bells, and stars and wait, what's that in the lower-left corner? Click it to reveal another page, a map to "one Cake Shop" and a sequence of stars below it:
4 7 16 7 16 4 7 4
Look at the desk again. There's a red telephone with dark grey buttons. The *, 0 and # buttons are marked. Picking up the phone causes the numbers on the other buttons to appear. So does holding down any of those three marked buttons, but only some numbers appear:
*: 4 5 7 8

0: 1 3 4 6 7 9

#: 2 7 8
Next to the phone, there's a shutter in the wall. But it's stuck. Back up and examine the remaining two desk drawers. The top drawer is unlocked and contains a gingerbread heart, as well as a strip of paper with symbols on it:
Tree Skates Hat Snowflake Tree Skates Hat Snowflake Tree
The bottom drawer is locked. The lock has four white square buttons, each with an unusual black figure on it.
Look at the radiator to the right of the desk. The room is warm already, but try turning its power knob anyway. It does nothing. Turn it back. Nothing. Turn it again. Turn it back. Oh, the knob is loose. Turn it... down? Turn it up. Turn it down. Turn... you broke it! Wait, why is it a screwdriver?
Check the holly wreath hanging on the wall. There seems to be something odd about the middle, and there's four indentations around the outside of the wreath, in the shape of gingerbread cookies: holly, heart, man, woman.
Puzzles
We need a digit for each of * 0 #.
Pressing those buttons on the phone lit up other buttons. How is this helpful?
Those buttons are
___  1_3 _2_

45_  4_6 ___

78_  7_9 78_

(*)  (0) (#)
Do those buttons create patterns? Any digits?
In the negative space, the digits 7, 1, 4 appear. Enter those digits in the drawer under the side table to open it up and get a lighter.
Light the candle on the round table. Drops of wax run down its side.
Zoom in on the candle. Wax drops fall in two columns:
R L R R L R L L L
Go back to the frame above the side table. Press the buttons in that same order, and then hit OK.
The front of the frame flips open. Take the gingerbread woman.
Now, can we get around to unlocking that tablet?
Press the buttons on the tablet screen according to the code on the Christmas card.
4 7 16 7 16 4 7 4which is (left/center/right)
C L R L R C L C
The buttons disappear, and are replaced by a single button labeled MAP. Click on it, and the screen now shows a map.
There are three train stations on the map (the green rectangles), and clicking on each station zooms in the map and shows us a pink star representing a cake shop.
Let's place an order, and hope the cake isn't a lie.
We're rather picky and only want the shop indicated on the Christmas card.
Maybe you could recognize the station names. (Unlikely, because Japanese.) Maybe you could recognize the street patterns. Or maybe you could recognize the shop name when clicking on the stars.
Either way, you'll find that one cake shop in the upper-right corner, with telephone number indicated.
Pick up the phone and press the buttons:
15877369
Thank you for calling. Your order will arrive shortly!
The shutter opens and a plate slides out, complete with a cake. (Express delivery!) You can't eat the cake right now, but you can take the gingerbread holly decoration from it.
Now we have all four cookies, it's time to use them.
(If you're missing a cookie, they are: on the left chair, in the desk drawer, in the frame on the wall, and on the cake.)
Place the four cookies into the holly wreath. A flap in the middle opens up, revealing a gold key.
Use the gold key to open up the case on the wall and press the button inside. The brick wall revolves around. There was a tree behind that wall all along!
Zoom in on the tree. It's bare right now, but there's a space on the floor marked for some square object.
I'm feeling the excitement of winter sports vividly expressed in pictures.
Unscrew the painting and click on it to remove the front panel. Behind, there's an 8x8 grid of symbols, with trees, skates, hats and snowflakes each forming a figure.
To avoid confusion, I won't give the figures names. The figures on the bottom desk drawer correspond to the following symbols:
Tree Hat

Snow Skates
The code from the top drawer is Tree Skates Hat Snowflakes... (repeated). So press the buttons in the order 142314231.
(Or ⌜⌟⌝ ⌞⌜⌟⌝ ⌞⌜.)
The drawer opens. Take the present, and then take the silver key on the present.
It seems that this key will open new doors.
Use the silver key to unlock the wardrobe. Inside, there's a surprisingly rigid pole.
The back of the wardrobe is an unlocked door which leads to the outside. (Yay!) But the snow is too deep around this back door, so we can't escape from there.
What do you call those? Tension poles? Support poles?
Walk around the bed again and push the drawer away from the wall. This time, use the pole on it so it doesn't shift back. Then walk back to the other side and search the drawer to get a snow shovel.
Shovel some snow from outside. It's still too deep to walk through, but at least you found some champagne in snow.
Place the champagne and snow in the bucket next to the round table. Two images and a word appear on its outside:
(Reindeer) song (Snowman)
We have a tree to set up here. Let's start with the present.
Place the present beside the tree. It magically lights up and even has a star on top!
Click on the lower half of the tree to look at the ornaments. There's a snowman ornament which matches the picture. Turn it over and press the button on the bottom, and the word "snow" pops up, again in a very unrealistic way.
That's nice and all, but we need to take that star down.
We need that star to open the last box, but it's too high to reach. Turn the chair around, climb up, and take the star.
A song... of towers and snow?
Place the star in the red box, which opens up. There are nine buttons here:
s i n g t o w e r
What order to press them in?
Use the clue on the champagne bucket, as well as some objects around the room.
Spell WinterSongSnow with the buttons. Take the room key.
Use the key on the other door, and it opens to a winter snowscape. And just like that, you have escaped. Congratulations!
I might have rushed that previous walkthrough a bit too much, since some formatting errors snuck in. Hopefully this one doesn't have those.
Escape a Parisian Hotel
So, you're in one of the finest hotels in all of Paris, with fancy rooms, beautiful music (huh?), and great service, if you can earn it by solving puzzles. It's like a tourist trap but not quite. The issue at hand is dinner, or the lack of it, and you can't have the ultimate Parisian dinner while locked in your room. So make your reservation, and then make your way out.
Exploration 1
Living room (facing courtyard)
There's a bunch of white furniture here. The chairs are just normal chairs, and the table in the middle has a flower vase with a welcome card sticking out of it.
In the far left corner, there's a locked cupboard with cups in it. They're nice cups, arranged not-so-neatly around a stack of plates. Some of them are upside down:
   Down Up Up

   Up Plates Down

   Down Down Up
There's also something blue on the bottom shelf.
In the far right corner, there's a small pedestal of some kind. On its top is an arrow with two circles attached to it, like a gimbal. (Actually, there's three, if you look closely at the shadow.) On its front is a panel with two buttons, labeled with angel wings and a heart, with a row of six lights between them.
(Turn left.)
Living room (other views)
The only thing here is a locked bathroom door.
(Turn left.)
There's a door, locked of course. The wall to its left has a safe which is extra secure: you can't even touch the keypad until you've unlocked it with a key!
(Turn left.)
There's the entrance to the bedroom, and nothing else on this screen. Go through it.
Bedroom
There's two beds in this bedroom, and they look large and comfy. Click the left side of the bedroom to look towards the windows. There's a panel with nine buttons. Eight of them have pictures of buildings on them and the center one is labelled OK. Clicking the buttons turns the buildings upside-down (putting the ground on top).
In between the two beds, there's a small table with two drawers and a phone (and some stationery you don't need). The phone takes a seven-digit number. The top drawer is locked with no obvious keyhole or code, and the bottom drawer is unlocked and empty.
On the right side of the bedroom, there seems to be a wardrobe with four door panels. Three of them seem to be missing handles. Clicking on them doesn't work.
Up and down
Both the cups and building buttons were in a 3x3 grid.
Press the buttons on the panel to make them match: the top left, center right, bottom left and center bottom ones should be upside-down. Hit the OK button, which flips open. Take the circle key.
Use the circle key to open the cupboard in the living room. Lift the plates and take the green key blade from beneath. Open the blue box on the bottom of the cupboard and take the wireless password slip from under it.
Use the key blade on the circle key to make a long key. This key opens the bathroom.
Exploration 2: Bathroom Edition
There's two pictures hanging on the wall over the toilet bowl. The left one has six symbols arranged in a circle. Clockwise from the top, they are
Wings Heart Wings Wings Wings HeartThe right one has a bent line with four corners. One of its ends is marked 6. Ending at 6, the corners and ends are
Top-right Top Bottom Bottom-left Top-left Bottom-rightThere's a sink to the right of it, which doesn't work. It seems to missing handles. There's a rack to the left of the sink. The only item of interest on the rack is a box with five green buttons. From left to right, their shapes are: oval, rectangle, diamond, figure-eight, trapezoidal. Clicking on the buttons makes them turn yellow from the bottom in three steps before resetting to green.
Click the right edge of the screen to enter the bath area (a separate room!) with both a bath and a shower. There's a towel rack on the wall with lots of thin bars and two gaps: four, four, and nah, the number of bars can't possibly be important.
There's also two shelves with various containers of liquid soaps, and a potted plant. They containers are filled to different levels: the rectangular and trapezoidal containers are quarter-full, the diamond-shaped container is half full, and the other two containers are full.
Geometry class
Click the green buttons on the box to match the levels of liquid in the containers.
Click them 3, 1, 2, 3, 1 times, and then click OK.
The box opens. Take the cosmetics box and two white handles.
Wings and Hearts
Match the patterns from the two pictures over the toilet bowl to get a sequence of wings and hearts.
Heart, Wings, Wings, Wings, Heart, Wings.
Enter the code into the living room pedestal (RLLLRL). A drawer opens. There's an information booklet inside, which tells you to call **9##17 to open... something.
Dial it. After a short wait, something seems to unlock. The screen on the phone indicates that you should look down. The top drawer under the phone is now unlocked, and it contains three door handles.
Attach the handles to the door, then back up and open it. In this wardrobe, there's a small clothes rack on the left, with no clothes and no hangers. But it has a clothes peg you can take.
There's also a chest of drawers in here, none of which do anything. However, there's a tablet on top, which asks for a wi-fi password. Type it in from the card (8a247e) and press OK. Hmm, looks like we need to scan a code to confirm dinner.
Wrecking a welcome note
We've already read the welcome note, so why not destroy it?
Attach the two handles to the sink and turn it on to fill the sink. Then soak the welcome note in the sink!
The ink fades and changes to a white diagram. Pick up the note, which is now a clue card, and click it to turn it sideways. The diagram looks like a towel rack, but also indicates a blue rectangular object covering the middle bars of the rack.
Attach the clothespeg to the welcome note and use it on the rack.
The ink dries out and now displays a QR code. Take the code card.
Use the code card on the tablet to scan it. Done! The tablet now shows a picture of a door, an arrow, and something that looks like a wallet.
Check the front door. A code box has been slipped under the door. (Instant service!) It takes a code with four colors, each either turquoise (green), maroon (red), amber (yellow) or sapphire (blue).
A sequence of colors
Open the cosmetics box. It doesn't have a mirror, but there's eyeshadow instructions, and a grid with four grey rectangles, each with a different number of stars:
  2 4

  1 3
The eyeshadow wells are also arranged in a grid:
  Green Red

  Blue Yellow
These two grids combine to indicate a sequence of colors.
Enter the code Blue Green Yellow Red into the box (4, 1, 3, 2 clicks) and then click OK. Take the safe key. There's a numeric code printed under the key: 5601.
Unlocking a safe
Use the key to unlock the keypad on the wall safe. Enter 5601 and press OK. The safe unlocks. Open it and take the room key.
Use the room key to unlock and open the front door. It's dinner time!
Enough messing about in beautifully rendered hotel rooms with their impressive mobile devices and non-mobile phones and complicated greeting cards and unnaturally prompt service, its time for simpler rooms with simpler puzzles. Well, most of them are.
Toys!
That's weird, I don't see any toys around...
Exploration
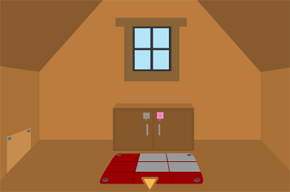
On the first screen, there's some kind of disco floor (I'm assuming it's a dance pad?) screwed down to the floor, and a panel on the wall that's screwed down, and a cupboard with two locked doors. The left door has a 3x3 grid of grey squares which turn red when clicked and back to grey when clicked again.
The right door has a pink lock with one grid of four grids of four dots... what? Let me try that again. It has four buttons, each with a 2x2 grid of dots marked on it. Clicking on each button turns some of its dots on or off, cycling through seven patterns.
Turn around.
There's a launcher for a toy rocket on the left, but no rocket to be found. There's also a mousehole in the wall, and a blue box to the right which takes a three-letter code.
The door is locked. The three buttons on the lock cycle through various sillhouettes when clicked.
3x3 Grid
The clue is right in front of you.
Follow the pad on the floor, and hit the buttons along the left and bottom edges to make a red L. (Upper left, left, bottom, bottom, bottom right.) Press OK.
Open the door and take the toy car from inside. (A toy! I wonder what's inside the other door...)
Toy car
Place the toy car in front of the mousehole, then click on it. It moves forward into the hole, then reverses back out.
Pick up the toy car again. It now has pink goop all over its front. Examine it, then click it to look at it from the front. There are three symbols in white: Teddy bear, Star, Heart.
Symbols
Go to the door and put in the symbols (2, 5 and 3 clicks).
The door opens and you're in the bedroom.
Exploration: Bedroom
There's a bed with a teddy bear on it. He wears a blue shirt with a white number 3. At the foot of the bed, there's a code panel with four round buttons (green, orange, red, black) and an OK button.
On the right side of the room, there's a cupboard locked with a three-digit number code. The three digits are colored pink, blue and green. There's a TV which turns on to display a green screen and a white number 9. (Possibly the most boring TV ever.)
There's also a bucket of pink paint, spilled on the floor (oh no!) with a paint roller sticking out. The paint roller is covered in that pink paint, except for a white region in the shape of the digit 8.
Three digits
Use the digits from the paint, bear and TV to unlock the cupboard in the bedroom.
The code is 839.
The cupboard opens. Take the toy rocket from inside.
Liftoff
Place the rocket on the launcher and click on it to press the red button and launch it.
It flies straight up, hitting the roof and breaking a hole in it (oh no! again!), and then lands back down next to the launcher. A crumpled paper ball has also dropped out of that hole. Unfold the paper ball. It's blank?
Blank
Wait, you were expecting a clue? Maybe it's in invisible ink. Children do that all the time, right?
Use the paint roller on the piece of paper. A grid of circles appears, in pink and white:
⚪⚫⚫⚪ (PWWP)

⚫⚪⚫⚫ (WPWW)

⚫⚪⚪⚪ (WPPP)

⚪⚪⚪⚫ (PPPW)
4x4 grid
Which is also a 2x2 grid of 2x2 grids.
Press buttons on the right door of the cupboard in the first screen to make it match the clue on the paper.
(Press the buttons the following number of times:)
3 25 6
The door opens. Take the toy train, which has a string tied to it.
Going round
There's nothing much to do with the train other than look at its wheels. What's so special about those?
They're colored red, green, black and yellow. Press the buttons at the foot of the bed accordingly:
Red Black Black Green Black Orange Red Orange, or 43313242.After clicking OK and then on the panel again, it flips open. Take the screwdriver.
Lefty Loosey
Go back to the first screen. Unscrew the pad on the attic floor, which slides to the right and reveals a clue: there's a red O and X separated by a crack in the floor.
Unscrew the panel in the wall. Nothing but a hole there... probably.
Choo choo
Use the train on the hole, and click it to move it. It moves into the hole, and then stops. Pull the train out by the end of the string. The front of the train seems to have pulled out a ladder from the hole, which you can take.
Letters in red
To open the blue box, we need three letters. However, only O and X are written on the floor in red. Where's the last one?
The pad that was moved aside spells L. So from left to right, the three red letters are O X L.
Enter the code into the blue box, which opens up. There's a large hammer inside.
Escape
Use the hammer to break the floor open (oh no!) between the O and X. Use the ladder on the hole, and then click it again.
You've escaped! (Now who's going to clean up all that mess?)
Three walkthroughs, nice job!
on ichima, i'm stuck
you said a code for top drawer for Tree Hat Snow Skates. I don't see a top drawer to use this code. Am I missing something?
please help.
@Paul, that's actually a clue from the top drawer
of the desk, to the right of the red phone
and it's used
to unlock the drawer below it, once you've also found the painting clue.
ok KK but the images are hard to Follow. when you say
L and backwards L etc. not sure if you mean buttom left bottom right or whatever.
but i'll try again.
That reindeer in the Ichima Room 18 looks suspiciously like a moose. :)
Indeed! I had written "moose" in the first draft of that walkthrough, and one of the last things I did was change it to "reindeer", since that's more Christmas-themed.
Update