
 Hi! Another week is over and a new Weekday Escape is here! Three escape games for a break from responsibilities or just for fun. It´s time to dive into the world of cupboards with highly secured drawers and the world, where the most valuable commodity is a screwdriver. Go ahead!
Tototoroom´s Button Escape is an escape from a hotel suite, probably 5 or more stars hotel, considering a jacuzzi.
Appgoya´s Mystery Meeting Room Escape is an escape from a dull place, where you surely want to escape from.
The last game, Spiritual Escape´s Orbit Escape, is almost full size escape game. Definitely not 10 minutes, you need more time to get through this one!
Have a good time and enjoy!
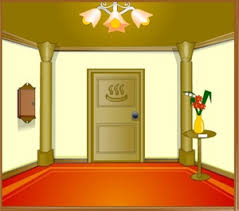
So you are locked in a hotel suite, a luxury hotel suite with jacuzzi placed on terrace under starry sky (!!!) and private dining room, and you want to escape (game doesn´t explain why would you do that). You have to find 11 buttons, which seem like a grey blobs, and after clicking turn into an orange smiley face. Counter is by an exit door and you can open it only after all buttons turn orange. Notice, that buttons can be any size and hidden anywhere, sometimes is visible only a part. Each find is rewarded with fanfare.
There is not a language barrier in this game, though at one or two moments it may seem so.
The cursor is not changing, no save button, one ending.
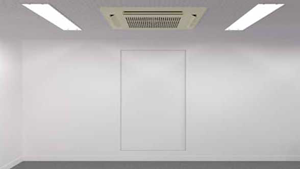
The meeting room you are locked in doesn´t seem very mysterious. It seems very boring, actually, and without direct light or fresh air a bit claustrophobic maybe. Before you can leave it you have to break some codes and they are not very easy, so you may spend more time there than you would like to....
Game´s style is very similar to Hottategoya, maybe Appgoya is their successor? I hope so!
The cursor is changing, save button, one ending.
This is very satisfying escape game. Well ballanced, not too easy neither too difficult, no pixel hunting and fluent playing. You are locked in a room, again, and the room is full of some devices, locked drawers, a flowerpot is here too (the plant must be a plastic one, there isn´t any window). Puzzles are both intuitive and logical, and at the moment you think you are out there is more content! Simply, pleasure to play!
The cursor is not changing, save button, one ending.
We love escape games, and our readers love talking about them and sharing hints! How about you? Let us know what you think, ask for clues, or help out other players in the comments below.


Some hints for Button Escape
Cleaning the blob on the picture
Use the wet paper with the blue squares
Wet the paper in the bathroom after turning on the tap
The order of the rooms for the map in the Jacuzzi room
Position the bedroom picture on top. I brute-forced it. I couldn't guess why it was in a different orientation from the map on the wall.
What the flower clue on the hanger is for
It shows which candles to light in the dining room
Hey, Barbara, for Button Escape I found that
the two different orientations for the room maps can be figured out by where the flowers are on one of the maps. You have to line up that corner of the room with the other map and then the orientation will be correct.
Button Escape 36
Find 11 buttons and escape! But first, let's make the most of our complementary hotel stay.
(You will need to view the necessary clues before solving each puzzle.)
Exploration: Main room
You start in a hallway, facing a door with a picture of steam coming out of a tub.
Facing sauna door
The door is locked.
On the left, there's a box. Its lock has a button with a plus sign on it, dividing it into four smaller buttons. Clicking each of these four corner buttons cycles its appearance between six different options, allowing you to make fancy clovers and leaves... but what's the correct combination?
On the right, there's a small table with a vase of flowers on it. Lift the vase and press the button (#1) underneath it. There's a note on the table, written in Japanese. Thankfully, you don't need to read it. However, it also hides a button (#2) on the table. There's also a locked yellow box on the table. I wonder what could fit in that small box...
(Turn right.)
Facing grape door
The door is locked, and has a picture of grapes on it. Hopefully this door doesn't lead to the produce aisle.
On the left, there's a switch which won't stay down, and a small picture of grapes in the upper left corner, a round button (#3), and a button labeled "Close". (What would we want to close?)
On the right, there's a map of the place, showing four rooms connected to the center room. In clockwise order: Bathroom, Dining Hall, Bedroom, Toilet. Clicking on the map flips it up, revealing a button (#4) and a hand towel with a simple pattern of blue squares on it.
(Turn right.)
Facing star door
The star door is locked. This time, there's nothing on the left wall.
On the right wall, there's a loosely done drawing on the wall, titled Crying Man. There's a dark spot on the bottom of its frame, which you can zoom in on (twice) to see an outline of a pattern beneath.
(Turn right.)
Facing toilet door
There's actually a picture of toilet paper on this door! The door is unlocked.
The pillar on the right of the door has its own additional lighting, and a rectangular device which doesn't respond to any clicks yet. (Since this pillar doesn't show up on any other views, I can only assume this room isn't actually square.)
(Go into the toilet.)
Exploration: Toilet
There's a box over the toilet, with four square buttons arranged vertically. Clicking on the buttons cycles them through nine Japanese characters (which are kanji for the numbers 1–9). Beside the buttons, the word "pass" is written (vertically) in white, except for the second "s" which is in blue.
There's a bunch of black blobs over the sink. Zooming on them reveals that the three small blobs are labeled "s", "s", "p" and the large blob is labeled "a". Again, the letters are in white except for the second "s" which is in blue. There's a button (#5) in the upper-left corner.
There's a button (#6) on the side of the toilet seat.
The sink doesn't work (yet), but we can open up the panel on its bottom to reveal a lock. It has a grid of buttons (7 rows by 3 columns), and an Open button.
7x3 grid
Copy the design on the hand towel, but rotated to fit the grid.
Press every button on the center column, and the 2nd, 4th and 6th buttons on each of the other columns. Then click Open and the panel opens up.
Turn the red valve. Now the sink works. Use the hand towel on the sink to wet it.
Modified plus sign
You need to wipe of the stain on the drawing frame before the game lets you use the clue.
Use the wet hand towel on the stained area of the drawing frame, then copy that clue onto the box to the left of the sauna door: click each quadrant thrice except for the lower left, which you click twice.
Click Open and the box opens. There's a lever which slams the sauna door open (and unlocks it permanently), and a matchbox.
Exploration: Sauna
There's a nice jacuzzi under the starlight. Click on the left corner to zoom in on a plaque with the floor plan of the place. There's a flower marked on the lower-left corner of the main room in that plan. Each of the squares representing the other rooms are buttons which can be clicked to cycle between four pictures (the same four pictures as on the doors). Beneath, there's a button labeled "Let's Jacuzzi".
The floor mat to the right of the jacuzzi hides a button (#7).
Turn right to look at the terrace doors, which are locked. Beside it, there's a panel showing which of the 11 buttons you have, and an Open button.
Jacuzzi time
Match the buttons on the jacuzzi panel with the pictures on the doors. The flower position should also match the table with flowers on it.
From top, clockwise: Stars, Toilet Paper, Sauna, Grapes. (3, 4, 1, 2 clicks)
Click the Let's Jacuzzi button, and it turns on. Take a soak in the bubbles, and a transparent capsule floats up, containing a red box.
Open up the red box. There's a ring!! Click on it to put it on, then click on the box again to remove the fabric and reveal a key.
Leave the jacuzzi, and use the bathrobes as you go.
Small box
The key opens the small box beside the vase on the table. Take a thing which looks like it could hook on to something.
That thing is a button. Use it on the pillar next to the toilet door, and press it to turn all the other lights out.
In the dark
Go back to the Crying Man drawing. The crying man now has two properly drawn eyes, and looks upward.
Click the space above the painting, but below the blue lamp, revealing a button.
Press this button to slam the bedroom door open and unlock it permanently.
Go back to the other pillar and turn the lights back on.
Exploration: Bedroom
There's a wardrobe on the left, with both doors locked by a yellow panel. The panel has a face on it, with buttons for eyes and a large button for the face. The buttons cycle through four choices when you click them. The drawer of the wardrobe contains a large button (#8).
Click on the curtains to open them. There's a nice view of the night sky through the window, and a black button underneath. Click the button, which turns off the lights in this room so that moonlight shines onto the floor. Click on the floor to see a face drawn in a square. There's a button (#9) in the upper-left corner.
Back out, turn the lights back on, and flip the right corner of the carpet to reveal a button (#10) under it.
Emoticon
Match the eyes on the wardrobe panel to those on the moonlit floor, by clicking the left button twice and the large button thrice.
Open the wardrobe to take a dress.
Getting dressed
Click on the dress to put it on.
That leaves the hanger, which has three three-pointed leaves drawn in the middle. Some points of the leaves are marked: left/center/left and right.
Can we use the hanger for anything else?
Use the hanger on the switch to the left of the grape door.
The weight is just enough to hold it down, and the other button changes its label from "Close" to "Open". (If you don't take the dress off of the hanger first, the button will not change.)
The grape door is now open.
Exploration: Dining room
That's a little fancier than I was expecting. There's three candelabra on the table, each with three unlit candles.
Zooming in on the table, there's what appears to be a bell in a case with four buttons, and also a plate with a napkin on it. Lifting the napkin reveals a sequence of bell-shaped markings, in red, green, blue and yellow. From left to right, the sequence is RGBYYGYG.
Candles
Use the match to light the candles (or put them out) according to the clue on the hanger.
Light the 1st, 5th, 7th and 9th candle from the left.
The curtains rise, allowing light to flood in (from where?) through four stained glass windows, which are identical except for a single panel which is a different color in each: from left to right, this panel is colored red, blue, yellow, and green.
Bell
Press the buttons on the bell case according to the color clues.
Red/Blue/Yellow/Green = 1 2 3 4
RGBYYGYG = 14233434
Press the buttons in that order to open the case, and then ring the bell. Dinner is served!
Click on the dinner to eat it. Dinner is finished!
A little Japanese
Click on the empty plates to turn them over. The small plates are labeled 五三七 and the large one is labeled 四.
Go back to the toilet, and zoom in on the panel above the toilet bowl. Each letter corresponds to one of those Japanese characters.
ssp a= 五三七 四
pass = 七四五三 (7,4,5,3 clicks)
The panel opens, and there's a large button (#11) inside.
All the buttons!
You've found all the buttons (and got some fanfare for it):
Order in which they appear in this walkthrough:
Under vase (right of sauna door)
Under welcome note (right of sauna door)
Grape picture (left of grape door)
Back of floor plan (right of grape door)
Black patches above toilet sink, upper-left corner
Side of toilet seat
Floor mat beside jacuzzi
Wardrobe drawer (in bedroom)
Moonlit floor, upper-left corner (in bedroom)
Under carpet corner (in bedroom)
Behind "pass" panel (in toilet)
On the terrace panel:
08 10 05 11 01 09

06 03 02 04 07
which means that you can open the terrace door by clicking the Open button beside it.
On the terrace, there's a table with wine. Click the table (or chair) to watch the celebratory fireworks.
thanks for the button escape walkthrough kk. hope you can get the other 2 done soon :)
Appgoya is Hottategoya's new name/site (there's a note on Hottategoya's Japanese page), so they are the same developer.
Mystery Meeting Room Escape
It looks like you've fallen asleep in the meeting room again, and now you're locked in.
Exploration
You're in the back of the room, with five long tables ahead. Their chairs are red and blue, arranged somewhat haphazardly. Number the tables:
 (Front)

 empty RBR=5

 4=BBB RRR=3

 2=BRB RBB=1

 (Back)
But first, let's look around the back. Turn left, there's a door here which is locked.
Turn left again, there's a safe on the wall which takes a three-letter code. The letters are numbered 1 to 3, and cycle through ten options when you click them.
Turn left again, there's a whiteboard with outlines of countries on it, held in place with differently-colored magnets: Canada France India China Japan Germany Italy Greece.
Table 1 is the nearest one on the right. Click on the box on it to zoom in. It needs two batteries, and has a clue written on it: LONG−SHORT. Under that clue, there's room for a three-something code, but we can't tell what because it's not powered yet.
Back out and we're on the starting view again.
Table 2 is on the left, and it has two laptops on it. Their screens display six French and five Indian flags respectively, with the second french flag labeled =R and the second last indian flag labeled =I. The laptop on the left has twelve numbers on their keyboard keys. On a QWERTY keyboard those numbers would spell out the sequence mjuhbgtfcde3, which is meaningless here. The other laptop has letters on its keyboard, but not quite the QWERTY layout you're used to:
 QWeRrYxIOP

 ASnnufiKL

 ZXivoNs
where I've already put the first eleven numbered keys in lowercase.
Back out, move forward, turn right.
We're looking at table 3, which is empty except for a clue writen on the table: a black star followed by the number 10.
Turn left twice to look at table 4, which doesn't even have graffiti. There's a clock on the wall over the table, with three lights under it and a button in the lower right. Pressing the button changes the clock to three different times and lights up the three lights in turn: 3:40, 10:00, 1:45.
Back out, turn right, and click the box on table 5, the one on the right. This box is locked and needs a key.
Back out. Now we're at the front of the room facing the back. There's a projector overhead which is turned off.
Turn left. There's a small lectern here, with a note hidden on its lower shelf.
Turn left again. The projector screen is down, and there's nothing on it.
Turn left. There's a door here, marked with a black star over its handle. Turning the handle does nothing. There's also a phone on the wall, but we don't know any number to dial.
Puzzles
(You can check in the game menu for hints in Japanese. I'm going to try translating them, but my Japanese isn't that great. For hints which don't require a separate spoiler tag, I'm putting their contents in italics.)
Let's start with a clue, a clue with a star.
Hint: "A clue is written on a long table. The number indicates how many times."
Click the door handle a total of 10 times. (This doesn't reset when you change views, so you don't need to click it 10 times in a row.)
On the tenth time, the handle falls out. Take the battery from inside.
Next, we solve a puzzle of a different type.
Hint: "Read the right keyboard's letters in the order from the left keyboard."
The corresponding keys read out SIXFOURNINE#, so dial 649# on the phone at the front.
The panel on top of the number pad opens up. Take the battery from inside.
We got a battery from each of those puzzles.
Place the batteries in the box on table 1. Its buttons light up to display 000. Looks like we need a three-digit code.
Hint: "Input the differences between the long and the short."
The hands of the clock point at different numbers:
 ( Time) Long−Short = Difference:

 ( 3:40) 8−3 = 5

 (10:00) 12−10 = 2

 ( 1:45) 9−1 = 8
Input 528 in the box.
A drawer in the box opens up, and it contains a key.
Use the key to unlock the box on table 5, and open it to find a tablet (computer).
This time, the unlock is more difficult.
There are five rectangular buttons on the screen, and the tablet requires a sequence of six of them to unlock.
Luckily, we've already found a piece of paper with a hint for this.
Hint: "Something in this room is arranged like the tablet buttons. R=Red, B=Blue."
The note from the lectern reads: RRR, RBR, BBR(RBB), BRB, BBB, BRB.
That matches the chair colors on tables 3, 5, 1, 2, 4, 2, so press the middle right, top right, bottom right, bottom left, middle left and bottom left buttons.
The door at the back of the room opens up!
There's a locked door which requires a key, and a box on the floor which contains a remote control. The remote is helpfully labeled "PROJECTOR".
Use the remote on the projector (visible from the front of the room looking back), which displays three rows of flags:
Greece, Germany, Italy.
Even if you don't know them, you can still figure out the next puzzle from the other information available.
Some of the flags are numbered:
  ?????2

  1??????

  ?3???
Geography time.
Hint: "The 3rd in Japan is P. The 5th in China is A."
Each individual flag represents a letter in its country's name. Spell out the country name, and then match the numbered flags to their letters.
1=[G]ermany, 2=Greec[e], 3=I[t]aly
Put in GET in the box at the back of the room, and open it to find another key.
There's only one place left to use this.
Go to the locked door accessible from the back of the room, and use the key to escape!
thanks again KK. can't wait for the walkthrough to the last one :)
This is my largest walkthrough so far — the game's almost as long as Elements!
Orbit
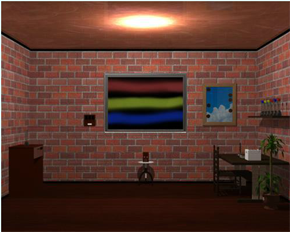
After those two thematic games, there's one with no narrative here. It's just a brick-walled room... but it's not just a brick-walled room!
You will need to view some clues before solving their puzzles. Also, since almost every code lock will have a small panel that opens up and a large white button that confirms the code, I'll ignore those features in their descriptions.
Please remember to save frequently.
[Exploration] A brick room
Let's ignore the table on the left for now, and start with things attached to the wall in front.
Painting, panel, white table, frame
There's a large "painting" with three horizontal airbrush strokes of red, yellow and blue. To the left of it, there's a code panel which isn't active. It looks like it's missing three round buttons.
Under the painting, there's a box on a small white table. This box has two buttons, marked with a bow and arrow and a symbol that looks like a guy shrugging. (I'm assuming those are Sagittarius♐ and Capricorn♑.) It also has six different lights, arranged in a circle. Clicking the right button lights each of the lights in turn clockwise: yellow, green, white, blue, red, (black), and clicking the left button does the same but counterclockwise.
To the right of the painting, there's a picture in a frame of a blue sky with clouds. Some circles appear along its left and right edges. From top down, they are on the left, right, right, left, right and left edges.
(Turn right.)
Desk, shelf, plant, switch, door
In the left corner, there's a table with a shelf above it. On the shelf, there's six small vases with colored balls in them: Blue Yellow Yellow Red Blue Red.
On the table, there's three items. There's a vertical stand with three square lights, either white or black. It has a button on the base which cycles the light pattern through six variations:
 1 2 3 4 5 6

 W W B W B B

 B B W B B W

 B W W W W B
There's also a book with the number 20 on its cover. Its contents are:
A sequence of black and white squares: BBWB BWBB
A sequence of five symbols alternating between Sagittarius and Capricorn, colored Yellow Blue Green Red White
A grid of nine black squares, with three zodiac signs running down its left edge: Aries♈ Taurus♉ Cancer♋
Lastly, there's a white box with a grid of nine black buttons on top.
There's a potted plant on the floor next to the table. Zoom in on the pot, which has the number 21 written on it, and click its left edge to take a white round button which was behind it.
On the right side of this wall, there's a switch near the ceiling, too high to reach, and a white door with two holes in the middle where you might expect handles.
(Turn right.)
Safe, moon photo, wall hole, brown round table
There's a brown safe on the left, which has both a keyhole and three differently sized horizontal rectangles on the door. Beside it, there's a photo of the moon, with its metallic frame screwed down on its corners.
Next to that, there's a rectangular hole in the wall with white markings on its left and right edges (Left Right Right Left Right Left, like the picture opposite it), and a blue box with three white squares on its top surface. The top square is level with the surface, the bottom-left square is protruding, and the bottom-right square is sunk into the surface.
In front of those three things, there's a small round brown table with a box on it made out of some shiny polished material. This box has three spherical holes on the top, and a handle for a white drawer in front that doesn't open yet.
(Turn right.)
Cupboard, clock, side table
There's a cupboard on the left side. Its top two doors are locked by a three-digit code, and the top-left door has PLANT×BOOK+MOON written near its bottom edge.
At first glance, it looks like the middle drawer also takes a three-digit code with digits colored red, blue and yellow. There's two weird identical figures on both sides of the code, each a vertical line passing through three circles of different sizes. (What's the catch?)
The bottom two doors of the cupboard are locked too, and the lock has two black buttons that flash red when pressed, and a larger white button between them.
In the middle of this wall, there's a clock near the ceiling, but only one of its hands is present. It's shaped like the figures on the wardrobe drawer, and points upwards.
In the right corner, there's a side table. For some reason, we can only zoom in on the drawer lock right now, but that's enough to click each of its three buttons, which flash different colors: Red, Blue, Yellow.
Red button yellow button blue button
We need a sequence of colors to open the side table, and we've already seen that sequence elsewhere in this room.
Enter BYYRBR (from the shelf) on the drawer lock, which are the (left/center/right) CRRLCL buttons.
The drawer opens. Take the screwdriver.
Lunar secrets
Unscrew the photo of the moon, picking up the screws and revealing a hidden compartment.
The number 18 is written on the inner wall here, and there's a long rectangular box with eight black buttons that turn white (or black) when pressed, and a round white button in the lower right corner.
We have the code for this box! But there's a twist...
Pressing the white button doesn't open the box immediately, but toggles the lights on the 1st, 3rd, 5th and 7th buttons. Pressing the white button again resets all the lights to black.
It seems we need to make the buttons match the clue after the round button is pressed, not before.
From the clue in the book, the 3rd and 6th buttons should be lit after the round button is pressed. Working backwards, this means that the 1st, 5th, 6th and 7th buttons need to be lit before.
Press those four buttons, then the round white button twice. The panel on the box opens up. Take the remote control. It has two blue buttons, two white buttons below that, one large white button, and the word SKY.
Blue and White
That's a lot of buttons on the remote. What's blue and white, and left and right, and sky all over?
Go back to the picture of the blue sky with clouds. The first four circles are missing from the sky portion, and the last two are missing from the clouds. So we have two sequences:
Color/Side

Blue Left

Blue Right

Blue Right

Blue Left

White Right

White Left
Press those buttons (as well as the large button) on the remote while zoomed in on the sky picture, and it opens up. Take a red sphere.
Clockwise and counterclockwise
The sequence of five symbols in the book matches the two buttons on the box under the painting. But what do the colors mean?
It's a safe code:
Press the left button until the light is yellow. (5x)
Press the right button until the light is blue. (3x)
Press the left button until the light is green. (2x)
Press the right button until the light is red. (3x)
Press the left button until the light is white. (2x)
The box opens. Take the yellow sphere.
MATH!
Before we do arithmetic, we need to know what numbers PLANT, BOOK and MOON are.
PLANT pot: 21
BOOK cover: 20
MOON photo: 18
21×20+18 = 438
Enter 438 on the lock of the top-right cupboard door to unlock both top cupboard doors.
Look at the five glasses on the middle shelf. They're filled with different-colored liquids: Blue Yellow Green White Red.
Also look at the photo on the bottom, which indicates (with a red X) a spot under the clock. What could be there?
Looking for treasure
Back out and click the wall area under the clock to zoom in on it. Click again to uncover a hidden compartment. There's three buttons here marked with Gemini♊ in red, blue and yellow. The blue button is currently depressed, and at most one button can be depressed at any time.
But perhaps you might notice something else the buttons do. It's not obvious, but spend some time to look carefully around.
Pushing the red or yellow Gemini button down also changes the time on the clock, making the hand point to 1 or 9 instead of 12.
Enter 1 12 9 on the middle drawer of the cupboard. Yes, the blue "digit" goes up to 12.
Open the drawer and take the white square button.
Deja vu
Place the square button on the blue box in the wall (to the right of the moon photo). Now it just looks like a binary code box.
Follow the markings on the sides of the hole that the blue box is in: LRRLRL.
After pressing those buttons, the box opens up. Take the blue sphere.
Some assembly
You should have three spheres:
Red: behind sky picture
Blue: in blue box
Yellow: in box with six lights
Use them on the shiny box on the round brown table, and open the drawer to get two brown cylinders, which are actually door handles.
(You can close the drawer and take the spheres back at this stage, but you won't need them until near the end.
Use these door handles on the white door (right of the potted plant), and screw them into place. Now you can slide the doors open. There's a ladder leading down.
(Go down.)
[Exploration] Darkness
The room downstairs is almost pitch black, with no light switch to be found. Click the right side of the screen anyway.
The number 23 is glowing on this wall, with 2 in red and 3 in white. There's a table with a box on the right, but we can't zoom in on that yet.
Turn right again. There's a number 1 on this wall, glowing green. The same table and box is here, and now we can zoom in on the box, which has five round buttons and a clue in the lower right. Is it a filled figure eight? A sponge being squeezed? That picture isn't clear enough.
Turn right. The number 54 is glowing on this wall, 5 in yellow and 4 in blue. What's with the numbers, colors and buttons?
That picture is a glass. The five buttons on the box here correspond to the five glasses of colored liquid upstairs, and the five colors of those glasses correspond to the five digits on the walls here.
Glasses: BYGWR = 45132
Click the 3rd, 5th, 4th, 1st and 2nd buttons from the left to open the box. Take the diamond key.
Knowledge is confusion
Use the key to open the safe to the left of the moon photo. It's full of books, two whole shelves of them! But you can't pick any of them up. So it must be a clue of some kind, but how to read it?
Also, what about those rectangles on the door? You didn't need them to open this safe...
...but the rectangles on the door match the rectangular buttons on the lower-right cupboard door.
The top and bottom buttons on that cupboard door flash red when pressed. So focus on only the red books, and whether they occur on the top or bottom shelf.
From left to right: Top Bottom Top Top Bottom Top Top
Press the corresponding buttons on the cupboard door, then open it to get a metal pole.
Now you're tall enough
Use the pole on the switch near the ceiling (same screen as potted plant). This turns off its light...
...and it turns on the lights downstairs.
[Exploration] Like night and day
Now we can explore this room properly.
There's a door on the left. It's locked with no clear way to open it. To the right of the door (and left of the ladder) is a panel with a grid of square buttons 3 high and 6 wide. All the squares are black except for two white ones, second and third from the right on the top row. Clicking on each square toggles it between black and white, except for those two squares which never change.
Turn right. There's a clue on this wall, consisting of the zodiac sign Taurus♉ and the number 248.
Turn right. There's a similar clue on this wall, but this time it's Aries♈ and 196.
Turn right. There's yet another similar clue. This time, it's Cancer♋ and 753.
It's black and white
There's one other clue which has black and white squares, and fits with the 3x6 grid of squares.
The stand of lights on the desk cycles through six variations, which form the six columns of the grid:
456123

W__WW_

__W__W

WW__WW
After unlocking the panel and taking the round button, the grid changes on its own:
W___WW

W_WW_W

WW___W
Nine digits
The book tells you what to do with those zodiac sign clues.
Arrange the clues like this:
♈196
♉248
♋753
Press the buttons on the box beside the book in that order. Take another round button.
Three buttons
Now you have three buttons:
Behind potted plant/inside grid panel/inside grid box
Place the buttons on the panel to the left of the painting, making each of its black displays light up and show a − sign.
Clicking on each button cycles it through four L-tetromino patterns before returning to the domino −.
Match the grid downstairs by clicking the buttons 2, 0, 4 times.
Zodiac signs appear on the painting: Taurus♉ Aries♈ Cancer♋ down the left, and a larger Gemini♊ in the middle.
Code of Gemini
The zodiac-number clues tell you the sequence for the color Gemini buttons.
The digits 123456789 correspond to ♈♉♋♉♋♈♋♉♈ (ATCTCACTA), which appear on the colors YRBRBYBRY of the painting.
So hit the correspondingly colored Gemini buttons (RLCLCRCLR).
The code panel opens up. Take the star key.
[Exploration] But wait! There's more!
Take the star key and unlock the door in the basement, which leads up a flight of stairs to a room covered in red carpet. At least this room isn't cluttered with safes.
Straight ahead, there's a double door with an elaborate lock: the grid of nine black squares lights up in a spiral pattern clockwise from the top left, and then the black circular area below it displays a white triangle. You can click any (empty) black square to light it up and the circular area to change its symbol (up, down, circle, star, circle-up, circle-down, circle-star), and then the white button to place the symbol in that square and reset the symbol in the circle. After all nine squares have been filled by symbols, clicking the white button again will clear all the squares.
To the left of that door, there's a similar grid of nine black squares, but it's not powered. There's a small ledge in front of it with a spherical indentation.
To the right of the door, there's a similar setup, but this time there's only one large black square. There's still a small ledge with a spherical indentation.
Turn right. There's a picture of the wall in the brick room with the clock. It looks normal.
Turn right twice. There's a diagram indicating two shelves full of books, but the third book from the right of the top shelf is missing.
(Turn left to leave the room.)
Back and forth
Go back to the shelves of books (left of the moon photo) and push the third book from the right on the top shelf.
Take the three spheres back from the polished box, if you haven't already done so.
Turn right, open the hidden compartment in the wall, and press the blue button to set the clock back to its initial state.
Make your way back to the red carpet room, where the diagram of books has been replaced by a lever.
Pull the lever, then turn right twice. The photo of the clock wall has also been replaced by a lever.
Pull that lever. Now the panels on both sides of the door work, and you can use the spheres on them.
Superimposition
Using the spheres on the right panel makes either the up, down or circle symbols appear.
Using them on the left panel colors some of the squares white.
The clues given are:
R=Up, Y=Dn, B=Cc

[W_W] [W__] [_W_]

[_W_] [WWW] [_WW]

[W_W] [__W] [WW_]
Put those grids together:
UpDn, Cc, Up

Dn, UpDnCc, DnCc

UpCc, Cc, UpDn
which, translated to clicks, is
320

165

423
Now put that code in the door, but in the spiral order:
Top left: 3
Top: 2
Top Right: 0
Right: 5
Bottom Right: 3
Bottom: 2
Bottom left: 4
Left: 1
Center: 6
The door unlocks. Click on it to open it and escape.
Congratulations!
And here's the tl;dr version of that, which might not make much sense if you haven't completed the game:
Orbit (speedrun instructions)
(Some notation may differ from the walkthrough.)
Box under painting:
LRLRL/53232. Get yellow orb.[R]On table, flip through book and cycle through stand.
[L]Side table:
CRRLCL. Get screwdriver.[L]Unscrew moon photo, box:
1567. Get remote.Cupboard top:
438. View photo.Drawer:
1 12 9. Get button.[R]Zoom on SKY, remote:
blue LRRL white RL. Get red orb.[LL]Button on blue box:
LRRLRL. Get blue orb.Orbs in box, open drawer, get handles.
[L]Handles and screws on door.
[DRR]Box:
35412, get key.[UR]Unlock safe.
Click cupboard, bottom doors:
UDUUDUU. Get pole.[RR]Hit switch with pole.
[D]Fill grid:
1__WW_

__4__6

23__57
[U]Box on desk: dial
149583762. Get button 2.Potted plant: Get button 3.
[L]Buttons on panel:
204[L]Gemini buttons:
R LCLC RCLR. Get key.[LLD]Unlock door, go upstairs.
[L]View diagram.
[Room1][R]Open safe, push 3rd book from top-right.
[Room3]Unlock door: spiral
320532416. Escape.My best timing with this is just over 3 and a half minutes.
on orbit, having a problem
when I type the number to open the top doors it won't work. I looked at all the clues.
Hi Paul,
I am assuming you are talking about the tall cupboard in the corner. It seems you must unscrew the moon picture before the upper cupboard lock will activate. (This would allow you to see the final number in the calculation).
Hope that helps.
eon,
I did that part already. I saw all 3 numbers and typed them in order the way KK put it, but all it did was reset to 000 and when I tried to open the top doors,they wouldn't open. :(
oh well :(
I got it now but now i'm stuck on
the grid. I typed it the way the walkthrough shows at the bottom floor but it don't do anything.
Please help.
now I can't find these
Gemini buttons. the only thing that might be are the ones I put the red yellow and green buttons earlier on. it said I could take them back of I wanted but i'd need them again later. if these are in fact the same ones I can't do it because it won't let me put the buttons back on the holes.
i'm confused
@Paul, for those three buttons,
Gemini buttons (red/blue/yellow) are the same buttons you use to get the code for the cupboard drawer (click the area under the clock after looking at the photo in the top cupboard).
I also just found an alternate (perhaps unintended) solution for one of the earlier puzzles in Orbit:
The box behind the moon photo would usually require you to work backwards to get the correct pattern to display.
Once you figure out that the white button
always toggles a fixed set of lights,
you can get the correct input by
just copying the output: 36 gives 1567, so 1567 gives 36.
But you can also make the game do this for you by
leaving the view, causing the game to "forget" that the button has already been pressed once.
In other words, after pushing the 3rd and 6th buttons, you can press the round white button, back up, zoom in again, and then press it twice to unlock.
kk
the final code before I exit is confusing. there are 2 #2;s etc. :( plus there are no room for all 3 balls so I don't know which one goes to which bas there are only 2 holes.
hope you can help.
Yes, the final code is extra complicated.
For the first step, the top-left square must be white and the bottom circle must display a star symbol before you press the other button.
Do the same for the rest: top square, circle symbol, press, top-right, triangle up, press, right, circle-triangle-down, press, bottom-right, star, press, bottom, circle, press, bottom-left, circle-triangle-up, press, left, triangle-down, press, center, circle-star, press.
When you finish after 44 clicks, every square should have a symbol in it. (But if every square has a symbol and the door doesn't open, then you've missed something.)
Orbit was VERY enjoyable. Just goes to show that good classic escapes are still being made, thank goodness.
Update