
 We've climbed the mountain of Monday and torn through the terror of Tuesday - now it's Wonderful Wednesday, and it's time to escape!
This week, MayMay wants you to locate that elusive USB that always seems to go missing at the bottom of your junk drawer. TomoLaSiDo has stolen a couple of key components of your bicycle. And Amajeto thinks your culinary skills could use some work, so they've sent you off to cooking classes.
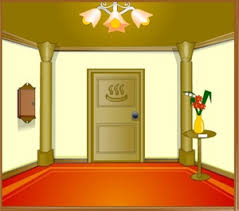
MayMay has dumped you in a very pink room with a range of code-locked boxes and safes scattered around the place. Which one is the USB holder? Are you the USB holder? What does the USB hold? So many existential questions that need answering...
 Room with Pedals
Biiiiicycle! Biiiiicycle! Biiiiiicycle! I want to ride my....
Get out your lycra, escape enthusiasts - we're going cycling! Well actually, we can't go cycling because our pedals have gone missing. Also, we're locked in the room and the owner of the room might get cross if we scratch the floor. So channel your inner MacGyver and think of some crazy uses for your pedals to help you escape from this beige prison.
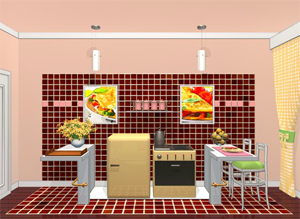
Are you wondering what kind of art might work on the walls of your kitchen? What might inspire you to culinary greatness? Have you considered two giant posters of omelettes? If not, check out this amazing design inspiration from Amajeto. I think it works spectacularly well with the retro brown tiles, don't you? If you aren't inspired and your cooking skills would send Gordon Ramsay into a expletive-laden meltdown, then you'd better escape before someone asks you to cook brunch...
We love escape games, and our readers love talking about them and sharing hints! How about you? Let us know what you think, ask for clues, or help out other players in the comments below.


This was more linear than I expected, even for a MayMay game. (Please fix the image.)
USB Holder
First room
First, let's deal with the two cupboard safes on the floor.
(A) The cupboard on the left is missing a handle.
(B) The next one needs a four-shape code, a white outline for each corner
Next, the wall safes.
(C) The left safe needs three filled shapes, either red, yellow or green.
(D) The right safe takes a four letter code, with letters among CDEFGMNOP.
The table is covered in dirt, and has a hook over it. Four white half-outlines are on the wall, as if something rectangular is missing here.
Turn around. Examine the door to see that it's screwed shut. There's three safes on the floor here:
(E) The upper-left safe requires a sequence of faces. The face shape, eye shape and mouth shapes are different.
(F) The bottom-left safe requires a three-digit code.
(G) The bottom-right safe requires a four-digit code, and is labeled SALE.
There's a set of power outlets on the floor, with different shapes for plugs and pins.
Plug shapes (E)
The shape of the power outlets is the code for the face safe.
(Tip for remembering the shapes: none of the faces have repeat shapes.)
Click the buttons 3, 1, 4 times.
Open the safe up to get a glue gun.
Glue gun (G)
Examine the glue gun closely. There's a serial number on it, which helps open the safe labeled SALE.
The letters S, A, L, E are written above the digits 5, 8, 3, 9.
Enter that into the safe, and open it to get a screwdriver.
Unscrew the door, and go through.
Second room
The picture in the frame on the left shows three shapes: a square, circle and triangle.
(H) The door in this room needs a sequence of four buttons to unlock. The buttons have animals on them: Bird, Snail, Cat, Rabbit.
(I) The box to the right of the door needs a four-digit code to unlock. The digits are orange and squarish.
Take the mirror from the right wall off of its hook.
Mirror (B)
Hang the mirror above the table, matching up the white outlines on each. The resulting shapes form the code for the cupboard on the floor.
Top: 5, 1
Bottom: 2, 3
Open the cupboard and take the piece of cloth.
Cloth (I)
Clean the table with the cloth, revealing a set of squarish outlines whose reflections in the mirror are numbers, the digit code for the box in the next room.
Enter 6953 in that box, then open it and take an eraser.
Eraser (C)
Use the eraser on the picture, so that the letters R, Y, G appear on the square, circle and triangle. This gives the code for the left wall safe.
Red Square, Yellow Circle, Green Triangle (3, 7, 2 clicks)
Open it and take the red ball.
Red ball (A)
We have everything needed to make a makeshift handle for that left cupboard.
Use the glue gun on the screw from the door, and use the red ball on the glued screw.
Then use the whole thing on the left cupboard to open it. Take a penknife.
Penknife (D)
Extend the penknife, making the letters on its blade visible. These letters form the code for the right wall safe.
Enter GONE into the safe (4, 7, 6, 2 clicks). Open it and take the USB connector.
USB connector
It's too short to be useful, but we have all the items necessary to extend its length.
Use the penknife on the eraser twice, then use the glue on it, then use the connector on it.
USB stick (F)
Turn the finished product over to see three digits on the underside, which opens the last safe.
Enter 718, open the safe, and take the laptop.
Laptop (H)
Examine the laptop, click on it to turn it on, and then use the USB stick on it.
The welcome message changes to a sequence of animal sillhouettes, which is what we need to open the exit door.
Cat, Bird, Rabbit, Snail, Cat (3rd, 1st, 4th, 2nd, 3rd buttons)
The door opens, and you're out!
私はあなたがこのゲームが好きで嬉しいです
USB は見る人の目にある :-)
Thank you MayMay for your comment :)
あなたのコメントありがとう:)
I love Maymay's games a lot but I feel like someone may have lied about selling them a glue gun
Google translation of MayMay's comment from the Japanese:
"I'm glad you liked this game
USB is in the eyes of the viewer :-) "
Having a tomoLa game featured here is rare, and it's even more rare to make a reference to that Biiiiicycle!
Room with Pedals
Collect key pieces from blue-and-white capsules to assemble the key and exit. You can collect multiple pedals but only one of them is a usable item. The game counts how many pedals you have, but there's no bonus for getting all of them.
Exploration
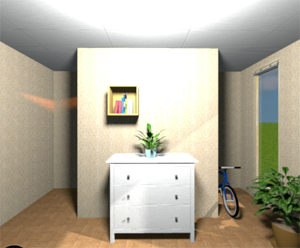
You start facing five windows overlooking a plain. It's even more plain than the name suggests, so at least the windows have different heights to keep things interesting. There's a potted plant that does nothing, next to a table with a box on it.
The box has a star-shaped gear protruding out, as well as two rectangles with a red circle and two blue lines marked. The box also a button that does nothing yet. On the front of the table, a series of white rectangles (stickers?) stand out among the metal table surface, and the first two and last two are lower than the other three.
Turn right. There's a sofa, and a blue bin on the left. Zoom on on the blue bin. You can't do anything with it, but there's a pedal (item) on the handrest of the sofa visible on this screen. Click the right side of the sofa to find another clue with white rectangles arranged vertically. The first and last rectangles are to the left of the other four. There's also a capsule stuck out of reach behind the sofa.
Turn right. There's the exit door (locked of course), and to the right of it, there's a safe in the wall. Not your normal safe though, this one has two visible metal pieces with handles sticking up and slightly separated. The safe also has three rectangular buttons on the right, two short and one long. Under the safe, there's a switch panel on the wall with two buttons which don't seem to do anything.
Turn right. There's a chest of drawers here, each requiring a different code to open. The top drawer needs a sequence of colors for three different-sized circles. The middle drawer needs a three-digit code. The bottom drawer needs a sequence of buttons, where each of the buttons is a rectangle with a different height.
Head down the left corridor and into the toilet. Sit down. Look right. Look up. Look left. It's just a drawing on the wall.
Go back to the wall with the chest of drawers. This time, click the partially visible bicycle on the right side. On its seat, there's a capsule containing the bottom-left key piece. Click the black bicycle pedal, which has 614 written on it in white.
Key pieces
Box on desk
Use the pedal on the gear protrusion. Two yellow lines are visible on the side of this pedal. Press the button to spin the pedals. The yellow and blue lines blur out into medium and large circles, while the red circle remains small.
Top drawer
Use the code from the box to determine the colors for each circle.
Yellow: medium. Red: small. Blue: large.
Make the circles blue, yellow and red (2, 1, 3 clicks) and then open the drawer, getting a capsule with the top-left key piece.
Middle drawer
Use the three-digit code from the black pedal (fixed to the bicycle).
Enter 614, and open the drawer to get a pedal and a capsule with the top key piece.
Bottom drawer
Use the window heights to unlock this drawer.
Press the long, middle, short, middle, short buttons. Open the drawer to get the upper-right key piece.
Capsule behind sofa
Use the pedal on the ball, sliding it along the floor until both the pedal and the capsule slide out the left side. Take the pedal and open the capsule to get the bottom-right key piece.
Wall safe
Use the pedal to link the two vertical handles together, and then use the code from the table to determine what buttons to press.
Down, Down, Up, Up, Up, Down, Down.
So press the second button twice, the first button thrice, the second button twice, and then the long button.
Both pieces shift to the right, and a capsule rolls out. It contains the bottom key piece.
More pedal collectables
Wall safe again
After getting the key piece, (back up and) zoom in again, put in the pedal and press the same buttons.
Both pieces shift to the right again, and a pedal moves into view.
Wall buttons
Use the code from the sofa to press the buttons in order.
Left, Right x4, Left.
The switch panel slides down and is replaced by two vertical handles.
Place the pedal on the handles, pulling them outward. It's a hidden drawer that holds another pedal!
Exit
You should have a complete key formed from all six key pieces:
Top left: Top drawer
Top middle: Middle drawer
Top right: Bottom drawer
Bottom left: Bicycle seat
Bottom middle: Wall safe
Bottom right: Behind sofa
You should also have four pedals in total, one item and three collectables:
(Item) On sofa armrest
In middle drawer
In button panel on wall
In wall safe
Open the door and carefully click the pedal sitting just outside, then leave with all five pedals!
enjoyed the first 2 games. can't wait for cooking class. keep me updated on the walkthrough for that :)
It was stuck in my head all day after playing the game. I wanted to make sure everyone else was subjected to it as well.
Too bad you all missed out on my totally sick air guitar.
For the first ten seconds in this game I thought I was still playing Breakfast Jigsaw Escape. Amajeto has brought a new look to the room, if not a new feel.
Cooking Classes 1
Go through every cupboard and drawer in this room to make one basic omelette.
Exploration
Window
There's a table on the left which doesn't have anything interesting on it. Particularly not an omelette. Yeah, what it needs is an omelette. The door next to the table is locked, which means that this screen is largely pointless empty space.
(Turn right.)
Sofa
There's a sofa with a locked stand on each side, and a omelette-inspired triptych where the middle picture seems to have been... scrambled. Clicking each of its pieces rotates it clockwise. The left table requires a sequence of purple shapes to open, and the right table is a 4x4 grid of squares which turn on or off when clicked, and there's a clue (O+K) written under the grid.
(Turn right.)
TV
There's a television mounted on the wall, and a whole lot of shelving constructed around it. What's on the shelves isn't important, other than a conspicuous digital clock on the upper-left shelf with its time stuck at 12:43, but there's a total of four locked drawers which we have to open up.
The drawer on the left of the TV has a 4x4 grid divided into four large squares. Some of the small squares have pictures of eggs (on lettuce?), sushi, pizza or chicken drumsticks on them. Clicking on the empty squares cycles them through the pictures.
The drawers on the right of the TV each require different codes. The top one requires a sequence of maroon/pink button presses. The next one requires a four-letter code, where the four letters are colored green, blue, yellow and red. The bottom one requires a four-digit code.
There's also a door on this screen, with its handle blocked by a chef head cutout. It's a little creepy having this chef watch you cook.
(Turn right.)
Kitchen
There's two pictures of omelettes on this wall, decorated on both sides with rows of pink tiles. To make things more interesting, each row of seven pink tiles is missing its second and second-last tile, in the sense that those tiles match the red background. The left picture isn't clickable, but the right one tilts a bit when you click its corners.
Below the left picture, there's a tablet computer on the table, displaying an array of letters with two squares missing out of it and a square in the upper-right corner outlined lightly. The letters are F, O, R, K arranged roughly from inside out, which matches the picture of the fork on the right of the letters.
Next to that table, there's a fridge with full of badly organized ingredients, from which you can get the stick of butter and two eggs to use later. Next to that, a stove which doesn't even have a frying pan on it, but you can turn the right knob to make the front plate red-hot.
Puzzles
Picture above sofa
Unscramble the picture by rotating its pieces (it's randomized per playthrough, but you don't have to complete it if you know the other codes).
A hidden compartment opens in the lower right. Take the remote control.
Right stand
Fill the grid according to where the letters O and K appear in the square area indicated on the tablet.
___K
OO_K
_O_K
_O_K
Turn those eight squares white, then open up the stand to take a key. There's also two squares on the back wall of the stand, with some of their corners marked with the numbers 1 to 6.
Left drawer
It's a mini sudoku! Fill each column and row (and 2x2 square) with each of the four pictures exactly once.
(Guide for those unfamiliar with solving sudoku)
Exactly one row and one column does not have pizza in it. Find the square where they intersect, and fill it with pizza.
Do the same with sushi.
For columns which have three out of four squares filled, fill the last square with the missing picture.
Do the same for rows, and you should have the whole puzzle completed.
Chicken/Eggs/Sushi/Pizza:
eCps
sPEC
Cesp
pScE
Number of clicks:
‒1‒‒
‒421
1‒‒‒
‒3‒2
Open the drawer and take the frying pan.
Television
Use the remote on the TV to turn it on. The TV displays a recipe for making an omelette (keep clicking with the remote to change pages).
The first letter of the title and of each instruction is in a different color (O C B P H A S P is Blue Pink Gray Beige Red Orange Yellow Green).
Top drawer
The wall tile pattern is the code to unlock this.
Light, Dark, Light x3, Dark, Light.
Press the RLRRRLR buttons, and open the drawer to get a fork.
Middle drawer
The recipe from the TV provides the colored letters for this lock.
The green, blue, yellow and red letters spell POSH.
Open the drawer and take the empty bowl.
Bottom drawer
The grid of letters on the tablet contains the four digits for this lock.
The F's are in the shape of an 8
The O's are in the shape of a 7
The R's are in the shape of a 0
The K's are in the shape of a 1
Unlock the drawer with the code 8701, then open it and take the salt and pepper.
Right picture
Use the corner clue from the right stand.
The numbered corners of the squares are the upper-left, upper-right, lower-left, lower-right, lower-left and lower-right corners.
So click the ⌜⌝ ⌞⌟ ⌞⌟ corners, which opens the picture. There's a sequence of four purple shapes behind it: star, diamond, heart, pentagon.
Locked door
Unlock the door with the key (from the right stand), then go outside. Take the cheese grater from the table.
Left stand
Putting in the code from the picture doesn't work. What's the twist?
The time on the clock (12:43) indicates the order to put the shapes in.
Put the shapes on the 1st, 2nd, 4th, 3rd buttons (or make the buttons display the 1st, 2nd, 4th, 3rd shapes).
Star, Diamond, Pentagon, Heart.
Press the buttons 1, 2, 3, 0 times, then open it up and take the cheese.
Omelette
You should have everything necessary to follow the recipe:
Eggs: in fridge
Bowl: in middle drawer
Fork: in top drawer
Salt and pepper: in bottom drawer
Butter: in fridge
Pan: in left drawer
Cheese: in left stand
Grater: on table outside
Use the eggs, fork and salt and pepper on the bowl, in that order.
Turn the stove on (right-most knob) and put the pan on it.
Use the butter on the pan, then the bowl of eggs.
Use the grater on the cheese, then the grater and cheese on the pan.
Take the whole pan, back up, zoom in on the plate, and use the pan on the plate to serve.
A happy chef face floats above the plate and shrinks to nothingness, which means it's time to leave:
Turn left to the door. The chef head has slid to the right, allowing you to open the door and exit. Congratulations!
KK, thanks again for the Cooking Classes Walkthrough.
and whoever is responsible for making the screenshots, please change the one on USB Holder as that was a screenshit from last weeks weekend escape game. Thanks.
I echo kktkkr and Paul's comments about fixing the image for the "USB Holder" game. I almost didn't play it.
I would never have been able to finish Room with Pedals because it was almost impossible to see
the squares on the front of the table. Even after reading the hint in the walkthrough, I had to use my Virtual Magnifying Glass all around the table to finally see the faint white on light-grey clue.
Thanks for the walkthrough, @kktkkr, and for all your great walkthroughs.
Update