
 The new Weekday Escape is out! Don't miss! We've got something for everyone!
I'm not exaggerating - this week we have four excellent games in very different styles. Cute Nicolet's room with a lot of funny and clever puzzles. After a pause, Maroya returns with another chapter from the serie 'kittens settling in their new home'. After much longer pause (which took several years) a new Petithima's game arrived and it does take quite a lot of thinking and trying to escape! Rinnogogo's created anothed dreamy and overall lovely story. Very relaxing.
Have a good time and enjoy!
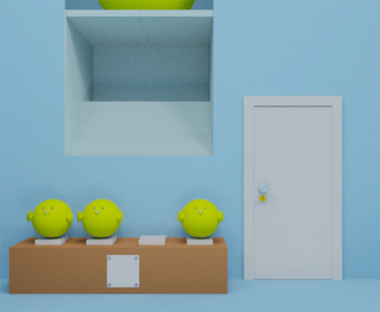
Being locked in Nicolet's cube isn't bad - after several games from them we all know that there's a lot to do and to admire. Always a pleasure to play their games and this one isn't an exeption - clean minimalist design, harmonic colors, very good puzzles and fun. And fish everywhere!
The cursor is not changing, autosave, one ending.
The game is available for Android and also iOS.
Maroya represents classical style escape in this WE and playing those is like meeting good old friend after some time. The developers haven't changed a pattern of their games for years - the same basic graphics, two cute kittens and their exploration of new homes part by part. Previous Part 1 can be found in WE N°204, but if you dig deeper in archives you can find more of kittens' exciting adventures.
So, look around, try to find some items and clues...you know the usual routine, will you help the kitties?
The cursor is changing, no save button, one ending.
Petithima returns after several years pause during which they've remarkably changed their style. At the beginning you hear sharp sound of a lock click...and you find yourself trapped in a small windowless room with few devices. The first impression of short and simple game (three or four puzzles and out) isn't correct, it takes quite a lot of time to get out! The game is demanding - hints and puzzles are tricky, devices can be reused, and you need really good observation and combining skills. Will you escape?
The cursor is not changing, autosave plus save button, one ending.
The game is available for iOS too.
Rinnogogo proves again their unique ability of connecting atmospheric and touching story with intuitive and logical puzzles. Your goal is to find some things for ill grandfather in his house, where dreamy memories from grandparents' life mix with clever and down-to-earth puzzles. Bitter sweet piano music fits perfectly the story. Gorgeous game!
The cursor is not changing, autosave, two endings.
We love escape games, and our readers love talking about them and sharing hints! How about you? Let us know what you think, ask for clues, or help out other players in the comments below.


I'm stuck in Maro and New Home. I thought I'd solved all the puzzles, but I still have one item in my inventory:
a wooden foot stool
I'm not sure what to do with it -- I've clicked everywhere I can think of. Anyone solved that one?
That last item is your ticket out... in! Check all the possible entrances again.
It's a window that's just a little too far to reach without the stool.
Fish
Don't worry, the fish in this room are perfectly fine without water.
Exploration
You start off facing the door, but unlike the previous games this one has a yellow keyhole and is on the right of the screen. A small display on the left has three round yellow fish on three of its four platforms, as well as a panel on the front fastened with screws. Above that, you see a little bit of a much larger yellow fish over an equally large empty space. Hmm, is that a crack running through its shelf?
Turn right to face four ring-shaped floats tied on different sides with red and blue ropes. The rightmost float seems to hide something on the wall. There's also a panel in the wall with two square holes in its left edge, one above the other.
Turn right. The wall here is almost blank except for a narrow pedestal with a square hole on its top.
Turn right. You get a seemingly much closer view of a shelf with two openings, the top having a lever handle next to a locked box with four buttons that cycle through circles of different sizes, and the bottom having two spiky fish next to a box with colored lines across its four round buttons. There's also a small red spot visible on top, and clicking it gives you a view of a grid of shells and stars on top of the shelf.
Shaft
Examine the lever more closely to find that its handle conceals a screwdriver!
Unscrew
Use the screwdriver to remove the panel on the display, revealing an orange button.
Push the orange button. The three round fish on the display shrink to different sizes.
Rotate
Use the clue from the floats to unlock the box on the bottom shelf.
The red lines are already in the right place, so you need to make the blue lines point
U R D U
Take another round fish from the box.
School
Place the round fish beside its peers on the display.
Then use the clue from all four fish to unlock the box on the top shelf.
With 1 being smallest and 4 being largest, the fish sizes are 2, 1, 4, 3.
So click the buttons 2, 1, 0, 3 times.
Open the box and take the yellow key.
Unlock / Exploration 2
Place the yellow key in the door and open it.
Now you're at the base of a ladder in a darker room. There's a panel on the right with bolts, and a folded note on the floor that shows an arrow through a grid of squares.
Climb the ladder to find the huge round fish connected to a string. The semicircular thing on the right has a small slot in it.
Release
Place the lever in its slot beside the huge fish, and pull it.
The trapdoor under the fish opens, it swings across the room and breaks a hole in the wall, then it bounces back to its original position and the trapdoor closes.
(Pulling on the lever again doesn't have any effect.)
Exploration 3
You see some dots around the perfectly circular hole. Perhaps that section of wall was fake all along?
Anyway, enter the hole to find a square brown pedestal with its top covered with a screw panel. The string hanging from off-screen draws your attention (click the top of the screen) to a pink octopus.
Turn right to face a television screen on a console table which has some sort of reddish device on the left and a box on the right with two triangular buttons underneath a row of three lights.
Turn right to face the way back, where you see two yellow safes, the left with four card suit buttons and the right with five color buttons. You also see a colorful evolutionary tree on the wall, and three numbered picture frames underneath… whoops, it looks like the impact has knocked the leftmost frame onto the floor.
Turn right to find a large spiky fish on a hook in front of a large fish tank with two striped fish in it. On the floor beneath, a red box has four color buttons between pictures of a crab and fish.
Branch
Use the clue from the evolutionary tree to unlock the box below the tank.
The path from crab to fish has segments that are pink, blue, pink, yellow.
(Click the buttons 1, 2, 1, 3 times.)
Take the spanner from inside.
Wrench
Use the spanner to unbolt the panel beside the ladder. Inside, you find a blue whale piece.
Triangular
Use the clue from the pictures (that were) on the wall to unlock the box under the TV.
First you need to imagine what the picture on the floor would be like if it were replaced onto the wall. It would go under the number 2, and the dot would be near the top edge, just like the other pictures.
So the highlighted triangles on pictures 1, 2, 3 point to the
L L R.
Push those buttons, and pick up a spike from the box.
Sharp
Place the spike in the narrow blue pedestal you saw earlier, then place the spiky fish on top.
Then climb back up to the large round fish, and pull the lever again.
The large round fish swings down and hits the equally large spiky fish, which gets launched up into the octopus, killing it.
(And then the round fish somehow swings back to its original position above the trapdoor which closes again.)
The spiky fish gets stuck in the wall in place of the octopus, which leaves behind nothing but a handle on the floor which has two protruding bits.
Pull
Place the handle on the wall panel under the floats, and open it.
Inside, you find a rectangular game cartridge and more bolts at the back of the compartment.
Wrench 2
Use the spanner to remove the bolts and the back of the wall compartment, revealing a striped fish.
Data
Place the cartridge in the reader under the TV, which makes a clue appear on screen. The clue has a vaguely familiar square grid with fish, card suits on the side and a yellow line on top.
Fours
Use the clue from the TV (and note) to unlock the left yellow box (with the four card suits).
Each column has exactly one fish, and from left to right they appear in the rows marked with the
Diamond Club Spade Heart.
Open the box and take another striped fish from it.
Fives
Use the clues from the note and shelf (in the first room) to unlock the right yellow box.
By rotating the note clue to match the grid on top of the shelf, you find that the arrow passes through the
- - - -

5 4 3 -

- - 2 -

- - 1 -
positions, and the shells there are
Yellow Yellow Yellow Blue Purple.
(Click the buttons 3 3 3 2 4 times.)
Take yet another striped fish.
Collection
Place all three striped fish on the hook, and they get hoisted into the tank. When you're done, a can appears on the hook and it contains a utility knife.
Cut
Use the knife to cut the last float off the wall. Now you can open the panel behind to find a lock with five arrow buttons, each one having one more line crossing it than the last.
Swim
Use the clue from the filled fish tank to unlock the arrow panel.
The fish with 1, 2, 3, 4, 5 stripes face the RRRLL sides.
So click the first three buttons once each.
Inside, you find another whale piece.
Flip over this whale piece to find a clue with three pictures in squares.
Unscrew 2
Use the screwdriver to remove the panel on top of the large pedestal. Inside, you find a whale-shaped hole with three inactive buttons beneath.
Whale
Place the smaller whale piece in the hole, and now the three buttons show digits.
Then use the clue from the other whale piece to solve that puzzle.
Count the round fish, red shells, and spiky fish, which total
5 4 3.
Did things just vanish? Looking closely, you find that it's a different puzzle now!
Place the other whale piece in the hole, and shells appear on the buttons. Use the clues you've seen to solve the puzzle!
The four shelves correspond to four spots in the grid. Which four?
Recall the TV solution from before. The fish appear in the
1 - - -

- - 3 -

- - - 4

- 2 - -
positions, and the corresponding shells are
Purple Yellow Yellow Blue.
(Click the buttons 1 3 3 0 times.)
All that's left is a big orange button.
Escape
Push the orange button to make a door appear, and open it to escape!
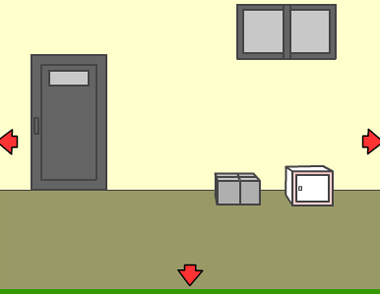
Maro and New Home - 1st Floor - Part 2
Still in Flash, by the way.
Recap/Intro
(Picture of Maro on the left and Komaro on the right.)
They came to a new house and explored!
The conquered the 2nd floor and next was the 1st!
They fled from a fierce beast into a neighboring room!
They escaped that room into the garden…
They witnessed the beast disappear!
The window was too high to reenter the house…
(^You are here.)
"Find some way to enter the house!"
Maro: Mission start!
Komaro: Roger!
Exploration
(Maro (that's you) will comment on stuff and you can sometimes click on Komaro for advice. None of the lines are big hints, but I'll still translate some of them.)
You start off facing the window you left from. It looks high, and the smaller window on the left is even more unreachable. The sparkle in the grass turns out to be a petal stone: a stone in the shape of a sakura petal. There's also some graffiti on the wall which Maro identifies as a map.
Go right. The door here is locked and the window somehow even higher than the others, but you notice a stack of something tied together with string and a four-color safe on the right decorated with drawings of flowers.
Go right. There's a fountain here with its tap handle tied down with wire. A pair of doors on the right is locked, and you find five petal-shaped holes.
Turn around by clicking the down arrow. Five colorful plant pots are placed on a bench, and there's a pair of scissors at the right. Some of the wall tiles/blocks at the right edge of the screen are slightly darker.
Go right to find a bed of budding flowers. There are more dark wall blocks here.
Go right to find even more dark blocks. The soil on the right looks a bit softened.
Go right. Even more dark blocks, but you also see some storage cabinets. The top-left has a three-digit lock, the top-right has a keyhole, and the pair of sliding doors below has a lock with gray rectangles on its four buttons.
Turn around. There's a fence on the left but no way to open it. Looking at the window, Maro wonders if the box in front of it will help you to reach it.
So zoom in on that AC unit and click the window. So close!
Look behind it to find a pair of wire cutters on the ground.
Cut 1
Use the scissors to unwrap the stack next to the locked main door. After tossing out a few clearly unimportant items from the top, you find a clue with colorful stripes.
Spectrum
Use the colorful striped clue to do something with the flower pots.
Hint: the white rectangles have pink flowers, which also appear in the white pot.
You need to lift the pots according to the order that their colors appear on the clue.
Numbering them 1 to 5 from left to right (so that odd numbers are on top and even below), this order is
1345231
Take the petal stone that's left behind.
Written
Use the clue from the dark wall blocks to unlock the top-left cupboard door.
The block patterns on all four screens combine to form the code:
264
Take the petal stone from inside.
Viewed
Use the clue from the opposite/north wall to unlock the bottom cupboard doors.
The starting pattern on each button matches the window layout of the first screen. Checking the positions of the windows on each screen, you find that they are (from left to right) one large, one large + one small, one small, none.
Click the buttons 3 0 1 2 times.
The right side of the cupboard is empty, but the left side contains a watering can.
Cut 2
Use the wire cutters to cut the wire off the fountain tap.
Water
Fill the watering can by using it on the tap.
Komaro: "They're about to bloom! But the soil may be a bit dry."
Use the full watering can on the flower buds. The flowers are now blooming in different colors.
The flowers seem to have primary colors except for the second from the left. Looking closer, you find a petal stone obscuring its yellow center.
Primary
Komaro: "The cover has flower patterns. It's a cute box."
Use the clue from the row of blooming flowers to unlock the safe directly opposite.
Red Yellow Yellow Blue
(just click the third button thrice!)
Take the petal stone.
Collected
Place all the petal stones in the holes on the double doors beside the fountain.
The left side of the locker contains a shovel, while the right side contains a poster with a hint.
Dig
Komaro: "If I dig with bare paws they'll get muddy."
Good thing you can just use the shovel to dig up the soft soil to find a box.
Quiz
The box has a blue stripe running around it, with two stars around its four-digit lock.
Maybe cats have a little more difficulty reading the clue, but you easily use the hint to work out the correct code.
The hint tells you to cover up the horizontal area between the stars. In this case, that means to ignore everything that appears in the blue stripe. Doing so, the words on the sides of the box (clockwise, following the arrow) just read
Five Forty Nine.
Convert each word to a number, and combine them to get the code:
5409
Open the box and take the key.
Unlock
Use the key to unlock the top-right cupboard door. Inside, you find a… platform? A stand? Let's just call it a wooden foot stool.
Stretch
While zoomed in on the air-conditioning unit, use the stool on the window to place it.
Then click the window again to leave.
Maro: This window isn't locked, how careless.
Komaro: But now we can get in.
Successful escape from the garden!
End screen:
Komaro: "Invading."
"Congratulations! Thank you for helping out. Now we can return to exploring rooms. If you like to come and play again, we'd be glad."
Now for the longer games…
This new art style is amazingly evocative, and the item animations are just so satisfying.
FRAME OUT
I'm roughly following the order of the nice guide with screenshots linked just above the game, so it may feel a little different compared to my usual ordering. More visual players who prefer fewer and longer spoiler tags may look there.
A small warning: it's possible to lose key items and get yourself stuck if you skip steps.
Exploration
The door in front of you is missing a doorknob, and there's a locked panel to the left. There's also a spotlight in the ceiling overhead and a "save electricity" sign on the wall.
Turn right. Some sort of pulley system without a handle hangs over a trapdoor secured with screws. (You might see something along the rope, but you can't reach it.) A small wall panel to the right is nailed shut.
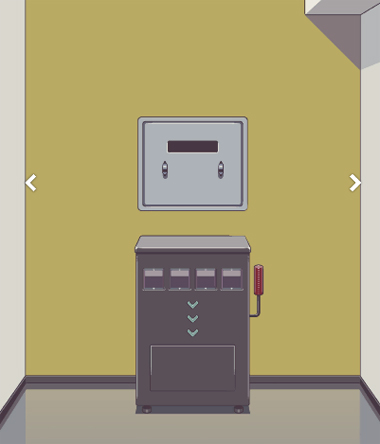
Turn right. There's a larger wall panel which seems to have a small screen and two protrusions, but there's nothing you can do with it. Underneath, a larger machine has a slot machine-style handle, a four-digit lock and chevrons/arrows leading down from it to an unlocked compartment that currently holds a bottle of rust remover.
Turn right to find a chest of drawers. There's a metal ball on top whose halves won't open, a screen on that ball that isn't active, and a power socket beside the drawers. The top drawer is locked, the second drawer is empty, and the third drawer has a three-digit lock. While looking at it, you also see a rusty handle under the drawers, where the arrow on the floor is pointing.
The middle drawer makes a sound when you click it, and you realize that its bottom is wobbly.
So click either side of the middle drawer to find a switch that releases the false bottom. After removing it, you can take the a checkered handkerchief.
Flip the handkerchief over to find a clue on the other side.
Anti oxide
Use the rust remover on the handle, and then polish it with the handkerchief.
Place the finished handle on the pulley and crank it to lower the rope.
Take the key from the end.
Unlock 1
Use the key to unlock the top drawer (make sure you click on the keyhole) and open it to find a hand mirror.
Reflect
Place the mirror on the arrow under the drawers, and you see a clue reflected in it.
So use that clue to unlock the bottom drawer.
Each digit has to reflected vertically (towards or away from you) to give the code:
589
Take the screwdriver.
Unscrew / Exploration 2
Use the screwdriver to unscrew the trapdoor, taking the screws along the way.
Then climb down.
Wow, this is a real mess. The bottom of the ladder ends in a chair that's been knocked over and covered with books. The green glow on the left comes from a computer screen which requires a password for each icon. On the right, you see a panel with numbered buttons and lights, and below that you see the silhouette of a power cable.
You can drag the books off the floor to get a closer look at the chair. It's now clear that the chair is broken, but you can't bring it with you up the ladder to repair it.
Powered
Bring the power cable upstairs and use it on the power socket next to the drawers.
The display of the ball now shows four symbols that you can change by clicking.
Fourfold
Use the clue from the handkerchief to unlock the ball.
The symbols on the back of the handkerchief appear only on the blue squares, and each column has an identical pair, indicating that you should read them from left to right.
Make the symbols on the ball match by clicking them 1 4 4 2 times.
Some parts of the symbols turn white.
Since that was the correct code, you can open the ball up to find a rope and USB flash drive.
Four digits
Enter the code from the ball into the lever machine.
1884
After pulling the lever, you hear something drop. Look in the chute and take the door handle.
You can try the door handle out, but the results are underwhelming.
Lower
Tie the rope you picked up to the end of the pulley rope. Now it extends down into the trapdoor, so climb down and take a look.
Click the end of the rope (first dragging away any books that cover it) to tie it to the chair.
Climb back up and spin the pulley handle to hoist the broken chair out.
Go back down the ladder, and you see a card case on the ground where the chair was. It has four empty card slots.
Load
Examine the computer screen and use the flash drive on it. Click the new icon to get a hint.
Click the bottom rung of the ladder repeatedly. It jiggles a bit and then comes off.
This ladder part has screw threads on both ends.
Powerless
Is the darkness really annoying you? Try solving the button panel to the right of the ladder.
Notice that you can click each button exactly once before it resets.
Trying a few combinations, you note that sometimes the numbered lights turn on halfway through. When?
Each numbered light turns on when the sum of the numbers on the pressed buttons is that value. (The sum of all six digits is 21, so you don't need to worry about that one.)
Essentially, the puzzle asks you to split the numbers 1 to 6 into four sets that sum to 7, 5 (=12−7), 4 (=16−12), 5 (=21−16).
6 can only fit into the first set, where it must be matched with 1.
Similarly, 5 must be the entirety of the second or fourth set.
With 1 gone, the only way to sum to 4 with distinct digits is to only use the digit 4.
This means the other 5 is made out of 2 and 3.
So there are a total of eight solutions to this, but you only need one. In the interest of variety, let's use a different one than the guide, and click the buttons in the order:
612345
Open the panel to find a switch, and pull it.
Oh, it turns everything off. Who would've guessed?
Climb up the ladder in the dark to look around. It turns out that the spotlight is still activated, and it shines a bright circle onto the lever machine with a clue in it.
Bar
Place the ladder rung on the wall panel above the lever machine. You can now flip it up or down to make dots appear on the screen. But where's the clue for this?
You just saw the clue in the dark: the arrow in the spotlight has rectangles along it on different sides:
DDUUDU
Open the panel to find a chair part.
Repair
Combine the chair part with the broken chair, then use the screws and screwdriver to secure it.
Stand
Place the chair in front of the door, and climb up to turn the spotlight around.
Hopefully this will produce another clue. Climb back down, turn the lights off, climb back up, and look at the door.
Nothing? Oh right, you need to place the doorknob and open the door first.
Once you've opened the door and turned the lights off (again), the spotlight highlights a piece of wallpaper that you can tear off to find four cards with green-and-black patterns.
Tough case
The four cards fit into the case, and you can get a four-digit code from it and enter it into the lever machine.
Together with the pattern on the case, the green parts form 3518, or is it 3916? Better check all the possibilities to be sure.
For clarity, let me label the cards according to how they appear before you take them:
A: vertical stripes, green black green
B: same as A but with an additional black square
C: green parts form the digit 3
D: the other one; green parts look like う
After some consideration about four digits being made of strokes with constant width, you can deduce that:
Each digit occupies an odd number of columns, and the last column is completely black, so the last slot is either C or D.
A and B cannot appear next to each other, so they must occupy the 1st and 3rd slots.
This gives the four possibilities:
ACBD: 3815
ADBC: 3619
BCAD: 3916
BDAC: 3518
Entering that in the lever machine, you get a jar with a key inside, Allen wrench, and a valve.
And the fourth code causes the machine to jam. You can try looking inside, but nothing is visible through the chute.
Bottle
Open the jar with the wrench, separating the bolt and jar lid from it before taking the key. The jar still has some strange markings on it.
Examining the items closely, you find that the jar lid can be reduced to a bent piece of metal that ends in a claw.
Force
Use the claw to pull the nails out of the wall panel beside the pulley. This uncovers some tiny markings at the top edge of the panel, and you can open the panel to find a L-shaped tool, a round platform and more clues on the back wall.
Unlock 2
Close the door, and use the key to unlock the panel to its left, revealing a small hole.
Pull the door handle out of the door, attach it to that panel, and turn.
The door opens and you faintly see an exit sign in the background. Freedom!
Exploration 3
Of course not. Upon stepping through the doorway, a sensor beeps and a trapdoor opens beneath your feet.
It's really dark here, but thankfully you have the arrow at the bottom of the screen telling you to turn around.
Pass through the small hole and the corner of the vent to arrive at a panel with nine buttons and a clue above it.
Lights Out
Use the clue above the button grid to solve it.
All lights need to be turned on, and each button toggles the state of itself and all its neighbors.
Whether by using an algorithm, solver, brute force or clever thinking, you arrive at the only solution:
Click all eight buttons around the outside once each.
You hear a click, and now you can open the doorway. Where does it lead?
Surprise! You're back in the basement.
You didn't get any new items though, so a different approach is needed to proceed.
Bypass
Turn the power off in the basement, and now you can pass the doorway undetected. (Yes, you could totally have done this earlier.)
The exit door is locked, and the panel to the left of its handle doesn't open either.
Turn left to find a washing area with a "save water" sign, the ceiling sensor connected to a switch on the right, and a wall panel with a button in the shape of a symbol you've seen before.
(Make sure you flip the switch if you don't want to fall through the floor again.)
Offset
The symbol you saw fits the wall panel beside the pulley (and the icon on the basement computer), which comes with its own set of symbols like that on the jar.
The jar also fits in that panel, but the symbols don't combine to anything meaningful.
However, you can fill the jar at the washing area after you place the valve there.
Placing it in the wall panel, the symbols on the back wall are now refracted to the correct position to form a code.
Enter that code in the basement computer after clicking its bottom-right icon.
PIECE
(Type it exactly, all capital letters.)
After clicking the screen or pressing Enter, the computer now tells you that something is unlocked.
Open the panel beside the doorway to find a round button and a hex nut.
Extend
The L-shaped tool would be great for reaching into the jammed lever machine, but it needs to be a bit longer.
So use the claw, nut, bolt and wrench on it. It's now a full-size crowbar!
Use it to dislodge a flashlight from the machine.
Tiny
Before we go spelunking, maybe you're curious about the tiny clue you saw on the wall panel.
Cover it with the full jar to magnify the clue. Hmm, the symbols look like those you saw on the ball.
You can't adjust the ball any further, but you can use it to convert those symbols to a four-digit code.
As indicated by the ball, each symbol is formed by rotating a digit repeatedly by right angles. (Also, those digits are exactly the same shape as they appear on the lever machine.)
You don't need to think for the second and fourth symbols since they appear on the ball with the digits 4 and 1. What about the other two?
The third symbol is slightly different from the one labeled 8 on the ball: the counter (open space) in each loop is bigger, suggesting that the digit being rotated does not have a horizonal bar in its middle. In fact, the same can be said for the first symbol: the large open counter precludes any digit with a horizontal bar.
This eliminates all the digits except for 7 and 0, and it's easy to check that those digits form the symbols when rotated. Putting it all together, the final code is:
7401
Enter that in the lever machine to make it dispense another button.
Flash
Reenter the tunnels through the basement (or you can reactivate the alarm system to reenter from the top).
After backing out to the corner, the game will finally let you use the flashlight. You don't see anything in its beam, but moving one screen further back makes the beam land on a letter C and some arrows.
Drag the light beam around the screens to view hidden clues:
Under trapdoor: a button hanging from the left wall
In front of corridor entrance: Letters connected by arrows. The three arrows leading away from E are numbered.
Corner: a button hanging from the right wall.
Sequence
Use the letter clue you saw in the tunnels to get a password for the computer.
Since E has three arrows leading out and only two leading in, it must be the first letter in the password. Follow the arrow labeled 1 to reach M and come back to E, then follow the arrow labeled 2 and so on, and you get the code:
EMERGENCY
(After clicking the top-right icon, type that in exactly, all capital letters.)
After "success" appears, click the screen again to view another clue and a green button. Clicking the green button unlocks something far away.
Linear
The clue on the computer indicates that the panel on the exit door is now unlocked. Inside, you find a mess of knobs with lines and corners.
So use the computer clue to place your four buttons correctly and unlock that panel.
Place the two straight-line buttons in the top-right spots, and rotate them to form the pattern shown on the screen. The last four columns of buttons should point towards each other to form vertical lines.
(If you mess up, you can click the hand connected to each placed button to remove it at any time.)
This leaves you with two corner pieces, so the only problem left is how to rotate them.
Rotate the buttons to make them connect, and together with the line there they should form the digit 6.
The red light turns yellow. What now?
The buttons on the panel form a mathematical clue:
61×111 works out to 6771.
Enter that in the lever machine to make it dispense a small box.
Since the small box has a corner drawn on its top face, pluck out one of the corner buttons from the panel and place it on the box, then click that button again to open the box and get a different button with a T-shaped pattern.
Junction
If you try rearranging the buttons in the panel, you'll find that you can't form a digit with the new button.
But you can form something else with the buttons:
Unsurprisingly, the T piece fits perfectly on top of the existing linear pieces to form a letter T.
Based on the principle that all uppercase letters have the same height, you rotate each of the pieces near the diagonal cross to align with it and form an X.
The remaining bottom linear piece can only be completed to an I, and you can guess the rest.
It's the capitalized word on the sign above:
EXIT
Once you've arranged the buttons correctly, the yellow light turns green. Open the door to end the game!
It definitely is a nice look, and the mechanics are well done. FWIW, though, the iOS version crashes constantly on my iPad.
Frame Out is a great game! Visually attractive and clever, with a final puzzle that I'd like to see more of in escape games. (That style of manual manipulation of components, with various possible combinations.) I'm not sure why the designers think we want to listen to our footsteps on every move throughout the game, though.
FYI, the tags at the top of this review do not work properly; clicking one brings up other game entries which have that tag, but not this entry itself. Something is also weird with "tags" vs "categories" on the site's main header, I've seen often that some don't work as expected.
Sepia
Once again, Rinnogogo has proven to be the master of emotional escape games.
Exploration
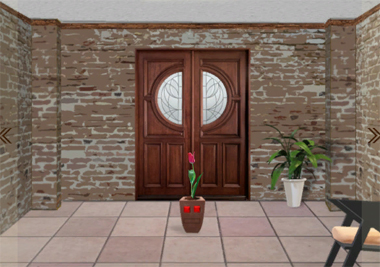
You start off facing a door with a locked panel beside.
Turn right to face a small table with roses on top. Lifting them up, you find that there are five origami roses and the last one has a paper strip with a word on it.
Turn right to face double doors. This is the main entrance but you can't leave yet. In front of it, there's a flower pot with two red buttons.
Turn right to find a small chair and a picture with words.
Follow the picture and wait just a moment. A boxing glove pops the picture out and you find a screwdriver tip in the compartment behind.
Crimson
Use the clue from the roses to unlock the flower pot.
When you pick the roses up, they appear on different sides of the screen:
RRLRL
Take the key that comes out.
Unlock
Insert the key into the panel beside the door.
The panel is now unlocked, but it snaps back down before you can push the button inside.
So use the boxing glove to prop up the panel.
Now you can push the button to open the door there.
Exploration 2
It's an elevator! One of the buttons is missing though. Under the button panel, you find a paper strip taped to the wall.
(In the puzzle spoilers, I'll refer to the floors using the abbreviations 1F to 4F.)
Let's go to floor 2! As you pass through the elevator door, you automatically turn to face it. (The elevator has a call button here but you can't/won't need to use it.) On the left, there's another locked door and the passage there has a torn paper strip beside that you can't pick up. Hanging from the ceiling is a white box with a metal plate on its bottom. The metal plate has two holes in it (or rather, two short tubes protruding out of it), but you can't reach any of that.
Turn right to face a television. Clicking the left drawer (which has a keyhole) changes the view to a slightly higher one, but the lock on the right drawer can only be accessed from the normal view. It's a slider lock where clicking each brown button makes it reappear in a slightly higher or lower position.
Turn right to face the windows. Some plants are growing in glass tubes on the table, and you can pick up the left chair. Taking a closer look at the blue cupboard on the left, you find a tall cabinet full of cup ramen and a striped door with a six-button lock, and you can take the paper bag from the second shelf but you can't open it by hand.
Turn right to face the couch, which has a box you can type a password into. The chair on the left has two batteries stuck in its basket weave.
Let's go to floor 4! This time, you're looking out onto the rooftop greenhouse(?), which doesn't have lots of plants but does have a colorful paint splatter on the floor next to a paper strip ("blain" is a real word but an unappetizing one).
Turn around to face the way back. A safe on the left has a digital keypad with room for four digits, and a clue with colored rectangles. On the right, another safe has four colored buttons on its top. The picture frame hanging above shows more roses bent in different directions, with a white arrow on the left, and it has a paper strip behind the right edge.
Leaves
Back on 2F, use the clue from the plants on the table to unlock the striped cupboard door.
As the button panel shows, you should look at the leaves on each plant, and count them:
6 3 5
2 4 1
Click the buttons in that order, starting with 1 and ending at 6.
Inside, you find even more food and a remote control.
Watch
Flip the remote over and insert the batteries, then use it to turn on the TV.
The screen shows a photo of the keypad safe you saw earlier, but using the remote on the TV again changes it to a different photo with a colorful word at the top right.
(Well, it's not a meaningful word as far as I can tell, but perhaps it's a reference to the end of the Heisei era?)
Stacked
Use the clue from the cup ramen to unlock the right drawer beneath the TV.
Each stack of cups has a brown cup in a different position:
Middle Top
Top Bottom
Open the drawer to find a colorful note.
Digital
Go up to 4F, and use the clues from the TV and note to unlock the keypad safe there.
The colored rectangles on top of the safe match the order of letters on the TV, so you can combine each letter with the same-colored segments on the note to form the code:
8649
Pick up another key.
Unlock 2
Go back down to 2F and use the key to unlock the left drawer.
Inside, you find a cleaning brush.
Cleanup
Go up to 4F and use the brush to scrub the floor clean. Only some lines remain drawn on the floor.
Squarish
Go back to 2F (yes, again) and enter the code from the floor at 4F into the box on the couch.
CIO
The box opens and you find a metallic key.
Unlock 3
Use this key to unlock the door beside the elevator.
It leads to the bathroom! You see a paper strip on the (hopefully clean) toilet bowl, as well as a huge glass pane with lines leaning on the dividing wall beside the bathtub.
Transparent
Go back up to 4F and place the glass pane on the floor. Cool, the lines connect!
Use that clue to unlock the box on the couch again.
SIR
Inside it, you find a round object that turns out to be the missing elevator button.
Exploration 3
Place the missing button in the elevator, and push it. Just like on 2F, you turn around after getting out of the elevator.
Turn right. The sliding wooden doors are held shut with a relatively tiny metal plate and two screws.
Turn right. The bed looks reflective and glowing, but otherwise you can't find anything interesting about it. On the right wall, the word Flowers has been cut out of wood and mounted there, but the O looks a little different, and you find a button there that pops out when clicked.
Turn right. It's an altar to Grandma! The photo frame shows her reaching out her hand to receive something. Back out and lift the cushion on the floor to find a pair of scissors.
Cut
Use the scissors to cut the paper bag.
Inside, you find some sake and squid.
Offer
Place the food on the altar, specifically clicking in the bowl.
When you back out, you find that a red handle has appeared!
Unscrew
Attach the screwdriver tip to the screwdriver. (Amusingly, it seems that you have to screw it in.)
Then use the completed screwdriver to remove the metal plate and screws from the 3F wardrobe.
Open the wardrobe. Under the faded clothes, there are four colored buckets with different items in them. You can lift the buckets to find different patterns on their bottoms.
Four colors
Go back up to 4F, and use the clue from the buckets to unlock the safe to the right of the elevator.
Each pattern consists of a different number of similar parts:
Black: 3 circles
Red: 2 lines
Blue: 1 square
White: 4 dots
In ascending order of the number of parts, this gives the code
Blue Red Black White
(LL UR UL LR)
The safe pops out a propeller/wheel with colored flower patterns on its blades.
Flowers
Go back to 3F and place the wheel on the button you popped out of the Flowers text.
Two arrows appear, allowing you to rotate it.
So use the clue from the 4F picture to turn the wheel correctly.
In the direction of the arrow (nearest to farthest) the roses in the picture bend towards the
RLLRR
Click the corresponding arrows.
The wall opens up and there's a more proper-looking safe that also requires a password.
High
Go back to 2F and place the chair beside the elevator. The only difference from before is that clicking the bottom of the ceiling box will no longer tell you that it's unreachable.
Place the metal plate and screws against that bottom plate, and use the screwdriver to attach them to the protruding tubes.
Once the screws are in, click again to pull down the bottom of the box, releasing some strings with balls and flowers on them.
Five by five
Use the remaining clues from the game to unlock the safe on 3F.
Start with the letter clue to the left of the hanging streamers.
The five paper strips you collected have words that begin with those letters:
globe(2F, in bathroom)actor(1F, on paper roses)blain(4F, on floor)cloud(4F, behind/beside picture)dream(in elevator)That gives you a grid of 25 letters that match the streamers, and the positions of the flowers tell you to take the 3rd, 1st, 4th, 2nd, 5th letters from the top in each column (from left to right), forming the code:
BLOOM
Type it in to open the safe and find the safekept items.
Ending 1
One of those items doesn't seem to have been given by you (as a kid): the envelope.
Now that you found what he wants to return, you can leave through the 1F door.
After a short animation, you get a simple end screen and a chance at "Another ending".
Ending 2
Click the button on the end screen of the first ending, and you find yourself back in the house with the front door locked.
With one option gone, another takes its place…
Solving all the puzzles in the game still leaves you with a pair of scissors in your inventory. Where can you use it?
Zoom in on the flower pot blocking the door and cut the rose from it.
Then take the elevator back up to 3F and place the rose on the altar. (Click slightly below the items you previously offered.)
When you back out, you notice a photo on the cushion. Taking it ends the game!
(If you load a completed game, you can examine the photo to replay the second ending.)
After the (re)testing, I've decided that the compact spoiler format is awkward and difficult to write. Back to double unnested spoilers next week!
SEPIA Ending 2
At the very end I am assuming you are putting the rose into the open hand of the grandma picture
That's an interesting possibility if you can do it that way. I had assumed that juxtaposition was a typical graphical glitch, and
squeezing the rose into the empty space on the altar made perfect sense to me.
Update