
 Welcome everybody, it's gaming Wednesday today!
This week WE features two very promising newbies. It's TwoPigs with their prologue to a chain of adventures of Christopher, not easily yielding duck, who bravely fights for his self-liberation by trying to escape a bedroom. Really hope we will get a sequel(s) soon and that the Christopher escapes in the end. Then comes reliable Amajeto, followed by the second newbie, The GuyUnderNL and their not long but strongly atmospheric story from under the sea. The closing game is by Rinnogogo and though it's a remake, I believe not many players played it earlier so now can enjoy it as a brand new game.
Have a good time and enjoy!
Short game by TwoPigs introduces a duck named Christopher, an unfortunate bird, who peacefully joined a tour around a castle and being deeply interested in its interiors, lost his group of visitors. Helplessly wanders around looking for it when suddenly - a deadlock! He ends up locked up in Prince's bedroom as a vassal! Can you help him to make the first step on his way to freedom?
The cursor isn't changing, no save button, one ending.
Everything like usual, Amajeto delivered another good looking and clever game. Gameplay is fluent but you do need to think about some puzzles for a while. Devs still have it. After all those games. Amazing.
The cursor isn't changing, no save button, one ending.
In GuyUnderNL's game (hand drawn awesome art by Minsuh Kang and Dongmin Shin, and excellent soundtrack) you find yourself in a dark cabin in a sunken ship. Yo-ho-ho! Well, whether you're a pirate or just a passenger is unclear but the game does feature a skeleton, a locked chest and already mentioned ship, and its atmosphere is pirate...no treasure, though. You need to save something more precious than gold and silver, your life. At any price. Will you?
The cursor isn't changing, no save button, one ending.
Diligent Rinnogogo delivers a new game - only three weeks after the last one! It's a remake of their first game and as an original title says, (A Little Adventure - not posted on JiG and inaccessible today) an adventure of two cat siblings. All the work is on an older one, the younger sister's role is a foil. The game consist of two parts and it's definitely longer than one would expect, especially considering it's a debut. So, don't be sad that the fun is over when kitties set on their way to grandma, click the button 'next' and keep clicking it until the second part starts.
The cursor isn't changing, autosave, one ending.
P.S. Let me remind you of Jonas Kyratzes games. They are certainly among the best games on JiG and since their author haven't released a new game for several years, some players have never heard about him and many others may forgot. Some of his games are directly playable, some for download (free) and one is paid download. Here are links to two games which can be played directly (you need to allow Adobe Flash only): The Book of Living Magic and The Fabulous Screech (don't forget to prepare a handkerchief to this one). Notice, that both won JiG competitions.
BONUS: Here is the latest puzzle game by Ninjadoodle: ClickPlayTime Issue #1. Should be 26 levels - can't confirm didn't get past the 22.
We love escape games, and our readers love talking about them and sharing hints! How about you? Let us know what you think, ask for clues, or help out other players in the comments below.


I just finished "The Fabulous Screech". Be prepared for your heart to be touched in a way that will leave you speechless. I have never played a game that stunned my heart and soul in such a beautiful way.
can;t wait for these.
could use a nudge on clickplaytime issue #1, lvl 8. brain is just not seeing it, and I know its right in front of my face.
clickplaytime issue #1, lvl 8
Think Roman Numerals - 2,1,2
Do you have any clues/help for Level 26. I have tried so many things but to no avail.
When I try to play Jiminy, after the game loads, I only get a black screen with this message: call_indirect to a null table entry (evaluating 'Module["asm"]["Hi"].apply(null,arguments)')
(I'm using Safari on a MacBook)
I tried the game now in several browsers on my pc - Edge - ok, Firefox - ok, Chrome - ok, Brave - similar result as you got...seems that's the browser's issue.
Let's start with this one because it was last week's bonus.
ClickPlayTime Issue #1
Before you start:
A mouse is strongly recommended for this game, as you'll need precision and timing for some levels. In particular, you'll want to test out the dragging on levels 1 and 2.
If you can't see the instructions and title around the game area, you may wish to scroll to read them when needed. Zooming out may solve this by keeping everything visible, but keeping the original zoom will help significantly with mouse control.
Level 1: (Title)
Click the ears extending from the ground, and drag upwards.
(Click the play button to continue!)
Level 2: Rocky Road Ⅰ
You can move the rock by dragging it slightly upwards.
After clicking the car to start it, (click and hold on the rock, then) drag the rock up at the right time to let the car pass.
Level 3: The Odd Robot Ⅰ
If you can't immediately spot the odd one out, the game will highlight it when you choose wrongly (and then place it randomly when restarting).
Therefore, if you take a screenshot of the robots and note which one was highlighted, you can take your time to find the difference.
Hint: it's not the face.
One of the robots has square antennae instead of round. Look carefully at each one until you find it.
Level 4: Secret Squirrel Ⅰ
What does the pig say?
The pig oinks, but without the first letter only INK is left.
That leaves the letters of POT and an S, but the word that goes with ink is…
INK SPOT
Level 5: Perfect Brew
Drag the teabag down (into the cup), and then up (out of the cup).
You'll need to remove the teabag when the cup opens its mouth for the first time.
Level 6: Rocky Road Ⅱ
It's an ambush!
After starting the car, immediately click the rock rapidly to crack it.
Level 7: Pixel Painter Ⅰ
There's no real puzzle here, so I'll just give you the pattern:
- - - - - - - - - - -- - - - - - - - - - -
- - - - - x - - - - -
- - - - x x x - - - -
- - - x x x x x - - -
- - x x - x - x x - -
- - x x x x x x x - -
- x - - x x x - - x -
- - x - - - - - x - -
- - - - - - - - - - -
- - - - - - - - - - -
Level 8: Crackin' Codes Ⅰ
The symbols on the clue translate into numbers… how?
The triangle looks like the roman numeral Ⅴ.
2-1-2 tells you to split the symbols into groups of 2, 1, 2.
VI V IV translates to
6 5 4.
Level 9: Whose Name?!
The lights are a clue.
The top UFO has Blue Red Orange lights, and the initials of blue, red, orange spell out BRO.
Similarly, the right UFO is BOR, the bottom is ORB, and the left is ROB.
(Start from the top and click the UFOs and names in clockwise order.)
Level 10: Rocky Road Ⅲ
Each of the blocks vanishes while you click and hold on them. If you hold long enough, they take slightly longer to come back.
Launch the car, vanish the first block, then release it (a bit early is okay) and vanish the second block.
Level 11: The Odd Robot Ⅱ
Hint: the difference is still not in the face.
One of the robots has black on the outside of its ears instead of white.
Level 12: Secret Squirrel Ⅱ
You'll need to know that RGB are colors, so
the arrow points to RED.
The remaining letters are a bear with a D.
RED BEARD
Level 13: Wind Master
Drag the pinwheel blades to spin it and make clouds appear. Clicking the clouds makes them vanish.
And the model is 4365, which is the number of lobes on the clouds.
Spin the wheel clockwise twice (click the cloud there), then counter-clockwise once (and click), then counter-clockwise twice (and click), then counter-clockwise twice (and click).
Level 14: Rocky Road Ⅳ
The longer you click and hold these blocks, the longer they stay hidden.
Hold the first block for about 2 seconds, then launch the car and hold the second block for as long as possible, then release when the car reaches the second block.
Level 15: Pixel Painter Ⅱ
- - - - - - - - - - -- - - - - - - - - - -
- x - - - - - - - x -
- x x x x x x x x x -
- - - x - x - x - - -
- - x x x x x x x - -
- x - x x x x x - x -
- x - x - - - x - x -
- - - x - - - x - - -
- - - - - - - - - - -
- - - - - - - - - - -
Level 16: Crackin' Codes Ⅱ
Each word represents a number. How?
HONEY includes the number ONE.
FATWOOD includes TWO.
VANILIN includes NIL.
The blue, yellow, red words include
2 1 0
Level 17: Three to Turn
Follow the instructions.
The logic is that each card needs to be flipped an odd number of times, but the rules don't let you flip any card five times (there are only four rounds), so based on a total of twelve flips each card must be flipped thrice. In other words, in the four rounds each card must be left out once.
Simply click the cards in clockwise order until the level is completed.
Level 18: Rocky Road Ⅴ
You can't move the rock, but you can launch the car in the air using the button.
Click just before the car reaches the rock.
Level 19: The Odd Robot Ⅲ
Hint: It's still not in the face.
One of the robots has the longer antenna on the left.
Level 20: Secret Squirrel Ⅲ
What's that on the label?
The label says WATER, and the shirt is there because…
WATER POLO
Level 21: Making Friends
The fixed comic should read
Oh man! I wish I had a ghostie friend to play with.
[lightbulb]
― BOOOO!!!
― Eeeek!
― Want to play tag?
― !?
If you haven't moved anything yet, here are instructions for fixing it:
Swap the middle tiles in the top row.
Swap the middle tiles in the bottom row.
Swap the middle tiles in the left column.
Swap the middle tiles in the right column.
Swap the middle tiles in the \ diagonal.
Swap the middle tiles in the / diagonal.
Level 22: Rocky Road Ⅵ
This one is all about speed. The rock that falls can be dragged to the right.
After launching the car, drag the rock right twice (don't drag too far), and then push the button to get it out of the way.
Level 23: Pixel Painter Ⅲ
- - - - - - - - - - -- - - - - - - - - - -
- - - - - - - - - - -
- - - x x x x x - - -
- x x x x x x x x x -
- - x - x - x - x - -
- - x x x x x x x - -
- x - - x - x - - x -
- - - x x - x x - - -
- - - - - - - - - - -
- - - - - - - - - - -
Level 24: Crackin' Codes Ⅲ
It's easy as pie.
Or rather, π.
The first three digits of pi are 3.14.
You'll need to enter the middle, right, left digits, or
143
Level 25: Winky Chase
Despite what the instructions say, it's not about the order.
You have to click each winking ghost before the next one winks.
You have only three lives, so be careful.
Focus on one ghost at a time, and click it the moment it winks.
(If you have good reflexes, you can focus on two or three at a time, working your way across the board until it's cleared.)
That completes the game!
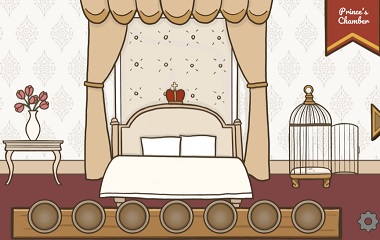
Royal Duck Runaway: Prologue
Exploration
You start off in the Prince's chamber. Since this is a demo, the menu at the top right corner doesn't help you go anywhere else.
Nothing in this elegant bedroom seems to react to your quacking.
Turn right. The globe on the desk isn't too well-made, and you can pick up a stone and stick after destroying it. To the right, the prince's portrait seems upset about missing something.
Turn right. The bathroom is really dark but you have no problem pulling 3 towels from the table, rack and bathtub. You can also turn on the newly-revealed light switch to make some hooks appear in the mirror, as well as fill the tub until a rubber duck appears.
Also, the toilet doesn't flush but if you keep trying the rope falls off.
Dry / Split
After turning the bathroom lights on, place the three towels on the hooks in the mirror, which slide aside so you can read a clue.
After reading that clue, you can follow its hint to
place the duck in the painting.
This reveals a hidden compartment.
Place the stone, stick and rope in the hidden compartment (in any order!), then take the completed axe from it.
Use that axe to
smash the vase beside the bed
and get a key, then use the key to unlock
the treasure chest below the painting.
Inside, you find
a scroll
which marks the end of the demo!
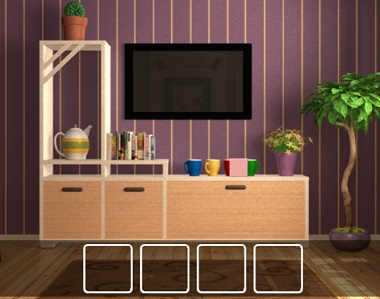
Violet Room
Exploration
Under the TV, you have cups of coffee and a square tile.
Turn right to face windows. In the middle, two small pink stick figures face each other, and you can click and hold to make numbers appear. The left cupboards have a grid of buttons and four colored bars, while the right cupboards have two white buttons and four colored buttons.
Turn right to face two locked doors. The picture in the middle is missing eight tiles.
Turn right to face four framed pictures. Clicking them, you find that the second has four shape buttons and the third has four digit buttons. Under that, there's a cake in front of two wooden figures which show numbers when you click and hold.
Left cupboards / Exploration 2
You'll need the clues from
the cake and coffee.
For the leftmost cupboard under the window:
Copy the pattern on the front of the cake:
W - W -

- W - W

- - W -
For the second cupboard from the left:
Based on the levels of coffee in the cups, click the bars 3, 1, 0, 2 times.
Take 2 square pieces and a key, then use the key to unlock the left door.
In this bedroom, you can click the pictures above the bed to zoom in on them, as well as zoom in on the left bedside table which has a four-letter drawer.
Four letters / Screen
Use the clues from
the pictures above the bed
to unlock the bedside table:
Reading the alphabet (or comparing with the pictures outside), you find that the digits 1, 2, 3, 4 on the right picture represent
SONGTake a square tile and remote control.
Use the remote to turn on the TV and view a clue.
Then use it on the TV again to view another clue.
Right cupboards
You'll need clues from
the bedside table and the TV.
For the second-right cupboard:
The flower painted on the bedside table has leaves on the
RRLRLR
sides of its stem.
For the rightmost cupboard:
The first screen of the TV represents the cups and their handles.
The cups with handles on the bottom-right, right, left, bottom-left are
Red Green Blue Yellow
(2, 7, 6, 0 clicks)
Take 2 square tiles.
Two pictures
You'll need the clues from
the purple/wooden figures and the TV.
For the middle-left picture:
The numbers that appear on the figures are 1, 2, 3, 4, and in that order they appear on the head, body, body, head, which have the shapes:
Circle Trapezium Square Circle
(6 8 3 6 clicks)
For the middle-right picture:
The parts shown on the second screen of the TV appear on figurines numbered
2143.
Take 2 square tiles.
Complete
Place all eight tiles into the picture between the doors, and rotate them until they align.
3 1 1 20 2 1 3
3 2 0 2
1 3 1 2
Take the gold key and use it to open the right door and escape!
thanks KK. can;t wait for the last 2.
I meant Level 24, but I found my answer in the walk through below. I had the right concept but a different understanding of the pattern to enter :)
hope the last 2 are coming
I can only get around to the last one tomorrow, so here's Jiminy first.
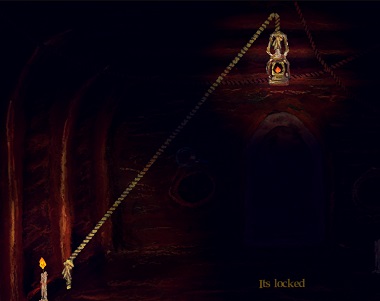
Jiminy
Exploration / Lights
It's real dark in here! The only bright things are a lamp you can't reach and a candle you can't touch.
Turn around. There's a single light here but when you reach to take it all you get is a broken bottle.
Turn around again, and use the bottle to cut the rope. Pick up the lantern from the floor.
You can now select it to light up the area around your cursor, and also use it to light candles on any screen. (There are three on the right of this screen.)
The door is still locked, but you can take a magnifying glass from the left porthole.
Turn around once more (you can light two candles here), and take the axe from the stove on the right. Also, it seems like you can read that note…
Round and Sharp
Hold the magnifying glass
over the note on the wall to read it.
Use the axe
to smash the barrel
and get a door handle, then attach it to the door and use the clue you found earlier:
Click the LRLLRL sides of the handle.
Exploration 2
The decor here may be slightly more disturbing, but you can still light three candles and look at the floating shoe.
Click the pile of junk in the bottom-right corner of the screen (light 2 candles here), and pick up the stick at the right side of the pile and the yellow handkerchief on the left.
Turn right to face a boat (and 3 unlit candles). The pile on the left is what you just looked at and the bottom of the boat is the way back to the previous room. You also see a skeleton on the boat, and you can click the paintings under the boat to get a closer look.
(Turn right to face the shoe again.)
Buoyant
Place the stick in the floating shoe and then add the handkerchief.
You can now control the shoe by clicking in the water. Use that to get the logs from the right side.
Chopped / Tune
Use the axe on the mast of the boat to form a ramp up to the skeleton.
You can click on the ribs to play them. But before that, there's something else to do with the axe.
Use the axe on
the right painting to "chop the tree" there
and then
hold the magnifying glass over the middle of the frame
to read a clue with colored bars.
Use the clue you found to solve the skeleton puzzle:
Since red ribs are on the left and black on the right, the colors and heights of the bars refer to the:
Left 4
Right 2
Left 2
Right 3
Right 4
Left 3
Left 1
ribs (where 1 is lowest and 4 highest)
Take the key.
Unlock
Use the key to unlock the stove, then place the logs inside and use the lantern to light them.
This ends the game!
I just finished "The Fabulous Screech" walmartone. Be prepared for your heart to be touched in a way that will leave you speechless.
Thanks KK. can;t wait for the last one.
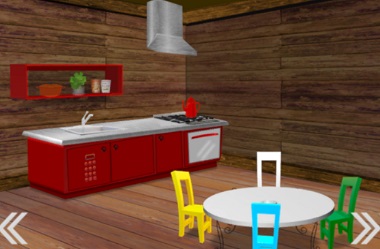
Our Adventure
The left menu grows with the addition of a hint system! Some of the hints aren't very direct though.
Exploration
A table with four colored chairs has a purple circle piece you can take from the compass on it. On the left, a kitchen cupboard has a keypad lock.
Turn right. There's a blue area on the wall that you can't zoom in on. The cabinet on the right has a red door with four colored buttons and a green door with a keyhole. The potted plant on the left has a green square piece in its soil. And at the right edge of the screen is a small bed with a small cat in it. If you look in the bed you'll see a torn note with some letter on it.
(And there's something else hidden that I'll get to when we read its hint.)
Turn right. Four pictures hang on the wall, and you can take a yellow triangle piece from the yellow frame. A doll sits on the couch, and she wears a green key around her neck.
A thin red stick extends out the right side of the couch.
Turn right. This screen has a window and door, but the light switch beside the door has a padlocked case. The display shelves here have a box with four colored buttons on it.
Reach / Framed
Following hint 1, look
at the right edge of the cupboard with colored doors
and use the stick to get the key there.
This grants you access to hint 2, which tells you to use the clue
from the colored frames
to unlock the box under the window:
From top to bottom, the frames are
Green (2 clicks)
Red (4)
Yellow (3)
Pink (1)
You get a torn note.
Two halves, three digits, four buttons, five presses
Having either half of the torn note lets you read hint 3. If you've been following up to here, the first part of that hint is done, and you can combine both halves of the note to unlock hints 4 and 5.
The second part of hint 3 refers to the key from the previous spoiler. Do what it says!
Unlock the cover on the light switch, and push it to make the room dark.
You can no longer use any of the cupboards in the room, but you can still see a clue from the mysterious blue line in the wall, as well as Mi's loud mewing.
Turns out she's scared of the dark, but when you check in on her you find a clue with an arrow passing through a grid of dots.
Following hint 4, use the clues from
the grid of dots in Mi's bed and the two half notes you have and the round table
to unlock the red door of the cupboard:
The arrow on the grid indicates letters on the note that spell out
WESWN,
and matching those to the compass on the table, you find that the
West East South West North
chairs are
Yellow Green Blue Yellow White.
(Push the 4th, 3rd, 1st, 4th, 2nd buttons from the top.)
Inside, you find a blue box with a screw panel on the front.
Following hint 5, use the clues from
the light through the gap when the room is dark, and the three shape pieces you found
to unlock the cupboard under the sink:
(Just like the other shape pieces, the circle piece has something drawn on it: a circle.)
The left column of the clue stacks two circles. That's an 8!
The square piece has a line drawn on it. A circle above a line is 9.
The triangle piece has two lines drawn on it. Together with the line on the square piece, that forms 7.
Enter 897.
Inside, you find a screwdriver and (open the other door) a pair of scissors.
Removal
You will need
the scissors, screwdriver and blue box.
Following hint 6, use the scissors to get the doll's green key, and then use that to unlock the right cupboard door and find a green box with four buttons.
This activates hint 7, and you can find another clue near the green box
when you click its right edge.
Use the screwdriver to unscrew the blue box, which has a keyhole, then
flip the removed lid over
to find a clue. You now have enough info to open the green box:
Looking at the table, the green, blue, white, yellow chairs are on the ESNW sides.
Since the green box has S on the right, those directions are the
URLD
Take the blue key and unlock the blue box.
It's a map! Click the button to go ahead. After a short "animation", you arrive at a general store.
Exploration 2
You only have the map left. It tells you that you've reached Aunt Hal/Hull, who has a quest for you. You can also examine the freezer which has a five-letter lock, and the capsule machine on the table.
Turn right to face a hamburger stand. Someone has carelessly left their coffee on the counter, so you take their spoon.
On the side of the sign that shows hamburger ingredients, you see a hammer and a clue.
You have a down arrow instead of a right one, so use it to turn around and face a restaurant entrance. Something white and fluffy is piled on a plate. On the left you see just a bit of something shiny, which turns out to be a small cat figure next to a small stove.
Click to the right of the restaurant entrance, where you see a blue bunny in a field with a keyhole in its torso. On the back wall, there's a poster of a very colorful bird.
Dig in
Use the spoon to clear out the white stuff on the plate, revealing a coin.
As hint 8 tells you, you'll need to use this coin on the capsule machine (and turn the lever) to get a capsule.
Hmm, this capsule seems a bit too difficult to open with kitty claws, but you can
use the hammer to open the capsule
and get the note inside.
Chill and Grill
As hint 9 says, you'll need to use the clues from
the note you got and the burger sign
to unlock the freezer. That last part of the hint got lost in translation, but it tells you how
to interpret the numbers.
Solution:
As the side of the sign says, a green 3 is t.
Looking at the front of the sign, you see that this is true: the 3rd letter of the green word is t.
Using this method to decode the note (1st of lettuce, 1st of egg and so on) gives you the code
lemonInstead of ice-cream, you only find a sardine!
Place the sardine on the stove outside the restaurant, look away and look back.
The cat's eating the fish, and it's left behind a bag with a key and photo of a trapped chick.
You can
flip the photo over
to find another clue.
Finding Piyo
Use the key on the blue rabbit to find a set of switches.
As hint 10 tells you, the clues for this puzzle are
the back of the photo and the hamburger shop poster.
Solution:
In the top row of rectangles on the back of the photo, the letters ICE appear on the bottom, top, top.
For the bottom row, TEA appears on the bottom, bottom, top.
Flip the switches
DUU

DDU
The cage appears, but it has a row of unlabeled buttons in front of it!
Hint 11 tells you the required clues:
the bird poster in the field and the marking on the cage.
to unlock the cage:
The letters O P E N are the
3rd 1st 4th 5th
letters of PHOENIX, so push those buttons in that order.
Now you can pick up Piyo and give it to Aunt Haru.
She rewards you with sweets, you (two cats) bring them to your grandma, and you (the player) win the game!
Let me remind you of Jonas Kyratzes games. They are certainly among the best games on JiG.
Update