![]() It's the end of 2014 which means this is the last Weekday Escape of 2014. To mark the occasion, let's raise our glasses in a toast to a few of 2014's mostest. So cheers and brrrrs to you, Ice Bucket Challenge, for giving us laughter, a few tears, and awareness of a very good cause. The ante can only be upped from here, think: 2015 breath fire dare? Next, cheers to All About That Bass, for not only did you get us to shake it, but the spin-offs and mash-ups ensured it'll be well into 2016 before the tune fades into quietude. Cheers, Alex From Target, for making thousands of school girls swoon by doing nothing—no song, no video, no magazine cover, just a red shirt and a name tag—that's true ninja heart throb skill in action! Thusly, we should also toast Heart Emoji for taking less than three and turning it into that which makes the world go around; 143 could only watch in envy. But let's save our most ebullient cheers for the escape games that inspired and entertained us since Tesshi-e's Mr. K never let us down, Lo.Nyan's gorgeous interiors became free luxury vacations, Haretoki's strange contraptions let us play like kids again. Plus there was this by Mateusz Skutnik because of you, JIG community. As we're toasting and sharing memories, here's a few more to close out the year...
It's the end of 2014 which means this is the last Weekday Escape of 2014. To mark the occasion, let's raise our glasses in a toast to a few of 2014's mostest. So cheers and brrrrs to you, Ice Bucket Challenge, for giving us laughter, a few tears, and awareness of a very good cause. The ante can only be upped from here, think: 2015 breath fire dare? Next, cheers to All About That Bass, for not only did you get us to shake it, but the spin-offs and mash-ups ensured it'll be well into 2016 before the tune fades into quietude. Cheers, Alex From Target, for making thousands of school girls swoon by doing nothing—no song, no video, no magazine cover, just a red shirt and a name tag—that's true ninja heart throb skill in action! Thusly, we should also toast Heart Emoji for taking less than three and turning it into that which makes the world go around; 143 could only watch in envy. But let's save our most ebullient cheers for the escape games that inspired and entertained us since Tesshi-e's Mr. K never let us down, Lo.Nyan's gorgeous interiors became free luxury vacations, Haretoki's strange contraptions let us play like kids again. Plus there was this by Mateusz Skutnik because of you, JIG community. As we're toasting and sharing memories, here's a few more to close out the year...
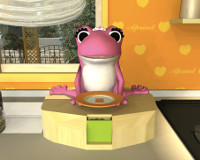
 Fruit Kitchens No.15: Apricot Orange - This thirteenth year of the 21st century, or the 3rd millennium if you want to be all technical and forward-minded about it, was certainly a prolific one for FunkyLand. Can you believe we only met this innovative whimsy-maker less than one year ago? Now we are all good buddies, happily riffling through FunkyLand's cupboards and raiding their fridge as if we're family. Which we are, of course. This installment, which has us seeking out seven apricots, is on the simpler side: no coyly presented codes to decipher or obtuse feats to accomplish. Where it gets tricky is in the actual hiding spots of both fruit and answers. Diligent searching will quickly turn up the solutions and the door key soon materializing before your eyes.
 Escape from the Similar Rooms 17 -
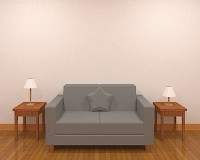
Hottategoya has found their niche well before the year began, but this year has shown us that Hottategoya can still bring it. Refined and polished graphics add to the triple-treat styling for escapes that please. The minimalism of design allows for clues embedded in the furnishings that, along with less-than-obvious solutions, makes for a game that's both beautiful and intelligent. Plus, it's fun despite being so similar to other entries in the series. As per usual, solve three codes to collect three gems, using those to gain the door key, and...voila! You're out.
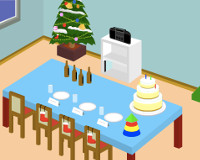
 Find the Escape-Men 131: The Christmas Party - Ah, the silliness, the games, the occasional awkward remark, and those dreaded pixel hunts! No1Game's escape-men antics always managed to keep us coming back for more. There is an undeniably affable charm to these little greenies, it's hard to not feel we're all having one big party together. Ergo this episode is so aptly festive. Unfortunately, all your friends have bailed out on the festivities, you can either rage in anger or make do by turning up your own fun (try both!). It's less prone to pixel hunts than some Escape-Men games, but there's some dubiously unspecific clues. Be sure to thoroughly examine everything and take the initiative to use items in unintuitive ways. Other than that, it's the usual story: search everywhere for ten escape-men and, when you have them all, your party will go on.
We love escape games, and our readers love talking about them and sharing hints! How about you? Let us know what you think, ask for clues, or help out other players in the comments below.


Walkthrough Guide
(Please allow page to fully load for spoiler tags to be functional.)
Fruit Kitchens 15: Apricot Orange Walkthrough
This escape game is short and sweet, as usual.
The goal is to find seven apricots.
Apricot #1
Zoom in on the sink in the middle background.
There's an apricot in the strainer in the sink. Take it.
Zoom out.
Apricot #2
Zoom in on the left hand background.
Zoom in on the espresso machine and toaster.
The "knob" on the rail behind them is actually an apricot - take it.
Zoom all the way out.
Apricot #3
Zoom in on the left hand background.
Zoom in on the cupboard below the counter.
Open the doors.
Take the can opener from the lower right shelf.
Zoom all the way out.
Zoom in on the right hand background.
Zoom in on the can on the counter.
Use the can opener on the can.
Take the apricot.
Zoom all the way out.
Apricot #4
Zoom in on the left hand background.
Zoom in on the little cupboard with jam bottles.
Note the descriptions and numbers on the jam bottles. You can zoom in on each of them if necessary.
Blueberry - 0
Cherry - 8
Apricot - 2
Muscat - 7
Zoom all the way out.
Zoom in on the table in the foreground.
Zoom in on the box on the chair.
Zoom in on the buttons.
Note the clue ABCM - does this remind you of something?
The 4 jam bottles!
Apricot - Blueberry - Cherry - Muscat
Enter the numbers from the jam bottles in the corresponding order: 2087.
Click OK.
Take the key from the lid of the box, and the apricot from the box itself.
Zoom all the way out.
Apricot #5
We need the key from #4.
Zoom in on the left hand background.
Zoom in on the jam bottle cupboard again.
Use the key to open the cupboard.
Take the bottle of apricot jam.
Zoom in on the space where the jam bottle stood.
Lift the green lid.
Take the apricot.
Zoom all the way out.
Apricot #6
We need the bottle of apricot jam from #5.
Zoom in on the middle background.
Zoom in on the pink frog (there's always a frog in FunkyLand games).
Place the jam bottle on its tray.
Take the apricot from below it.
Zoom all the way out.
Apricot #7
Zoom in on the middle background.
Take the cake server standing in the window to the right of the cooking range.
Zoom all the way out.
Zoom in on the table in the foreground.
Note the colors and dots of the heart shapes on the cake.
From top right, clockwise: blue (2 dots), pink, green (1 dot), yellow.
Use the cake server to lift the segment with the blue heart shape.
Take the heart shape from below it.
Zoom all the way out.
Zoom in on the right hand background.
Zoom in on the medaillion to the right of the door.
Place the heart shape in the open space.
Push the shapes to reconstruct the colors on the cake, taking the dots into account.
From top right, clockwise: pink, green, yellow, blue
Click OK.
Take the apricot.
Zoom all the way out.
Escape
When you have found all seven apricots, they will magically be transformed into a key.
Take the key.
Go to the door.
Use the key on the door.
Go through the door, and enjoy the view of a sunlit terrace with a table laden with goodies.
Posted by: hans.vogelaar |
December 31, 2014 5:14 AM
Escape from the similar rooms walkthrough
Don't forget to click on the clocks to see them up close. To navigate forward through the rooms, use the door with the clock. To navigate backward from the final door, use the door without a clock.
Rooms
First room
There's a picture with a "2" in it.
There's a couch with a circle pillow.
There are two lamps: high, low
The clock shows 6:15
Second room
There's a picture with a "1" in it. There's a ticket and a red circle.
There's a couch with a square pillow.
There are two lamps: low, high
The clock shows 12:15
There's a puzzle with a 2x2 grid
Third room
There's a picture that doesn't have a number. It has a smaller version of the ticket/red-circle from the previous picture.
There's a couch with a star pillow.
There are two lamps: high, low
The clock shows 6:15
There's a puzzle with a 3x3 grid
Fourth room
There's a picture with a "3" in it.
There's a couch with a diamond pillow.
There are two lamps: high, low
The clock shows 11:45
There's a puzzle with 5 shapes
Fifth room
There's a picture with a "4" in it.
There's a couch with a hexagon pillow.
There are two lamps: high, low
The clock shows 6:45
There's a box that wants 3 shapes.
Getting the three gems
Pentagon gem
In the fourth room, the puzzle has three columns. The middle column has five shapes and the other columns have up-down buttons.
Use the height of the lamps in the room with the pillow of the required shape.
High low
Low high
High low
High low
High low
Triangle gem
In the third room, the puzzle has four squares in a 2x2 grid.
There's a dark line in 2 sides of each square.
Look at the clocks in each room. The hands match the position of the dark lines.
6:15 6:45
12:15 11:45
Use the numbers on the pictures in each room to get the order to click the squares.
2 4
1 3
Bottom left, top left, bottom right, top right
Hmm, that doesn't work. But we have one more clock with 6:15. If we assume that's room "5", then we get
2,5 ... 4
1 ... 3
Bottom left, top left, bottom right, top right, top left
Diamond gem
In the fourth room, the puzzle has a 3x3 grid. We can click the squares in the grid, but they don't stay lit up.
Look at the pictures with the numbers, and at the picture without a number. (I pasted a screen shots of the unnumbered picture into a Paint session, so I could see where each detail fit in.)
The pictures with the numbers are details of the picture without a number.
4 2 -
3 - -
1 - -
Click the four squares in the order indicated by the number on the picture.
Bottom left, top middle, middle left, top left.
Place the gems in the box in the last room. Get the key, and exit out the door.
Clear!
Posted by: barbara |
January 2, 2015 6:44 AM