
Guardians of Magic:
Amanda's Awakening
Platform: iPad, Windows
![]() New from Hitpoint Studios comes Guardians of Magic: Amanda's Awakening, a casual adventure game that focuses on inventory puzzles, exploration, and a lush fantasy setting. You take on the role of Amanda, a young girl who discovers some secrets about her late grandfather's life, including his feud with her mentor, Dr. Magus. It's technology versus magic in this well-spun game, and you'll get to explore a heap of scenes as you search for items to help you solve puzzles.
New from Hitpoint Studios comes Guardians of Magic: Amanda's Awakening, a casual adventure game that focuses on inventory puzzles, exploration, and a lush fantasy setting. You take on the role of Amanda, a young girl who discovers some secrets about her late grandfather's life, including his feud with her mentor, Dr. Magus. It's technology versus magic in this well-spun game, and you'll get to explore a heap of scenes as you search for items to help you solve puzzles.
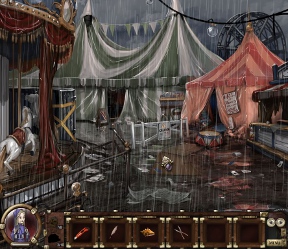 Guardians of Magic is set up like many modern casual hidden object adventure games, though this one's focus is squarely on the adventure aspects. No hidden object scenes to contend with, just exploration, inventory puzzles, and a few mini-games. Move from area to area interacting with the environment with your mouse. The cursor changes depending on which action you can take with an object, turning into gears when you'll need something from your inventory, a hand when you can pick up an item, and an arrow when you can move to a new scene. Very intuitive design that casual players will greatly appreciate.
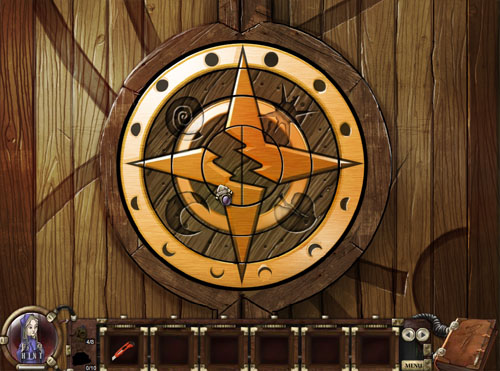
Two machines help Amanda in her quest, but first, she's got to find and assemble them! Almost two dozen small boxes are hidden throughout Guardians of Magic, each containing a section of machinery. To get the pieces, you'll have to solve a quick mini-puzzle, usually something along the lines of a tangram, a jigsaw, or a memory matching game. If you aren't in the mood for the diversion, wait a few seconds and click the skip button at the top of the screen. No penalty, just a delightfully solved puzzle before your eyes!
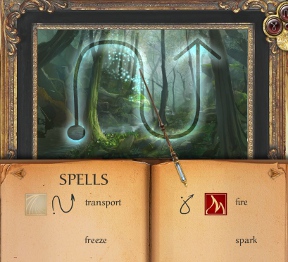
Guardians of Magic has a fun open-ended sort of design that gives you the freedom to explore most of the game as you please. After playing a bit, you gain access to a room filled with locked portraits. Once you open the doors, you can enter and explore the small worlds as you please, using new items and abilities you find in other portraits to uncover new puzzles and secrets to explore. The addition of Amanda's magic wand and set of spells also keeps things relatively open, allowing you to cast spells like fire or shock to interact with a few objects in the game.
 Analysis: Guardians of Magic: Amanda's Awakening sets itself up against a stock of clones and lookalikes that crowd the casual adventure genre, but it manages to set itself apart with superb gameplay, a decent storyline, and an interesting mix of magic and mechanical elements, sort of like Harry Potter meets Myst. The gameplay moves along at a nice clip, keeping you active and interested in the puzzles and plot at every point. It's a relatively short experience, clocking in at less than three hours, but it's satisfying from beginning to end.
Near the end of the game, Guardians of Magic: Amanda's Awakening drops the ball with a pointless maze sort of level that's nothing but confusing and monotonous. To top it off, the hint system is surprisingly useless, telling you to just "wander around some more" when you're honestly stuck. It's frustrating to work your way through so much of a good game only to find it lets you down when you need it most. Despite this, the overall experience is good, and you won't regret diving in to the game.
It's a bit on the short side and the hint system is largely useless, but Guardians of Magic: Amanda's Awakening still manages to pull off an exciting casual adventure experience. It stands above most others in the genre with a better story, more interesting characters, and puzzles that walk the line between obtuse and difficult. Give it a try and see if you're drawn in as deeply as we were!
![]() Windows:
Windows:
Download the demo
Get the full version
![]() Mac OS X:
Mac OS X:
Not available.
Try Boot Camp or Parallels or CrossOver Games.


Walkthrough Guide
(Please allow page to fully load for spoiler tags to be functional.)
Guardians of Magic: Amanda's Awakening Walkthrough
Constellations
Corvus: In the drawer in the living room.
Capricornus: In the chest in the living room.
Delphinus: Behind the painting in the room adjacent to the Ritual Hall.
Scorpius: Use all four runes on the stone circle.
Monocerus: In the bottle on the beach.
Pegasus: In the last room of the Courtyard castle.
Box Locations
In the box delivered to the house.
In the cottage foyer, next to the door.
On the shelf in the living room.
On the shelf in the library.
In the chest in the living room
In the left-hand pew seat in the Ritual Chamber.
In the room adjacent to the Ritual Chamber.
In the Fairy Woods.
Beyond the Courtyard staircase.
In the far room of the Courtyard.
In the vending machine, found in the far tent of the Circus.
In the mirror room in the Circus.
In the security room in the Circus.
From the fairy after giving her the three items.
Behind the missing picture in the cottage foyer.
In the safe in the Magus Industries office.
Walkthrough
Outside The House
Pick up the three gears.
Go to the well.
Use the three gears on the well side.
Use the crank to raise the bucket.
Get the key.
Note the symbols inside the bucket.
Exit the well and click on the basement doors - left of the house.
Use the key on the basement door lock.
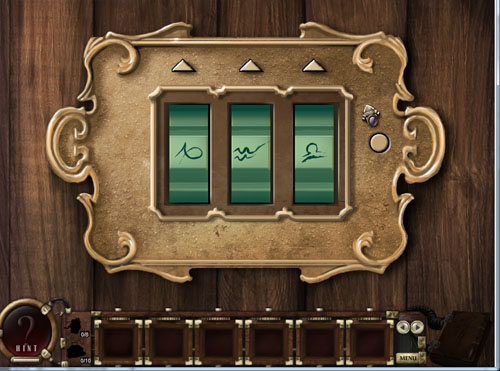
Tumbler Puzzle
Use the symbols found inside the well bucket. Screen
The combination is Fish, Water, Octopus.
The Basement
You'll hear a knock. Go outside and get the package at the front of the house.
Head back into the basement.
Put the package on the workbench.
Take the box cutter.
Use the box cutter on the box.
Take out the letter, blueprint and box.
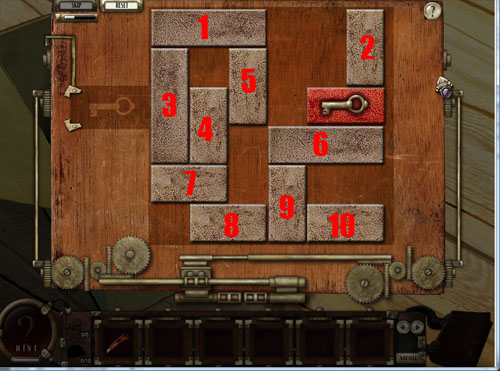
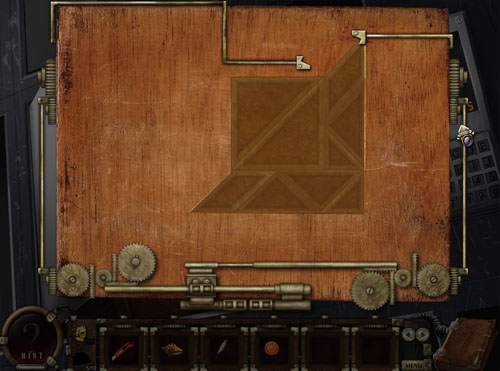
Box Slide Puzzle 1
Screen
Move the key block to the left.
Move block 2 down.
Move block 1 to the far right.
Move blocks 4 and 5 to the top.
Move block 7 to the right.
Move block 3 to the bottom.
Move the key block into the key area.
Rotate the piece and place it on the blueprint.
Go upstairs.
Upstairs
Pick up the box at the right side of the door.
Picture Match Puzzle 1
Match the pictures.
Take a closer look at the four pictures on the wall.
Enter the living room.
Pick up the crystal ball on the desk.
Open the drawer on the desk.
Get the Corvus constellation.
Get the box on the bookshelf.
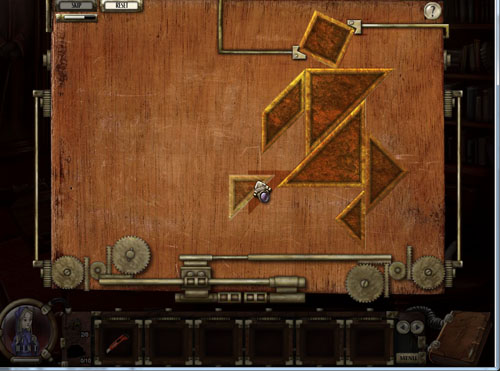
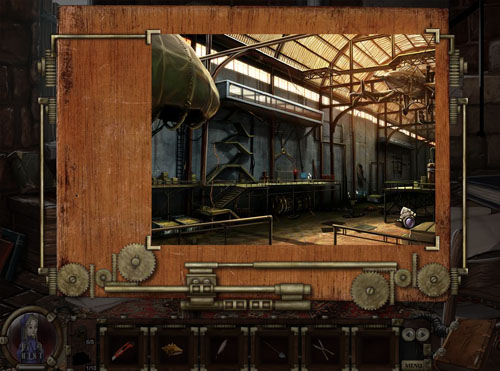
Jigsaw Puzzle 1
Screen
Finding The Library
Pick up the empty jug on the table.
Go to the front of the house and collect water from the well.
Return to the living room and use the water on the kettle.
Click on the left-hand switch on the wall.
Turn on the kettle.
Go to the basement and click on the boiler.
Boiler Puzzle
Start with the highest number and work your way down until the pressure lowers to 10. Screen
Solution: 2nd switch, 3rd switch, 5th switch.
Go to the living room.
Click on the Fireplace and use the code on the mirror for the sequence.
Code: 5Glb.
Enter the library.
The Library
Pick up the letter and quill pen on the desk.
Pick up the spell book.
Click on the shelf to the left.
Pick up the key (top shelf) and box (bottom shelf).
Construction Puzzle 1
Screen
Return to the living room.
Use the key on the chest (left of screen).
Take the torn page (Capricornus constellation) and the box.
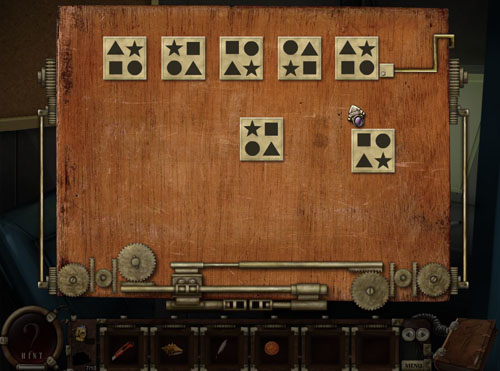
Symbol Puzzle 1
Screen
Return to the library and click on the painting
Use the transport spell.
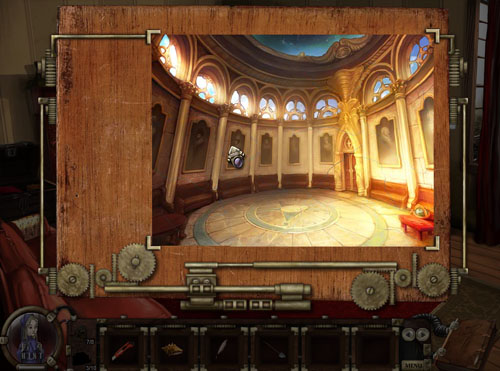
The Ritual Hall
Align the puzzle as it appears in your journal. Screen
Enter the main chamber.
Click on the bench on the far left.
Pick up the Box.
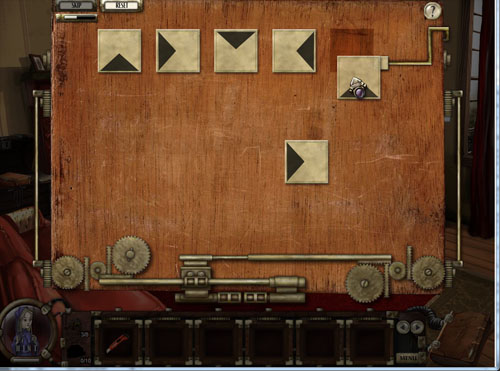
Picture Match Puzzle 2
Match the pictures.
Enter the room to the right.
Click on the middle painting.
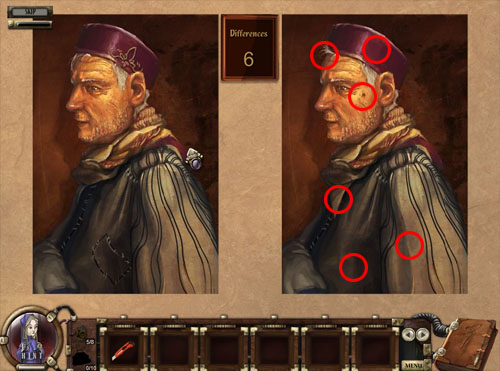
Spot The Difference Puzzle
Screen
Get the Fire Spell and Delphinus constellation.
Get the box.
Weight Puzzle 1
Screen
Return to the Ritual Chamber and use the telescope.
Locate the Corvus constellation.
Enter the Fairy Woods painting.
The Fairy Woods
Pick up the box
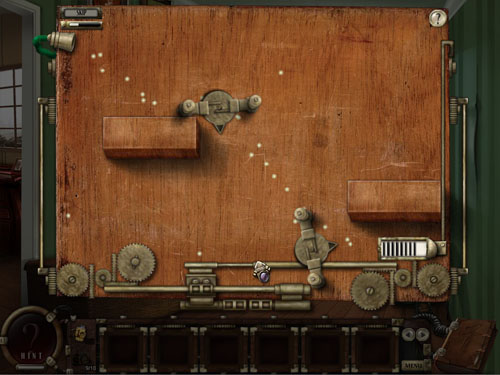
Energy Flow Puzzle 1
Screen
Use the Bubble Blower.
Talk to the Fairy.
Get her instructions.
Pick up the rune.
The Courtyard
Return to the Ritual Chamber and locate the Delphinus constellation.
Enter the Courtyard and go to the beach.
Pick up the message in the bottle (the Monocerus constellation) and the sea shell.
Turn on the Bubble Blower and pick up the rune.
Return to the Ritual Chamber.
Use the telescope and locate the Capricornus constellation.
Enter the Stone Circle Painting.
The Stone Circle
Use the bubble blower and pick up the two runes.
Look at the central stone and use the four runes.
Get the Scorpius constellation.
Return to the Ritual Room.
Use the Telescope and find the Monocerus constellation.
Enter the Courtyard 1500.
Courtyard 1500
Pick up the gears, spade and schematic.
Return to the Ritual Hall and enter the Courtyard painting.
The Courtyard
Use the gears on the boiler.
Use the fire spell on the boiler grate.
Pull the switch next to the door.
Go up the stairs.
Collect the box.
Weight Puzzle 2
Screen
Torch Puzzle
Light the torches using the fire spell, following the schematic found in Courtyard 1500.
Enter the door.
Take the hedge clippers, Spark spell, Pegasus constellation and Box.
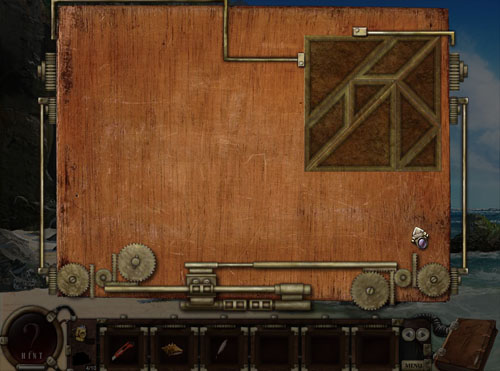
Jigsaw Puzzle 2
Screen
Return to the courtyard.
Use the hedge clippers on the bush to the left.
Take the box.
Slide Puzzle 2
Screen
Move 2 to the left
Move 5 to the top.
Move 4 to the right.
Move 6 to the top.
Move 4 and 7 to the left.
Move 5 down to the bottom.
Move the key to the left.
Move 3 to the bottom.
Move 2 to the right.
Move 6 to the top.
Move key to the left.
Move 5 to the top.
Move 4 and 7 to the right.
Move 1 down.
Move the key to the exit.
Go to the beach and use the shovel on the spot under the palm tree.
Get the box.
Construction Puzzle 2
Screen
Return to the Ritual chamber and use the Pegasus constellation.
Enter the Circus painting.
The Circus
Click on the 3-for-1 game.
Get the game token.
Click on the tent in the far back.
Click on the slot machine. Get three Pegasus icons. Do this by clicking on a button when you see the raven. Get the ticket.
Use the Wack-A-Mole game. Activate it with the spark spell. Get the game ticket.
Use both tickets on the vending machine to get the box.
Construction Puzzle 3
Screen
Leave the tent and go to the right-hand tent.
Mirror Puzzle
Click on the mirror at the bottom left.
Click on the mirror at the bottom of the pillar.
Click on the mirror second from the bottom.
Pick up the box.
Picture Match Puzzle 3
Match the pictures.
Go into the back room.
Look at the newspaper and TV screen.
Get the box.
Sequence Match Puzzle 2
Screen
Return to the Ritual Chamber and head to the Fairy Forest.
The Fairy's Gift
Give the game token, quill pen and sea shell to the fairy.
Use the box cutter on the box.
Get the envelope, blueprint, picture and box.
Slide Puzzle 3
Solution coming soon!
Return to the Ritual Chamber and go back to the cottage foyer.
Use the fairy picture on the empty picture frame.
Pick up the box.
Energy Flow Puzzle 2
Screen
Return to the Ritual Chamber, use the Telescope and find Scorpius.
Enter the Magus Industries painting.
Magus Industries
Click on the webcam to take a photo.
Check the drawer by the chair and get a blank Id card.
Use the ID card on the printer and click on Print.
Take the ID card and use the elevator.
Go to the basement.
Use the red fuel tank, on the left, on the generator. Flip the switch.
Look for a box on the left. Get the wire clippers.
Look for a box on the right, back. Use the wire clippers to get a piece of wire.
Head up the stairs and through the door.
Activate the bubble blower and use it to trace the footsteps.
Follow the trial to Mera using the Bubble Blower. Use Spark to destroy bots.
Use the wire on the door lock.
Get the freeze spell.
Take the elevator to the offices.
Click on the screen at the top right.
Mix the three colours (Green, Orange, Red) on the test tubes (left).
Use Fire on it.
Take the corrosive gel and use it on the safe.
Get the piece and assemble the power drain device.
Go to the Research Lab.
Click on the screen.
Go to the Storage level.
Use the power drain device on the lock.
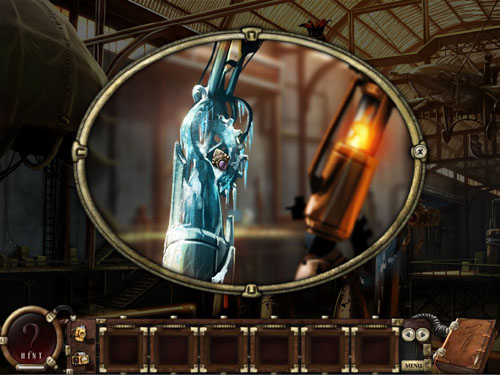
The Robot
Click on the journal and activate the freeze spell.
Use it on one of the arm joints. Repeat with the other joint.
Screen
When security bots arrive, use the spark spell on them.
When the robot moves forward, use the freeze spell on its leg joints.
Once the robot has fallen over, use the power drain device on the crystals.
Congrats, you are done!
Posted by: James Francis |
April 6, 2011 3:31 PM
|
April 6, 2011 3:31 PM