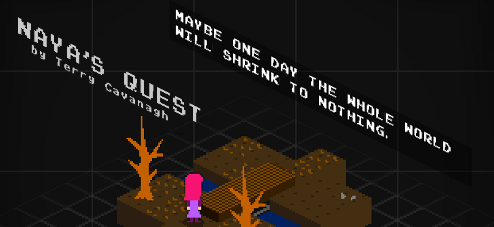
![]() Terry Cavanagh's Naya's Quest is a bit of an unexpected breed... something like an isometric adventure game crossed with a puzzle platformer with a post-apocalyptic story at its heart. You play as Naya, a young girl who travels to an abandoned town after meeting a monk who claims he left something behind there that may be of use to her. There are a few different control options to choose from, but most of them are variations on using the [arrow] keys to change the direction Naya's facing and move her forward, with [Z] or the [spacebar] to jump forward in the direction you're facing, allowing you to cross small gaps or hop up on short platforms. To discuss the rest of the game is actually a minor spoiler as to what the monk has left Naya, so if you'd rather find out for yourself, stop reading now, but this wouldn't be much of a review if it didn't review the game's mechanics and gameplay, and so...
Terry Cavanagh's Naya's Quest is a bit of an unexpected breed... something like an isometric adventure game crossed with a puzzle platformer with a post-apocalyptic story at its heart. You play as Naya, a young girl who travels to an abandoned town after meeting a monk who claims he left something behind there that may be of use to her. There are a few different control options to choose from, but most of them are variations on using the [arrow] keys to change the direction Naya's facing and move her forward, with [Z] or the [spacebar] to jump forward in the direction you're facing, allowing you to cross small gaps or hop up on short platforms. To discuss the rest of the game is actually a minor spoiler as to what the monk has left Naya, so if you'd rather find out for yourself, stop reading now, but this wouldn't be much of a review if it didn't review the game's mechanics and gameplay, and so...
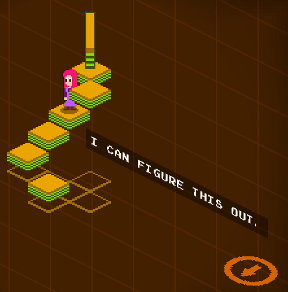
 The monk's gift is a machine that, when activated with [X], reduces the level to a cross-section of the world around you, and once you leave the town with it, the game begins in earnest. See, although it may look like most everything is on the same level, more or less, layouts are designed to play on your perspective. Floors that look like a single straight unbroken run can actually be composed of different pieces in different alignments on the grid that makes up your isometric world, which means that pitfalls can be hidden anywhere, to say nothing of how challenging navigation can become. The device's cross-section ability allows you to break up what you see into chunks that, with the help of a grid below them, can help you to figure out the true lay of the land. Fall into the abyss, and you'll lose one of your three lives. Each room allows you to try three times to complete it, and if your lives run out, you can either go back to the last save square you passed, or restart from the beginning of the last room you successfully completed.
The lives system is, largely, the biggest problem with the game since it doesn't provide anything to the experience beyond frustration. It's such a clever, challenging concept of a puzzle that this arbitrary slap on the wrist feels jarringly out of place, and could lead to a few rage quits when someone might otherwise be inclined to plug away at it contentedly. It's a fabulous concept that might take you a while to wrap your brain around, but is well worth the effort... though the ending feels more than a little abrupt.
Though the narrative is sparse, revealed in bits and pieces as you play through the game's three sets of levels, it's a tantalizing little mystery that compels you forward... though perhaps not quite as much as the increasingly fiendish level design. Some stages were so deceptively simple looking and yet so clever in their solutions that I had to laugh in delight. The care that's gone into the level design is clear, and once the new twists start being introduced in later levels, you'll find the challenge ramping up in surprising ways. Suffice it to say, Naya's Quest has more than one trick up its sleeve, and is easily one of the most delightfully difficult puzzle games to come around in a long, long time. It's not easy to reconcile the fact that your eyes are lying to you, but it's even harder to innovate, and Terry Cavanagh continues to establish himself as a creator who finds as much joy in creativity and experimentation as we do in enjoying the fruits of his labours. Even when they give me a headache.
Naya's Quest is also available to play on Terry Cavanagh's official site!


Walkthrough Guide
(Please allow page to fully load for spoiler tags to be functional.)
Naya's Quest walkthrough
Solutions are the series of moves required to complete the level.
Notation Guide: Using the default control scheme (you can press Tab to change it in game):
Forward is denoted by 'f',
backwards is denoted by 'b',
left is denoted by 'l', and
right is denoted by 'r'.
'j' is used to denote a single press of the jump button.
't' is used to indicate a turn instead of a move e.g. 'tr' would mean turning towards the right, but staying in place. (This is so I can indicate easily when you need to jump immediately after turning.)
-----
Edge Section 1:
Room 1 Solution:
f,f,f,f,tr,r,r,r,r
Room 2 Solution
r,r,r,td,d,tr,j,td,d,d,d,d,tl,j,td,d,d
Room 3 Solution
d,d,d,d,tr,r,r,j,td,d,d
Room 4 Solution
tl,l,l,l,td,d,tr,r,r,j,r,r,td,d,d,d,d
Room 5 Solution
tl,l,td,d,tl,l,td,d,tl,l,td,d
Room 6 Solution
d,d,j,d,d,tl,l,l,j,l,l,l
Room 7 Solution
l,l,l,l,l,tf,f,j,tr,j,j,tf,j,tr,r,r
Room 8 Solution
r,r,td,d,d,tr,r,r,td,d,tr,j,td,d,tl,j,tf,j,f,f,f,tl,l,l,tf,f,f,f
Room 9 Solution
f,f,tl,l,j,tf,f,tl,j,l,tf,f,f,f
Room 10 Solution
f,j,f,tl,l,l,j,td,j,tl,l,l,tf,f,j,f,f
Edge Section 2:
Room 1 Solution:
tr,r,r,tf,f,f,f,f,tl,j,td,j,d,d,tl,l,l,tf,j,tr,j,tf,f,f,f,tl,l,l
Room 2 Solution
l,tf,f,tl,l,l,tf,f,tl,l,l,tf,f,tl,l,l
Room 3 Solution
j,j,j,tf,j,j,j,tr,r
Room 4 Solution
r,j,tf,j,j,j,tr,r,r,r,j,tf,f,f,f
Room 5 Solution
tr,j,j,j,j,j,tf,f,td,d,tl,l,l,l,l,l,tf,j,j,j,j,j,tr,j,tf,f,f,
Room 6 Solution
f,f,tl,j,td,d
Room 7 Solution
d,tr,r,td,j,tr,j,td,j,tr,j,td,d,tr,r,r
Room 8 Solution
r,r,r,tf,j,tl,j,j,tf,j,tr,j,j,j,tf,f,f,tr,r,r,tf,f,f,
Room 9 Solution
j,j,j,f,tr,j,j,j,j,td,j,j,tl,j,tr,j,tf,f,f,f,f
Room 10 Solution
f,tr,r,r,r,r,r,r,td,d,d,d,tr,j,td,d,tr,j,td,d,tr,j,td,d,d,d,tl,l,l,l,l,l,l,tf,f,f
Edge Section 3:
I will explain each level's gimmick before giving the solution in a further spoiler tag.
Note that during the 'outside' section
you will have to jump on what has previously been only decorative walls in order to proceed.
-----
Room 1
Gimmick: The tiles fall away after you walk on them.
Solution:
j,j,j,tf,j,f,td,j,j,tl,j,j,j,j,j,tf,j,tr,j,tf,f,tr,j,tf,f,f,f,f,f
Room 2
Gimmick: Jumping puts you on the underside of the block you were on, instead of the normal jumping action.
Solution:
(Notation remains the same, despite change in jumping mechanics)f,f,f,,j,f,tr,r,r,r,j,td,d,d,d,tr,r,r,tf,f,j,f,f,f,f
Room 3
Gimmick: Moving platforms. Notation still works without timing your jumps.
Solution:
(Notation still works, unless you end up jumping over a platform. Use your common sense. I'll mark jumps that you could miss due to the moving platforms with an asterix.) f,j*,tl,j,l,tf,j,tl,j,tf,f,j,tl,j*,tr,r,td,j*,d,tr,j,tf,j,tr,r,j*,tf,f
Room 4
Gimmick: Hexagonal tiles, control scheme automatically changed to type 2. Note that holding down
Solution:
(New notation: forward:'f'; turn counterclockwise:'l'; turn clockwise:'r'; jump:'j'.)f,f,r,j,j,f,l,f,f,r,r,j,j,l,j,l,f,l,f,r,f
Room 5
Gimmick: Move only in diagonals.
Solution:
f,tr,r,r,td,d,tr,j,j
Room 6
Gimmick: Scan command moves certain blocks around the level, and also moves you if you are standing on them. (Look at the grid underneath the level.)
Solution:
j,j,f,tr,r,r,td,j,use scan,j,use scan,tr,r,tf,f,f,f,use scan,j,f,f
Room 7
Gimmick: Scan command moves all platforms to the flat plane you are on, but disables movement. Use scan command again to return the level to normal and restore movement.
Solution:
f,f,tl,l,tf,f,tl,l,j,tr,j,r,td,d,tl,j,l,tf,j,f,j,tl,j,l,l,td,d,j,j,j,d,d,tr,r,r,tf,f
Room 8
Gimmick: Scan command splits screen into 4 views: One from the usual isometric view, one from the back, one from the right, and one from the top.
Solution:
f,f,j,tr,r,r,td,j,j,tr,r,r,td,j,j,tr,r,r,tf,j,tr,j,tl,l,td,j,tl,l,l,td,d,d,d,d
Room 9
Gimmick: Scan command rotates the level. Perform it repeatedly to gain a better idea of the level.
-----
Note:
the New Game Plus is the entire game with this gimmick.
-----
Solution:
(from original rotation, with the entrance and exit at the top-right)d,tl,l,td,d,d,j,tr,j,r,r,j,tf,j,j,tl,l,tf,f,f
Room 10
Gimmick: Scan command brings up the 'SYSTEM TERMINAL'. The grid of numbers and dashes is a map of the level. The X marks your current position. The numbers (0-9) indicate the height of the platform in that vertical column. The dashes(-) indicate columns where there are no platforms.
Solution:
tr,j,tf,j,f,f,tl,j,j,j,j,tf,f,f,j,tr,j,tf,f
Upon completing the last move the ending will play.
Posted by: syrahl696 |
September 28, 2013 8:03 AM