JayisGames.com is now available ad-free!
Jay is Games recommends Cheat Happens with 8,000+ games and 35,000+ trainers!

Transmover: New Generation


  • Currently 4.3/5
  • 1
  • 2
  • 3
  • 4
  • 5
Rating: 4.3/5 (63 votes)
Comments (55) | Views (6,489)
MikeTransmover: New Generation
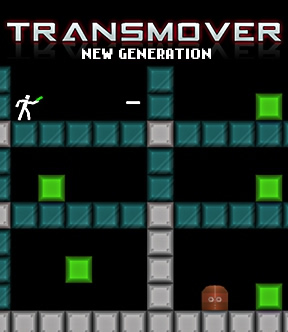
You can't jump, you can't fly, you don't have super-strength, and you can barely scrabble over a single blocky hunk of pixels. But you have the finest person-to-block transmover-ray technology available, and that makes you mighty! Transmover: New Generation is the sequel to Polygon Gmen's Transmover, and it features as much great puzzle-platforming and laser-effected teleportation as the original.

Navigate the game's menus using the [spacebar] and [arrow] keys. Once you select a level, move the transmoving stick-dude with the [arrow keys] and fire your transmoving ray-gun with the [WASD] keys. You can blast your laser gun in any of the four orthogonal directions, but you can't jump, and you can only climb over a single block one unit high. The goal of each level is to grab the key and take it to the door, and since both key and door are often placed in remote, unapproachable areas of the level screen, you must rely on Transmotion to zip you hither and yon. Blasting a green block with your transmotion ray will cause you and the block to switch places, which is integral to accessing all those hard-to-reach places. You can zap a block across a chasm to cross it, or use transmotion to engineer bridges and stairways to make unreachable spots a little more reachable.

Zapping other blocks can have other effects. Some, like blocks that can only be zapped on certain sides, or blocks that change the path of your transmotion ray, will be familiar to those who have played the original. Other features, like conjoined blocks, or block-operated switches, are new to Transmover: New Generation. Despite a few new features, there isn't much different between the New and Old generations of Transmover. Graphics and sound get a slight polish but are still largely recognizable from the original. Level design still offers a familiar flavor of puzzle-platforming. But that's good! The original Transmover boasted a clever concept and fun puzzles, and if Transmover: New Generation is more of the same, it's more of the same good casual gaming.

So get moving! Or, dare I say it, get Transmoving! </unabashed pseudo-pun>

Play Transmover: New Generation

Walkthrough Guide


(Please allow page to fully load for spoiler tags to be functional.)

Transmotion: New Generation walkthrough
Levels 1-20

Level 1

  • Climb the ladder, grab the key, climb or fall back down and use the door. Easy!

Level 2

  • Go right, grab the key, climb the ladder, go left over the edge and use the door. Also easy!

Level 3

  1. Climb down the ladder and onto the wire to position yourself over the key, then press [down] to drop.

  2. Climb the same ladder to the same wire, then drop onto the wire below it.

  3. Scurry up the adjoining ladder and scuttle yourself across the long wire at the top of the screen.

  4. Position yourself over the wire nearest the door and press [down] to drop. Climb over to the right and use the door.

Level 4

  1. Zap the green box across the pit to the left. Climb the ladder and zap the box to the right.

  2. Climb the ladder, then zap the box to the left.

  3. Grab the key, then zap the box you just zapped, now on the right side of the pit.

  4. Climb the ladder to the door.

Level 5

  1. Go over to the green box and stand beneath it, then zap it.

  2. Go to one of the ladders that isn't over the key, then zap the box again.

  3. Climb down the ladder that is over the key to grab it.

  4. Stand under the green box to zap it again, then climb up to the door.

Level 6

  1. Go all the way to the left, then zap the nearest green box.

  2. Climb up the stairs you just made and grab the key.

  3. Go as far to the right as you can, to the wall nearest the door, and zap the other green box. Climb on top of this box and zap beneath you.

  4. Stand one spot to the left of the box you just moved. Zap to your left to move the other box.

  5. Climb up the stairs you just made to the door.

Level 7

  1. Fire at the pink-purple box that's rotating clockwise. Zap it and it will deflect your ray down.

  2. Grab the key, then fire up at the blue box that's rotating counter-clockwise. Then head to the door.

Level 8

  1. Your blast goes through the bluish glass blocks. Zap left, left, down, right, down, then left, to get to the cell with the key in it. You will have to move one spot to position yourself over the green blocks before firing down.

  2. Climb up the green blocks to grab the key.

  3. Climb down again, then blast right, up, right, and finally down to get to the door.

Level 9

  1. Climb up the nearest ladder, across the wire, then up the next ladder so the green box is directly to your right. Fire at the box.

  2. Walk off the ledge to the left, stand under the green box and shoot up.

  3. Climb the ladders and wires until you are just above the key, then drop.

  4. Walk off the ledge, then fire through the glass wall at the green box to the left. Use the door.

Level 10

  1. The two sets of three boxes are conjoined, so if you fire at one, you will transport all three in the same configuration. You switch places with the particular box you fire at. If the three boxes can't fit from where you're standing, teleportation won't take place.

  2. Zap the set of boxes to the right from underneath. Move one spot from the right of the spot just underneath the ledge with the key, then zap to your right.

  3. Climb up the stairs you made to get the key.

  4. Zap the set of boxes to the left from underneath. Move one spot from the left of the spot just underneath the ledge with the door, then zap to your left.

  5. Climb up the stairs you made to get the door.

Level 11

  1. Move all the way to the right, then zap the set of three boxes to the left.

  2. Climb on top of the set of three boxes and zap down.

  3. Move just under the gap between the ledge with the door and the stair-shaped boxes, then zap to the right.

  4. Stand under the set of three green boxes and zap up. Move to the far right of the screen and zap to the left.

  5. Climb up the set of three boxes to get the key.

  6. Stand either underneath or one spot to the right of the nearby ledge and zap to the right.

  7. Climb the stairs you made to the door.

Level 12

  1. Climb the big ladder, then across the wire, until you are just under the leftmost of the two gray blocks, then zap to the right.

  2. Climb all the way up the big ladder, across the boxes you just moved, position yourself on the wire over the key and drop.

  3. Head right until you are standing in the left side of the shallow pit, just under the lowest of the set of green boxes, then fire up.

  4. Climb up the short ladder on the left side of the screen. Stand one spot to the right of the far left wall and fire right.

  5. Climb up the big ladder and across the wires until you are over the green boxes, then fire down.

  6. Climb up the big ladder and across the wire one last time, then climb the stairs you made to the door.

Level 13

  1. Move over the block in the quadrant below you and zap it.

  2. Zap the box to your right, then zap the set of conjoined boxes to your right to move it out of the way.

  3. Move under the block in the quadrant above you and zap it.

  4. Zap left twice, then down, then to the right, so you're back in the lower-right quadrant with the key.

  5. Zap the box in your quadrant to get it out of the way.

  6. Position yourself under the set of conjoined boxes above you and zap it.

  7. Once agin, zap left twice, then down, then to the right, so you're are again in the quadrant with the key. You'll have to move a space to the right before zapping down at the set of conjoined boxes so it can fit in the place you were standing.

  8. Move all the way to the right, as close to the wall with the key as you can. Zap the set of conjoined boxes to the left to make a staircase. Climb the stairs to get the key.

  9. Position yourself under the box above you and zap it, then zap the box to the left so you are in the same quadrant as the door.

  10. Move all the way to the left, as near the door as you can. Zap the set of conjoined boxes to the right to make another staircase. Climb the stairs to the door.

Level 14

  1. The blue gear spins the blocks connected to it counter-clockwise. The blue and red gear spins the blocks connected to it in one of two positions, pointing at 9 o'clock or 6 o'clock.

  2. Stand atop the blue and red gear and fire down. Head down the stairs to the left to grab the key.

  3. Stand under the blue gear and fire up twice. Crawl back up atop the blue and red gear and fire to the left, so the blocks connected to the blue gear are pointing at 3 o'clock.

  4. Stay where you are and fire at the gear below you. Walk to the door.

Level 15

  1. Grab the key right away by climbing the ladder and moving all the way to the right.

  2. Firing at either red gear will rotate everything attached to it clockwise. Stand below the gear on the right and fire up.

  3. Climb up the ladder and move so you are standing atop the top gear, then fire down.

  4. Move back to the lower level to the spot below the same gear, which is now the gear on the right. Fire up.

  5. Climb up the ladder and onto the platform. Fire at the top gear directly across to your left.

  6. Move left to the door.

Level 16

  1. Zap the green box directly below you.

  2. Move all the way to your left, directly below the key, then zap to your right.

  3. Stand below the single green block and zap up.

  4. Move so you are three spots to the right of the far left wall, then zap to your right. Climb the stairs you just made to grab the key.

  5. Stand atop the single green box and zap down.

  6. Move so you are two spots to the left of the far right wall (the one with the door on top). Zap to the left.

  7. Stand under the single green box and fire up, then fire at the gear to the right.

  8. Stand one spot to the left and below the set of connected boxes and gears. Fire at the single green box to the left.

  9. Climb up the stairs you just made to the door.

Level 17

  1. Climb across the wire over the second box from the left, the one with a surface you can zap. Zap it.

  2. Climb up the ladder and zap one of the two middle blocks on the far right side. Grab the key.

  3. Fire to your left to cross the gap, then head for the door.

Level 18

  • A few hints: The trickiest thing about this level is the likelihood that you will get stuck if you switch places with a box you are standing on top of. To prevent this, make sure that adjacent boxes are high enough so that you can walk under them.

  • You are trying to build staircases, first to the key, then to the door. The last step in each case is to stand below what will become the lowest step and zapping it. Otherwise you will be stuck below the staircase.

  • You want to set up the highest step first, then the two middle steps, then the last step. Just because you have a step where it needs to be, it doesn't mean you won't need to move it again.

  • The solution is in the spoiler below.

  • Picture the four boxes as Box 1, 2, 3, and 4, from left to right.

  • You can move a box up by standing on top of it and firing down. You can move a box down by standing below it and shooting up. Keep that in mind as you read the steps for the solution.

    • Box 2 up

    • Box 3 up

    • Box 1 up

    • Box 2 down

    • Box 4 up

    • Box 3 down

    • Box 4 up

    • Box 1 up

    • Box 2 up

    • Box 1 down

    • Box 2 up

    • Box 3 up

    • Box 1 up

    • Box 2 down

    • Box 4 up

    • Box 3 down

    • Box 1 up

    • Box 2 up

    • Box 1 down

    • Box 2 up

    • Box 3 up

    • Box 1 up

    • Box 2 down

    • Box 3 up

    • Box 2 up

    • Box 1 down

    • Take the key

    • Box 1 up

    • Box 2 down

    • Box 1 up

    • Box 2 up

    • Box 3 down

    • Box 1 up

    • Box 2 down

    • Box 3 up

    • Box 4 down

    • Box 3 up

    • Box 4 up

    • Box 2 up

    • Box 3 down

    • Box 2 up

    • Box 3 up

    • Box 4 down

    • Head to the door.

Level 19

  1. If you put a green box in the gray switch (the partial gray square), it activate platforms that are off, and deactivates the platforms that are on. The outcome is similar when you put green boxes in the two brown switches.

  2. Stand in the gray switch and zap the green box to the left. Climb the stairs and grab the key.

  3. Zap the box in the gray switch from anywhere you can to flip it back to the original setting.

  4. Climb the ladder and stand beneath the leftmost brown switch, then zap the green box to the right. Climb atop the box so you are standing in the brown switch, then zap beneath you.

  5. Repeat this step for the other green box and the rightmost switch.

  6. Climb the stairs to the left and use the door.

Level 20

  1. Walk off the ledge and over the glass block to the left.

  2. Fire to the right at the green boxes on the left.

  3. Stand on the purple switch and fire at the green boxes to the right again. Do the same for the brown switch and the last green box to the right.

  4. Stand between the purple switch and the glass block to the left, then zap the green box to the left. Climb the stairs and grab the key.

  5. Walk off the ledge to the right and zap at the brown switch to the left.

  6. Stand in the gray switch and zap the box in the purple switch to your left.

  7. Stand between the gray switch and the glass block to the right, then zap the green box to the right.

  8. Climb up the stairs to the door.

Walkthrough Stages 41-60

Most of the stages have three tiers of spoilers. The first is the general strategy that I used for the level with some tips for the part I found to be the trickiest. The second tier has more of a step-by-step description. Because some of the stages are difficult to describe in words, there is a third tier of spoilers that spell out exactly how to do it.

As you can probably figure out, ▲�-�▼►WASD stand for the keys. If some keystrokes are in parentheses like (D►), it means those keys have to be timed to move a block into the right spot. This really isn't a reflexes game. None of the timing shots are difficult, but some of the puzzles had me stumped for a long time. Kudos to the Polygon Gmen for for an awesome degree of difficulty on these stages.

Stage 41:

Raise the gear platform up to bridge the left gap, and use the Z- and L-shaped blocks to build a stair on the right.

Move the gear platform into place by flipping it over, then raise it up two levels using the two single-use blocks. You can use the Z-shaped block to get on top the platform for the second shot, as in this screenshot .

From the beginning, �-�DD►►S►►►►D�-��-��-��-��-�S�-��-�W.

Build a staircase out of the two blocks. The only trick is to move far enough away from the blocks that you have room to transmove them. There is plenty of space here (not so in later levels).

From the last screen shot, DD ► (all the way to the corner) A►►►►A►►►►►►D�-��-�S ►D�-��-��-��-�S�-��-�D►►►►►A►D, climb the platform, shoot the top gear, and out.

Stage 42:

Build a staircase on the right side first, then move back to the peak and build a staircase on the left side.

Here is a screenshot of the right staircase.

From the beginning, ►►►►S�-�W►A►A.

Transmove back to the peak, and build a staircase on the left side. This move is almost a mirror image of the right.

From the key, A�-��-��-��-��-�S►W�-�D�-�D�-��-��-�D�-��-�D�-��-�D�-��-�D.

Stage 43:

In order to get the key and make it back to the top, you need to have a block from the upper section that you can shoot from below to get back up.

The block with the green on the left bottom is the only block that will work. Put it to the right of the block below the door as in this screenshot.

From the beginning, ►(D�-�)►►W�-�S►A►(D►)A.

Use one of the single-use blocks and one of the green blocks to get the key, then move the green block back onto the lower platform as in this screenshot.

From the last screenshot, ►►►►(A►)►►►►(A►)►►►►►SW�-��-�D�-��-�▲ (S�-�)▲▲�-�S.

Place the other single-use block next to the first one, and put one of the green blocks to the left of the single block in the center of the screen as in this screenshot.

From the last screenshot, ►A►►►W�-�D�-�S�-��-�W►A►S�-�S.

Now move the green block out onto the edge of the platform, stand next to it and swap places so you can climb the stairs and stand under the half-green block.

From the last screenshot, ►►►►A►D�-��-��-�W.

Stage 43:

In order to get the key and make it back to the top, you need to have a block from the upper section that you can shoot from below to get back up.

The block with the green on the left bottom is the only block that will work. Put it to the right of the block below the door as in this screenshot.

From the beginning, ►(D�-�)►►W�-�S►A►(D►)A.

Use one of the single-use blocks and one of the green blocks to get the key, then move the green block back onto the lower platform as in this screenshot.

From the last screenshot, ►►►►(A►)►►►►(A►)►►►►►SW�-��-�D�-��-�▲ (S�-�)▲▲�-�S.

Place the other single-use block next to the first one, and put one of the green blocks to the left of the single block in the center of the screen as in this screenshot.

From the last screenshot, ►A►►►W�-�D�-�S�-��-�W►A►►S�-�S.

Now move the green block out onto the edge of the platform, stand next to it and swap places so you can climb the stairs and stand under the half-green block.

From the last screenshot, ►►►►A►►►D�-��-��-�W.

Stage 44:

You can place a block on top of a treadmill by shooting, then moving onto the treadmill just before the bolt hits a block. Also, when you are climbing onto a block, a treadmill that is directly above your head won't affect you. Some shots are much easier if you use the slow speed.

Go to the left side and move the left green block onto the middle left treadmill. Move one of the right blocks onto the lower treadmill. Make sure to raise the other green block one level so you can shoot it later. If you time it correctly, you will end up as in this screenshot.

Transmove the left block under the left middle treadmill, then jump on top of the block and move it up. This is tricky with the treadmill, but if you just hold down ► and tap S repeatedly, it will work. Now hit space to slow the game down to speed 1. Hit D, and just before the bolt hits, tap ►. Stand on top of the right green block and move it up one level.

Move the block on the right side to the top left treadmill to get the key.

Stand on top of the lower block, so you are in the center of the treadmill triangle. Slow the game down again, press D, quickly tap �-�, then wait until the bolt is about to hit the block and tap �-� a second time. If you miss the timing, you can move the other blocks around to get back to the shooting position and try again, or just reset the stage and and start over.

After getting the key, move the middle block in the staircase over to the left, then you can move it onto the middle right treadmill, and finally move the upper left block onto the upper right treadmill.

Start from the position shown in this screenshot. Press S►W�-��-��-�D�-��-��-��-�S►►►►►. Stand in the center of the treadmill triangle, slow the game down, press A, then tap ► just before the bolt hits the block. If you time it correctly, you will end up with a block on the middle right treadmill. The final shot is exactly the same. If you miss the timing, you can use the lowest block to reset the upper block into position, put the lower block back, then redo the shot. No need to reset the stage from this point.

Stage 45:

Spend some time figuring out exactly how the green guys move, you will need to use them as steps. The most difficult part is raising the T-shaped block with a green guy already on it since they can't climb up onto anything.

Move the T-shaped block into position on the left side, then move one of the green guys onto the block, and climb on top of him. Make sure the other green guy is still standing right next to you. Once you raise the block, you won't be able to adjust the spacing between you and the lower green guy. This screenshot shows the position.

Run left to move the green guy out of the way, then back to the right so that your are standing under the key with a clear shot to the right. Press D, then run back to the right so that both green guys are standing next to you. Run left until you are standing next to the right side of the block. Press DD�-��-��-��-�►► to stand on top of the left green guy. This creates the correct amount of space between the two green guys. Now press SD�-��-��-��-�A►.

Swap so the green guy is standing on top of you, then move the block up one level. You can now use the lower green guy to climb onto the platform, and the upper green guy makes a step so you can get the key.

Press SS then move around to the left until you are standing just to the right of the block. Now press D and move left to climb the platform and get the key.

Getting to the door is an exact mirror image of getting the key.

Stage 46:

There is a way to set up the blocks so that you can move a block into the switch while simultaneously escaping from the right side of the screen. The trick is timing your fall correctly.

Use one block to extend the platform above the treadmills one block to the right. I found that placing the other block at the base of the left ladder makes the timing easiest. That way, you can shoot the upper portal and immediately step the right and fall into the switch just as the bolt hits the block. This screenshot shows the position right before the shot. You can make the shot with the block at any position on the lowest level, but you will have to adjust the timing of when you step off the platform.

From the beginning, move left to stand on top of the left block. Raise the block 3 levels by pressing S then climbing the ladder to get back on top of the block. Then press ►W�-��-�D to move the other block to the base of the ladder. Climb to the right block of the 3-block platform. Hit space to slow the game down, press A, then tap ► just before the bolt hits the block. Climb back up into the position shown in the screenshot.

Set the game on slow again. Tap A, then immediately tap ►. If the green block ends up above or below the switch, your timing is not quite correct and you will have to restart the stage. Now climb the ladder and you're out.

Stage 47:

You have to raise the long block up to the top level in order to bridge the gap to the key. The trick for me was realizing that the block doesn't have to go through the gaps between the left and right platforms, it can wrap around the left and right sides of the screen and work as a bridge that way too.

Move the block up through the center gap on the lower platforms, then move it to wrap around the screen so that the left edge of the block is on the base of the right ladder. This way, you can cross to the right side and be able to raise the platform and fall back onto the right platform. If you fall on the floor or the left platform, you won't be able to use the right ladder and continue moving up. The position is shown in this screenshot.

From the beginning, A�-��-�A►S, climb the left ladder and raise the block two more times. Climb the ladder a third time, cross the platform, and stand at the base of the right ladder. Press D, tap ▲, and climb the left ladder again. Press W and you should be in the position shown in the screenshot.

Move the block to the top of the right ladder and shift it one square right so that you can still use the ladder. Then move the block to the top of the left ladder. Shift it left one block at a time until it bridges the gap to the door platform and allows you to still use the upper left ladder. The door and the key will allow you to move a block onto them. The final position is shown in this screenshot.

From the last screen shot, cross the bridge and climb to the top of the right ladder. Press S, and quickly tap ►. Now climb the ladder,cross the bridge, climb to the top of the upper left ladder, and press S. Now you will have to shift the block four squares to the left. To shift the block, just tap W or S and quickly tap �-�. When you have shifted it four times, it should be in the position shown in the screenshot.

Climb to the top of the ladder, cross to the left. While you are standing above the upper right platform, press S.

Stage 48:

You have to build three staircases - first on the right, then on the far left, and finally on the left to get the key. All of the red blocks have to go.

Right staircase. Destroy all three red blocks on the right, then use the three blocks with the green half at the top-right to build a staircase to the right as in this screenshot.

From the beginning, ►A►A►AA►►(A►)►►►►(A►). If you are having trouble with the second timed shot, press space to slow the game down, press A, then tap ► just before the bolt hits the block.

Far left staircase. First destroy the center column of red blocks. This will also shift the center column of half-green blocks to the left. Now destroy the remaining column of red blocks and build a staircase at the far left out of the blocks with the green at the top left as shown in this screenshot.

From the last screenshot, �-��-�SDSDSD �-��-��-��-��-�SD�-��-�D�-��-��-��-��-�D(D�-�)�-��-��-��-��-�(D�-�).

Left staircase. The procedure is the mirror of the right staircase now that there is enough room.

From the last screenshot, D�-��-��-�(D�-�)�-��-��-�(D�-�)

Stage 49:

Build a platform that is two blocks wide and two levels below the top of the door's platform. It needs to stick out one block past the edge of the base platform with the ladder.

First, raise the two blocks on one side so that the outer block is one level above the top of the ladder. On the opposite side, raise the outer block one level higher.

See screenshot. I used the left side, but this whole stage can be mirrored either way.

Now move the higher block over to the other side and make sure it is one space farther out than the block below it. Finish the platform by raising the inner block one level. Raise a block on the opposite side to the highest level you can reach (one below the door platform).

See screenshot.

Form the final stair, stand on the outer edge of the platform and move the opposite block over. Now you can stand next to the block, swap positions, and you're out.

See screenshot.

stage 50:

Think about leaving yourself a path for yourself to get back as you head for the key.

In each compartment, move one of the half green blocks down from the ceiling so that they can be hit from the other side of the portal when you need to get back. Remember that one side of each portal will be blocked by the single-use block on the way back.

Here is a screenshot at the key showing the position I used.

Stage 51:

The trick to creating space between you and the green guys is to stand on top of a green guy, shoot down and immediately step away. Repeat as necessary.

You need to move one green guy so that he is five spaces to the left of you, as shown in this screenshot.

Start by moving all the way to the right, the press AA►(S�-�)DD�-�. The timing of the shot is not to press �-� immediately after pressing S. You have to wait a moment for your character to reappear. This will place the left green guy two spaces to the left, and you will be standing on top of the right green guy. If you moved more than 1 space to the left after the timed shot, you will have to step back to the right.

Now press (S�-�)D�-�(S�-�)D, move left and you will be at the position shown in the screenshot.

Swap places with the green guy so that you don't touch the white crumbling blocks, and move out to the end of the platform. Shoot at the green guy and grab the key just before you transmove.

If you having trouble with the timing, you can increase the space between you and the green guy by repeating the (S�-�)D�-� step a few more times. This leaves more time for you to grab the key while the bolt is in the air.

Stage 52:

Recognize that the gear platforms on the right are a one-way road - you can go up, but you can't come back down. Also, the large block looks like a staircase, but it won't work as a stair. Use it to transmove back to the top.

When you leave the left side, make sure to keep the large block in an accessible position as shown in this screenshot.

From the beginning, press �-��-��-�(W►). Cross the handrail to the right, climb to the top of the ladder, and press (S►)�-�W�-��-��-�W. Cross the two handrails.

From the top of the center ladder, press ▼▼A▲▲A. You should be at the position in the screenshot.

Now climb the right side. The platforms are one-way, so you will need to use the one-shot block to exit. If you close the "gate" behind yourself, there will be room to use the large block to get back up on the handrail.

From the last screenshot, press ►▼SD. Move right, stand in the space under the gear you just shot, and press (W►).

From the position in the previous spoiler, press D►►►► A�-��-�D►►A�-��-�D►►�-��-�▲▲►►►▼�-��-��-��-�A�-�W. Cross the handrail to the left and you are out.

Stage 53:

This level is all about figuring out the quirky ways that the green guys can be trapped. For some reason, if there is a green guy on a ladder, another green guy will not cross the ladder under the first one. To me, this was not entirely predictable. The non-intuitive aspects of the green and brown stick guys is probably my only complaint about this otherwise awesome game.

Trap both green guys. One green guy needs to be on top of the ladder and the other to the left of the bottom portal. Stand to the right of the upper portal, shoot left, and quickly run to stand on top of the mirror block. It should look like this screenshot. He's trapped, you can move around and he won't fall. I know, it didn't really make sense to me either.

From the beginning, ►►►A►►►A►S�-��-�(D�-�)�-��-��-��-�►W�-�D�-�S. Now run to the far left side of the screen, then run back under the mirror block, this stretches out the distance between you and the green guy.

From the previous position under the mirror block, press W, then move back to the left and stand on top of the lower portal block. Press (A►)►►►►�-�▲(A�-��-�) and you should be in the position in the screenshot.

Climb up to the upper ladder, swap places with the upper green guy. You don't need him anymore, so move to the left, then back to the right to get him out of your firing line to the block. Move it up, then use the green guy that is still on the platform to swap places and get back up. It should look like this screenshot.

From the last screenshot, climb to the upper ladder, you will have one green guy directly above you and another directly to the left, W►�-�►S►�-�W�-�▲�-�D►A.

Stage 54:

You can trade blocks through the glass wall. Get the more useful blocks on the right, and leave the more limited blocks on the left.

Build a staircase to get the key, but keep the two all green blocks on the bottom as in this screenshot. The only tricks to this are moving the up-down block over two squares and moving the left-right block up two squares.

To move the up-down block to the left, first move it up two squares, then stand under it, press W and quickly tap �-�. To move the left-right block up, press A or D and quickly hop up on top of another block. This is easier if you stand farther away from the left-right block so the bolt is in the air for longer.

From the beginning, �-��-��-��-�S�-��-��-�DW�-�S(W�-�)�-�S►D�-��-�S (W�-�)�-�S►D�-��-�S►S►D�-��-��-��-�S D►►►A►►►► (A►)►►►D�-��-��-�(D�-�)�-�A�-�W►A►S►D

After getting the key, trade the three half green blocks from the right side over to the left side while bringing the two solid green blocks over to the right. You will have to maneuver the blocks around to avoid trapping yourself. One possible sequence is screenshot 1, screenshot 2, screenshot 3.

From the key to first screenshot, press

First to second screenshot, press

Second to third screenshot, press

Use the four blocks to build a stair. The general technique is to set the blocks up so they alternate sides as the go up the shaft. Then you can raise a block through the center and move up the right side onto the top of the staircase. It is better explained in screenshot 1, screenshot 2, and screenshot 3. If you master this building technique now, level 60 will be much easier.

First to second screenshot, press W�-�W►►►►►W �-�D�-�S►►W�-�D�-��-�S►►A►S�-�A►►►►S►W�-��-�S.

Second to third screenshot, press ►W►SAA►►►►►►S�-��-�D�-�S►D.

Second screenshot to end, press �-�S�-�W►S►A►►W.

Stage 55:

Remember that you can swap blocks through the glass. When you are inside the center area, there will be two blocks outside, when you are outside the center area, there will always be one block outside with you. Getting a straight shot and having enough space to transmove blocks is the tricky part.

Ultimately, you want the large square block outside with you, but the long 3-block takes up a lot of space and makes it very difficult to maneuver. I put it outside temporarily while I re-arranged the center section. Here are some screenshots to show the intermediate configurations that I came up with. Other ways will probably work too. Screenshot 1, screenshot 2, screenshot 3.

Beginning to first screen shot, press �-��-��-�DW�-�SDD�-��-�(S►)(W►).

First to second screen shot. Press ►W►A�-��-�DSS►A►►AWWDS �-��-�D�-�D�-�(W►)►S�-�A►►SA►SA►►A►►.

Second to third screenshot, (S►)►W�-��-��-�D�-�(W►)S�-�D, move right to the switches and shoot the block.

Stage 56:

Use a block to hold open the shutter blocks - this swaps their open/close sequence. You can open a hole in the walls of purple and peach shutters, then open the gray shutters and get the key.

First, move a block on top of one of the purple shutters, you will need to use the other two blocks to make a stair from the ladder to the center.

Open the purple shutters, and move the block into one of the open purple shutters.

Now close the purple shutters and open the peach ones. Move the block into one of the peach shutters.

Finally, close the peach shutters, move the block out, and open the gray shutters. The path to the key is open.

Stage 57:

This level is mostly about figuring out how to maneuver the green guys in a tight space and how the treadmills can trap them or you. The strategy I used was to first get the green block down where I can use it, then to use the block and a trapped green guy to get the key. Then I switched both of the shutters by putting green guys in them while moving a block in and out of the switch. finally, I used the green block and a trapped green guy to reach the door.

Make sure your first movement is to the right so the highest green guy doesn't destroy the platform below the door.

Get the green block. You will need to maneuver the green guys so that you can use one of them to transmove out of the treadmill that you will get stuck in. Then, use the block to open the left shutter and free the green guy. You will end in a position similar to this screenshot.

From the start, ►�-��-��-�►►�-�W►►►►A�-��-��-�DD�-�►ASDDWS►►�-�.

Now use the block and the 3 green guys to get the key. The first move is tricky as you have to shoot the block from above while the treadmill is moving you to the left. Next, trap the three green guys around the lower right treadmill as in this screenshot.

From the last screenshot, press (�-�S). The block should move straight up. Now press ►►AA►►SAA►►(A►). If you miss the timing on the last shot, you can maneuver the block back to the original position and try again. Get the key.

Swap the two shutters by putting a green guy in each (one at a time) when it is open. Trap a green guy in the top treadmill, and you can use the staircase to exit. The final arrangement is shown in this screenshot.

From the key, press �-�SW�-��-��-��-�D�-�D�-�A�-�A�-�DDDD�-��-��-��-�AAA►SDDD�-�.

Run all the way to the right, press A►►►A�-��-�SDD�-��-�SSDD�-�►A►►►A�-��-�SDD�-��-�S�-��-��-��-� DDD�-��-��-��-��-�(�-�S)AA.

Stage 58:

After you transmove a block through the window, you will need a way to get back on top of the closed gray shutter block.

Build a stair so that you can stand in the gray switch.

From the beginning, press D►►AW►►►S�-�A►►S►W�-�.

When you move the block into the switch, it will swap the cycle of the gray shutter because your character is in the shutter. Make sure you raise the block on the right, then move the upper block below the glass block as shown in this screenshot.

From the position in the previous spoiler, press S►S�-�(W�-�)�-�.

Move the lower block on to the ladder, and you can use the right block to climb back up onto the gray shutter.

From the last screenshot, press (S�-�)►►W�-��-�A▲.

Stage 59:

The basic problem is recognizing which shutter block you need to swap cycles. You do this by closing the shutter with a block or stick man standing in it. Once you swap the open-close cycle, you can use the long green block as a step, transmove the green guy onto the shutter blocks, and you are home free.

First, get the key by moving your green guy into the space between the two glass blocks and moving the long green block to the left of the lower ladder, as in this screenshot.

From the beginning, run left until the green guy is under the ladder and you are one block to the left. Press ►▲►S�-�►D. Stand on top of the long green block, press S, and get the key.

Switch the open-close cycle of the left purple shutter. This screenshot shows a starting position for the maneuver.

From the last screenshot, press �-��-�S�-��-��-�D(W�-�). If you time it correctly, the last shot will put the left block of the long green block in the purple switch, and you will be standing in the left purple shutter holding it open.

Put the green guy back in the hole between the two glass blocks, and put the platform to the right of the lower ladder. You can then get up on top of the shutter platform as in this screenshot.

This is exactly the same as getting the key, except you place the long green block to the right of the ladder instead of to the left.

Move the green guy onto the shutter platform, then move to the right and get the key.

From the last screenshot, press A and quickly step to the right.

Stage 60:

It's extremely important to be systematic on this level. You will need to develop a building strategy, then repeat parts of it in cycles as you slowly advance the bricks up the walls. There's no quick solution. My solution takes about 10-12 minutes, and that's if I don't get confused and accidentally undo part of my work.

My solution looks somewhat like a zipper. Position the blocks on the left and right walls of the shaft in a staggered manner, then advance a block up the center of the shaft until you can stand on the top of the highest block and raise it by one square. A good portion of the structure beneath then needs to be rebuilt.

The recursion portion is just like Towers of Hanoi. To solve the problem for 8 levels, you first have to solve it for once for 7 levels and once for 6 levels, which means that you have to solve it for once for 6 levels, twice for 5 levels, and once for 4 levels, which means ... etc.

Here are three screenshots (1, 2, 3) of my solution at various points. You can see the alternating structure. This level was originally very interesting, but it has become a bit tedious and writing a step-by-step walkthrough is more than I am interested in right now. I could probably post a video screen capture if someone wants it.

55 Comments

Easy, easy, easy.
Till level 11.
It's probably really easy too, but then I've had a hard day.

Reply

Levels 1-10: easy. 11 and onward: not so much.

Reply
Islander March 7, 2011 12:02 PM

DeeBee - I assume you were able to get the key? After that,

move the horizontal bar somewhere to the right where you can get on it and nothing else is above it, then shoot down. Then move to the left where the vertical space is between the stairs and the door, and shoot at the vertical bar. Now move the horizontal bar so that you can step on to the rest of the stairs. I hope that made sense!

Anyone have ideas on 12??

Reply

Yah Islander

I can't remember the exact sequence of steps but you have to get the green blocks to fit into the spaces on the ground, they are not there for no reason

Now level 18 is another question, it's hurting my brain, there is rhyme and reason but I CANT FIGURE IT OUT!!

Reply

for #12 :

Shoot the right gear, collect the key, shoot the left gear. I think. If I remember correctly.

Any hints on #18?

Reply
Anonymous March 7, 2011 1:13 PM

Right, so far 7 and 11 aren't possible.

Well, at least you can skip the broken levels and move on, and there are fewer of them than most games of this type.

What? You say you've solved 7 and 11? THEN WHERE'S THE FREAKIN' ANSWER, SMART GUY? 'CAUSE i SURE AS HECK DON'T SEE ANY WAY!

Somebody (presumably the developer, 'cause there's no way for anyone else to ever figure this crazy stuff out), please post a walkthrough already. This is ridiculous.

Reply
Islander March 7, 2011 1:28 PM

Thanks, Bleh.

Eh, yeah, I did figure that those blocks aren't there randomly, I didn't just start playing games today...I was hoping for more of "how to get the blocks there" but thanks anyway.

Reply
citrustang March 7, 2011 1:31 PM

Stuck on 18. I might need to come back to it with fresh eyes.

Reply
Patrick March 7, 2011 2:13 PM

I have cleared 1-25 and I am not the developer. Some of those levels are harder than others, but none are impossible. I must admit, though, I have not the foggiest idea what to do on 26.

Reply

@JIGuest:

Level 7:

Shoot left at the purple fan. Grab the key.

Shoot up at the blue fan.

Level 11:

Bring the horizontal bar over to the right (just left of the vertical bar). Then stand on it and shoot down

Stand just left of the grey staircase, and shoot the vertical bar to plug the hole.

Bring the horizontal bar back down, then bring it right under the key. Grab the key, and bring the horizontal bar to the base of the stairway

Reply

Anybody figure out #22? I can get the key, but I have no clue how to get to the door.

Reply

Ah, the power of posting!

To get to the door in level 22:

You need to get a block to the square diagonally above and to the left of the white outline. Then get a block in the white outline and on the ground directly below the first block

Reply

For 26:

Rembember - you might be faster than your laser beam!

Solution 26:

Stand close to the hole. Shoot left, start running right. The green block is beamed to the place you are at the moment of the switch, not at the moment of the shot!

Reply
(_*G*_) March 7, 2011 2:45 PM

here's for lvl 26

Space bar changes the speed, if you put it to the slowest, you can shoot while running over the hole. The block will appear where you are when the bullet hits it, hopefully, in the hole

Reply
nerdypants March 7, 2011 4:15 PM

I really liked the original Transmover, and I'm glad this sequel so far seems to be just as good as its predecessor.

That said, good lord in heaven how do you do number 18?! I am pretty sure this is impossible.

Reply
tchakkazulu March 7, 2011 4:22 PM

For level 18:

I'll call the four boxes 1,2,3,4 respectively. You can move them u(p) and d(own).
3u, 2d, recognise mirrored starting position.
3u, 4u, 2u, 3d, 2u, 4u, 1u, 3u, 2d, 4u, 3d, 1u, 2u, 1d, 2u, 3u, 1u, 2d, 3u, 2u, 1d, get key.
4u, 4d, 3d, recognise starting position.
2u, 1u, 3u, 2d, 3u, 1u, 4u, 2u, 3d, 1u, 2d, 4u, 3u, 4d, 3u, 2u, 4u, 3d, 2u, 3u, 4d, exit.

Reply
nerdypants March 7, 2011 4:30 PM

Thank you SO MUCH, tchakkazulu. I was totally stuck.

Reply
Arainach March 7, 2011 5:40 PM

That's a sharp learning curve. I'm stuck on 13. Interesting concept, however.

Reply
Coldfrog March 7, 2011 6:15 PM

Oh maaaaaaaaaan... At first I was like, this is OK. I breezed through the first 10 levels, and some of the stuff was kind of clever, but nothing really mind-breaking And then I hit level 11, and that's when I knew, this guy's an evil genius. This game is one of those games that makes you think it's something else, and once you figure out what's going on, it switches on that lightbulb that only the best puzzle games are able to activate. I particularly love level 18. It's a fiendish take on:

The Towers of Hanoi Puzzle

which I thought was a really clever way of re-looking at that classic but over-used puzzle. Yet somehow it was kept fresh for me, and it made me see how clever this game can be. I haven't finished this game yet, but the cleverness of the puzzles combined with the very smooth play makes me rate this one a 5!

Reply
Username March 7, 2011 6:50 PM

22 is killing me, I know the solution is just barely out of reach, must keep trying....or maybe this post will make it possible.

Reply
nerdypants March 7, 2011 6:55 PM

I'm stuck on 23 now...

Username, I wish I could help you with 22, but I cannot for the life of me remember how I got that key. If you need help getting to the door, keith's comment helped me out.

Reply
Tobberian March 8, 2011 6:18 AM

Level 12:

Travel the handrail to below 2nd (of 3) block, shoot Right, go to left side in pit, shoot up, right and drop down above key, 1 step left, shoot right, go to handrail above green blocks, shoot down, go to exit.

Reply
Anonymous March 8, 2011 11:48 AM

Yeah, I'm going to need more help than "It's the Towers of Hanoi" for L 18. Frankly, I don't see the comparison.

The Towers of Hanoi appears to be solvable, for a given value of "solution". L18 seems to provide approximately 2 possible moves, neither of which provide any progress toward a solution whatsoever...

Reply

@Coldfrog - Yes, I totally thought of Towers of Hanoi, too. Not that it made it any easier :)

General tip for #18:

Worry about getting the highest (4th) step in place, then don't be afraid do destruct your stairway a bit before putting the 3rd step in place

Any tips for #39?

Reply

@keith: Tips for #39.

Keep the bar flat - no need to rotate it. Also, ignore the one-use blocks on the right. The only things you need to shoot on this level are the green blocks on either end of the bar.

To get the key:

Position the bar so that a green block is directly above the key, then stand below and shoot up. You'll fall through the key.

To get out:

Get a green block in the box to activate the stairs. Run up the stairs and swing along the hangbar until you're over the box.

Shoot the green block, then move right along the hangbar before the ray hits. After switching, the green block should no longer be above the activation box.

Shoot the green block. You'll now be hanging on the hangbar. Go to the end and run along the platform to the door.

Reply
Anonymous March 9, 2011 3:34 PM

Sorry, 18 still not doable even remotely. I'm not sure what tchakkazulu's instructions are meant to be, but they are not a means to move those boxes. 3 moves in and you are trapped, and I don't see how else to interpret them, condensed as they are.

You can't build stairs (that you can actually use, instead of being trapped beneath them) without the ability to move the boxes left & right. Period. WTF.

This one especially should not be so hard. After all, you only have a handful of choices per move (# of boxes you can reach x up or down). Yet even systematically trying moves from the starting position leaves you in an untenable, stuck position within 3 moves no matter what you choose...

AAAAAARRRRRRRGGGGGGGHHHHHH! Somebody please point out what is really missing?

Reply

Wow. I won't say this is impossible, but starting on level 18 I started to see more and more levels of brow-furrowing difficulty.

Reply
Anonymous March 10, 2011 11:31 AM

Mother of Fred, that's insane.

Even with DETAILED instructions, I can't complete 18 more than 1 try in 3. I follow the instructions exactly, and about halfway through there's an impossible move (i.e., "move box X up" 1 when it is 3 units above you with no way to get on top of it). How on Earth can anyone possibly see how to work that out without exact instructions? It seems beyond HUMAN.

Reply
Anonymous March 10, 2011 11:39 AM

Can't get to the door in 21, no combination works. Somebody show me the cheat, 'cause that one's not possible, either.

Reply
Anonymous March 10, 2011 11:41 AM

Aaargh, no, I meant 23, not 21. 21's OK. 23 is some kind of vicious tease pretending to be a solvable level when in fact it cannot be completed. As far as I can see. Despite dozens of tries. And systematically working out the position of the little green guys. Maybe button-mashing is how you're supposed to get these impossible ones...

Reply

OK, There's some trick to level 51, but I am not seeing it...

Reply
nerdypants March 10, 2011 9:43 PM

Level 23:

The first thing to realize is that the little green guys act just like the green blocks: they teleport you when you shoot them. That had me stuck for a long time.

How to beat the level:

Move the white guy right once. Then move him all the way down that little ladder, all the way left, then all the way up again. This should have brought one of the green guys into your reach. Shoot right to change places with him.

Move the white guy down then all the way right, grabbing the key. Now move him all the way down to the floor. Move left until you and the other green guy are under that little ledge, touching each other. Now go right until the white guy is standing at the bottom of the middle ladder, and the green guy just to your left on the first ladder.

Move up until you both hit that platform, then shoot left so you switch places with the green guy. Now move all the way left until you hit the wall. Go right again so that both you and the green guy are in that hole, shoot left to switch places with him, and then go right to get to the door.

Reply

Trick to Level 51:

Move everyone to the right as far as you can go, to give yourself room.

Climb on top of left clone. Shoot down. Run left. The right clone won't move until the left clone lands. By that time you will have a gap between you and the left clone. W_GG

Shoot the left clone, then the right clone. G_GW

Climb over right clone. Left clone will move with you. G__WG

Shoot the right clone. G__GW

Repeat to build up the gap.

Hope that makes sense! Do you have any advice for levels 48 & 49?

Reply
Anonymous March 11, 2011 9:44 AM

Nerdypants, I appreciate the attempt at help, but your last paragraph is exactly where the level is unbeatable -- and your instructions do not work, I'm afraid.

First, if you go "all the way to the wall", you end up trapped on the platform at the far left, after you both fall from the climbing rod. You can switch places with the green guy and leave, but there's no way to get into the hole with the door, at all.

Second, even if it worked the way you described, there's no way to simply "go right so you're both in the hole". The level does not look like that. The hole is elevated and you cannot get into it any way that I can see, green guy or no green guy.

What's going on here? Why can't anyone tell me how this is actually done? Could it be that it CANNOT be done? Cruel.

Reply
Anonymous March 11, 2011 9:57 AM

Nerdypants: Oh, I completely mis-interpreted your instructions at just about every opportunity I had to do so. Sorry.

I misunderstood "go right" (thinking order needed to be maintained) and "in the hole", thinking you meant the cave with the door, not the floor between the platforms.

Ugh. I don't think I like this game very much.

Reply
Anonymous March 11, 2011 11:02 AM

I'm giving up on this one until some of you apparently highly-psychic individuals out there read the minds of the developers and post walkthroughs or at least hints for some of these patently impossible levels.

This is ridiculous. Who enjoys games that are this hard? This is not fun.

Reply

I haven't gotten 48 yet, but here are some tips for 49:

It's pretty easy to build a little 2-step stairway going up from the top of the ladder. You'll be doing that a few times.

If you build a 2-step stairway, you can raise the second block up to be one just level below the doorway platform.

Build a stairway in the other direction now. You can make use of the block you just raised on the other side.

You'll need to do this twice. You'll have to destruct the 2 steps multiple times to get the other two blocks in place.

Ultimately, you'll need a flat platform two block wide, from which you can shoot across and bring over the final block and use it to get up to the door.

Reply
Delinquent March 11, 2011 12:34 PM

Anyone have an idea about 36?

Reply

Level 36

Hint:

Once you get up to the top area, you're only going to be able to shoot through the red portal in one direction... you'd better make sure you can shoot something when you do.

Solution:

Build a stairway up to the red portal, so the portal is the third step. This needs to be on the right side of the portal, ascending to the left.

Make sure one of the remaining blocks on the right side is one space above the ground, so you can shoot it from the bottom step of your stairway.

Stand on the bottom step. Shoot to the right and immediately run up till you are standing on the red portal. This should move that block to be setting an top of the red portal.

Stand on the second step and shoot through the portal (to the left). You will grab the key as you fall. Then shoot up through the portal to return to the bottom area.

Reply
nerdypants March 11, 2011 10:34 PM

Does anyone have any tips on 37? And by "tips" I mean "a step-by-step guide of how to do it".

Reply

#37 is simple, yet tediously long.

1) Shoot the right-hand blue wheel.

2) Shoot the (now) left-hand brown wheel.

3) Repeat steps 1&2 ad nauseum, "walking" the platform down and across the screen until it's in a position to allow you to access the key.

4) Repeat steps 1&2 ad nauseum, "walking" the platform down and across the screen until it's in a position to allow you to access the door.

Reply
nerdypants March 12, 2011 1:19 AM

Phil B.:

Thank you so much. I'm nowhere near as patient as you'd need to be to figure that out on your own.

Reply

I can't believe the scorn some posters are heaping on this game. Sure, the difficulty ramps up, but they aren't insoluble. The biggest difficulty is not understanding what each new element does - for example, I wasn't sure about the green men or the fans. But trying things out solved that.

It seems it's alright to require the player have reflexes in the 0.25 second range move after move after move, but make people think and you're asking for trouble. Sigh.

Reply
Delinquent March 15, 2011 4:40 AM

43 is killing me! It feels like i'm so close! I managed to get one of the blocks up-right downstairs, i get the key, but can't make the stairs to the exit! Any ideas how to do that?

Reply
nerdypants March 16, 2011 7:28 PM

Level 43

Hint

You want to move the block that's green on the bottom-left out of that enclosure on the top-right and use it to build some stairs.

Walkthrough

Stand in front of the door. Shoot right then immediately move left, so that the side-side green block doesn't end up blocking the door. When you're in that enclosure, shoot the topmost block so it lands on the floor, then stand on top of the other block in there and shoot it up one space. Now stand on top of the block on the floor in there and shoot left, so you change places with the side-side block again. Stand on the door again and shoot right, moving right so the block lands just to the right of the block the door's on. Now shoot left again to get yourself out of the enclosure.

You should now be standing on the platform under the door, with a bottom-left-green block just to the right of the block the door's on.

Stand at the top of the ladder. Shoot left then move right, so that one of the light brown blocks lands to the top-right of the ladder, the beginnings of a stair. Now stand on that first step and shoot left, moving right, so that a green block lands to the top-right of the other block, completing a set of stairs to the key.

Move the green block from the stairs to the floor, then up the ladder and onto the platform again. Make sure both green blocks are up in the air so you have a clear shot, then move the other light brown block to the spot right above the ladder, to the left of your bottom stair.

Use the green blocks to make stairs so you can get one of those blocks just to the left of that gray block floating in the air. Now put the remaining green block on top of the gray block that's to the top-right of the ladder. Stand to the left of that green block and shoot it, then climb the stairs so you're standing underneath that bottom-left-green block.Now shoot that, and you're out.

Reply
Delinquent March 18, 2011 6:54 AM

Thanks Nerdypants!

And solution for #48:

First build the stairs to the exit, remove the red block to the right, and use the up-right green block for the stairs!

Move to the top of the blocks in the middle and remove the URR (Up-Right red) block then move the ULG (Up-Left Green) block up one level and move the DLG (at your right) underneath it.

Remove the next URR block. And bring the next ULG up one level. Remove the bottom ULR block and you have access to the left part of the screen.

So now you have 5 blocks forming a plus sign above you (2 red and 3 green blocks). You have to remove the red blocks of the plus so you should make a tow block staircase. move the bottom ULG to the third position from the wall and shoot the first ULR block, then move the same ULG up one level. Get the DLG from the middle of the plus sign to the ground and finish the staircase to shoot the last ULR.

Start building the staircase to the key from the top. Get the key and get out!

Reply

If (err, make that when) you get stumped on levels 41-60, skip ahead to levels 61 and onwards. These levels are much easier than 41-60. (It seems they were contributed by users.)

PS: I have a rough draft of a walkthrough for levels 21-40, and plan to post it after checking and proof-reading it.

Reply
--james-- April 2, 2011 9:02 PM

Walkthrough Stages 41-60

Most of the stages have three tiers of spoilers. The first is the general strategy that I used for the level with some tips for the part I found to be the trickiest. The second tier has more of a step-by-step description. Because some of the stages are difficult to describe in words, there is a third tier of spoilers that spell out exactly how to do it.

As you can probably figure out, ▲�-�▼►WASD stand for the keys. If some keystrokes are in parentheses like (D►), it means those keys have to be timed to move a block into the right spot. This really isn't a reflexes game. None of the timing shots are difficult, but some of the puzzles had me stumped for a long time. Kudos to the Polygon Gmen for for an awesome degree of difficulty on these stages.

Stage 41:

Raise the gear platform up to bridge the left gap, and use the Z- and L-shaped blocks to build a stair on the right.

Move the gear platform into place by flipping it over, then raise it up two levels using the two single-use blocks. You can use the Z-shaped block to get on top the platform for the second shot, as in this screenshot .

From the beginning, �-�DD►►S►►►►D�-��-��-��-��-�S�-��-�W.

Build a staircase out of the two blocks. The only trick is to move far enough away from the blocks that you have room to transmove them. There is plenty of space here (not so in later levels).

From the last screen shot, DD ► (all the way to the corner) A►►►►A►►►►►►D�-��-�S ►D�-��-��-��-�S�-��-�D►►►►►A►D, climb the platform, shoot the top gear, and out.

Stage 42:

Build a staircase on the right side first, then move back to the peak and build a staircase on the left side.

Here is a screenshot of the right staircase.

From the beginning, ►►►►S�-�W►A►A.

Transmove back to the peak, and build a staircase on the left side. This move is almost a mirror image of the right.

From the key, A�-��-��-��-��-�S►W�-�D�-�D�-��-��-�D�-��-�D�-��-�D�-��-�D.

Stage 43:

In order to get the key and make it back to the top, you need to have a block from the upper section that you can shoot from below to get back up.

The block with the green on the left bottom is the only block that will work. Put it to the right of the block below the door as in this screenshot.

From the beginning, ►(D�-�)►►W�-�S►A►(D►)A.

Use one of the single-use blocks and one of the green blocks to get the key, then move the green block back onto the lower platform as in this screenshot.

From the last screenshot, ►►►►(A►)►►►►(A►)►►►►►SW�-��-�D�-��-�▲ (S�-�)▲▲�-�S.

Place the other single-use block next to the first one, and put one of the green blocks to the left of the single block in the center of the screen as in this screenshot.

From the last screenshot, ►A►►►W�-�D�-�S�-��-�W►A►S�-�S.

Now move the green block out onto the edge of the platform, stand next to it and swap places so you can climb the stairs and stand under the half-green block.

From the last screenshot, ►►►►A►D�-��-��-�W.

Stage 43:

In order to get the key and make it back to the top, you need to have a block from the upper section that you can shoot from below to get back up.

The block with the green on the left bottom is the only block that will work. Put it to the right of the block below the door as in this screenshot.

From the beginning, ►(D�-�)►►W�-�S►A►(D►)A.

Use one of the single-use blocks and one of the green blocks to get the key, then move the green block back onto the lower platform as in this screenshot.

From the last screenshot, ►►►►(A►)►►►►(A►)►►►►►SW�-��-�D�-��-�▲ (S�-�)▲▲�-�S.

Place the other single-use block next to the first one, and put one of the green blocks to the left of the single block in the center of the screen as in this screenshot.

From the last screenshot, ►A►►►W�-�D�-�S�-��-�W►A►►S�-�S.

Now move the green block out onto the edge of the platform, stand next to it and swap places so you can climb the stairs and stand under the half-green block.

From the last screenshot, ►►►►A►►►D�-��-��-�W.

Stage 44:

You can place a block on top of a treadmill by shooting, then moving onto the treadmill just before the bolt hits a block. Also, when you are climbing onto a block, a treadmill that is directly above your head won't affect you. Some shots are much easier if you use the slow speed.

Go to the left side and move the left green block onto the middle left treadmill. Move one of the right blocks onto the lower treadmill. Make sure to raise the other green block one level so you can shoot it later. If you time it correctly, you will end up as in this screenshot.

Transmove the left block under the left middle treadmill, then jump on top of the block and move it up. This is tricky with the treadmill, but if you just hold down ► and tap S repeatedly, it will work. Now hit space to slow the game down to speed 1. Hit D, and just before the bolt hits, tap ►. Stand on top of the right green block and move it up one level.

Move the block on the right side to the top left treadmill to get the key.

Stand on top of the lower block, so you are in the center of the treadmill triangle. Slow the game down again, press D, quickly tap �-�, then wait until the bolt is about to hit the block and tap �-� a second time. If you miss the timing, you can move the other blocks around to get back to the shooting position and try again, or just reset the stage and and start over.

After getting the key, move the middle block in the staircase over to the left, then you can move it onto the middle right treadmill, and finally move the upper left block onto the upper right treadmill.

Start from the position shown in this screenshot. Press S►W�-��-��-�D�-��-��-��-�S►►►►►. Stand in the center of the treadmill triangle, slow the game down, press A, then tap ► just before the bolt hits the block. If you time it correctly, you will end up with a block on the middle right treadmill. The final shot is exactly the same. If you miss the timing, you can use the lowest block to reset the upper block into position, put the lower block back, then redo the shot. No need to reset the stage from this point.

Stage 45:

Spend some time figuring out exactly how the green guys move, you will need to use them as steps. The most difficult part is raising the T-shaped block with a green guy already on it since they can't climb up onto anything.

Move the T-shaped block into position on the left side, then move one of the green guys onto the block, and climb on top of him. Make sure the other green guy is still standing right next to you. Once you raise the block, you won't be able to adjust the spacing between you and the lower green guy. This screenshot shows the position.

Run left to move the green guy out of the way, then back to the right so that your are standing under the key with a clear shot to the right. Press D, then run back to the right so that both green guys are standing next to you. Run left until you are standing next to the right side of the block. Press DD�-��-��-��-�►► to stand on top of the left green guy. This creates the correct amount of space between the two green guys. Now press SD�-��-��-��-�A►.

Swap so the green guy is standing on top of you, then move the block up one level. You can now use the lower green guy to climb onto the platform, and the upper green guy makes a step so you can get the key.

Press SS then move around to the left until you are standing just to the right of the block. Now press D and move left to climb the platform and get the key.

Getting to the door is an exact mirror image of getting the key.

Stage 46:

There is a way to set up the blocks so that you can move a block into the switch while simultaneously escaping from the right side of the screen. The trick is timing your fall correctly.

Use one block to extend the platform above the treadmills one block to the right. I found that placing the other block at the base of the left ladder makes the timing easiest. That way, you can shoot the upper portal and immediately step the right and fall into the switch just as the bolt hits the block. This screenshot shows the position right before the shot. You can make the shot with the block at any position on the lowest level, but you will have to adjust the timing of when you step off the platform.

From the beginning, move left to stand on top of the left block. Raise the block 3 levels by pressing S then climbing the ladder to get back on top of the block. Then press ►W�-��-�D to move the other block to the base of the ladder. Climb to the right block of the 3-block platform. Hit space to slow the game down, press A, then tap ► just before the bolt hits the block. Climb back up into the position shown in the screenshot.

Set the game on slow again. Tap A, then immediately tap ►. If the green block ends up above or below the switch, your timing is not quite correct and you will have to restart the stage. Now climb the ladder and you're out.

Stage 47:

You have to raise the long block up to the top level in order to bridge the gap to the key. The trick for me was realizing that the block doesn't have to go through the gaps between the left and right platforms, it can wrap around the left and right sides of the screen and work as a bridge that way too.

Move the block up through the center gap on the lower platforms, then move it to wrap around the screen so that the left edge of the block is on the base of the right ladder. This way, you can cross to the right side and be able to raise the platform and fall back onto the right platform. If you fall on the floor or the left platform, you won't be able to use the right ladder and continue moving up. The position is shown in this screenshot.

From the beginning, A�-��-�A►S, climb the left ladder and raise the block two more times. Climb the ladder a third time, cross the platform, and stand at the base of the right ladder. Press D, tap ▲, and climb the left ladder again. Press W and you should be in the position shown in the screenshot.

Move the block to the top of the right ladder and shift it one square right so that you can still use the ladder. Then move the block to the top of the left ladder. Shift it left one block at a time until it bridges the gap to the door platform and allows you to still use the upper left ladder. The door and the key will allow you to move a block onto them. The final position is shown in this screenshot.

From the last screen shot, cross the bridge and climb to the top of the right ladder. Press S, and quickly tap ►. Now climb the ladder,cross the bridge, climb to the top of the upper left ladder, and press S. Now you will have to shift the block four squares to the left. To shift the block, just tap W or S and quickly tap �-�. When you have shifted it four times, it should be in the position shown in the screenshot.

Climb to the top of the ladder, cross to the left. While you are standing above the upper right platform, press S.

Stage 48:

You have to build three staircases - first on the right, then on the far left, and finally on the left to get the key. All of the red blocks have to go.

Right staircase. Destroy all three red blocks on the right, then use the three blocks with the green half at the top-right to build a staircase to the right as in this screenshot.

From the beginning, ►A►A►AA►►(A►)►►►►(A►). If you are having trouble with the second timed shot, press space to slow the game down, press A, then tap ► just before the bolt hits the block.

Far left staircase. First destroy the center column of red blocks. This will also shift the center column of half-green blocks to the left. Now destroy the remaining column of red blocks and build a staircase at the far left out of the blocks with the green at the top left as shown in this screenshot.

From the last screenshot, �-��-�SDSDSD �-��-��-��-��-�SD�-��-�D�-��-��-��-��-�D(D�-�)�-��-��-��-��-�(D�-�).

Left staircase. The procedure is the mirror of the right staircase now that there is enough room.

From the last screenshot, D�-��-��-�(D�-�)�-��-��-�(D�-�)

Stage 49:

Build a platform that is two blocks wide and two levels below the top of the door's platform. It needs to stick out one block past the edge of the base platform with the ladder.

First, raise the two blocks on one side so that the outer block is one level above the top of the ladder. On the opposite side, raise the outer block one level higher.

See screenshot. I used the left side, but this whole stage can be mirrored either way.

Now move the higher block over to the other side and make sure it is one space farther out than the block below it. Finish the platform by raising the inner block one level. Raise a block on the opposite side to the highest level you can reach (one below the door platform).

See screenshot.

Form the final stair, stand on the outer edge of the platform and move the opposite block over. Now you can stand next to the block, swap positions, and you're out.

See screenshot.

stage 50:

Think about leaving yourself a path for yourself to get back as you head for the key.

In each compartment, move one of the half green blocks down from the ceiling so that they can be hit from the other side of the portal when you need to get back. Remember that one side of each portal will be blocked by the single-use block on the way back.

Here is a screenshot at the key showing the position I used.

Stage 51:

The trick to creating space between you and the green guys is to stand on top of a green guy, shoot down and immediately step away. Repeat as necessary.

You need to move one green guy so that he is five spaces to the left of you, as shown in this screenshot.

Start by moving all the way to the right, the press AA►(S�-�)DD�-�. The timing of the shot is not to press �-� immediately after pressing S. You have to wait a moment for your character to reappear. This will place the left green guy two spaces to the left, and you will be standing on top of the right green guy. If you moved more than 1 space to the left after the timed shot, you will have to step back to the right.

Now press (S�-�)D�-�(S�-�)D, move left and you will be at the position shown in the screenshot.

Swap places with the green guy so that you don't touch the white crumbling blocks, and move out to the end of the platform. Shoot at the green guy and grab the key just before you transmove.

If you having trouble with the timing, you can increase the space between you and the green guy by repeating the (S�-�)D�-� step a few more times. This leaves more time for you to grab the key while the bolt is in the air.

Stage 52:

Recognize that the gear platforms on the right are a one-way road - you can go up, but you can't come back down. Also, the large block looks like a staircase, but it won't work as a stair. Use it to transmove back to the top.

When you leave the left side, make sure to keep the large block in an accessible position as shown in this screenshot.

From the beginning, press �-��-��-�(W►). Cross the handrail to the right, climb to the top of the ladder, and press (S►)�-�W�-��-��-�W. Cross the two handrails.

From the top of the center ladder, press ▼▼A▲▲A. You should be at the position in the screenshot.

Now climb the right side. The platforms are one-way, so you will need to use the one-shot block to exit. If you close the "gate" behind yourself, there will be room to use the large block to get back up on the handrail.

From the last screenshot, press ►▼SD. Move right, stand in the space under the gear you just shot, and press (W►).

From the position in the previous spoiler, press D►►►► A�-��-�D►►A�-��-�D►►�-��-�▲▲►►►▼�-��-��-��-�A�-�W. Cross the handrail to the left and you are out.

Stage 53:

This level is all about figuring out the quirky ways that the green guys can be trapped. For some reason, if there is a green guy on a ladder, another green guy will not cross the ladder under the first one. To me, this was not entirely predictable. The non-intuitive aspects of the green and brown stick guys is probably my only complaint about this otherwise awesome game.

Trap both green guys. One green guy needs to be on top of the ladder and the other to the left of the bottom portal. Stand to the right of the upper portal, shoot left, and quickly run to stand on top of the mirror block. It should look like this screenshot. He's trapped, you can move around and he won't fall. I know, it didn't really make sense to me either.

From the beginning, ►►►A►►►A►S�-��-�(D�-�)�-��-��-��-�►W�-�D�-�S. Now run to the far left side of the screen, then run back under the mirror block, this stretches out the distance between you and the green guy.

From the previous position under the mirror block, press W, then move back to the left and stand on top of the lower portal block. Press (A►)►►►►�-�▲(A�-��-�) and you should be in the position in the screenshot.

Climb up to the upper ladder, swap places with the upper green guy. You don't need him anymore, so move to the left, then back to the right to get him out of your firing line to the block. Move it up, then use the green guy that is still on the platform to swap places and get back up. It should look like this screenshot.

From the last screenshot, climb to the upper ladder, you will have one green guy directly above you and another directly to the left, W►�-�►S►�-�W�-�▲�-�D►A.

Stage 54:

You can trade blocks through the glass wall. Get the more useful blocks on the right, and leave the more limited blocks on the left.

Build a staircase to get the key, but keep the two all green blocks on the bottom as in this screenshot. The only tricks to this are moving the up-down block over two squares and moving the left-right block up two squares.

To move the up-down block to the left, first move it up two squares, then stand under it, press W and quickly tap �-�. To move the left-right block up, press A or D and quickly hop up on top of another block. This is easier if you stand farther away from the left-right block so the bolt is in the air for longer.

From the beginning, �-��-��-��-�S�-��-��-�DW�-�S(W�-�)�-�S►D�-��-�S (W�-�)�-�S►D�-��-�S►S►D�-��-��-��-�S D►►►A►►►► (A►)►►►D�-��-��-�(D�-�)�-�A�-�W►A►S►D

After getting the key, trade the three half green blocks from the right side over to the left side while bringing the two solid green blocks over to the right. You will have to maneuver the blocks around to avoid trapping yourself. One possible sequence is screenshot 1, screenshot 2, screenshot 3.

From the key to first screenshot, press

First to second screenshot, press

Second to third screenshot, press

Use the four blocks to build a stair. The general technique is to set the blocks up so they alternate sides as the go up the shaft. Then you can raise a block through the center and move up the right side onto the top of the staircase. It is better explained in screenshot 1, screenshot 2, and screenshot 3. If you master this building technique now, level 60 will be much easier.

First to second screenshot, press W�-�W►►►►►W �-�D�-�S►►W�-�D�-��-�S►►A►S�-�A►►►►S►W�-��-�S.

Second to third screenshot, press ►W►SAA►►►►►►S�-��-�D�-�S►D.

Second screenshot to end, press �-�S�-�W►S►A►►W.

Stage 55:

Remember that you can swap blocks through the glass. When you are inside the center area, there will be two blocks outside, when you are outside the center area, there will always be one block outside with you. Getting a straight shot and having enough space to transmove blocks is the tricky part.

Ultimately, you want the large square block outside with you, but the long 3-block takes up a lot of space and makes it very difficult to maneuver. I put it outside temporarily while I re-arranged the center section. Here are some screenshots to show the intermediate configurations that I came up with. Other ways will probably work too. Screenshot 1, screenshot 2, screenshot 3.

Beginning to first screen shot, press �-��-��-�DW�-�SDD�-��-�(S►)(W►).

First to second screen shot. Press ►W►A�-��-�DSS►A►►AWWDS �-��-�D�-�D�-�(W►)►S�-�A►►SA►SA►►A►►.

Second to third screenshot, (S►)►W�-��-��-�D�-�(W►)S�-�D, move right to the switches and shoot the block.

Stage 56:

Use a block to hold open the shutter blocks - this swaps their open/close sequence. You can open a hole in the walls of purple and peach shutters, then open the gray shutters and get the key.

First, move a block on top of one of the purple shutters, you will need to use the other two blocks to make a stair from the ladder to the center.

Open the purple shutters, and move the block into one of the open purple shutters.

Now close the purple shutters and open the peach ones. Move the block into one of the peach shutters.

Finally, close the peach shutters, move the block out, and open the gray shutters. The path to the key is open.

Stage 57:

This level is mostly about figuring out how to maneuver the green guys in a tight space and how the treadmills can trap them or you. The strategy I used was to first get the green block down where I can use it, then to use the block and a trapped green guy to get the key. Then I switched both of the shutters by putting green guys in them while moving a block in and out of the switch. finally, I used the green block and a trapped green guy to reach the door.

Make sure your first movement is to the right so the highest green guy doesn't destroy the platform below the door.

Get the green block. You will need to maneuver the green guys so that you can use one of them to transmove out of the treadmill that you will get stuck in. Then, use the block to open the left shutter and free the green guy. You will end in a position similar to this screenshot.

From the start, ►�-��-��-�►►�-�W►►►►A�-��-��-�DD�-�►ASDDWS►►�-�.

Now use the block and the 3 green guys to get the key. The first move is tricky as you have to shoot the block from above while the treadmill is moving you to the left. Next, trap the three green guys around the lower right treadmill as in this screenshot.

From the last screenshot, press (�-�S). The block should move straight up. Now press ►►AA►►SAA►►(A►). If you miss the timing on the last shot, you can maneuver the block back to the original position and try again. Get the key.

Swap the two shutters by putting a green guy in each (one at a time) when it is open. Trap a green guy in the top treadmill, and you can use the staircase to exit. The final arrangement is shown in this screenshot.

From the key, press �-�SW�-��-��-��-�D�-�D�-�A�-�A�-�DDDD�-��-��-��-�AAA►SDDD�-�.

Run all the way to the right, press A►►►A�-��-�SDD�-��-�SSDD�-�►A►►►A�-��-�SDD�-��-�S�-��-��-��-� DDD�-��-��-��-��-�(�-�S)AA.

Stage 58:

After you transmove a block through the window, you will need a way to get back on top of the closed gray shutter block.

Build a stair so that you can stand in the gray switch.

From the beginning, press D►►AW►►►S�-�A►►S►W�-�.

When you move the block into the switch, it will swap the cycle of the gray shutter because your character is in the shutter. Make sure you raise the block on the right, then move the upper block below the glass block as shown in this screenshot.

From the position in the previous spoiler, press S►S�-�(W�-�)�-�.

Move the lower block on to the ladder, and you can use the right block to climb back up onto the gray shutter.

From the last screenshot, press (S�-�)►►W�-��-�A▲.

Stage 59:

The basic problem is recognizing which shutter block you need to swap cycles. You do this by closing the shutter with a block or stick man standing in it. Once you swap the open-close cycle, you can use the long green block as a step, transmove the green guy onto the shutter blocks, and you are home free.

First, get the key by moving your green guy into the space between the two glass blocks and moving the long green block to the left of the lower ladder, as in this screenshot.

From the beginning, run left until the green guy is under the ladder and you are one block to the left. Press ►▲►S�-�►D. Stand on top of the long green block, press S, and get the key.

Switch the open-close cycle of the left purple shutter. This screenshot shows a starting position for the maneuver.

From the last screenshot, press �-��-�S�-��-��-�D(W�-�). If you time it correctly, the last shot will put the left block of the long green block in the purple switch, and you will be standing in the left purple shutter holding it open.

Put the green guy back in the hole between the two glass blocks, and put the platform to the right of the lower ladder. You can then get up on top of the shutter platform as in this screenshot.

This is exactly the same as getting the key, except you place the long green block to the right of the ladder instead of to the left.

Move the green guy onto the shutter platform, then move to the right and get the key.

From the last screenshot, press A and quickly step to the right.

Stage 60:

It's extremely important to be systematic on this level. You will need to develop a building strategy, then repeat parts of it in cycles as you slowly advance the bricks up the walls. There's no quick solution. My solution takes about 10-12 minutes, and that's if I don't get confused and accidentally undo part of my work.

My solution looks somewhat like a zipper. Position the blocks on the left and right walls of the shaft in a staggered manner, then advance a block up the center of the shaft until you can stand on the top of the highest block and raise it by one square. A good portion of the structure beneath then needs to be rebuilt.

The recursion portion is just like Towers of Hanoi. To solve the problem for 8 levels, you first have to solve it for once for 7 levels and once for 6 levels, which means that you have to solve it for once for 6 levels, twice for 5 levels, and once for 4 levels, which means ... etc.

Here are three screenshots (1, 2, 3) of my solution at various points. You can see the alternating structure. This level was originally very interesting, but it has become a bit tedious and writing a step-by-step walkthrough is more than I am interested in right now. I could probably post a video screen capture if someone wants it.

Reply
--james-- April 2, 2011 9:09 PM

Seems like conversation here has dwindled a bit. I hope this game gets the attention it deserves, because this is truly an awesome game for puzzle lovers. Lots of games have interesting ideas but the levels are boring and easy, or the difficulty relies on pixel perfect reflexes.

Great job designing all the levels for this game!

Reply

Much later ...

After spending far too much time tweaking the presentation, I've got draft walkthroughs for levels 21-58 and a few others. You can view them here (or download this zip).

Please let me know about any mistakes, better solutions, etc, preferably by commenting here. (Alternatively, you can work out my email from the domain name in those URLs.)

Once I'm more confident in my solutions, I'll post V1.00. Maybe I'll have solved levels 59 and 60 by then ...

Reply
Delinquent April 4, 2011 5:35 AM

I have solved levels 61-100. I'll write a walkthrough and post it!

Reply
Yeah, Someone's here April 9, 2011 7:40 PM

So.... This is basically Lode Runner without the trademark moves of drilling ground pieces. Kinda boring if you ask me.

Reply

I don't know if anyone's reading in here anymore, but the solutions given to level 18 talk about how to maneuver the 4 boxes. It seems things have changed between then and now, because there are only 3 boxes!

Reply

^ Scroll Up | Homepage >

Leave a comment [top of page]

Please consider creating a Casual Gameplay account if you're a regular visitor here, as it will allow us to create an even better experience for you. Sign-up here!
  • PLEASE UNDERSTAND SITE POLICIES BEFORE POSTING COMMENTS
  • You may use limited HTML tags for style:
    (a href, b, br/, strong, em, ul, ol, li, code, spoiler)
    HTML tags begin with a less-than sign: < and end with a greater-than sign: >. Always. No exceptions.
  • To post spoilers, please use spoiler tags: <spoiler> example </spoiler>
    If you need help understanding spoiler tags, read the spoiler help.
  • Please Preview your comment before posting, especially when using spoilers!
  • No link dropping, no domains as names; do not spam, and do not advertise! (rel="nofollow" in use)
chrpa Jayisgames needs your help to continue providing quality content. Click for details Welcome to the Roundup 66 - Retro with four games! After you find the ten monkeys in the chapter, look in the inventory. You will find a...  ...
chrpa Jayisgames needs your help to continue providing quality content. Click for details Welcome to the Roundup 65 with three games! As mentioned in the previous roundups, only odd-numbered episodes are featured since even-numbered are for Robin Vencel's patrons (the...  ...
chrpa Jayisgames needs your help to continue providing quality content. Click for details Hi! Weekday Escape and Weekday Puzzle are here! First we have two new cans from tomoLaSiDo and then two small rooms from isotronic. That's all for this...  ...
6,365 Views
0 Comments
chrpa Jayisgames needs your help to continue providing quality content. Click for details Welcome to Mobile Monday! We have another beautiful game from Nicolet and it's a winter game as it should be. Tasuku Yahiro have released another of their...  ...

HELP Jayisgames.com

Recent Comments


Display 5 more comments
Limit to the last 5 comments

Game of the week


Dark Romance: Vampire Origins Collector's Edition

Your Favorite Games edit

add
Save links to your favorite games here. Use the Favorites editor.

Monthly Archives