![]()
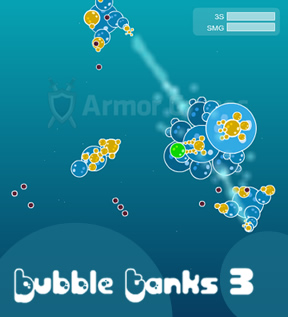
 Hero Interactive has just released another installment of their famous Bubble Tanks series with Bubble Tanks 3, an arcade arena shooter in which you pilot a tank made of bubbles and fight other similarly composed tanks for their bubbles on your way to total bubble domination.
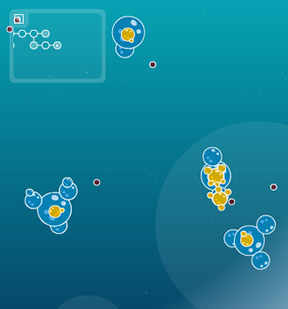
There are two sides to the gameplay: semi-close quarters arena-shooter-style combat and exploration. Your immediate playing field is just a single bubble, but that bubble is connected to four other bubbles and those bubbles are connected to other bubbles and the whole network of bubbles stretches out into infinity. Use the [WASD] keys to move, and when your bubble tank moves outside of the current bubble you slide over to the next bubble. A mini-map will help you keep track of where you've been. The farther you get away from your starting bubble the more difficult and plentiful your enemies will be. Press the left mouse button to fire and take down your enemies.
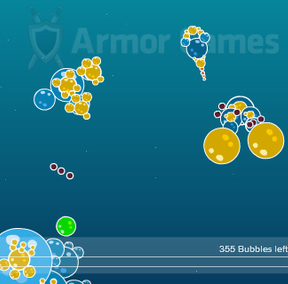
You'll start as a pretty weak bubble tank, but when you destroy an enemy they'll leave some of their bubbles behind. You can pick these bubbles up on your own or, alternately, clear all the enemies from the bubble to have all their remains magnetically drawn to you. Once you have enough bubbles, your tank levels up. And this is where Bubble Tanks 3 differs from previous installments.
 In the past, player input to tank upgrades was limited. You were given some pre-determined options to choose from. And while those are still available, now you have the option of really getting your hands soapy and doing all of the tank building yourself. Using the system Hero Interactive was testing in Bubble Tanks Arenas, you can build your ideal tank. Every upgrade level unlocks new weapons and passive upgrades and you're given a bigger pool of gun points to spend. Each primary weapon, secondary weapon or passive upgrade costs gun points to equip, so make sure you have enough available before you start tearing your tank apart. If you're not happy with your build, you can edit your tank in any bubble that's been cleared out.
Bubble Tanks 3 also features some cool sharing systems. From the menu screen you can enter the enemy editor. This lets you create an enemy and upload it. After it's uploaded, there's a chance you might see your creation and the creations of other players in-game. This keeps the gameplay fresh not only in terms of enemy variety, but also because it's doubtful you'll play the same game twice. Also, you will find some premium content being offered in the form of monthly parts packs that will offer more parts for your tanks and for enemy tanks. Don't let this discourage you, though, because it seems Hero Interactive will be offering a lot of free updates as well.
Analysis: Bubble Tanks 3 takes the series to new heights by combining the best of the Bubble Tanks core gameplay with the customizing features from Bubble Tanks Arenas. The result is a solid sequel to a very popular Flash game series that's a lot of fun to play. Although there's no story you need to be familiar with, the combat is simple and easy to grasp and the new customizing features are easy to learn as well.
 The best part of Bubble Tanks 3 is also the biggest new feature: the tank editing. It's so much fun to play around with the different weapons and the construction of your tank. There's a nice variety of weapons to try out and all the different combinations will surely keep you entertained. And yet the game doles out gun points rather stingily, which will cause you to stop, think and plan carefully what to add and how to customize. All this is compelling because it makes you want to get to the next upgrade as quickly as possible.
The sharing systems are also well integrated. The tank sharing mechanics give the game an incredible amount of variety. It never stops being cool coming up against a new user-designed enemy in-game. It also means that playing through the campaign doesn't fall into a routine. Which is good, because while the campaign is fun, it doesn't offer a whole lot. The new tanks help keep things fresh and replay value higher than for previous installments.
Bubble Tanks 3 is a great new addition to a great series. The campaign is solid, the user-created tanks keep things fresh and the enemy editor is a ton of fun and will keep this version of the game living for a long time to come.
Thanks to CJ and Code1949 for sending this one in!
Play the entire Bubble Tanks series...


Walkthrough Guide
(Please allow page to fully load for spoiler tags to be functional.)
Getting used to the editing system just takes a little bit of time. I suppose that it would have been more helpful to have had a help screen to get an idea on how to build.
Here's a thorough manual on whats what when building a tank. (It took hours to make.)
"The numbers Mason... what do they mean?!" and first impressions:
In the center, you will have your tank. This is your building area. The arrow shows what direction it will be facing. Just above the tank, you have your building limitations. At the top of your screen, you have your options. Symmetric mode, load a tank, save and exit, and stats. To the lower right, you have your parts list. When placing a part, part options appear at the bottom.
We arn't even in the same social class:
Class is basically your tank's weight class. The higher your tank class, the heavier and larger it generally will be. Certain parts (particuarlly the stronger weapons and specials) can only be used with higher classes. (Likewise, certain parts can only be used with lower classes.) Add more blocks (or increase the size of ones already attached), and you can increase it.
Complexity is best when it isn't:
Complexity is basically the game's way keeping your tank within the size/weight/sane person's limit. (It basically means you can't add too many parts.) Certain parts, like moving parts, powerful weapons, and magically delicious secondaries add more complexity then other items. (That means really really nice items are more limited then other items.)
Your gun points do not mean your skill:
GP or Gun Points, is the games way of stopping you from making your tank a gun nut. Obviously, the name refers to weapons. However secondaries and passives are a part of it too. Each and every weapon has a price, and this price is paid for in gun points, but just for clarity, it's like a short term trade. Attach a gun, and you lose some gun points. Remove the gun, and you get them back. Each class and level has a maximum amount of gun points that it may use for items. An increase in the class is an increase in gun points. As an added bonus, parts are arranged in gun point price.
Getting to know yourself:
Your stats sheet, up in the top right, will constantly prove to be the best way of knowing what abilies you and your tank have. It tells you what your speed is, and what weapons you have attached to your bubbly mass. (Sadly, it doesn't tell you where they are or what they look like.) It is this knowledge of knowing your weapons, that will benefit you, and reduce future stress. Course the undo last button does that pretty well too (it's actually good at causing it too if you're not careful). If you need a quick heads up on what your tank has, feel free to check here!
So many parts, so little time!
In the bottom right, you have your items. You have your body, which is basically bubbles for shape, form, building on, and increasing your tank class, your primaries, which you should know are your main weapons, activated when you click (shame on you for not knowing), your secondaries, which are activated with the spacebar (shame shame), and your passives. When you hover your mouse over any item, a convinient pop-up appears, showing you it's price for being added (class, complexity, and gun points, if it needs any), and at the same time, giving a clear description on what it does in blue (which includes damage just above) and what it is for (often with a hilarious little quote). As an added bonus (in the off chance that you were not listening), all non-body items are organized by gun point price. The number to the left of the weapon, is the gun point price.
Keeping it the same both ways (or not):
(Important)
You may have seen a little button at the top that says Symmetric Mode. If you have, then you must have been listening. (Have a cookie.) Symmetric mode, basically means that when you place something on one side, it appears on the other side (the center being the white line running through your tank. It is important to know this, because when you place an item with it on, you technically are paying for two items, instead of one. To tell when symmetric mode is on (without the trial and error of trying to place a block), simply check to see if the small box has a white X running through it. If the box indeed has an X, then it is on, if it doesn't, it is off. Also, for everytime you enter edit mode, it will typically be on.
"Can we just get started?"
(Disclaimer: I am not responsible for any sudden bouts of rage, loss of hair, reduced eyesight, computer lag, or trollings caused by the viewing of the wall of text about to appear. It's your fault...)
Ok, now that you are slightly familiar with the ins and outs on what your screen does (it shows you all of these interesting little words that you happen to be reading... silly), let's get building. (Or use this helpful table of contents to find help on a particular item.)
1. Placing blocks 2. Bringing up extra item options 3. What your extra item options are and where 4. The resize tool
1. To place a block, simply select an item to the bottom right, to make it appear in the gray box above. When it does, click and drag the object onto your building field. (I ain't going to tell you how you aught to place it, that would be impossing of me.)
2. When you are certain that you have placed it in a place you want, you may click the item again, to bring up some extra options. (You can tell that you have selected it, when it is inside a blue box.)
3. After selecting it, make your way to the bottom of the screen to see your options (you have 3). Your options at the bottom are: resize, rotation, and undo (although undo is always present).
4. To increase the size, drag the bar to the right, to decrease it, drag it to the left. This is helpful for making your tank the class you want it to be.
5. When rotating the item, dragging the bar to the right turns the item clockwise (even normal bubbles can be turned by the sight of their specs spinning). Dragging it to the left turns it counter-clockwise.
6. Undo last, means you can undo your last change done to the map. Take caution, for you can not re-undo or redo anything you may have undid. (It means, if you undo something, and you didn't want to undo it, you would have to set it back to the way you wanted it yourself.)
7. Some other options can be found near the top of the screen above your restrictions. You have: delete selected, bring to front, send to back, and align to center.
8. Delete selected is pretty apparent (it deletes any item you have selected), although one does not always have to click this. You can also delete itema by dragging it back to the gray box from whence it came.
9. Bring to front, means that any item you choose, can be brought to the front, so that it overlaps any other item. (It's like taking a sheet of paper from a stack, and putting it on the top.)
10. Send to back is doing the opposite, it sends an item to the bottom so that other items appear on top. (It is these two options, that allow you to create slightly realistic and 3-D items.)
11. Align to center means it takes the item you have chosen, and puts it on the white line.
"Save me, I'm too cool to die!", "Changing mags (aka re-loading)", and "Exit, stage right":
Now that you have finished building your tank, it's time to save it. To save it, simply go to the top of your screen, and click save and exit. (You have to do this if you want to use it.) You simply give it a name, and become its author, using whatever name you pick. ("What? Nobody told me I have to put up with it!") If you want to make a tank using a premade (or custom made/locally made) tank, head to the load a tank option. It tells you what the buttons do there, meaning I won't have to! If you've decided "Screw all of this tank building, and this unneccessarilly long explanation on the meaning of bubble tank life!", simply click the exit button. (You can not use what you have made though, because you didn't save it, therefor it doesn't exist.)
I hoped that this will help you create incredible tanks in the near/late future! Keep building, and stay good.
Posted by: Learner |
August 25, 2011 5:44 PM