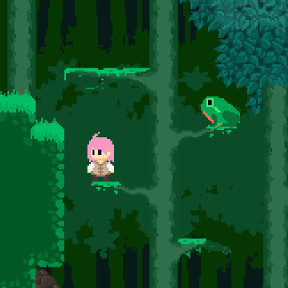
JayisGames.com is now available ad-free!
Jay is Games recommends Cheat Happens with 8,000+ games and 35,000+ trainers!

Phoenotopia


  • Currently 4.7/5
  • 1
  • 2
  • 3
  • 4
  • 5
Rating: 4.7/5 (305 votes)
Comments (196) | Views (157,976)

Phoenotopia

Johnny123Quang H. Tran's Phoenotopia is the kind of game that comes along once in a very long while. While occasionally simple, it's still a better adventure game than most of the full price offerings you can pick up at your local retailer, in terms of art, story, gameplay and heart. The game is set on a post-Earth colony, an idyllic world full of gorgeous retro landscapes straight out of the best of the SNES generation. You play as Gale, a pink-haired everywoman whose simple life as a farm girl is interrupted one day when strange alien ships come and abduct everyone in your village, leaving just you and a couple dozen children left to fend for yourselves. It's your duty to head out into the world and find out what happened to your friends and family, braving myriad enemies and interacting with dozens of colorful characters along the way. In case you have noticed, the writing is far above standard for a game like this. The abduction establishes some real emotional stakes early on, and the wealth of characters you discover in your travels manage to be funny and interesting without being verbose. What's more, the brief nods at a deeper backstory regarding the fate of the old Earth offer some tantalizing hints at a vast and rich universe. Seriously, can you say franchise?

PhoenotopiaYou have several melee weapons you can equip and use with [X] as well as ranged or throwable weapons you can use with [C], including slingshots, sticks, and bombs. You jump with [Z], open your menu with [S], and use the [arrows] for basic movement. By the way, all of these keys can be remapped at any time. Controls are tight and responsive, useful when fighting multiple enemies or leaping across a tricky platform puzzle. Combat feels easy at first, but that won't last. Some of the boss battles are downright devious, and it's easy to work up a sweat when you're being swamped by multiple enemies.

If this game were plopped into the indie section on Steam it would sell faster than chocolate-dipped bacon. This is about as good as free RPG games get. Yes, it's a bit of a "light" RPG, what with its lack of dice rolls and its real-time two-button combat. Or maybe it's a deep action platform game, offering hours of creative challenges and beautiful scenery to explore as you slay your way through an emotionally resonant story. If you're into stat-cruncher RPG's with turn-based combat you might find your kicks elsewhere. But for those of us who remember the heyday of Metroidvania and Zelda games, this is a shot in the arm. Browser games really have no business being this compelling, and all for only the cost of an internet connection. So in short, we've got a free browser game with a rich story, gorgeous visuals, a soundtrack worthy of a Studio Ghibli film, and tight gameplay that's always evolving over hours of increasing challenges. Bravo, Phoenotopia. Bravo.

Play Phoenotopia

Walkthrough Guide


(Please allow page to fully load for spoiler tags to be functional.)

Phoenotopia Walkthrough - Tips, Secrets, and Enemies © Jayisgames 2014

  • Heart Rubies and Moon Stones

  • Here, you will find the locations of all the Heart Rubies and Moon Stones by zone, along with the items you need to reach them.

    Duri Forest

    Heart Ruby 1 – Given as a reward for defeating the giant toad boss.
    Heart Ruby 2 (Rocket Boots) – Inside the ruins, get to the room with the Duri Fruits. Climb on top of the tree and fly over to the left side and enter the door. Once inside, proceed to the left and enter the new room. Go to the bottom, and throw a javelin to activate the switch on the right. Climb up the platforms to find three boxes in the left corner, one of which contains the Heart Ruby.
    Moonstone 1 - Once you open the first locked gate, you will come across a room with some bridges that need to be activated through a pressure plate. On the bottom of the room, you’ll find a small cube. Grab it, head up and drop it from there. Head back to the left end of the room and enter the last door. You will see a platform that needs to be triggered through another pressure plate. Aim for the Duri fruits with you Slingshot and then hit the one that dropped off. This will trigger the pressure plate and you can now climb up and collect the Moonstone.

    Panselo

    Heart Ruby 1 – In the Dojo, once you’ve bought the Rolling technique scroll, climb up the ladder, head left and roll under the wall to grab the ruby.
    Heart Ruby 2 (Rocket Boots) – Climb up the gate on the west side and start flying from building to building, going east. Once you’ve reached Gale’s house, jump over to the window and enter. The Heart Ruby is inside.
    Moon Stone 1 - Go to the second town area and enter the first house you encounter (the one with the Pukis in front). Once inside, proceed to the right until, you will see a bunch of small boxes next to a ladder. Grab a box and put it on the pressure plate on the right. This will open a door above you. Now you can climb up the ladder and grab that Moonstone.
    Moon Stone 2 (Slingshot, Javelin) – Go inside Ruth’s house and use the slingshot to hit the switch above you. Throw a javelin at the right wall and use it to climb up the ladder where you’ll find another switch. Go down to the new area and head left to grab the moonstone.
    Moon Stone 4 (Javelin, Rocket Boots) – Climb up the last house on the west. Jump up and throw a javelin at the wall. Next, use the rocket boots to fly over to the javelin and enter the door above. You’ll find the Moon Stone in one of the boxes at the bottom.
    Moon Stone 3 (Rolling Scroll) – Go to the big wall to the west and simply roll under it. The Moon Stone is inside one of the boxes.

    Sunflower Road

    Heart ruby 1 (35 Rai) – Inside the Inn, on the bottom level is a boy who’s complaining about the size of the bees around. Buy a wooden sword from Atai and give it to him. You’ll get the Heart Ruby as a reward.
    Moon Stone 1 – On the east side of the road, climb up the leaves until you come across a honeycomb. The moon stone is right below it.
    Moon Sone 2 – West side of the road. You’ll find the Moon Stone on a leaf, left of the honeycomb. You’ll have to climb up above it and jump down or fly with the Rocket Boots to get it.

    Atai Bridge

    Heart ruby 1 (Bombs) – At the very end of the west side of the bridge, you’ll notice a Heart Ruby below. Blow up the large stones that block the path to it. Next, go right until you see two big metal boxes. Push the bottom one to the left and then use it to push the one on top of it. Once you get the box to the small gap, roll under and get that heart ruby.
    Moon Stone 1 (Bombs) – On the east side of the bridge, blow up the pile of stones above the ledge with the egg and the Moon Stone will appear.
    Moon Stone 2 – Middle section of the bridge. To the west of the Moon Stone, there should be a large metal box and a smaller one. Push the big one to the right and use the slingshot to get the small box out and stack it on top of the larger box. Position the metal box so that you can roll through and snatch the moon stone.

    Atai City

    Heart Ruby 1 – Enter the hidden door next to the lady that trades silk. Use your Slingshot to hit the switch. Next form a staircase from the big pile of boxes. The Heart Ruby is on top.
    Heart Ruby 2 – When you’ve freed Lisa and she is back to Panselo, go inside the mayor’s house and enter the kitchen from the top door. Talk to the first guard left on the left twice. He’ll give you a love letter to give Lisa. Give the letter to your sister and she’ll send her response letter through you. Once you give that to the guard, he’ll give you his Heart Ruby.
    Moon Stone 1 – Buy a comic book from Daea and give it to the bandit in Atai’s jail. He will give you the Moon Stone.
    Moon Stone 2 – Go inside the shop and break the box in the bottom left corner. Head down, break the grate and roll under. You’ll find the Moon Stone in the next room.
    Moon Stone 3 (Javelin) – Go west until you come across two large boxes with an anchor mark on them. Throw a javelin at the lowest possible point on the platform, climb up and brake them. Inside one is the Moon Stone.
    Moon Stone 4 (Javelin, Rocket Boots, Stamina booster) – Go to the mayor’s palace and use a javelin to climb on top. Jump on the pillar on the left. Use a stamina booster (i.e. honey) and fly all the way to the next pillar, with a jar on it. The Moon Stone is inside the jar.
    Moon Stone 5 – Inside the mayor’s palace head to the kitchen and enter the other door in there. Destroy the box on the left to get the Moon Stone.
    Moon Stone 6 (Javelin, Floatation Donut) – Jump inside the well and head west. Enter each door to activate the switches. Go inside the last door and head right until you see some pots. Use the Javelin to make a ledge and destroy the pots. The moon stone is in one of them.

    Bandit’s Lair

    Heart Ruby 1 – You will notice this one behind the second sequence puzzle. To get the right numbers, head right and jumping from platform to platform get to the door leading to the save room. Enter the door on the right side of the statue. Use the lamp to get through the darkness. The numbers for the sequence puzzle are written on the wall, on the west side of the room.
    Heart Ruby 2 – Prize for defeating the boss.
    Heart Ruby 3 (Javelin) – On right side of the Heart Ruby puzzle you’ll find a door in a hole. Enter it and head down until you find some water. Swim to the left and go inside the building. Press the pressure switch and use the javelin to hit the switches. Once that’s done climb to the top and break the stuff on the right to find a heart ruby.
    Moon Stone 1 – In the main entrance of the lair, with the trapped bridges, trigger a trap to fall down. The Moon Stone is behind a couple of rocks on the right wall. Throw a well-timed bomb to destroy them and simply jump there to get the stone.

    Misty Gorge

    Heart Ruby 1 – From the east side, get to the third section. Swim until you find a leaf that you can hop on and then head left to get to another flower. Climb on top of it and jump on the platforms, heading west.
    Moon Stone 1 – Get to the first area west of the Inn. Swim until you get to the green fish that spits and then go left until you find a leaf to hop on. Head west, through the platforms until you find the moon stone on a leaf.
    Moon Stone 2 (Javelin, Rocket Boots) – From the third area, on the east side (Moon Stone 1), climb on top and head west. Keep going until you reach a cave entrance, on top of the area, hidden behind a couple of rocks. Once inside, simply proceed forward until you find a Moon Stone.

    Crossroads

    Heart Ruby 1 (100 rai) – Go inside the Inn and rent a room for 100 bucks. When you wake up go outside the balcony and jump over to the one on the right. Inside you’ll find some boxes on the bottom. The Heart Ruby is inside.
    Moon Stone 1 – Go inside the Inn and talk to the green haired girl. Then head west to until you reach a tree house. Kill all the slimes there. Go to the Great Walls and find Gill, the guy on top of the right tower. Talk to him twice and head back to the tree house in the Crossroads. Talk to Floe, the girl with the orange hair to get the Moon Stone.

    Daea

    Heart Ruby 1 – Head over to the bar and enter the bottom left door. Once inside, throw a bomb at the box that is blocking your way down. Now, push second box on the bottom to the right. Go back up, push the other box on it and roll under the wall to collect your Heart Ruby.
    Heart Ruby 2 – Inside the jail, head to jail sector A. Once you reach the cell room, go in the cell on the bottom level. Blow up the wall on the left. You’ll find some boxes in there. Stack them up next to the door you came in from and drop a bomb on top to blow up the low above. Use the spear to get to second floor and blow up the right wall. You will find a Heart Ruby inside.
    Moon Stone 1 – Go to the bar and head up, right above the door you came out from. Destroy the grate and roll under the wall. You will find yourself in a small maze of tunnels. Roll to the left. Now drop a bomb and hit it until it reaches the grates on the ceiling of the room below you. Get in there and collect your Moon Stone from the chest.
    Moon Stone 2 (Rocket Boots) – Inside the Inn, head up until you get to the balcony with the kid next to you. Go to the right side and fly west until you reach another balcony with a door. Inside you’ll find a small maze. The moon stone is in the middle, blow.
    Moon Stone 3 – Go to the main entrance of the sewers. Once you see water for the first time, swim to the right until you reach a few pots. The moon stone is in one of them.
    Moon Stone 4 – Go to the save room inside the Jail. Bomb the right wall and destroy the boxes you find there. One of them contains the moon stone.
    Moon Stone 5 – Enter the room that’s right in front of the locked door leading to Jail sector B. You’ll see a puzzle with four timed switches. Climb up between the top two and throw a bomb down the one on the left below you. Quickly switch to the Slingshot and shoot the top left one. Turn around, hit the right one with you weapon and run down to the last one. A door will open with tree chests inside. One of them contains a Moon Stone.
    Moon Stone 6 – Go inside the sewers. Enter the first door below and make your way through the platforms above the water. Instead of continuing down through the water, throw a javelin on the wall and climb up. You will come across a few pots, one of which contains a Moon Stone.

    Prince Tower

    Heart Ruby 1 – Reward for defeating the boss.
    Heart Ruby 2 (Rocket boots) – Go to the top of the tower, above the room where you found the prince. Climb up the rightmost pillar and fly west until you reach a balcony. Enter the room, activate the switch and climb up the ladder and enter the door. After you’ve salved the puzzle, go to the next room and start climbing up until you reach the heart ruby.
    Moon Stone 1 – From the ground floor, proceed up until you encounter the first balconies on the sides. One of them has a moon stone that can be reached using a javelin.
    Moon stone 2 (Rocket Boots) – Go to the balcony in the save room. Jump off the balcony and use the Rocket boots to fly to the area below. Inside you’ll find a few pots, one of which contains a Moon Stone.

    Fran’s Lab

    Heart Ruby – Fran will give you the heart ruby once you’ve gathered 15 moon stones.

    Great Walls

    Heart Ruby 1 – Enter the room next to the save statue. Go to the right end and roll under. In the next room you’ll find a heart ruby.
    Moon Stone 1 – Go to the Duri forest and get a Mikan Fruit. Next head to Atai and give it to the potion lady. She will make a new potion – Mikan Fragrance. Go to the Great Walls, enter the room next to the save statue and give the potion to the first soldier you see (the one who complains about the bugs). He will give you the moon stone.

    Dread Lands

    Heart Ruby 1 – Starting from the south side, In the third area, go down and kill everything you can until you see the red robot. Run left and let him stay there. Destroy the wooden boxes and roll under the gap. Climb the ladder and use a javelin to get to the upper level. Kill the robot behind the box (preferably with bombs so he wouldn’t get a chance to hit). Now push the metal box to the right and roll to the other side of the wall. DO NOT push the wooden box yet! Go right and wait for the mines to activate. After they’ve blown, push the box down the gap and then down the other one. You will find a couple of robots there, so be very careful not to destroy the box while fighting them. After you’re done dealing with them, push the box to the right wall and use a javelin to get to the grate above. Roll under it, and you will find yourself in a rather large room. Blow up the floor in the middle go downstairs and run for the door. Don’t try to kill the robots. Inside you will find a Heart Ruby.
    Heart Ruby 2 (The Artifact) – When you find Moon Stone 1 look for another crack on the floor. Drop down and use the artifact to open the gate. Once inside salve the puzzle and head to the next room. You will find the heart ruby inside a box above.
    Moon Stone 1 – Reach the save room behind the “O” door. Once inside, fly through the gap into another room. Look for some cracks on the floor and bomb it. Drop down, head right and find the moon stone inside one of the pots.
    Moon Stone 2 – Go to the west end of the area, east of the save room. Climb up the ladder and push the box to the right edge. Climb on it and throw a javelin on the right wall. Proceed right, on top of the buildings, until you find a pot that contains a Moon Stone.
    Moon Stone 3 - Go back the same way, until you reach the same metal box (Moon Stone 2). Go right, through the gap in the wall and grab a mine. Jump down to the edge of the wall below you and throw a bomb or a javelin to destroy the cracked wall. Enter the room above. Downstairs, on the left end of the room, you will find a chest full of money and on the right end, an O key. Now go to the section west of the one with the save room. Go downstairs and unlock the door on the right. The moon stone is in one of the pots.

    Mul Cavern

    Heart Ruby – From the save room, deep inside the caverns, head left and destroy the leftmost hive in there. You will find the heart ruby at the end of the tunnel, behind the hive.
    Moon Stone 1 – Above the save statue, at the south entrance, Throw a javelin at the right wall. Fly over to the right until you reach the end of the area. A few chests lie there, one of which contains a Moon Stone.
    Moon Stone 2 – From the save room inside the caverns, head to the section to your west and then up. On your way you’ll notice a few wooden boxes above you. Climb up to the area above and then drop down from the gap leading to the boxes. The moon stone is in one on the left.
    Moon Stone 3 – From the save room in the caverns go a section up and then right. There should be a ledge above you. Use the javelin and the rocket boots to get to the mushroom with the moon stone on it.

    Forgotten Forest

    Moon Stone 1 - In the area, where the save statue is, right after you open the second door, throw a javelin on the wall to the right and climb up. You’ll find the moon stone inside a pot.
    Moon Stone 2 – Right before reaching the second statue, you’ll notice a tree branch. Climb up and fly left until you see another one. Now throw a Javelin to the wall on the right and climb up to find you moon stone.
    Moon Stone 3 – In the area with the inner save statue, head inside the house on the right side of the statue. Destroy the boxes and activate the switch. A ladder leading down will appear. In the rightmost room you’ll find another door leading to a robot like the one in Thomas’ lab. After you’ve dealt with it and collected the key head right, open the door and get the Moon Stone from the pots inside.
    Moon Stone 4 – Go two areas east of the inner save statue. You’ll find the moon stone behind a couple of rocks. Destroy the rocks with a Ki Spear or a bomb to snatch the stone.
    Moon Stone 5 – From the north entrance, head a section left. You’ll encounter some arches. Sse the tree branches and the rocket boots to climb on top of the tall arches and head left and fly to find some more branches. Fly further left to find one more. Jump and fly back until you reach the top arches. On the top arches are some pots, one of which has a moon stone.

    Hidden Village

    Heart Ruby – Once you’ve collected 40 moon stones, give them to Fran and he will reward you with a Heart Ruby.
    Moon Stone – Go inside the house, where the Inn and the shop are. On top, you’ll find a blue harpy asking for something shiny. Give her a Gold Bar and she will trade you the moon stone.

    Ancient’s Crater

    Moon Stone 1 (The Artifact) – Once you’ve collected the artifact go to the previous area. You will come across a hole in the ground, blocked by a blue barrier. Use the artifact to activate the blue switch in the ground. The moon stone is in the hole.
    Moon Stone 2 – In the main room within the ancient civilization (the one with the three floors and water in the background), enter the top right door. Once inside, get to the very end of the area and throw a javelin on the wall on the left. Fly over and use the artifact to reveal the hidden flooring. You’ll find the moon stone on the left ledge in one of the crates.

  • Gear

  • The Lucky Belt

    Requires a Mikan Fragment and a Sandwich
    Go to the shop in Adea to buy a sandwich. Don’t eat it, it’s not for you! Next head back to Duri Forest. Go east until you reach a cave entrance blocked by a stone. Blow up the stone and get inside. You will reach an open area at the end of which, there are some orange fruits. Get one of those and head to Atai. Go to the potion lady (the one who gave you the Talkinator) and give her the orange fruit you just got. Go in and out, and buy the orange potion.
    Now head to the Great Walls. Give the sandwich to the guy standing on the right side of the save statue. Next, go through the door on your left and give the Mikan Fragrance to the first guy you encounter. He will give you a Moon Stone.
    Go outside and climb the left tower. Talk to the guy on the right edge. He’ll give you a letter and a new location – Framers Block. Go there and enter the house. Talk to the old guy on the second floor. He will ask you to take care of some noises downstairs. Enter the room in the bottom right corner, destroy all the crates there and kill the frog. Once you’re done go talk to the elder man again. He will give you the Lucky Belt.

    Ancient Armor

    Requires Rocket Boots and The Artifact to find.
    A fairly easy item to acquire. Go to Adar’s House, climb on top of it and fly left until you reach a cave entrance. Once inside, climb up and fly to the rightmost platform. From there, use The Artifact to activate the switch and open the gates below. Once inside, proceed west until you reach a room with golems inside. Head down and enter the rightmost door. The Ancient Armor is inside.

    The Morning Star

    Requires Rocket Boots
    To get this weapon, you will need two Asteroid Rocks. One is given to you by Fran when you acquire 25 Moon Stones. For the other one, you’ll have to visit the Misty Gorge again. From the third area, on the east side, climb on top and head west. Keep going until you reach a cave entrance, on top of the area, hidden behind a couple of rocks. Once inside, simply proceed forward until you find a Moon Stone and the rock itself next to it.
    Now head to the blacksmith in Adea and give the rocks to the apprentice. Go in and out and voila! The Morning Star is available to you for only 200 rai.

    Nebula Armlet

    Requires Bombs and a Floatation Donut
    This item will help you focus your Ki (holding ‘X’ will trigger the charged attack much faster). Go to Atai City and jump inside the well. Head right and go through both rooms to activate the switches inside. Proceed west into the next area. You will come across a hole with lots of stones in it. Destroy all of them and enter the door that pops up. Inside you will have to get rid of all the robots in each area in order to proceed forward. Lure the red ones and hit the switch above so that they will drop down. The armlet is located in a chest, in the rightmost room of the last area.

    Blood Ring

    This item will heal you up to 10 health points whenever you drop below. To get it, all you need is to get to the Hidden Village. The ring is available for sale in the shop for less than 1000 rai.

    Ki Spear Technique

    Go to Panselo and buy a Chocolate Protein Shake from the Dojo. Next, you’ll need a Duri Fruit which you can get either from the Duri Forest or buy for 20 rai in Atai. Now go to Cross Roads and give the Duri Fruit to the girl that has lost her memories. Then go out and back inside the Inn and give her the Chocolate protein shake. Do the same thing, only this time, give her the Green Bracelet from your misc. items. Again, in and out and talk to her one more time. She will thank you and give you the scroll.

  • Potions

    • Chocolate Protein Shake

    • Increases health points by 2. Can be used only 5 times.

    • Mikan Fragment

    • Quest item. Can be given to the boy in Crossroads who complains about the smells and the guard in the Great Walls with the bug bites problem.

    • Power Potion

    • This potion boosts your ground attack, making each normal hit a charged hit. It also boosts your speed and stamina for one minute.
      To get it, you’ll have to acquire a slime jelly from the wisps that run away from you inside the Mul Caverns. Once you acquire one, go to the potion lady in Atai and give it to her. The potion will be available for 300 rai.

    • Bottle of Glowy wisps

    • This potion revives you upon death. It can be bought from the shop in the Hidden Village but you can only carry one at a time.

  • Enemies & tips

    • Slime

    • – If you can see a puddle on the ground or sealing, a slime will pop once you get close. Once they appear, they will stay idle and wonder before charging you. Just get close enough so that they will show up and kill them before they’ve moved.

    • Green Toad

    • – Annoying creatures. Easiest way to deal with them is to stay far behind and wait for them to jump. You have about a second to get close and hit them. If you encounter a toad in the water, either lure it into the ground or run away from it.

    • Caterpillar

    • – Cannot be killed. Hitting them will change their direction. Just move around them as they aren’t hostile.

    • Bat

    • – They will charge at you once you get close enough. Use the Slingshot to kill them but keep in mind that killing one will awaken the others next to it.

    • Bull Bee

    • – Not hostile. They just fly around the sunflowers doing their thing. DO NOT attack them! If you do, they will start chasing you along with all the others on their way.

    • Spider

    • – Like Slimes, Spiders will drop down once you get near them. Just move close enough, until the drop and hit them.

    • Baby sand dragon

    • – Those will pop up from the sand. If you’re close enough, they will start rolling towards you. If not, they will just spit on you (with quite the range). As soon as you see one pop up, go ahead and hit it before it does anything.

    • Red Bandit

    • – Those will simply charge at you. Easiest way to deal with them is to jump over when they’re charging and hit them when they’re idle.

    • Blue Bandit

    • – Throws axes at you. When you’re trying to kill one, use the Slingshot to stun him, in order to reach and hit him.

    • Yellow fish

    • – They just jump in and out of the water. You can either ninja your way through them or kill them with a well-timed hit.

    • Green fish

    • – Hard to kill as they will spit on you once they jump out of the water. To kill them, you’ll have to hit when they’re jumping up, and never, when falling down.

    • Ghost Wisp

    • – Not Hostile. Once you hear them coming, just get to a lower ground until they all pass through.

    • Guard Dog

    • – If you hate frogs, you’re just gonna love those little things. Try to keep them at a distance with a bomb or a spear. Once you hit them, they enter rage mode and start jumping further. Can be dealt with the same way you deal with frogs, but you’ll have to be way faster.

    • Archer Guard

    • – Just like the blue bandits, archer guards will try to keep their distance from you. Try to get them stuck in a corner, using your Slingshot to get near them.

    • Spear Guard

    • – Charges at you with a long ranged attack. Just jump over them and hit them while they’re idle.

    • Kobold

    • – Stay out their shot’s reach. Once they stop shooting, use the javelin to hit them. If you know where they will appear, you can wait for them nearby and hit once they show up to deal more damage.

    • Flying Homing Mine

    • – Those things have a blow up timer. They will chase after you, so either run or hit to keep them away.

    • Blue Toad

    • – A super fast version of the green toad. Nothing, but the Ki Spear Technique will help you here as they are impossible to fight in melee range.

    • Hive

    • – The most ridiculously hard enemies in the game. Usually found in areas with three or four more, they spawn a number of bugs (3 – 5) once you get near or hit them. The bugs can fly, jump, bite, explode and throw acid once they die. If you’re feeling brave and decide to kill them, try to stay on a higher platform and lure them to fly to you. Luckly, they die from one javelin hit, so make it count. You can also throw bombs at the hives to get rid of them and exit the area without killing the bugs. Once you go back inside they’ll be all gone.

    • Turrets

    • – will shoot at sight. Generally, just wait for the shot and go for the kill.

    • Droids

    • – In other words, flying turrets. Use your slingshot to bring them down and destroy them.

    • Arc

    • – A red and a blue bandit in one. Have them charge at you but don’t jump over them until the very last moment, as they can also jump while charging. Once you’ve dodged turn around and hit.

    • Plant Dog

    • – Insanely hard to kill with no casualties. Unlike the dogs in the prison, these take more hits to kill, deal more damage and shoot. Use the Ki Spear technique and never let them get close to you.

    • Harpy

    • – Most important thing to watch out for is the bombs they drop as they deal 13 points of damage. To kill a Harpy wait for it to charge at you and dodge, then quickly turn around and hit it on its way up. Requires 3 hits to kill.

    • Laser Tower

    • – These will destroy anything in range. They turn red when something gets near them. Can only be destroyed with The Artifact, but beware of the energy saws shot afterwards.

    • White Robots

    • - Can hit and spit acid. If there is a barrier between you and the robot, use bombs to kill it. If not, try to get it stuck in a corner and start bashing.

    • Red Robots

    • - Can only be shut down for a while, not killed. Usually, you’ll see a platform around them that leads to a pit. There should be a switch to open the pit.
      If there isn’t such a pit, look for alternative paths or just run for your life.

  • Bosses

  • A general tip is to never use the Ki technique on bosses as it will only cost you valuable time and is not as efficient as just spamming the attack button.

    • Armored Frog King

    • - First of all, you won’t damage it while bashing its head with your Bat. Instead, aim for the stack of Duri Fruits above it. This will make the frog turn around for some reason, so now you can poke it safely from behind for a brief period of time. Repeat three or four time and you’re good to go.
      THINGS THAT YOU SHOULDN’T DO:
      1. Do not try to use the Slingshot while you’re being sucked towards the frog or while it’s shooting Duri Fruits out of its mouth. This will only result in damaging yourself before you even get to shoot. Aim for the fruits only before and right after the frog throws up some Duris at you.
      2. Do not try to focus your Ki for a stronger hit (holding ‘X’). This will only slow you down. Just spam the damn button until the gigantic jerk switches sides.

    • Sand Dragon

    • - There isn’t much to say about this boss. You’re gonna have to drop bombs whenever it comes out of the sand to bite you. Once it has swallowed the bomb, it will come up as soon as the bomb explodes and you’ll be able to deal some damage. Make every hit count as the Sand Dragon will get angrier each time it swallows a bomb.

    • Giant laser shooting robot(Thom’s lab)

    • - Don’t try to dodge the lasers! You will get hit at least twice if you do. Instead just jump over the robot and let it shoot in the other direction.
      Always have your Slingshot ready for action! As soon as mister Terminator shuts down for a while, hit him until he’s on the platform and then hit the timed switch above you. That way you’ll deal about twice as much damage each time.

    • Kobold General

    • - Never stay in front of the boss. You want to always be on his opposite side.
      Always keep a javelin on one of the walls in the bottom. Stay on its edge whenever the boss decides to open fire.
      Generally, the Kobold will always shoots twice before he starts charging his lightning ball. So be sure you’ll be able to reach him easily on his third time.
      If the boss is charging his death ball from the ceiling, you will need to jump and throw a javelin in order to hit him.

    • Eye bot

    • - Once the fight starts, your first priority is to destroy all the spheres hanging in the air.
      Always kill the damned flying turret before you go hitting the boss itself.
      To crack open the boss and damage it, you’re gonna have to get the four eyes – two on the ground and two on the ceiling. Bombs do a good job here, but they can reach the eyes above, so use the Artifact. Always leave the bottom or top left eye for last so you’d have more time to smash its metal skull.

    • 66

    • – After Prince Douchebag has sent one of his killing machines after you, there is nothing to do but run. Run fast, run fancy and keep your fingers ready to hit the 1, 2, 3 and 4 buttons. Use the speed boosters (if you bought any), and always close the doors behind you. Your only chance is to hit the switches from the very first time.

    Phoenotopia: Step-By-Step Walkthrough © Jayisgames 2014

    Here you’ll find a detailed walkthrough for Phoenotopia, along with all secrets and tips on enemies and bosses. Keep in mind though, that the walkthrough contains a lot of spoilers.

    1. General info and tips

      • Most important thing to remember when playing Phoenotopia, is that the game is full of secret places where you’ll find valuable items. Keep your eyes open all the time. Check every corner, climb every ladder, enter each room and destroy every box and pot you come across.

      • Money could be an issue, especially if you’re looking to become a killing machine. Play smart and only use money to resurrect when your last save is far away.

      • Talk to everyone you see. While some of them will give you useful information, others will be in need of something. If you manage to find out what it is and give it to them, you’ll almost always be rewarded.

      • Always carry at least a couple of healing items in your inventory. Stamina and speed boosters (i.e. hoeny) could also come in handy, especially when salving puzzles.

      • Don’t just rush into enemies. Observe their movements and always enter combat with a strategy in mind.

      • The maximum amount of health points you can have is 99. You will need all 23 Heart Rubies and 5 Chocolate Protein Shakes to get there.

      • There is a total of 42 Moon Stones in the game. Unless you’re going for the “Master Moon Stone Hunter” medal, you won’t be needing the last two.

      • You can use the number keys to switch your tools quickly.

    2. Step by step walkthrough


    3. The walkthrough covers the whole game. From the moment you wake up in Panselo, until the very last boss. Moon stones and heart rubies are also included in here, as you progress through the game. However, if you’re looking for their actual locations, check the Heart Rubies and Moon Stones section.

      First thing to do when you wake up is to go left and through the door. You’ll find yourself in a house with two floors. Although the game has a great story, if you aren’t interested in details you can skip talking to everyone inside and head through one of the doors on the upper floor. Go right to the second town area and enter the first house you encounter (the one with the Pukis in front). Once inside, you will see a gray box. Push it to the right, until it reaches the wall and climb up to pick up the Wooden Bat. Equip it and proceed forward. You will see a bunch of small boxes next to a ladder. Grab a box and put it on the plate on the right. This will open a door above you. Now you can climb up the ladder and grab that Moonstone. Moonstones are precious and often well hidden, so keep in that in mind while exploring new areas.
      Now that you are armed with a deadly stick, get out of that house and head left. Talk to clem, the guy standing in the carrot field, to learn the location of the Duri forest. Proceed to the left until you reach the village gate. Climb up the ladder and hit the gate switch (purple sphere thingy). Head out and go to the Duri Forest, where you adventure will begin.

      Duri Forest

      Once here, simply proceed forward until you reach a cut scene. There are a few things to look out for, however. First of all, look all around for any treasures. Second, frogs are jerks! I know what you’re thinking: “Oh, look a frog. I’ll just go ahead and poke it with the might of my Wooden Bat until it drops dead.” Now, like I said, frogs are jerks and they will probably piss you off. The easiest way to deal with them, is to wait for them to jump and then strike. Sadly it takes two hits at this point of the game. As a Ki student you will have to learn to be patient, not just with frogs, but with most creatures you encounter in the game (all jokes aside).
      If you find yourself low on health, hit the fruits on the Duri trees and then smash them. They will either drop a Duri Fruit for you to eat, or get shattered into pieces, which heal you. Last thing to look out for is save statues. Save as often as you possibly can, as reviving costs money which you will really, really need later on.
      Once you’ve found Alex and obtained the slingshot, hit the switch with it and go inside the dungeon. Kill Slimes one by one if you don’t want any trouble. Bats can be dealt with using the Slingshot. Keep in mind that the stone from the Slingshot will bounce 2 times. This will allow you to hit some switches indirectly and push items that you cannot reach.
      Once you obtain the key to the top floor and enter it, you will come across a room with some bridges that need to be activated through a pressure plate. On the bottom of the room, you’ll find a small cube. Grab it, head up and drop it from there. Before you proceed, head back to the left end of the room and enter the last door. You will see a platform that needs to be triggered through another pressure plate. Aim for the Duri fruits with you Slingshot and then hit the one that dropped off. This will trigger the pressure plate and now you can climb up and collect the Moonstone. Once you’re done with that go back to the big room, activate the bridge the same way as before and proceed forward. Go through all the rooms before you head into the one with the boss.

      Boss fight
      Now that you hate frogs (as we all do at this point), a giant armored frog for a boss doesn’t seem too pleasant, does it? Not to worry. This is a fairly easy boss. Here’s how to deal with it in case you’re having trouble:
      First of all, you won’t damage it while bashing its head with your Bat. Instead, aim for the stack of Duri Fruits above it. This will make the frog turn around for some reason, so now you can poke it safely from behind for a brief period of time. Repeat three or four time and you’re good to go.
      THINGS THAT YOU SHOULDN’T DO:
      1. Do not try to use the Slingshot while you’re being sucked towards the frog or while it’s shooting Duri Fruits out of its mouth. This will only result in damaging yourself before you even get to shoot. Aim for the fruits only before and right after the frog throws up some Duris at you.
      2. Do not try to focus your Ki for a stronger hit (holding ‘X’). This will only slow you down. Just spam the damn button until the gigantic jerk switches sides.
      Finally, if you are having that much trouble or the frog is just pissing you off and no one is looking, hit space, go full screen and if your game is moving slower you’ll be able to deal a lot more damage for one turn (but that’s cheating).
      Congratulations! You just killed your first boss and obtained your first Heart Ruby. You can now proceed to the next room and get a hold of the “Shooting Star”. After the “close encounter” with that Spaceship flying above your village, head back to Pansello. You will need to find your little brother there. He’s on top of the very last building on the right. If you haven’t already do some exploring in the buildings on your way there. You will find quite a lot of money stored in chests, boxes and piggybanks.
      Now do as Alex says and head back to your home and talk to him again so he can tell you what to do. After you’ve realized that you aren’t the smart one in the family, go and find him again after you’ve woken up. He will give you the location of the Sunflower Road.
      Before you head off, stop by the Dojo and buy the Scroll of Rolling. It costs only 50 rai while you should have about 100 – 130, so it shouldn’t be a problem. Then head right and climb the ladder to the upper floor. At the left end you will find a small gap. Roll in there and get that Heart Ruby. Now get out and head to the wall at the right end of the village. There is a hidden gap under which you can roll. Inside you’ll find some boxes, one of which contains a Moonstone. You might also want to stop by the shop and buy some food for desperate times.
      Go to Sunflower Road. Whatever you do there, DO NOT attack the bees as they will group up and start chasing you. There is a Moonstone on one of the leaves but getting there can be tricky as the bees keep flying around the sunflowers. Proceed forward through the village and the broken bridge until you reach Atai.

      Atai Bridge

      Once you’ve reached the middle section of the bridge you’ll notice a Moon Stone. To the west of it, there should be a large metal box and a smaller box. Push the box to the right and use a slingshot to get the small box out of the broken bridge and stack it on top of the larger box. Position the metal box so that you can roll through and snatch the moon stone.
      Once you’ve got the Bombs, you want to destroy the stones and free that scientist looking guy. He’s really hard to miss so you shouldn’t have trouble finding him.
      At the very end on the west side of the bridge, you’ll notice a Heart Ruby. Blow up the large stones that block the path to it. Next, go right until you see two big metal boxes. Push the bottom one to the left and then use it to push the one on top of it. Once you get the box to the small gap, roll under and get that heart ruby.

      Atai City

      Once you’re in Atai, you might want to ask around to know what’s going on. There is a bandit in the jail, who won’t say anything about the Bandit’s Lair. If you’ve done your research in the city, you’d know that you’re going to have to visit the local potioner. You’ll find her in the last door to the left above the food shops. You can buy a Talkinator Juice for the imprisoned bandit. Before you get too excited about the 5000 rai bounty that you’re going after, go explores the areas to the left. You will find your weird sister there begging you to help her with some debt. After you’ve talked to her, go and visit her “boss” to the left. While you’re there, you might want to go in the kitchen. Enter the door on the ground floor and destroy all the boxes, one of which contains a moonstone. Now that you’ve talked to the mayor and found out that you’re going to have to give away the whole bounty for someone who hates animals, go back to the city.
      Climb on top of a building and start going left until you reach the top of the prison. You will notice that one of the windows is darker. Jump on it and enter. Find the bandit in his cell and give him the potion. He will give you the location of the Bandit’s Lair. Now head back to your sister and ask her about interesting places to visit. This will give you the location of Adar’s house – the guy from whom you’re going to borrow some bombs for the Bandit’s Lair. On your way out of the city, drop by the Inn. On the ground floor you will find a big wooden box blocking a ladder. Destroy it and go down. Once in, roll your way through the tunnels to find another Moon Stone. You might want to visit the shop as well. There is a decent weapon for sell, an armor and a lamp. If you don’t have enough money to buy everything, only buy the Iron Hammer. Your next priority is the Lamp. The Leather Armor should be a luxury at this point.

      Adar’s House

      Once you get there, head west until you reach the end of a cave. You will find the bombs just standing there. Grab them and head back. Stop buy his house, blow up that rock blocking the ladder and “borrow” his money as well.

      The last thing to do before heading to the Bandit’s Lair, if you have 25 rai to spare, is to stop by the shop in Atai and buy a Wooden Sword. Then go to the Inn in the Sunflower city and give that sword to the little boy. He’ll reward you with a Heart Ruby.

      Bandit’s Lair

      Go to the west end of the area and destroy the last rock on the right. A door to the Lair will appear. Once you reach the room with the bridge, be very careful! The ground is full of pressure plates, which will trigger traps. Eventually you will fall down in an area full of Bats and Sand Dragons. You can either try to kill the Sand Dragons or you can try and ninja your way to the switch in the bottom right corner. Hit that through the stone and head up the stone ladders. Right above the switch, you’ll see a Moon Stone, blocked by some rocks. You can get to it by jumping and throwing a bomb right before it explodes. Once you’re done with that too, head to the upper right side of the area and climb up the ladder.
      Once you enter the door right of the bridge, you’ll find yourself in another room with a blocked door with a button sequence puzzle. Go in the room in the sand. You’ll see five or six bandits sleeping in there. As long as you’re a decent ninja and don’t touch or hit them, they won’t wake up. At the west end of the room you’ll find another door. Inside is a journal containing the right order for the buttons puzzle.
      In the next room head left and go through the door below. You’ll find some money in there as well as another frog in a box. Go back jump up from platform to platform heading west, until you reach a save room. Inside are two more doors. In the room to the right, you’ll find the sequence to the second puzzle. Then enter the upper door. There’s a ladder there, leading to some treasure and to the top of the building. Once you’ve collected everything, head back to the main room and enter one of the two doors below. Now go through the door on the east end of the room. Climb up the ladder and go left. Trigger both traps but do try to avoid any damage. You’ll see a timed switch. Climb up and drop a bomb, then quickly go get the key below you. That’s one out of two keys. Head back to the previous room. You’ll see a switch right above the bridge. To avoid any fatal damage, wait until all the bandits are on the left side and hit the switch with your Slingshot. Now quickly get them all with their backs against the wall and kill them simultaneously.
      Head right and enter the door. In the new room, go downstairs. You’ll see another puzzle with timed switches. All of the switches will open a different barrier. Only the last one on the left will stop the magnet for a short period of time. Drop a bomb next to the rightmost switch and right before the bomb explodes, hit the left switch, so that the key can drop. Next comes the switch on your right and then the next one.
      Now that you have the second key, head up and start climbing the ladders. Be very careful not to touch any of the bells, as they will trigger an unavoidable arrow trap. Once you’re out, go back to the main room. Now save your game and proceed through the locked doors.
      Boss Fight
      There isn’t much to say about this boss. You’re gonna have to drop bombs whenever it comes out of the sand to bite you. Once it has swallowed the bomb, it will come up as soon as the bomb explodes and you’ll be able to deal some damage. Make every hit count as the Sand Dragon will get angrier each time it swallows a bomb.
      Now that you’ve defeated the boss, collected your heart ruby and captured the bandit chief, head back to the safe room. Go to the upper room and climb the ladder all the way to the top of the building. You’ll come across a sign warning you not to jump off, since apparently Bob thought it’s a clever shortcut and broke his leg. Now, you aren’t Bob and you don’t get beaten by little girls with pink hair, so don’t hesitate and jump right off. You’ll land right above the entrance door. Destroy the rocks in front of you and a hidden door will pop. Inside you’ll find a piece of High Quality Cotton Silk which you can sell to the silk lady in Atai for a decent amount of rai.
      Nothing left to do, but head back to Atai City and free your sis. Go to the prison to give the guards the Bandit Chief. After a few cut scenes, your sister will be free and you will have to head back to your home village. Head to your house and talk to your little brother. Lisa will tell you to look for Thomas, the scientist guy and will show the location of the next area – Misty Corge. Before heading there, visit the mayor’s kitchen in Atai again.
      Once inside, talk twice to Albert, the first guy left of the door. He’ll give you a love letter for your sister. Once you deliver to Lisa, she will give you her reply letter, so head back to Atai and give it to Albert one last time.
      Now that you’ve crushed the poor bastard’s heart, it’s time to pack and head to the Misty Corge.

      Misty Corge

      You will need to cross a river to continue the adventure. But as we know from earlier, you can’t really swim. Not to worry! You can buy a Floatation Donut from the fisherman inside the shop. If you don’t have the 60 bucks, go kill some monsters and hope that they will drop some money. There isn’t much to do here. Just go east as fast as you can. This is a dangerous area. The only place you would want to stop is the third area east of the Inn. Once you’ve reached it, swim until you see a flower on which you can climb. Hop on it and head back left to climb up another flower. Then go right, jumping from platform to platform until you see another Heart Ruby. Beware of Spiders and Wisps.

      Crossroads

      In the Inn in this town, you’ll find a girl with brown hair, in a karate costume. In order to restore her memories, you’ll need a Duri Fruit and a Chocolate Protein Shake.
      In order to get the Heart Ruby in this village, you’ll need to rent a room and rest. Go outside the balcony and jump over to the one on the right. Inside you will find the Ruby inside a box. So whenever you fell like spending a 100 bucks to rest and get another ruby you know where to find it.
      To get the Moon Stone, talk to Lass, the green haired girl inside the Inn. Next, head east to the tree house and kill all the Slimes. Collect your money from Lass once you’re done and leave the village. Go to the Great Walls. On the top of the second tower, you’ll locate a guy named Gill (you need to find him at Fran’s lab first). Talk to him and head back to the Crossroads. Go to the tree house again and talk to Floe, the girl with the orange hair. She will give you the Moon Stone.
      Another thing that you can do here is to get a robot toy for the guy in the first room on the left. You will find those in Daea’s shop.

      Fran’s lab

      By this time you should have at least 5 stones, so head to Fran’s lab and talk to him, so he can reward you. Keep coming every time you get 5 more. He will eventually give you a Heart Ruby and more.

      Thomas’ Lab

      Head to Thomas’ lab next. Once inside use the Slingshot to destroy the box above the door and activate the switch. This will open the door in the top right corner of the room. In there, grab the box from the bottom of the room and put on the pressure plate above. On the ground you’ll see four more pressure plates. Put boxes on three of them and stand on the fourth one. The wall on the right will open. In there you’ll have to fight a giant robot that shoots lasers.
      Boss Fight
      Don’t try to dodge the lasers! You will get hit at least twice if you do. Instead just jump over the robot and let it shoot in the other direction.
      Always have your Slingshot ready for action! As soon as mister Terminator turns off for a while, hit him until he’s on the platform and then hit the timed switch above you. That way you’ll deal about twice as much damage each time.
      Once the metal head is dealt with, climb up and go to the room on your left. Talk to the paranoid guy in there so he can fix your golem head. Next stop is Daea.

      Daea

      First things first. Head over to the bar and enter the bottom left door. Once inside, throw a bomb at the box that is blocking your way down. Now, push second box on the bottom to the right. Go back up, push the other box on it and roll under the wall to collect your Heart Ruby.
      Now, go back to the bar and head up, right above the door you came out from. Destroy the grate and roll under the wall. You will find yourself in a small maze of tunnels. Roll to the left. Now drop a bomb and hit it until it reaches the grates on the ceiling of the room below you. Get in there and collect your Moon Stone from the chest.
      Meanwhile you can buy a comic book from the shop and give it to the prisoner back in Atai City. He will reward you with a Moon Stone.
      Now you can head west and go to the king’s castle. After all the cut scenes, go west again and enter the door to the sewers. Talk twice to the guard inside and head to back to the king’s castle. You will see a little girl on the bridge in this area twice. You’ll need to find a girl called Ruby. Go back to town and find the house with no signs on it. Enter the door on the second floor and talk to the guy in the blue shirt. Head to the shop and talk to the lady in blue. She’s on the top floor, west side. Now that you know where Ruby is, go ahead and enter the sewers. The door inside should be unlocked.
      Once you enter the door below you, head right and swim until you find some pots. You will find a Moon Stone in one of them. Proceed on your way west until you climb a ladder and enter another room. Head right. You will find ladder that is out of reach. Kill the Slimes and stack up the boxes so you can climb up the ladder.
      Jail Sector C

      When you reach the main room (the one with the many locked doors), enter the save room in the middle. Once inside bomb the east wall. Destroy the boxes inside to get another Moon Stone. Now head to jail room C. You’ll find a key on a platform above you as well as 4 timed switches. Just plant a bomb between two of them and hit the other two when it blows up. Proceed forward and free everyone from their cells.

      Jail Sector D

      Go back to the main room and enter Jail sector D. Once inside, use your Slingshot to get the key down (stones from the Slingshot go through the platform). When you’re done freeing everyone from their cells, head to cell C IV and bomb the ground. You will find yourself dropping down to sector E. You’ll reach a room with two dogs and a ladder leading down. Kill the two dogs and go down. You will come across a puzzle with a magnet. Turn on the magnet and send it right so it could pick up the key. Hit the switch to open the platform blocking it and use the magnet again to drop it in the hole above you. Once that’s done, close the platform, turn on the magnet again and send it to the left. Turn it off and voilà. Once you’re out save your game, as a boss fight awaits next.

      Jail Sector B

      Before you unlock the door to Jail sector B, enter the room that’s right in front of it. You’ll see a puzzle with four timed switches. Climb up between the top two and throw a bomb down the one on the left below you. Quickly switch to the Slingshot and shoot the top left one. Turn around, hit the right one with you weapon and run down to the last one. A door will open with tree chests inside. One of them contains a Moon Stone.
      Next stop, jail sector B. Inside you’ll find 4 timed stiches and a few boxes on the right. Put a box on the platform above each switch and hit the one in the middle. Grab the key and head east.
      Boss fight
      Kill everything as fast as you possibly can.
      Try to get soldiers and/or dogs stacked so you can hit them both at once.
      Use the Slingshot to stun enemies you’re running towards. Very useful against Archers.
      Once you killed everything that tried to lay a finger on you, use the Javelin to get to the door above. Inside the room you’ll find the key to the cell. Open it up and talk to Thomas and the other Soldiers. The key to jail sector A is inside.

      Jail Sector A

      Head back to the main room and get to jail sector A. Once you reach the cell room, go in the cell on the bottom level. Blow up the wall on the left. You’ll find some boxes in there. Stack them up next to the door you came in from and drop a bomb on top to blow up the low above. Use the spear to get to second floor and blow up the right wall. You will find a Heart Ruby inside.
      You can now continue to the top cell and get out of there.
      Back in Daea, go inside the sewers again. Enter the first door below and make your way through the platforms above the water. Instead of continuing down through the water, throw a javelin on the wall and climb up. You will come across a few pots, one of which contains a Moon Stone.

      The Lucky Belt

      Go to the shop to buy a sandwich. Don’t eat it, it’s not for you! Next head back to Duri Forest. Go east until you reach a cave entrance blocked by a stone. Blow up the stone and get inside. You will reach an open area at the end of which, there are some orange fruits. Get one of those and head to Atai. Go to the potion lady and give her the orange fruit you just got.
      While she’s making the potion, go west until you come across two large boxes with an anchor mark on them. Throw a javelin at the lowest possible point on the platform, climb up and destroy them. Inside is another Moon Stone. Now head to the mayor’s house but don’t enter it. Throw a javelin on the wall in the left end and climb up the building. There is a window that is darker than the other one. Climb on it and go inside. On the right you’ll see a gap with a switch at its far end. Use the Slingshot to hit the switch and the door behind you will open. Borrow the mayor’s money by destroying everything you see inside.
      Go back to the potion lady and buy the orange potion. Go outside and check the carpets below the Inn for a hidden door. Hit the switch above you and go down until you reach 3 piles of boxes. Use them to climb all the way to the right top corner of the room. There you will find another Heart Ruby.
      Now head to the Great Walls. Give the sandwich to the guy standing on the right side of the save statue. Now go through the door on your left and give the Mikan Fragrance to the first guy you encounter. He will give you a Moon Stone. Now go to the right end of the room and roll under the wall. Use the boxes inside to trigger the pressure plates and get your Heart Ruby.
      Go outside and climb the left tower. Talk to the guy on the right edge. He’ll give you a letter and a new location – Framers Block. Go there and enter the house. Talk to the old guy on the second floor. He will ask you to take care of some noises downstairs. Enter the room in the bottom right corner, destroy all the crates there and kill the frog. Once you’re done go talk to the elder man again. He will give you the Lucky Belt.

    4. Ki Spear Technique Scroll

    5. Go to Panselo and buy a Chocolate Protein Shake from the Dojo. Next, you’ll need a Duri Fruit which you can get either from the Duri Forest or buy it for 20 rai in Atai. Now go to cross roads and give the Duri Fruit to the girl that lost her memories. Then go out and back inside the Inn and give her the Chocolate protein shake. Do the same thing, only this time, give her the Green Bracelet from your misc. items. Again, in and out and talk to her one more time. She will thank you and give you the scroll.

    6. Prince’s Tower

    7. Once you’re done gearing up and buying food (if you find it necessary), head to the Prince’s Tower.
      This is a fairly easy area to get through. Once you’ve reached the 4th floor, you will notice chest locked behind a stone barrier. Go to the right balcony and hit the time switch with the Slingshot. Make sure that you’ve left the bridge in the middle open and run down to the chest.
      On the next floor, simply use a bomb to delay the switch activation, run right to the first platform and wait for it to activate. Next comes the room with the bell traps. Once you’ve activated all the switches and the platforms are there, start climbing. The bells on the first platform can be jumped over. Another way to get through is to activate the first bell that will disable the platform and land on the second one. Roll under the traps on the second platform and jump over the ones on the third. Above are five ladders. You can get through by activating the traps only when jumping on the longest ladders (2nd 4th and 5th). Once you’ve touched a bell, quickly go down to the bottom end of the ladder and wait there until the arrows pass.
      You cannot get to the pots that are locked in the save room. You need an item that is yet to be found so no need to bang your head. Just heal up, save and go kill yourself a kobold boss.
      Boss Fight
      Never stay in front of the boss. You want to always be on his opposite side.
      Always keep a javelin on one of the walls in the bottom. Stay on its edge whenever the boss decides to open fire.
      Generally, the Kobold will always shoot twice before he starts charging his lightning ball. So be sure you’re able to reach him easily on his third time.
      If the boss is charging his death ball from the ceiling, you will need to jump and throw a javelin in order to hit him.

      Once you got the big rat, it’s time to collect your Heart Ruby and free the prince.
      After the cut scene is over and your sister managed to accuse you of loathing, you can go to the last house next to the wall. Once inside, throw a javelin against the wall, next to the ladder and climb up. On the second floor you’ll see a switch which opens a small gap on the first floor. Go down there and grab the Moon Stone.
      After you’ve had the adult-only meeting and got the artifact shard from the prince, grab lots of food and head to the Great Walls.

      Dread Lands

      Talk to the guard at the wall’s gate. He will open the gate for you and you will be able to “sneak” to Dread Lands.
      Once in Dread Lands, watch out for X signs. Those show you where mines will appear. DO NOT try to take more than one robot at once! Another thing worth mentioning is that red robots cannot be killed. So whenever you get chased by one, get out of its sight as fast as possible.
      In the third area, go down and kill everything you can until you see the red robot. Run left and let him stay there. Destroy the wooden boxes and roll under the gap. Climb the ladder and use a javelin to get to the upper level. Kill the robot behind the box (preferably with bombs so he wouldn’t get a chance to hit) and collect your key. Now push the metal box to the right and roll to the other side of the wall. DO NOT push the wooden box yet! Go right and wait for the mines to activate. After they’ve blown, push the box down the gap and then down the other one. You will find a couple of robots there, so be very careful not to destroy the box while fighting them. After you’re done dealing with them, push the box to the right wall and use a javelin to get to the grate above. Roll under it, and you will find yourself in a rather large room. Blow up the floor in the middle go downstairs and run for the door. Don’t try to kill the robots. Inside you will find a Heart Ruby.
      Get out of there and proceed to the next area. First thing to do is climb up the ladder and push the box to the right edge. Throw a javelin on the left wall, kill the robot upstairs and climb up to grab the key there. Now climb on the metal box again and throw a javelin on the right wall. Proceed right, on top of the buildings, until you find a pot that contains a Moon Stone.
      Go back the same way, until you reach the same metal box. Go right, through the gap in the wall and grab a mine. Jump down to the right edge of the wall below you. Enter the room above. Downstairs, on the left end of the room, you will find a chest full of money and on the right end, another key. Get out of there and go east until you exit the Dread lands.

      Mul Cavern

      Rocket Boots
      Once Billy has said what he has to say, go down and enter the cave left of the save statue. If you find the damned bugs in there too many and too hard to kill, just keep going left until you find the Rocket Boots.
      Above the save statue, at the entrance, fly to the right until you reach the end of the area. A few chests lie there, one of which contains a Moon Stone. Now head down and enter the cave right of the save statue. Inside you’re gonna have to destroy the hive on the right, as it is blocking your path. Try and kill all of the blue things that run away from you with your slingshot until they drop an item. In the next area head to the bottom right corner and jump down. Now head left of the save statue. Once inside, be very careful! The area is full of hives, so try to kill the bugs one by one. Enter the cave behind the hive and make your way to another Heart Ruby.
      Now head west from the statue. Inside head right until you find a hole through which you can go up. Proceed to the right until you’re out of the caverns. Since the area could get ridiculously hard and you’re probably out of food to heal up, it might be a good idea to skip the Moon Stones for now. You can see their location in the Heart Rubies & Moon Stones section.

      Ancient’s Crater Part 1

      A fairly easy area. Your goal for now is to get The Artifact. Just head west until you reach Bobby’s friends. Don’t come near the statues with big diamond in the middle. When you encounter any, either fly over them or go under.
      Once you get The Artifact and are able to deactivate the statues with it, head back to the previous area. Go west until you see a hole in the ground which is blocked. Below is a blue switch, which you can activate using the artifact.
      Then head east until you drop down into a blue room with two doors. Go to the door on the right, save your progress and use the teleport to get back to the beginning of the area. Now that you have all the mobility items, go find some gear. Collect every Heart Ruby and Moon Stone you can. You’ll find them in the Heart Rubies & Moon Stones section.

      Ancient Armor

      A fairly easy item to acquire. Go to Adar’s House, climb on top of it and fly left until you reach a cave entrance. Once inside, climb up and fly to the rightmost platform. From there, use The Artifact to activate the switch and open the gates below. Once inside, proceed west until you reach a room with golems inside. Head down and enter the rightmost door. The Ancient Armor is inside.

      The Morning Star

      To get this weapon, you will need two Asteroid Rocks. One is given to you by Fran when you acquire 25 Moon Stones. For the other one, you’ll have to visit the Misty Gorge again. From the third area, on the east side, climb on top and head west. Keep going until you reach a cave entrance, on top of the area, hidden behind a couple of rocks. Once inside, simply proceed forward until you find a Moon Stone and the rock itself next to it.
      Now head to the blacksmith in Adea and give the rocks to the apprentice. Go in and out and voila! The Morning Star is available to you for only 200 rai.

      Nebula Armlet

      This item will help you focus your Ki (holding ‘X’ will trigger the charged attack faster). Go to Atai City and jump inside the well. Head right and go through both rooms to activate the switches inside. Proceed west into the next area. You will come across a hole with lots of stones in it. Destroy all of them and enter the door that pops up. Inside you will have to get rid of all the robots in each area in order to proceed forward. Lure the red ones and hit the switch above so that they will drop down. The armlet is located in a chest, in the rightmost room of the last area.

      Forgotten Forest

      While not mandatory, going through this area will lead you to a new village where you can buy some valuable costly items. You will need to gather 30 Moon Stones and give them to Fran. This will activate the portal in his house, from which you can access the area.
      Once you get through the portal, head east until you reach a broken bridge with a Harpy flying above it. Drop down and kill the orc. He will drop the key to the door at the right end. Kill the orcs inside and get to the top felt corner. Take the metal boxes there, place them on the pressure plates and stand on the last one. A door on the bottom left side will open. Grab the key from there and enter the cave on your right. Climb up to the other area and kill the dog there. Take the key that it drops and go back to the area below.
      Go east until you reach a save statue. Enter the house on the right side of the statue, destroy the boxes and activate the switch. A ladder leading down will appear. In the rightmost room you’ll find another door leading to a robot like the one in Thomas’ lab. After you’ve dealt with it and collected the key head right, open the door and get the Moon Stone from the pots inside. Once outside the house, go east until you reach another locked door. Climb up the tree into a new area and head east until you reach the Hidden village.

      Ancient’s Crater Part 2

      Now that you’re really tough you can head on to the final area. Use the portal in the beginning of the crater. Get out of the save room, go down the ladder and use the Artifact to reveal the hidden blocks around you. Head east and enter the door. Go west and activate the switch there. Two orcs will appear. Kill them and go to the west side to activate the second switch. Go back to the middle. Right above the blocked door is a tunnel at the end of which you’ll find the third switch. Throw a spear inside and you’re good to go.
      Once you’re in the big aquarium room enter the door on the right and head west. The only thing to look out for here is the trap timing. Once you’ve dropped down to a new room and then entered another door, you’ll have to use the Artifact again to reveal your way. Careful not to fall down as you are gonna have to start anew.
      Once you’re back in the aquarium room enter the door on the left. When you get to the trap with the two robots, lure them down and hit the switch that drops bombs. Three bombs should be enough. Hit the bastards until they’re on the platform and then use the Slingshot to get them to drop down.
      In the next room you are going to have to kill a Harpy. Do not try to jump on a platform to reach it! Simply wait for it to charge at you, dodge and hit. Avoid bombs at all costs as they deal 13 damage. Once you kill the damned thing, head down the ladder and don’t forget to get the chest above you, as it contains a 45 hp Old Ration.
      Inside the next room, you’re gonna have to make your way through the traps without activating any of them. After the rather simple puzzle with the bomb you’re going to find a save room right before the boss fight. You can use the portal to go back and rest somewhere before the final fight. You might also want to get loaded with some speed and stamina boosters rather than just food. However, don’t consume them before the boss fight ends.

      Boss fight

      Once the fight starts, your first priority is to destroy all the spheres hanging in the air.
      Always kill the damned flying turret before you go hitting the boss itself.
      To crack open the boss and damage it, you’re gonna have to get the four eyes – two on the ground and two on the ceiling. Bombs do a good job here, but they can reach the eyes above, so use the Artifact. Always leave the bottom or top left eye for last so you’d have more time to smash its metal skull.
      Once you’ve dealt with the boss, sit back, relax and enjoy the last cut scene.

      66

      Now that Prince Douchebag has sent one of his killing machines after you, there is nothing to do but run. Run fast, run fancy and keep your fingers ready to hit the 1, 2, 3 and 4 buttons. Use the speed boosters (if you bought any), and always close the doors behind you. It is very important that you hit the switches from the very first time.
      After you get to a dead end enjoy the close encounter with the UFOs. This is where our epic journey comes to an end, temporarily, I hope.

    196 Comments

    Cyberjar88 October 2, 2014 7:48 PM

    I hope there are a lot of people playing this and taking notes. Some of the puzzles in the game can be very tricky.

    Reply
    thegreatescaper October 2, 2014 11:21 PM

    Only just started, but can already tell that it's going to be amazing!

    Although I do feel bad stealing all these nice grannies' money. Why do they keep coins in pots anyway?

    Reply
    thetriad.akt3 October 2, 2014 11:23 PM

    I'm not finished yet, but I judge I'm about 75% done.

    This game is beautiful. I love the art and music, the controls are (mostly) good, though the delay on attacking's caught me out a little. Aside from the bosses, which seem a little fiddly to defeat, the game poses a pretty decent challenge and I was hooked from pretty much the first screen.

    I'm not the most sentimental of people, but the best way I could describe this is charming. Charming, stylistically innocent without being sickly sweet, and with a good sense of humor.

    Reply

    I must be stupid, but I am stuck. Where are you supposed to go after visiting Adar's house?

    Reply
    Cyberjar88 October 3, 2014 10:49 AM replied to chacha51

    Try the Bandit's Hideout.

    Reply
    chacha51 October 3, 2014 11:20 AM replied to Cyberjar88

    Thanks Cyberjar88! Only, really, I have no idea where it is and how to reach it. I guess I am supposed to interact with

    the bandit in the town's cell? I have that potion to make him talk but cannot access him

    Reply
    Patreon Contributor Questioner October 3, 2014 11:55 AM

    Nooooo...

    I crushed the elders piggy bank at crossroads inn by mistake, and now i'm feeling really bad about it...

    Is there a way to repay her?

    Reply
    https://www.google.com/accounts/o8/id?id=AItOawnrLT_DgOiK7Leoj0eRHY69GNEFT33XtTU October 3, 2014 2:57 PM

    Silly question, is there some way to improve my jump ability because the place where you get in after the kid gives you the catapult there's a long jump that's impossible to make even AFTER you open the bridge because you STILL can't reach it.

    Reply
    Kaitn October 3, 2014 3:15 PM replied to Questioner

    Sure, just buy her a golden bar from Atai's shopkeeper.

    Reply
    Kaitn October 3, 2014 3:22 PM replied to chacha51

    That one took me awhile to find too. You have to jump on the roof of the prison and enter through an open window. Then through the ventilation to the left.

    Reply

    Not exactly sure what situation are you talking about, but so far I travelled quite far and these are the things I found:

    There is not a jump upgrade. However, there is a number of skills that supplements that.
    First one is the throwing spear found on a defeated prison warden (boss), which allows you to create an artificial platform by throwing it against a wall.
    The second one are The Rocket boots found in the Mul caverns. Generally in the left direction from entrance.
    It only lets you float in the altitude you are in right now and only for a brief while, but still pretty handy.
    The third one is ANY stamina boosting item, such as honey and energy drinks, which increases the amount of time you are able to float with The Rocket boots. Not useful too often, but there are places you wont be able to access otherwise. (pot on top of tower in Atai, near the mayor house)

    Hope that helps.

    Reply

    If you are at the part with aiming the slingshot at targets to make the bridges go out in the forest:

    The switches can be switched "off" again.

    Reply
    Patreon Contributor Questioner October 3, 2014 3:48 PM replied to Kaitn

    Thanks!

    Reply
    james.kasten October 3, 2014 4:05 PM

    It is possible to repay the old lady at the Crossroads Inn. You have to give her a gold bar. You can but them from the upstairs merchant in Atai, the same one you can buy the pouch expansions from.

    Reply

    @chacha51

    There's a window above the jail; climb the inn building and jump the roofs over to the right.

    Reply

    Does anybody know how to hit the boss dragon in the bandit hideout? I've tried every weapon I have without making a dent.

    Reply

    Fran accepted my moonstones the first time, but now there's no conversation option to give more. I have 9, which is more than 5, but Fran just asks me to come back when I have a set of 5 :(

    Game's still fantastic though. :)

    Reply

    Any tips on killing the sand dragon?

    Reply

    Killing the sand dragon:

    In the phase where it's trying to bite you, drop a bomb into its mouth. Wait a few seconds. Whack sand dragon.

    Haven't actually killed it yet, but that injured it

    Reply

    Put simply, dragon eat bomb.

    Reply

    Good looking game, great music, but simply terrible controls. "Attack," wait for it... wait for it... you just got hit for minus four by a stupid frog. And I'm done. Not going to continue with this.

    Reply

    Video game law says you must keep valuable goods in pots for random questers!

    Reply
    Patreon Contributor Questioner October 4, 2014 5:42 AM replied to Ezra

    I believe Fran means a NEW set of 5 moonstones.

    Reply
    diamondisabel October 4, 2014 11:08 AM

    It's probably a silly question, but how do you

    kill the first boss- the giant toad?

    Reply
    diamondisabel October 4, 2014 11:18 AM

    I've already tried

    shooting down its throat with the slingshot

    but it seemed to have no effect

    Reply
    Furipu October 4, 2014 11:22 AM replied to diamondisabel

    I'll try to answer in hint-through format:

    One thing you probably tried was to attack it from the front, but it's difficult to get close, so the slingshot is the logical choice.

    However, the slingshot doesn't seem to do any damage either, even if you hit the inside of its mouth...

    Do you see the cluster of fruit that the toad stops under?

    The fruit is thorny, so what happens if you knock it down onto the toad with your slingshot?

    Additionally, any fruit in the battle can be broken for a chance to get a healing pickup if you need it.

    Reply
    diamondisabel October 4, 2014 11:25 AM replied to Furipu

    Thanks! I probably would not have noticed this anytime soon without your help!

    Reply

    Wow...
    I just passed the wall and arrived in Drealands. I have plenty of health and equipment, but there's this HUGE difficulty spike that feels unfair...
    Am I missing something? How do I effectively fight these terminator things?

    Reply

    I'm getting a bit of trouble trying to recruit Aella (Crossroads) - she is asking for a round green object (what I would clearly assume is Nana's bracelet) - any hints?

    Reply

    Getting to Bubbles is such a headache. I get the technique, but how am I supposed to execute it with these controls?

    Reply
    james.kasten October 4, 2014 1:42 PM replied to Anon

    You're right, it's Nana's bracelet. But that can't be accessed until after you've used all the other quest-important items. It'll reappear after you go to Thomas' lab.

    Reply

    Fighting the robots:

    You know those chargeup moves you learned but never used except for smashing boxes because they're so slow? Those. Also bombs.

    You can also use a red light-green light technique

    If they're facing the wrong way or off screen they can't see you at all, not even if you hit them.

    Reply

    E-Soda:
    A well-preserved beverage of the ancient civilization. The label on the can claims it's got what plants crave. Increases stamina for 2 minutes and restores 20 HP.

    Reply

    Super nice game :3 Completed it 100% XD Althrough the ending was the hardest part :P

    Reply
    darksilvermoon5 October 4, 2014 6:11 PM

    Does anyone have any tips for how to

    get past the bells on ladders in the bandit's hideout?

    Reply

    Put simply, avoid touching them.
    Put not-so-simply:

    Make sure you have room above you when jumping from ladder to ladder. Hitting your head in midair makes you start falling, usually sending you right into a bell. Climb a bit down before each jump.

    Reply
    shjack180 October 4, 2014 7:15 PM

    I just cannot defeat the sand dragon. :( :( I know what I'm supposed to do, but I take way too much damage. Most I've beaten it down to is half its health. So frustrating. I just want to advance to the next part of this beautiful game!

    Reply

    Ok, I give.

    Thomas just got kidnapped and now I am at a loss. I'm also missing the souvenir and the chocolate drink. What should I be doing next?

    Reply
    Cyberjar88 October 5, 2014 12:03 AM

    Is there anything I need to have before fighting the sand dragon? Specifically, anything that will give me an edge or keep me healthy?

    Reply
    shjack180 October 5, 2014 1:01 AM replied to Cyberjar88

    @Cyberjar88

    I was finally able to beat it with a maximum of 35 health, the leather armor, and the hammer as my weapon in lieu of the stick. Even so, I didn't beat it until attempt number three with that stuff. As far as strategy goes, you have to get good at dodging its different modes of attack and placing the bombs to where he'll swallow them instead of nipping at you and hitting him as many times as possible before he recovers from the resulting explosion.

    Reply
    Patreon Contributor Questioner October 5, 2014 8:11 AM

    A little tip:

    If you save at the statues AFTER healing yourself by heart pots in the room:

    When retrying from the save statue you will have the health you hade when you were saving, and the heart pots will still be there.

    By using this method you can create full health at each save point.

    Reply
    diamondisabel October 5, 2014 11:12 AM

    I'm a bit stuck. I've gotten to Aaea and I can't figure out what to do next. I found

    a robot boss battle in Chomas' Lab, but I keep dying before I can kill it using the strategy of

    letting it crash into the wall, then hitting it over a trapdoor and dropping it

    I don't know if that's the only thing I can do, but either way I'm having trouble

    Reply
    diamondisabel October 5, 2014 12:07 PM

    Okay, now I have helped

    the girl who can't remember her name, by giving her

    a Duri fruit

    and

    a chocolate shake

    so that she remembered her name was

    Aella

    but now she wants

    a round green object

    and all I have matching the description is

    the flotation device

    which I can't give to her.

    Anyone know what I need?

    Reply
    Patreon Contributor Questioner October 5, 2014 12:28 PM replied to diamondisabel

    You will need:

    The green bracelet.
    It won't be accesible when you have another quest item in your inventory like the robot head or the bandit chef.

    Reply
    Patreon Contributor Questioner October 5, 2014 12:31 PM replied to diamondisabel

    For the robot boss:

    To progress with the story you will have to defeat it. You can hurt it by hitting it too (atleast sometimes).

    Reply

    This is precisely what you have to do.

    I highly suggest having the Slingshot ready. Kudos if you have the hammer, but not manditory. Use normal attacks, not charged.

    Reply

    O... kay. I found something really interesting.

    Please note: if you want to play this game properly, STOP READING NOW. You have been warned. I'm not going into the details of what will happen, but this does make the game world a little... improper.

    When you get to Atai, you can buy gold bars at the shop, and 'give' them to the same shopkeeper to sell them, right? The game intends that you buy low and sell high, but instead, try buying as low as possible, then sell immediately. You will see what I noticed.

    Reply
    AutomneLiza October 5, 2014 1:56 PM

    I'm stuck

    Thomas is kidnapped, and I can't get into the sewer without a key.

    Help??

    Reply
    shjack180 October 5, 2014 2:06 PM

    Anyone have a strategy to share for beating the prison wolf boss? Hard enough not to get my health taken away from those irritating archers, but not even bomb placement has worked in getting a single hit on that werewolf.

    Reply
    shjack180 October 5, 2014 2:10 PM replied to AutomneLiza

    WAutomneLiza

    Talk to the little girl at the King's Castle gate. That should get you started.

    Reply

    can some one help me with the Mul cavern?
    i have gotten as far as the room with the save statue in it, but both paths lead to dead ends!
    please advise.

    Reply
    Patreon Contributor Questioner October 5, 2014 2:19 PM replied to shjack180

    For the wolf boss:

    Hit him with the spear when he's charging up the big gun. There should be a hole in his shield.

    Reply
    AutomneLiza October 5, 2014 2:20 PM

    @shjack180
    Thank you! I didn't realize she had more to say

    Reply
    Patreon Contributor Questioner October 5, 2014 2:20 PM replied to soman

    Mul cavern:

    It is possible to climb up from the screen to the right from the save statue.

    Reply
    shjack180 October 5, 2014 2:21 PM replied to Questioner

    Looks like I have a bigger problem then.

    How do I get the spear?

    Reply
    shjack180 October 5, 2014 2:23 PM replied to Questioner

    Funny too.

    I have the scroll for charging the spear with ki, but I don't have the spear

    Reply

    To enter the sewers, you need to focus on Thomas's lab first.

    On a separate note, anyone have a map of all levels? and How do you move through the northern most level to the east?

    Reply

    Finished it. This game is AMAZING! It's like a free Zelda game, that's how good it is.

    But I still have a lot of heart rubies and moonstones that I need to find. And I couldn't get up that cliff in Forgotten Forest. Any hints? As well as getting a...

    second asteroid rock. Got the one from Fran. But need another

    for weapon upgrade.

    This game has so many side quests. It needs an extensive FAQ as well as a basic walkthrough.

    The ending was

    TO BE CONTINUED? I'm betting the second part will be paid content. This was just to hook us.

    Reply
    AutomneLiza October 5, 2014 3:06 PM

    I seem to be missing something

    in cell block D how am I supposed to get the key on that platform? I don't see any switches

    Reply
    shjack180 October 5, 2014 3:11 PM replied to AutomneLiza

    @AutomneLiza

    Did you know that the rocks from your slingshot can go through wooden platforms? I didn't until I got to that room in cell block D. ;)

    Reply
    AutomneLiza October 5, 2014 3:17 PM

    @shjack180
    Why didn't I think of that??

    I've been sitting here shooting rocks trying to bounce it off the wall!

    Reply

    The level I am referring to is Forgotten Forest West.

    Reply

    I have the same problem in Forgotten Forest as well.

    Reply

    Clay pots were the boxes of the ancient world. If you put tar on the closed lids, they became similar to Vacuum sealed bags. Do a google search for the dead sea scrolls. I am pretty sure you will be amazed by them.

    Reply

    I've really got to say the attack delay, combined with the stun delay is brutal. Get 75% of the way done with the attack animation, get hit, knocked back and stunned, then even if you immediately try to attack, you get hit again. It seems like if you get hit, you have to run away.

    I really hope there's something that helps counteract that, but there doesn't seem to be.

    Reply

    Thanks, Questioner, that was it. I'd been assuming Fran took the moonstones from my inventory, but I keep them all.

    OK, I love this game, but I do not love this game enough to play the chase scene with 0066. It might be fair on a fast computer, but with an input lag, I can't keep trying any more.

    Reply
    cloudydays October 6, 2014 12:12 AM

    For the life of me, I can't figure out how to get through the ladders and bells in the Prince Tower. Any suggestions?

    Reply
    diamondisabel October 6, 2014 12:42 AM

    The land behind the wall is really giving me the creeps.
    Every few steps is another semi-jump-scare.
    I can't even attempt getting past it right now. Especially since it's midnight... but seriously. The creators really did a good job setting the atmosphere to ominous at that part.
    I'm really feeling uneasy...
    After all I've been through with is wonderful game though, I think I'll find a way to persevere, but I might have to save it for the morning!

    Reply
    diamondisabel October 6, 2014 12:44 AM

    I think I'll take a quick stroll through Sunflower Road before trying to get to sleep... Just to shake the creeps that that part has given me...

    Reply

    Walkthrough for Prince Tower bell room

    Part 0 - the ground

    • Get rid of the kobold mercenary.

    • Hit each of the three switches, to activate the platforms above.

    • A well-placed javelin will boost you to the platforms above.

    Part 1 - the platforms

    picture guide on Photobucket

    • For the first platform, hop over the bells in two groups. You'll want to fall very straight in between.

    • For the second platform, roll under the bells. You should be roughly lined up with the start of the platform. (If you're out on the edge, you won't make it past the last bell. If you're right up against the bells, you'll fall off the end.)

    • For the third platform, take one big leap over all three bells.

    • Again, a javelin boosts you to the next part.

    Part 2 - the ladders

    A picture would help here. I don't have one yet.

    • For the first two bells, line yourself up right next to them, and leap over to the next ladder.

    • Next, go all the way to the bottom of the ladder. Leap through the bells onto the next one, then quickly move to the bottom of that one too. You should just be able to dodge the darts.

    • The final bell is another case of just lining yourself up and leaping over.

    That's all of the bells.

    Reply
    Patreon Contributor Questioner October 6, 2014 11:19 AM replied to shjack180

    You should get the spear by:

    Completing prison cell B.

    Reply

    At the moment I'm stopped at the

    harpy

    but my cohesive thoughts–

    This is a beautiful game. And the people who want to enjoy this story are probably never going to bother finding out just how beautiful.

    The narrative is at turns dramatic, ironic, heartbreaking, with a touch of social commentary about girls and women. The architecture and planning for the whole thing is very clean, cohesive, and takes you through a multitude of realized mini-worlds that are nevertheless interconnected. From the NPCs to the design of the puzzles, it's hardly disappointing because every little nuance matters. And no one but the most dedicated platform gamers are going to know.

    What kills it is not only the awful delay with the primary attack; it's the refusal to allow the space bar to be used as a jump command. Lefty and righty, this has worked since they invented computer games for a reason! Instead we're stuck with an un-intuitive three-button piano piece where ALL the attackers are faster than the character, and there is no permanent upgrade to correct that delay. And the very first power-up makes the main attack go from weak to unusable.

    Why design narrow fighting spaces with a directional character, swinging a long-range weapon, if she cannot swing behind her? It invites enemies to swarm and just stab in the back till you can't move. I understand if the creators didn't want to rely on an overly muscled up attack, because the strategies are quite clever, but as another poster said -- all the ways to survive entail running away. It's an avoidance game disguised as a battler. I'd have better luck throwing rocks... oh wait! You do, except it takes five seconds just to aim when a toddler could do it instantly, see the part where the enemies are all faster.

    It just makes me angry and frustrated because people invested so much time into making this really fantastic, layered world, a really, really good game, and then somebody talks them into who knows how many more frames of animation for the attacks. And the repetitive dying isn't even part of the story.

    No one will open your book if the pages are glued together.

    And last I checked, flash is still the king of eating processing, so yeah, let's make it even more cumbersome. For me at least, it's turned what could've been four hours of gaming into an entire weekend (so nicely recorded in the opening screen), and I'm still not finished. I bet this isn't even play-tested to be handicapped accessible either. It just feels like oh, only the cool kids who can platform in their sleep get to see this. And if they can create all this other stuff, why neglect the very basis of the game?

    Reply
    mark.gettinger October 6, 2014 3:36 PM

    @shudog
    I liked the control weaknesses. They added a sense of limits and frailty to the character. It enhanced the story for me by making the character real. I loved how every battle, even a room of normal henchmen, must be won with strategy and pattern recognition. You make very good points however and I do platform in my sleep.
    As for that dang harpy.

    I beat the harpy by falling off the left edge of the platform and using my rocket boots to dodge and lure her lower. Once you pop back up at the top she is below you and can easily be hit when she rises through the floor.

    Reply

    For the harpy

    • I jumped off the left side... backwards. Face right, press jump and _then_ left.

    • I threw a spear at the platform below the ladder. This took approximately a zillion tries.

    • I hovered over to stand on the spear. Compared to throwing the spear, this was easy.

    • Then I ran onwards to the door, to make the harpy go away, and came back for the treasure.

    • No harpy-slaying required, just some very precise spear work.

    Reply
    Scout_friend October 6, 2014 9:47 PM

    Any tips for the 4 timed switches in the sewer?

    Reply

    OK, made the other picture for the above "Walkthrough for Prince Tower bell room".

    Part 2 - the ladders

    Picture walkthrough with the hardest part marked in red.

    • For the first two bells, line yourself up right next to them, and leap over to the next ladder.

    • Next, go all the way to the bottom of the ladder. Leap through the bells onto the next one, then quickly move to the bottom of that one too. You should just be able to dodge the darts.

    • The final bell is another case of just lining yourself up and leaping over.

    That's all of the bells.

    Reply

    I need some help - I just finished Mul Cavern, but now I'm stuck between Ancient's Crater (which I can't finish with all the lasers) and Forgotten Forest W (which I can't make the jump).

    Any hints?

    Reply

    Finished the game 100% and loved it. Although there were moments where fighting and barely trying to survive was kind of frustrating.

    This really should be on Steam or something. More people should play this. :)

    Reply

    Anon,

    You'll need to get past those lasers. The little guns can be killed. Stay out of range of the laser towers.

    Their vertical range is limited. Some you can go under. Others you can go over, with a high start and the Jet Boots.

    If you don't have the Jet Boots yet, they're in Mul Cavern.

    Reply
    shjack180 October 7, 2014 12:32 AM

    Yup, I think I will forever be stuck with the wolf boss at Prince Tower. The combination of bad reflexes, slow thinking, and poor spear-to wall-placement matched to an overpowered boss have me imprisoned with the prince xp

    Reply

    Thanks Erza, I just found out via watching LPs. I feel like a fool now trying to BS my way through those lasers

    Reply
    Furipu October 7, 2014 4:13 AM replied to shjack180

    In that boss room, you should be able to place the spears well enough if you throw them just as you hit your head on the floor-separating platform - worked like a charm for me. However, make sure you have some healing items because the boss is fairly strong even if you time all the jumps right.

    Reply
    shjack180 October 7, 2014 1:15 PM replied to Furipu

    Thanks for the tips. I will try them out

    Reply

    The

    morning star seems pretty useless. It's sole benefit seems to be it makes charge attacks stronger. Which would be great if I could even USE them reliably. I can barely reliably get a NORMAL attack on. Even with the reduced charge time, it's too long of a time to be useful most of the time.

    This is especially bad considering that enemies seem to be designed to be able to attack in just UNDER the time it takes for you to attack.

    Harpies are annoying because what looks like a hit, whiffs. This same problem seems to exist for the switches you have to jump to hit. I'd slingshot the harpy bombs, but by the time I can even get the slingshot aimed towards it, the harpy usually has let go of the bomb.

    Woe betide me if I accidentally trigger two in just trying to dodge the harpy.

    Plantdogs are also annoying. They take a ton of hits, and again, they are able to attack me RIGHT before the attack animation ends. The best I can do is potshot them while they try to shoot stuff at me. It seems like it would be the perfect time to charge attack, but no, they stop at hit me JUST before I can hit them.

    Pretty much all the enemies in that area have way more health than they really need, considering that the attack delay is the fairly long animation that MUST finish before any damage can be done. And up until that damage is done, you can be stopped by a single point of damage. Which also prevents me from attacking just long enough that attacking as soon as I can also gets me hit. Just long enough for them to set up another attack.

    Which seems to be a problem with most, if not enemies. It's not fun. It's annoying.

    The blood amulet also seems useless, at a hefty 999 pricetag. Oh joy, I can restore to 10 hp. The same as if I died and continued. Which is already pretty terrible, considering I get meat grindered most of the time.

    Reply
    silent george October 7, 2014 4:41 PM

    I'm stuck, fairly early on it seems, judging by the tips above!

    I have opened it up all the way to the Wall, have gotten Aeaea to the point where she just needs the bracelet, have given lots of things to lots of people. But I can't get into the castle in Daea, can't get into the sewers, haven't even met Thomas let alone cued up his kidnapping....

    Any help?

    But yes, what a great game! If it had ended after the Sand Dragon battle, it would have be a nice free game. But there is so much more...

    Reply
    diamondisabel October 7, 2014 6:01 PM replied to silent george

    @silent george -

    Go back to Panselo and find Lisa- she may tell you some useful information.

    She tells you about how Thomas uses a cover for his labs.

    A tailor's shop, she says, or something like it.

    Do you remember any place like that-

    Maybe with fabrics and clothing, but no people?

    hmmmmm.....
    ...It's near the Wall...
    Give up? Alright, then.

    It's a little place called Choma's Lab

    You must use a bit of detective work, then complete a puzzle, and finally

    beat a minor boss (so bring a good supply of food in case you need it)

    before you find Thomas.

    Not too hard! And if you can't figure something else out with the info I gave you, just say the word ;P

    Reply

    Re shjack180...
    I agree, the boss at the Prince's Tower is as far as I may go.

    The controls in this game are so poor and the key interface is so far from ergonomic that it renders the game unfair.

    I'm convinced the only way to beat the game is to have a separate controller attached to the computer.

    Reply

    Soldier in the barracks at the Great Wall says there is a draft near the floor. Where is the hole???

    Reply

    yakksoho,

    It's very low to the ground.

    Roll into the right-hand wall.

    Reply

    Any tips on the stinken crater boss??

    Reply

    I can't get past the second jump platform in the ruins :(. No matter if I take a running leap or start at the very edge just a pixel shy of falling off, I can't reach it!

    Reply
    yakksoho October 8, 2014 1:44 AM replied to Ezra

    Ezra, thank you! I never thought of that!

    I was wondering where the other side of that locked door was... I should have tried exploring that direction more thoroughly!

    Reply
    Furipu October 8, 2014 2:46 AM replied to Nathaniel Shaw

    Yep, that one's tough. I'll admit I looked up a video of someone beating it, mostly to see if it could even be done, heh. Anyway, tips below:

    The basic mechanic here is that you close its eyes (two in the floor, two in the ceiling) with the artifact, which opens up the main body for a melee beating.
    The eyes don't re-open over time, so it's a good idea to close three and wait for a good moment to close the fourth quickly, so that you can go smash the body undisturbed.
    The four modules that are screwed onto rods all over the room can be destroyed by a jump-melee, unless they're too high up in which case you have to hit them with the slingshot, which brings them in your reach. Admittedly the slingshot will be hard to aim, so leave the high ones for last and start aiming just as you jump over the rolling projectile from the module.

    P.S. I won't spoil what follows, but I recommend having one or two stamina consumables left after the boss.

    Good luck, you'll probably need it against this beast. ^^

    Reply

    I was playing without any type of lag all of yesterday but today the game isn't running as smoothly. The previous times I loaded the game it wasn't connected to newgrounds but now it is and I'm assuming that's what's causing me trouble. Is there any way to sever the connection?

    Reply

    thanks for the tips with the sand dragon, people. I'm still not past him, but I did figure out a new strategy to minimize my damage when he starts spewing acid which he only does right

    after you incur damage.

    to avoid the acid,

    run as fast as you can to the far wall and stay against it. when he pops up right in front of you to start throwing acid, for some reason he doesn't know you're right behind him and you don't incur any damage as long as you stay there.

    I haven't figured out any other way to protect myself from the acid balls so if there's anyone else who could use an extra boost, hopefully that helps you.

    Reply
    bavnah October 8, 2014 9:03 AM replied to bavnah

    okay that worked! I had the leather vest, the iron hammer, bombs, 32 HP max, and I had to use items worth 45 HP to avoid dying, but I did it. I ended with 13 HP and items worth 17hp left in my inventory unused. It turns out that trying to

    run back and forth to avoid him

    was much less effective than

    just standing in the corner while he was rampaging and hoping he doesn't splat me and/or jumping when he rolled toward me. I had to take on damage to get him to eat the bombs

    hooray! off to get my 5000 rai!

    Reply
    susmalmeida October 8, 2014 10:27 AM

    Help!! I'm stuck in the begining, after defeating the first boss (toad)I got the golem's head went out, saw the spaceship, went to the village every adult disappeard and there doesn't seem to be anything more to do. Here to go from here, how to move further?

    Reply
    Furipu October 8, 2014 11:46 AM replied to susmalmeida

    Quite often, new locations are discovered when someone tells you about them, including the point you're at. Talk to people in the village (most probably Alex but not 100% sure) and you'll unlock it eventually.

    Reply

    stuck again! but not on a boss... on a quest. or more accurately, a rescue mission. thomas just got

    kidnapped, and billy said we should go investigate

    but I have no idea where I can go next.

    I've done a bunch of side quests to get people stuff they've asked for, but I'm not getting anywhere. The only other thing I know I can do at this point is with the girl with no name. I know I have to give her

    the chocolate drink

    but I'm still about 15 rai short. grrr!

    Reply
    shjack180 October 8, 2014 12:59 PM replied to bavnah

    @bavnah

    Talk to the little girl in front of the King's castle gate.

    Reply
    bavnah October 8, 2014 1:51 PM replied to bavnah

    update: helping no-name girl did not advance my progress whatsoever, but it looks like once I get a new weapon, I'll have advanced abilities with it. Without the weapon itself though, the scroll of blahblahblah is useless to me.

    Reply
    bavnah October 8, 2014 2:36 PM replied to bavnah

    update update: once you've met up with thomas and then have to get into the castle, talk to

    the red-headed girl by the castle gates

    for a BIG hint on where to go next. I must have talked to every person in Daea trying to figure it out...

    Reply
    yakksoho October 8, 2014 4:23 PM replied to expired

    Same here; first few days I played (beginning Oct 4th) there was only an occasional lag, which did not interfere too much with reaction time.

    I occasionally have to reload the whole page, and load my saved game, when the browser crashes. But that did not seem to have an effect.

    But now when I play, there is a terrible lag, even in non-enemy areas, and suddenly when I am on the map I get a lot of pop up messages about "awards" which seems irrelevant to the game (since when did a Zelda game have "points" to accumulate? Not interested).

    I would be interested in removing the awards box in the corner, I believe it is slowing down the game.

    Reply
    silent george October 8, 2014 5:08 PM replied to diamondisabel

    Thank you diamondisabel! I was stuck wandering around looking for "Chomas's Lab"—it's actual "Thomas's", just with the fancy calligraphy.

    Reply
    silent george October 8, 2014 5:55 PM replied to Scout_friend

    scoutfriend, for the four switches in the jail room,

    stand in the middle of the top floor. Slingshot a low one to fall down and hit the left-bottom switch, slingshot top-left, melee hit the other two. Be very quick.

    Reply
    silent george October 8, 2014 6:08 PM replied to Scout_friend

    I'm stuck in the jail. I have

    cleared cell blocks D and C, and have done the four-switch thing to get a lot of cash outside cell block B, but I have no way of getting into B or A.

    Help?

    Reply
    Furipu October 8, 2014 6:45 PM replied to silent george

    Have you been to

    cell block E? You get in by bombing the floor in one of the cells in block D (the empty one). The next key is there, and you shouldn't have any problems finding your way from there on.

    Reply

    I am having a lot of trouble with the ladders in Prince's Tower.

    After obtaining the rocket boots I flew to the far right from the top of the tower. There are two tall golden ladders with arrows shooting down each in alternation.

    I have tried repeatedly to synchronize my jumps to avoid each arrow in turn, but I do not believe that is possible (nor reasonable; if hit by an arrow, one would not fall, totally immobilized, all the way to the bottom. There is no way to catch oneself on the way down which is absurd. It implies that these arrows are as powerful as other missiles in the game, such as laser beams, magic orbs, etc.)

    After starting with full HP (81) and drinking honey potions for stamina, this is still not possible simply by synchronized jumping. I feel there must be a strategy I'm missing, involving Rocket Boots maybe. Anyone who has passed this please let me know what you used.

    Reply

    Just to add to what everyone else has said, the attack delay is quite frustrating, but I'm willing to play through this game because the music is quite nice and the story is interesting.

    But I'm stuck at the...

    wolf boss at the moment. I can't figure out how to hit him apart from when he's charging up the energy ball, and even then I deal barely any damage. Also, the energy ball seems unavoidable; any hints with that? Thanks guys.

    Reply

    Woah, sorry about the double post but I just got it! For those wondering,

    if you throw your (uncharged) spear at him while it's charging the big attack, he stops and the energy field goes down. I didn't realise it, maybe because I didn't hit him right last time.

    Reply
    Furipu October 9, 2014 3:19 AM replied to yakksoho

    That's a really difficult challenge room you found, and it leads to a

    heart ruby

    You can use the bed in the prince's room to rest as needed, it's fairly close by. It mostly takes practice, but there are two things that may not have been intended, though who knows. The important thing is that they help:

    As you said, rocket boots can help you with timing by briefly floating outside the arrows' range.
    You can also use your javelin as a sort of emergency platform, possibly serving as a kind of checkpoint to fall onto if you fall.
    Also, it is possible to grab back onto the ladders if you're shot down, but you'll probably lose at least a quarter of the total height.

    Reply
    yakksoho October 9, 2014 3:32 AM replied to Furipu

    Thanks for the hints Furipu!

    For whatever reason, I have never been able to catch a ladder while falling (after being hit by an arrow). I did not think it possible, but if others can do this, it may be my lack of coordination, or the keyboard. (I can catch a ladder mid-air if I'm just jumping though.)

    Nor can I catch the ladder while hovering with the boots! :(

    Javelin helps considerably; I've managed to get one half way up the wall. The honey potion is also essential for me to even get half-way!

    Thanks for reassuring me that it is possible. I'll practise some more but I may not be cut out for this one!

    Reply
    Furipu October 9, 2014 4:36 AM replied to yakksoho

    Good luck, that room may be the hardest optional challenge in the game, but it definitely is possible. It took me a long time too, and then when I suddenly made it I was all "huh, is it over...?", as if I couldn't believe it after all the failed attempts! I didn't use any stamina items since it seemed to rely on timing more than speed, so I'm not sure if they help, but if you think they do, you may want to consider getting

    the purple honey (sunflower inn shop after a quest there), which gives a whooping 8 minutes of stamina boost.

    Reply
    susmalmeida October 9, 2014 9:38 AM

    Furipu thanks for the tip.
    Now I'm stuck at the bandit's lair, I only found two buildings I can enter to explore and didn't find anything usefull, found to small dragons that spit at me (can seem to harm them) and nothing more, if I jump trough the rooftops I get stuck at the building on the far right side. HELP!!!!

    Reply
    Furipu October 9, 2014 9:56 AM replied to susmalmeida

    Hm... that almost sounds like you're missing the

    bombs, which are found near Adar's house - talk to Lisa in Atai to unlock that zone.

    Reply
    isengrin October 9, 2014 10:19 AM replied to yakksoho

    Thanks for the tip about the challenge room. Didn't find it before but now...ug!

    I cleared it by not trying to climb the ladders at all but ascended by just jumping between ladders. The key was the starting point. My first jump was on the left ladder and at the first horizontal shooting point, I was in position to jump right parallel to it's shots. The second one was the real problem but I just lucked through. Yeah...there's some luck involved definitely.

    I noticed that you can hook into a ladder while hovering with the rocket boots but it's very unforgiving. You have to be completely center to the ladder to latch onto it. Anything less and you'll fall.

    Now can someone tell me how to get up forbidden forest?

    Reply
    Furipu October 9, 2014 11:14 AM replied to isengrin

    Congratulations for clearing that room! As for forbidden forest, I assume you mean the cliff at the very start? You get up there in a rather roundabout way:

    Keep giving moonstones to Fran until she and the whole team vanish (I think that happens after 30 stones) and then check the basement. They will have repaired the teleporter, and it will lead you ontop of that cliff where you'll be able to hit a switch to make some platforms that'll let you jump up there without going through the lab.

    Reply
    shjack180 October 9, 2014 11:45 AM replied to rev3rsor

    You just became my savior for this game. Thank you for posting that strategy for beating the wolf boss. Up until then,

    I had been attacking him with the charged spear only

    Yesssss, I can finally progress in the game!!!

    Reply

    The fact that this game is (currently) rated 4.5 out of 5 is clear-cut proof that evil still exists in the world.

    Reply
    shjack180 October 9, 2014 2:19 PM

    Okay, I've freed the prince but I'm stuck again. Although I remember defeating them

    under Atai City

    I cannot figure out how to destroy the red raging robots in Oreao Lands S. I've tried charged attacks, normal attacks, and bombs to no avail. At the point I am in my journey, I've not come across Mul Caverns and do not have the rocket boots. What am I missing in quest and strategy here?

    Reply
    Furipu October 9, 2014 2:38 PM replied to shjack180

    Those would be Dread Lands, not Oreao. As far as I know, the only way to really get rid of the red ones is to drop them into a pit, which isn't really an option in Dread Lands. Most of the time your best bet is to damage them enough to make them collapse, then run past before they get up again. As for the rocket boots, you get them later in the storyline so you're not missing them or anything.

    Reply
    kathleen.indie.gee October 10, 2014 3:32 AM

    The Developer's blog is called Quell's Dev Blog. You can make a donation there to thank him for this amazing game. It says there will be a phoenotopia 2, and it will also be free.

    Reply
    kathleen.indie.gee October 10, 2014 3:42 AM

    There is a link to the strategy guide on Newgrounds. Sorry, I can't post a link, but just search for phoenotopia on NewGrounds and scroll down to the author comments section. There are links to an FAQ, the guide and videos of how to beat the bosses and tricky puzzles.

    Reply
    kathleen.indie.gee October 10, 2014 4:29 AM

    Here is a Progression Guide (General walkthrough). This is part of the larger Strategy Guide available on Scribd (Search for Phoenotopia Guide). Credit goes to nggroundsplayer347.

    Progression Guide
    Leave the bedroom and head up the ladder. After talking to Kiter, exit using the right door. Talk to the first man (Clem) on your right (on the field) and you’ll get Duri Forest as a new location. Head right into a new section and go inside the first building you see. Push the metal crate right and get the Wooden Bat. Get out of the building (break the bottom wooden crate) and head all the way left until you reach the gate. Climb the ladder and hit the switch with your bat and leave the village.

    Head to Duri forest and climb all the way up and head all the way right. You’ll eventually encounter a cutscene and get the slingshot. Use the slingshot and make your way through the dungeon, making sure to visit each room and retrieve any keys you find, you’ll only need two however. You’ll eventually come to a room with a skull (aka boss) plaque. When you’re ready, head in and defeat the Armored King Toad with your slingshot and bat. Retrieve the heart ruby and golem head (the shooting star).
    Head back to the village and head all the way right into the east section and head right and on the last building, jump up and talk to Alex twice. Then meet him back at your place and approach him. Upon waking up, leave your house, head right, and talk to Alex. If you haven’t already, buy the rolling technique scroll from the Dojo.

    Depart for Sunflower Road. When you’re at the road, just keep going left, past the first road, then past the Honey Labs Inn, and finally past the second road.

    Head for Atai Bridge. Roll your way through any small areas, push crates and jump and head east.

    Once you’ve crossed the bridge, head for Atai. Head all the way left until you meet up with Lisa. Then talk to the mayor and then Lisa about any interesting places. Buy a talkinator potion and sneak into the prison by going through the window. Give it to the bandit for a new location.

    Stop by Adar’s House and head west until you enter a large cave and get the bombs and head back.

    Enter the Bandit’s Lair, avoiding the booby traps, bandits, baby sand dragons and using the bomb and slingshot to solve puzzles and retrieve keys and passcodes.You’ll eventually enter the boss room and fight an adult Sand Dragon, make sure to feed it bombs and hit it when it’s vulnerable. Once that’s done head east and capture the bandit leader, then head to Atai’s prison and approach the guards.

    After some events, you’ll meet with the mayor and then be able to leave with Lisa. Head to Panselo Village and go to your house.

    Now head for Misty Gorge. Buy the flotation Donut there and head east, watching out for the fishes, toads, and ghost wasps on your way to Thomas’ Lab.

    Once you’re at the lab, head in and find Thomas, which involves finding switches and pressing them and defeating a giant robot, which can be done by dropping the robot done a pit multiple times. Once you’ve found Thomas, head to Daea.

    At Daea just head all the way west and up until you’re at the gate to the castle. After the cutscene, head up and talk with the maid on the floor above you. Leave and the head down and left, into the prison. Talk with the guard there and head back to the gate and talk with the kid there. Go find the residential area and talk with a blonde boy (he should say that Ruby went to take a lunch break) and head for the shop. Go talk with the lunch seller and head for the sewers (in the bottom right part of Daea). Head left, making your way into the sewers and ultimately getting to the prison.

    Once you’re at the prison, find keys and obtain them by using objects around the place or using your items, defeating the prison guards and dogs while freeing prisoners and talking to them, to find out where Thomas is.
    You’ll eventually have to fight a wave of guards and dogs and a Kobold where you’ll pick up the javelin where you’ll have to use it to reach the room above and get the key. Once you do that and reunite with Thomas, head right and grab the key for Prison Block A and go there.

    You will eventually find yourself at the Prince Tower where you’ll fight Kobolds, use the javelin to make you way up and using your bombs and slingshots on switches in an attempt to reach the Prince.

    Note: Before attempting the Prince’s tower, use the exit door after the sewer, at the bottom of the tower. Finish all the quests and get all the Hearts (at least 60 health) and moonstones (at least 15 Moonstones) you can. Just before starting the Prince’s tower go buy a full bag of the best food available. There is a save point at the top of the tower, before the Kobold boss. But if you leave the tower (ie. to get more food) you have to repeat the whole tower again. So make sure you are prepared.

    Before you get to the Prince you’ll face a Kobold Mercenary General, use the javelin to stay away from him and use it to stun him while he disables part of his shield for an energy shot at you.

    After defeating it, you’ll free and meet with the Prince. You’ll be back in Panselo where you will have to gather up all of the adults and Alex for a meeting. After that, talk to the Prince to get the artifact shard and leave the village.

    Enter the Great Walls and talk to the person on the far right, before the blocked wall and head through into the Dread Lands. In the Dread Lands, make your way through, avoiding the bomb traps and red golems while defeating the steel and partially broken golems while finding keys to progress past the locked doors.

    You’ll find the Mul Cavern (where you’ll find the Rocket boots which is in the leftmost area of the cavern). After obtaining them, use it to help maneuver past the bugs and spiders as well as getting out of the caverns on the other end.

    Next, you’ll be at the Ancient’s Crater where you’ll have to avoid setting off the trip wires for bombs and lasers, breaking any sentries and avoiding the laser towers by flying over them (or just going underneath them) where you’ll assemble the artifact at a certain point.

    Use the artifact to disable the laser sentries and activate the switch that will lead you deep into the ancient civilization. Once there, use the artifact as well as your other items to get deeper inside, looking out for enemies, exposing hidden paths with the artifact, and activating switches.

    Near the end, you’ll have to fight a giant security mainframe robot, where you’ll need to use the artifact to disable the eyes and then beat up the main body of the robot.

    After that, you’ll end up in a chase scene where you should run for it while activating barriers for the pursuer and activating switches to progress through and escape.

    You’ll have beaten the main part of the game at this point, but there are more areas to visit.

    After freeing the person stuck under some rubble at Atai Bridge and giving that person 30 moonstones and taking a teleporter in Fran’s Lab.

    You’ll end up in a building in Forgotten Forest where you’ll fight harpies, arcs, and plant dogs while finding or retrieving keys from the environment or from enemies as you make your way through the forest. You’ll end up unlocking Hidden Village which is necessary for 100% completion.

    Reply

    Saviour-V teleports in...

    After completing the game, if you manage to get

    42 moonstones, and possibly all health upgrades (Heart Rubies and Choc Protein Shakes inclusive),

    a new area will open up. Talk to Gill in Hidden Village for some information on it.

    Also, I've finished the game, thanks to that progression guide. Feel free to ask me anything, as long as it's not speedrun-related; I wasn't aiming for that one. ^_^;

    I can provide a little insight on a few power-ups and collectables.

    Saviour-V bows, and teleports out...

    Reply

    Saviour-V teleports in again...

    If you're fast enough to do this, you can pull off what was called the "Ascension Glitch":

    1. Charge up your Ki by holding down the Attack button.
    2. Let go and immediately mash the Attack button quickly.

    If done successfully, you will get in 3 consecutive powered strikes instead of one, and that can be useful in some places.

    Alternatively, completing the

    2nd potion quest

    in Atai will net you the

    power potion (which boosts your speed and attack power for about 1 minute),

    provided you have the patience to farm for that important item to complete it.

    Saviour-V bows, and teleports out again...

    Reply
    Furipu October 10, 2014 7:19 AM replied to saviourv

    Hm, sounds like I ought to hunt down the last two moonstones then. I thought they were spares since they're over a multiple of five, so I skipped them... Just when I thought I was done, something new pops up, heh. Thanks for the info! One question though - is there a way to continue playing after finishing the story? I seemed to be stuck at the end of the credits, but what you said suggests otherwise.

    Reply


    For the record, I think this game is better than that Zelda game for the Gameboy (the one with the fish...?)

    Small snag I've run into...
    When the game is on pause (spacebar) it says "Get Save Password". The button seems to react, but I've never gotten a password. I'm becoming increasingly paranoid that I will lose my progress in this game. Does anyone know how the passcodes work?

    Thanks!

    Reply
    Patreon Contributor Questioner October 10, 2014 9:10 AM replied to yakksoho

    yakksoho:

    The code is copied to the clipboard.

    Reply
    yakksoho October 10, 2014 9:30 AM replied to Questioner

    Thanks Questioner!
    My that's a loooooong code! O___O

    Reply
    silent george October 10, 2014 12:34 PM

    Ruby Hearts and Moonstones guidance? Do the flashing symbols on the map mean that there are more to be found in that area? Are there certain powerups needed before achieving them? Trying to avoid grinding for hours...

    Reply
    yakksoho October 10, 2014 6:30 PM replied to silent george

    Silent George:

    Yes, the flashing icons denote all Rubies and/or Moonstones yet to be achieved. But it does not tell you how many, nor if it is yet possible to reach them.

    Expect to be kept on your feet, and look for areas that seem impossible to reach right now. (Especially true early in the game... you will see the flashing icon but cannot achieve all the stones until you have power-ups or tools from further down the road.)

    Regarding regions with multiple entrances:

    Through experimentation I have determined that in regions which cover two "spots" on the map (such as Misty Gulch, or Sunflower Road) ... both spots will show the icon. So you can enter from either, say, the North or South point, but you don't know which end the ruby/stone is closest to.

    At first I found that confusing ... but after realising that any area you can walk to without going back to the map (including Atai and the Tower), it becomes a great help to locate the rest of the stones!

    Happy hunting, finding these stones is my favourite part of this game so far :)

    Reply
    yakksoho October 10, 2014 6:38 PM replied to saviourv

    Since you mentioned it Saviour V, I'd like to ask the board about the potions.

    In Atai you are told to retrieve slime jelly so the shamaness can make you a potion. I always assumed I'd run into something slimy eventually, but it hasn't happened yet!

    By now I've been to most areas in the game (excepting the forest) so at this point I sense I've overlooked it. Any tips on generating gelatinous byprouducts?

    Reply
    Furipu October 11, 2014 2:32 AM replied to yakksoho

    I didn't complete that particular quest, myself, but from what the scribd guide (mentioned earlier by kathleen) says, it seems the flying jellies are the floating blue things that generally try to avoid you in the Mul Cavern.

    Reply

    Just a question, how are you meant to defeat the

    flying thing in the lab area, after the robots?
    It's the one that flies around, drops bombs and throws stars. I assume that you're meant to hit it when it swoops down, but pretty much every time I just get hit and can't attack. Any hints?

    Reply

    ...aaaaand power of the post! Got it :)
    But now I'm up to the next boss, and I've got no idea of how to stay alive, nor damage it. I'm going to have to think about this one for a bit longer.

    Reply
    yakksoho October 11, 2014 5:02 AM replied to Furipu

    Thanks again, Furipu for the explanation.

    :( I'm disappointed to hear that the source of this rare potion are these ephemeral, innocuous little glowfolk!!! I did not even realise they could be destroyed (who would want to destroy them?)

    After telling myself repeatedly, it's only a game! I took to hitting as many as possible with rocks (I see now what SaviourV meant my 'patience'!) Still, no luck in scoring some jelly.

    Honestly I don't mind spending time hunting this jelly down... the longer I can delay my interactions with those rabid moth plagues, the better!

    Reply
    saviourv October 11, 2014 5:14 AM replied to yakksoho

    Saviour-V teleports in...

    Those flying slimes in question are indeed the ones found in Mul Cavern, yakksoho-san.

    The only trouble is that it does take a long time to get their drop (the goo needed for the quest). Almost on par with the Translucent Meat from the Ghost Wisps.

    Which, if you can get THAT, can be given to one of the chefs in Daea for her to produce Mystery Bento which restores a whopping 50 HP!

    A few tips on farming this elusive item:

    1. Get the Lucky Belt (found in Farmer's Block, from the man who keeps hearing croaking noises). It'll increase your chances of drops a little bit more.

    Ironically enough, the man himself will CROAK (i.e. pass away) after you complete that quest.

    2. The area that has the highest concentration of Flying Slimes is the save statue deep within the Mul Caverns. Save there when you can. Also, take advantage of the Spotted Lepista that spawns automatically every time you reload your save from that point; it'll give you 15 HP while you're in the caverns, and believe me, you'll need it.

    3. The flying slimes shy away from close contact AND whenever you splatter one of their own within close range. Therefore, you'll need to hit them with a well-placed shot from your slingshot, and immediately drop out of their sight range if there are any other flying slimes near the one you've just killed.

    For instance, let's say you spot 2 flying slimes, not too far away from you. Move away from them until they're on the far side of the screen, then shoot one. Immediately move away once you hear it splatter, then move back in after you've heard the sound of movement.

    If you're lucky, the next slime shouldn't have moved too far, and you can snipe it, and repeat the process. Otherwise, if the slime(s) have moved onto the walls, consider reloading your save; even if you leave the save room, those slimes won't be there when you return to it, and waiting for those slimes to leave the walls takes more time.

    Hope that helps.

    Saviour-V bows, before teleporting out...

    Reply
    tsai.debra October 11, 2014 6:06 AM

    any general tips for killing harpies? specifically the two in front of what I presume is the path to the

    hidden village

    Reply
    Furipu October 11, 2014 6:30 AM replied to tsai.debra

    I'm afraid the most sure-fire way is to whack 'em when they swoop down... It seems to help if the swoop itself is mostly vertical, so you don't have to dodge too far. Then jump-melee them on their way back up. You may be able to land multiple javelin hits while it tries to get back up, as each hit knocks it back a bit and by the time it gets back, your stamina is ready for another throw. Supposedly it's possible to kill them by shooting their own bomb, but the most I managed to do was make one drop it prematurely.
    Also, if memory serves, there indeed is a duo of harpies right by the area exit, so you're almost done.

    Reply

    Saviour-V teleports in again...

    When dealing with harpies, the slingshot can be both your best friend and your worst enemy. It is possible to hit a harpy's bomb if you immediately pull out your slingshot the moment a harpy flies upward away from you; that's the sign that it's about to bring a bomb into play.

    Additionally, the slingshot can be used to interrupt any actions that a harpy is about to do, which also means that you can stop it from diving at you if you hit it before it does.

    Or, in a more practical scenario, whenever a harpy hovers in place and flaps its wings (the tell-tale sign of a dive-bomb), pull out your slingshot and hit it immediately, and you might be able to either stop it from diving, or hit it mid-dive (causing it to cancel the dive-bomb).

    The "worst enemy" bit is because the slingshot takes a few precious moments to angle itself about 80 degrees upwards, so if you're unsure that you have enough time to hit the harpy when it's either bringing a bomb or preparing for a dive-bomb, immediately press Down (to cancel your slingshot), and roll away from its range!

    Saviour-V bows, and teleports out again...

    Reply

    Saviour-V teleports back in, momentarily...

    Something else I forgot to mention. Should you be lucky enough to smack a bomb while a harpy is carrying it, the harpy will be catapulted far away from you, shrieking in pain.

    Hit a second bomb successfully, and you'll defeat the harpy entirely.

    Saviour-V bows, before teleporting out again...

    Reply

    In the Jail, the door next to the gate for cell block B...

    there are four switches which open a gate, with some chests inside. The switches remain on for only a few seconds. What is the method of success, I have tried various tactics of ricochet and bombing (and used honey potion) to no avail. Thanks.

    One criticism I have against this game if any.... there is a difference between "challenging" and "patently insane". These last few moonstones definitely crossed the "fun" line hours ago.

    Reply
    yakksoho October 11, 2014 9:34 AM replied to yakksoho

    Finally, I have gotten my share of POP...
    Regarding jail room with the four switches:

    The method which worked for me:
    (1) drink honey potion and equip bombs
    (2) stand on the upper left switch. deposit bomb on top of it.
    (3) jump to table, then to upper right switch. deposit a bomb on top of it.
    (4) turn so you fall off the switch; quickly turn and fall down the ladder; turn in mid-run so you land on the little shelf. (while running, switch to the slingshot)
    (5) now you are on the shelf. quickly aim the stone so that it arcs and hits the lower left switch (you cannot see the switch, so practise the angle first)
    (6) as soon as the first stone is released, shoot the lower right switch (closest to you)

    The key for me was deciding when to run, fall or jump (if she falls too far, there is a delay before standing up.) But the jump ascension adds time too. Finally I struck on a good combination.

    Unfortunately, the more memorable parts of this game are quickly becoming these last tedious bits, which I consider poorly designed. Not just devious, but disenchanting. Better than glitches I guess! (recalling the Ocarina of Time glitch in the water labyrinth....)

    Reply
    kathleen.indie.gee October 12, 2014 1:26 AM

    Regarding the four-switch puzzle in B-cell of the Prison, Do the switches have to be hit in a certain order?

    If not then there is a glitch. I can't see all the switches at once, but I can hear when them click off. I have done it successfully several times, but the stone pillar doesn't lift.

    First method

    Place a bomb on top of the left top switch, jump on table, then place bomb on top of right switch. Jump down (while switching to spear). Throw spear at bottom left switch, jump down and hit fourth switch.

    Second method

    Stand at the bottom of the ladder. Throw a bomb, towards the lowest switch. Climb the ladder. Jump and hit both top switches (use the wooden beams in the background to help line up your jumps), then fall down the left side, and hit the last switch.

    Reply

    I don't think there's an order to it.
    If you wanted to try my way, it felt pretty difficult to me but here goes:

    Before starting, throw a spear next to the bottom-right switch so that you can land on it and then walk over to melee it.
    Stand just to the left of the upper-left switch.
    Use a slingshot to hit the upper-right switch, then straight away hit the one above you with another slingshot.
    Then drop down to the left, and melee the switch.
    Finally, hurry over to the bottom-right switch. landing on the previously placed spear, and melee it.
    This took me a lot of tries, so probably there's a better way.

    Reply

    Hey all, hoping you can help me with a problem at the Forbidden Forest...

    After defeating the robot in the underground lab, I used the dropped key to open the door inside instead of using it to progress. Is there another green key I can get or am I stuck?

    Reply

    Also - Where is the moonstone in Duri Forest? I can't find it anywhere even after consulting the guide!

    Reply
    saviourv October 12, 2014 9:59 PM replied to matey8

    Saviour-V teleports in...

    A few enemies drop keys within the Forbidden Forest, but only once. If there's an area that you don't have a key for, explore and defeat some enemies until one appears. You shouldn't have to worry about not having enough keys to explore the Forbidden Forest entirely.

    As for the Duri Forest area, which Moon Stone are you after?

    Saviour-V teleports out...

    Reply

    Well, I thought there was only one moonstone in Duri Forest. I guess not (I'm at 40)? Directions on finding any moonstone there would be much appreciated. :)

    Reply
    Furipu October 13, 2014 2:41 AM replied to matey8

    As far as I can see there's only one moonstone in Duri Forest, maybe you mistook it for a heart ruby or didn't save after getting it?
    Either way, it's in the room where you extend bridges by dropping a box on a button down below (thus completely blocking off the bottom area). Once the bridges are extended, go left, even past the entrance door and you should get it easily.

    Reply
    kathleen.indie.gee October 13, 2014 2:30 PM

    @matey8 - There are two hearts and one moonstone in Duri forest. Here are directions to the moonstone:

    In the ruins, go to the room with the Duri fruit tree. Climb to the top and go right. Go through the locked metal gate and in the door. From here, if you go left, there is a stone column. If you go right there is a bridge puzzle. When the bridge is closed, go back past the door, and the stone column is now open. Enter the door. Knock down a duri fruit and hit it again to activate the switch and reach the moonstone on the left.

    Reply

    I think I've tried to beat

    0066

    at least 50 times now. I was barely getting any farther each time until I got to a door I can't even find the switch for! How do you

    get through the room with the stationary auto-target robots, without getting killed first? There's definitely not enough time to kill them both before 0066 catches up.

    How do you open that door??

    Reply
    Furipu October 14, 2014 2:08 PM replied to bavnah

    It's a bit hit or miss, depending on how fast you can hit switches, but the following seems to be the intended way:

    The door indeed opens by killing the two turrets.
    If you've just been simply running, there won't be enough time to do so, however - as you noted.
    You may have noticed that 66 has to bash through any doors that you leave in his way.
    Just close any doors you pass through that have a switch you can reach from that side, which will delay 66 more than it delays you.
    If in doubt, use a stamina consumable so you're faster.

    Reply
    h.proksch October 14, 2014 3:53 PM

    this might have already been asked, but what do you give the blue haired person at the Cross Roads in to get rid of the smell, and also what exciting ingredient does the cook in Daea need ?

    Reply
    h.proksch October 14, 2014 6:46 PM

    also, where is the moonstone at the wall?

    Reply
    Furipu October 15, 2014 2:16 AM replied to h.proksch

    Ironically, two of your questions have the same answer:

    The soldier complaining about smell gives you the moonstone once you give him some Mikan Fragrance, which is unlocked by bringing some Mikan Fruit to the potion shop.
    You can find the fruit in Duri Forest, in one of the caves initially blocked by rubble - they look a bit like oranges.

    As for the cook, you can get a hint from an adventurer in the same city:

    Translucent Meat, dropped by Ghost Wisps in the Místy Gorge (the ones that fly by in swarms). Quite low drop rate, but the unlocked food heals for 50, which makes it the best purchased food.

    Reply

    I really liked this game, but..now I don't. This is a fine example of how a terrible ending can ruin an otherwise pretty great game. I don't even care if this is continued in another game, it doesn't matter because that's how bad the ending is.

    If this game is supposed to be like Zelda, it monumentally failed for this one reason. Every Zelda game has something very important at the end, called closure. The player feels like all the work they've put into solving puzzles and collecting things amounted to something. That's not here.

    It's like if the "worst ending" in one of the DS Castlevania games was the only ending. And that's terrible.

    Also, a lovely glitch:

    Despite having definitely collected everything in the game, Gill remains firmly planted in the watch tower area, refusing to ever move into the hidden village and reveal the secret location. It doesn't really matter to me unless going there changes the ending, which I'm reasonably sure it doesn't, but it still kind of sucks.

    Reply
    bavnah October 16, 2014 4:16 PM replied to Furipu

    I have been using honey to be faster but I just can't seem to master the jumping melee attack - I just keep missing and they're ALL at the ceiling GRRR. I have done almost everything else I can do in the game besides buy the blood ring (I have all but one moon stone and all but one heart ruby - I don't think either of those will actually help me in this situation and since they are two of the hardest challenges in the game, I'm not going to waste my time for a stinking badge).

    Does the blood ring help? The vendor doesn't really say what it does....

    Also, would it be useful to stock up on bottles of wisps? Obviously it's not easy since they're expensive, but I have about 700 in the bank right now and I could have a few available. The only thing is that they don't regenerate with you if you do end up dying - I'd be putting all my eggs in that basket hoping I make it through first time.

    I really wish I could save just before 66 so I don't have to pay to revive at the last checkpoint and I could keep my items. It's just such a pain and it's so hard!

    Reply
    Furipu October 16, 2014 4:55 PM replied to bavnah

    The blood ring won't help you there, since its exact effect is that

    whenever you are under 10 hp, it regenerates you up to that treshold. Great for surviving lots of smaller hits, but it won't save you from an instant kill like what you've got there.
    On that note, wouldn't using wisps just make 66 hit you again instantly?

    In your case it seems the only thing missing is getting the ceiling switches quickly... I didn't test this, but maybe consider using the javelin on them instead? I just hope it won't go just barely right under them.

    Reply

    A walkthrough from the Jayisgames team should be available tomorrow.

    Reply
    silent george October 22, 2014 6:10 PM

    I'm sorta stuck on the Moonstones. I have 28.

    For the one at the Wall, I've

    gotten the one by rolling down at the bottom of the bunk room. But its still flashing a moonstone.

    Also, I'm stuck finding the (last?) heart and moonstones at the Crossroads, Daea, Atai/Bandit. I have gotten the nasty one with the ladders at the Prince's Tower, BTW.

    Reply

    Phoenotopia: Walkthrough © Jayisgames 2014

    Here you’ll find a detailed walkthrough for Phoenotopia, along with all secrets and tips on enemies and bosses. Keep in mind though, that the walkthrough contains a lot of spoilers.

    1. General info and tips

      • Most important thing to remember when playing Phoenotopia, is that the game is full of secret places where you’ll find valuable items. Keep your eyes open all the time. Check every corner, climb every ladder, enter each room and destroy every box and pot you come across.

      • Money could be an issue, especially if you’re looking to become a killing machine. Play smart and only use money to resurrect when your last save is far away.

      • Talk to everyone you see. While some of them will give you useful information, others will be in need of something. If you manage to find out what it is and give it to them, you’ll almost always be rewarded.

      • Always carry at least a couple of healing items in your inventory. Stamina and speed boosters (i.e. hoeny) could also come in handy, especially when salving puzzles.

      • Don’t just rush into enemies. Observe their movements and always enter combat with a strategy in mind.

      • The maximum amount of health points you can have is 99. You will need all 23 Heart Rubies and 5 Chocolate Protein Shakes to get there.

      • There is a total of 42 Moon Stones in the game. Unless you’re going for the “Master Moon Stone Hunter” medal, you won’t be needing the last two.

      • You can use the number keys to switch your tools quickly.

    2. Step by step walkthrough


    3. The walkthrough covers the whole game. From the moment you wake up in Panselo, until the very last boss. Moon stones and heart rubies are also included in here, as you progress through the game. However, if you’re looking for their actual locations, check the Heart Rubies and Moon Stones section.

      First thing to do when you wake up is to go left and through the door. You’ll find yourself in a house with two floors. Although the game has a great story, if you aren’t interested in details you can skip talking to everyone inside and head through one of the doors on the upper floor. Go right to the second town area and enter the first house you encounter (the one with the Pukis in front). Once inside, you will see a gray box. Push it to the right, until it reaches the wall and climb up to pick up the Wooden Bat. Equip it and proceed forward. You will see a bunch of small boxes next to a ladder. Grab a box and put it on the plate on the right. This will open a door above you. Now you can climb up the ladder and grab that Moonstone. Moonstones are precious and often well hidden, so keep in that in mind while exploring new areas.
      Now that you are armed with a deadly stick, get out of that house and head left. Talk to clem, the guy standing in the carrot field, to learn the location of the Duri forest. Proceed to the left until you reach the village gate. Climb up the ladder and hit the gate switch (purple sphere thingy). Head out and go to the Duri Forest, where you adventure will begin.

      Duri Forest

      Once here, simply proceed forward until you reach a cut scene. There are a few things to look out for, however. First of all, look all around for any treasures. Second, frogs are jerks! I know what you’re thinking: “Oh, look a frog. I’ll just go ahead and poke it with the might of my Wooden Bat until it drops dead.” Now, like I said, frogs are jerks and they will probably piss you off. The easiest way to deal with them, is to wait for them to jump and then strike. Sadly it takes two hits at this point of the game. As a Ki student you will have to learn to be patient, not just with frogs, but with most creatures you encounter in the game (all jokes aside).
      If you find yourself low on health, hit the fruits on the Duri trees and then smash them. They will either drop a Duri Fruit for you to eat, or get shattered into pieces, which heal you. Last thing to look out for is save statues. Save as often as you possibly can, as reviving costs money which you will really, really need later on.
      Once you’ve found Alex and obtained the slingshot, hit the switch with it and go inside the dungeon. Kill Slimes one by one if you don’t want any trouble. Bats can be dealt with using the Slingshot. Keep in mind that the stone from the Slingshot will bounce 2 times. This will allow you to hit some switches indirectly and push items that you cannot reach.
      Once you obtain the key to the top floor and enter it, you will come across a room with some bridges that need to be activated through a pressure plate. On the bottom of the room, you’ll find a small cube. Grab it, head up and drop it from there. Before you proceed, head back to the left end of the room and enter the last door. You will see a platform that needs to be triggered through another pressure plate. Aim for the Duri fruits with you Slingshot and then hit the one that dropped off. This will trigger the pressure plate and now you can climb up and collect the Moonstone. Once you’re done with that go back to the big room, activate the bridge the same way as before and proceed forward. Go through all the rooms before you head into the one with the boss.

      Boss fight
      Now that you hate frogs (as we all do at this point), a giant armored frog for a boss doesn’t seem too pleasant, does it? Not to worry. This is a fairly easy boss. Here’s how to deal with it in case you’re having trouble:
      First of all, you won’t damage it while bashing its head with your Bat. Instead, aim for the stack of Duri Fruits above it. This will make the frog turn around for some reason, so now you can poke it safely from behind for a brief period of time. Repeat three or four time and you’re good to go.
      THINGS THAT YOU SHOULDN’T DO:
      1. Do not try to use the Slingshot while you’re being sucked towards the frog or while it’s shooting Duri Fruits out of its mouth. This will only result in damaging yourself before you even get to shoot. Aim for the fruits only before and right after the frog throws up some Duris at you.
      2. Do not try to focus your Ki for a stronger hit (holding ‘X’). This will only slow you down. Just spam the damn button until the gigantic jerk switches sides.
      Finally, if you are having that much trouble or the frog is just pissing you off and no one is looking, hit space, go full screen and if your game is moving slower you’ll be able to deal a lot more damage for one turn (but that’s cheating).
      Congratulations! You just killed your first boss and obtained your first Heart Ruby. You can now proceed to the next room and get a hold of the “Shooting Star”. After the “close encounter” with that Spaceship flying above your village, head back to Pansello. You will need to find your little brother there. He’s on top of the very last building on the right. If you haven’t already do some exploring in the buildings on your way there. You will find quite a lot of money stored in chests, boxes and piggybanks.
      Now do as Alex says and head back to your home and talk to him again so he can tell you what to do. After you’ve realized that you aren’t the smart one in the family, go and find him again after you’ve woken up. He will give you the location of the Sunflower Road.
      Before you head off, stop by the Dojo and buy the Scroll of Rolling. It costs only 50 rai while you should have about 100 – 130, so it shouldn’t be a problem. Then head right and climb the ladder to the upper floor. At the left end you will find a small gap. Roll in there and get that Heart Ruby. Now get out and head to the wall at the right end of the village. There is a hidden gap under which you can roll. Inside you’ll find some boxes, one of which contains a Moonstone. You might also want to stop by the shop and buy some food for desperate times.
      Go to Sunflower Road. Whatever you do there, DO NOT attack the bees as they will group up and start chasing you. There is a Moonstone on one of the leaves but getting there can be tricky as the bees keep flying around the sunflowers. Proceed forward through the village and the broken bridge until you reach Atai.

      Atai Bridge

      Once you’ve reached the middle section of the bridge you’ll notice a Moon Stone. To the west of it, there should be a large metal box and a smaller box. Push the box to the right and use a slingshot to get the small box out of the broken bridge and stack it on top of the larger box. Position the metal box so that you can roll through and snatch the moon stone.
      Once you’ve got the Bombs, you want to destroy the stones and free that scientist looking guy. He’s really hard to miss so you shouldn’t have trouble finding him.
      At the very end on the west side of the bridge, you’ll notice a Heart Ruby. Blow up the large stones that block the path to it. Next, go right until you see two big metal boxes. Push the bottom one to the left and then use it to push the one on top of it. Once you get the box to the small gap, roll under and get that heart ruby.

      Atai City

      Once you’re in Atai, you might want to ask around to know what’s going on. There is a bandit in the jail, who won’t say anything about the Bandit’s Lair. If you’ve done your research in the city, you’d know that you’re going to have to visit the local potioner. You’ll find her in the last door to the left above the food shops. You can buy a Talkinator Juice for the imprisoned bandit. Before you get too excited about the 5000 rai bounty that you’re going after, go explores the areas to the left. You will find your weird sister there begging you to help her with some debt. After you’ve talked to her, go and visit her “boss” to the left. While you’re there, you might want to go in the kitchen. Enter the door on the ground floor and destroy all the boxes, one of which contains a moonstone. Now that you’ve talked to the mayor and found out that you’re going to have to give away the whole bounty for someone who hates animals, go back to the city.
      Climb on top of a building and start going left until you reach the top of the prison. You will notice that one of the windows is darker. Jump on it and enter. Find the bandit in his cell and give him the potion. He will give you the location of the Bandit’s Lair. Now head back to your sister and ask her about interesting places to visit. This will give you the location of Adar’s house – the guy from whom you’re going to borrow some bombs for the Bandit’s Lair. On your way out of the city, drop by the Inn. On the ground floor you will find a big wooden box blocking a ladder. Destroy it and go down. Once in, roll your way through the tunnels to find another Moon Stone. You might want to visit the shop as well. There is a decent weapon for sell, an armor and a lamp. If you don’t have enough money to buy everything, only buy the Iron Hammer. Your next priority is the Lamp. The Leather Armor should be a luxury at this point.

      Adar’s House

      Once you get there, head west until you reach the end of a cave. You will find the bombs just standing there. Grab them and head back. Stop buy his house, blow up that rock blocking the ladder and “borrow” his money as well.

      The last thing to do before heading to the Bandit’s Lair, if you have 25 rai to spare, is to stop by the shop in Atai and buy a Wooden Sword. Then go to the Inn in the Sunflower city and give that sword to the little boy. He’ll reward you with a Heart Ruby.

      Bandit’s Lair

      Go to the west end of the area and destroy the last rock on the right. A door to the Lair will appear. Once you reach the room with the bridge, be very careful! The ground is full of pressure plates, which will trigger traps. Eventually you will fall down in an area full of Bats and Sand Dragons. You can either try to kill the Sand Dragons or you can try and ninja your way to the switch in the bottom right corner. Hit that through the stone and head up the stone ladders. Right above the switch, you’ll see a Moon Stone, blocked by some rocks. You can get to it by jumping and throwing a bomb right before it explodes. Once you’re done with that too, head to the upper right side of the area and climb up the ladder.
      Once you enter the door right of the bridge, you’ll find yourself in another room with a blocked door with a button sequence puzzle. Go in the room in the sand. You’ll see five or six bandits sleeping in there. As long as you’re a decent ninja and don’t touch or hit them, they won’t wake up. At the west end of the room you’ll find another door. Inside is a journal containing the right order for the buttons puzzle.
      In the next room head left and go through the door below. You’ll find some money in there as well as another frog in a box. Go back jump up from platform to platform heading west, until you reach a save room. Inside are two more doors. In the room to the right, you’ll find the sequence to the second puzzle. Then enter the upper door. There’s a ladder there, leading to some treasure and to the top of the building. Once you’ve collected everything, head back to the main room and enter one of the two doors below. Now go through the door on the east end of the room. Climb up the ladder and go left. Trigger both traps but do try to avoid any damage. You’ll see a timed switch. Climb up and drop a bomb, then quickly go get the key below you. That’s one out of two keys. Head back to the previous room. You’ll see a switch right above the bridge. To avoid any fatal damage, wait until all the bandits are on the left side and hit the switch with your Slingshot. Now quickly get them all with their backs against the wall and kill them simultaneously.
      Head right and enter the door. In the new room, go downstairs. You’ll see another puzzle with timed switches. All of the switches will open a different barrier. Only the last one on the left will stop the magnet for a short period of time. Drop a bomb next to the rightmost switch and right before the bomb explodes, hit the left switch, so that the key can drop. Next comes the switch on your right and then the next one.
      Now that you have the second key, head up and start climbing the ladders. Be very careful not to touch any of the bells, as they will trigger an unavoidable arrow trap. Once you’re out, go back to the main room. Now save your game and proceed through the locked doors.
      Boss Fight
      There isn’t much to say about this boss. You’re gonna have to drop bombs whenever it comes out of the sand to bite you. Once it has swallowed the bomb, it will come up as soon as the bomb explodes and you’ll be able to deal some damage. Make every hit count as the Sand Dragon will get angrier each time it swallows a bomb.
      Now that you’ve defeated the boss, collected your heart ruby and captured the bandit chief, head back to the safe room. Go to the upper room and climb the ladder all the way to the top of the building. You’ll come across a sign warning you not to jump off, since apparently Bob thought it’s a clever shortcut and broke his leg. Now, you aren’t Bob and you don’t get beaten by little girls with pink hair, so don’t hesitate and jump right off. You’ll land right above the entrance door. Destroy the rocks in front of you and a hidden door will pop. Inside you’ll find a piece of High Quality Cotton Silk which you can sell to the silk lady in Atai for a decent amount of rai.
      Nothing left to do, but head back to Atai City and free your sis. Go to the prison to give the guards the Bandit Chief. After a few cut scenes, your sister will be free and you will have to head back to your home village. Head to your house and talk to your little brother. Lisa will tell you to look for Thomas, the scientist guy and will show the location of the next area – Misty Corge. Before heading there, visit the mayor’s kitchen in Atai again.
      Once inside, talk twice to Albert, the first guy left of the door. He’ll give you a love letter for your sister. Once you deliver to Lisa, she will give you her reply letter, so head back to Atai and give it to Albert one last time.
      Now that you’ve crushed the poor bastard’s heart, it’s time to pack and head to the Misty Corge.

      Misty Corge

      You will need to cross a river to continue the adventure. But as we know from earlier, you can’t really swim. Not to worry! You can buy a Floatation Donut from the fisherman inside the shop. If you don’t have the 60 bucks, go kill some monsters and hope that they will drop some money. There isn’t much to do here. Just go east as fast as you can. This is a dangerous area. The only place you would want to stop is the third area east of the Inn. Once you’ve reached it, swim until you see a flower on which you can climb. Hop on it and head back left to climb up another flower. Then go right, jumping from platform to platform until you see another Heart Ruby. Beware of Spiders and Wisps.

      Crossroads

      In the Inn in this town, you’ll find a girl with brown hair, in a karate costume. In order to restore her memories, you’ll need a Duri Fruit and a Chocolate Protein Shake.
      In order to get the Heart Ruby in this village, you’ll need to rent a room and rest. Go outside the balcony and jump over to the one on the right. Inside you will find the Ruby inside a box. So whenever you fell like spending a 100 bucks to rest and get another ruby you know where to find it.
      To get the Moon Stone, talk to Lass, the green haired girl inside the Inn. Next, head east to the tree house and kill all the Slimes. Collect your money from Lass once you’re done and leave the village. Go to the Great Walls. On the top of the second tower, you’ll locate a guy named Gill (you need to find him at Fran’s lab first). Talk to him and head back to the Crossroads. Go to the tree house again and talk to Floe, the girl with the orange hair. She will give you the Moon Stone.
      Another thing that you can do here is to get a robot toy for the guy in the first room on the left. You will find those in Daea’s shop.

      Fran’s lab

      By this time you should have at least 5 stones, so head to Fran’s lab and talk to him, so he can reward you. Keep coming every time you get 5 more. He will eventually give you a Heart Ruby and more.

      Thomas’ Lab

      Head to Thomas’ lab next. Once inside use the Slingshot to destroy the box above the door and activate the switch. This will open the door in the top right corner of the room. In there, grab the box from the bottom of the room and put on the pressure plate above. On the ground you’ll see four more pressure plates. Put boxes on three of them and stand on the fourth one. The wall on the right will open. In there you’ll have to fight a giant robot that shoots lasers.
      Boss Fight
      Don’t try to dodge the lasers! You will get hit at least twice if you do. Instead just jump over the robot and let it shoot in the other direction.
      Always have your Slingshot ready for action! As soon as mister Terminator turns off for a while, hit him until he’s on the platform and then hit the timed switch above you. That way you’ll deal about twice as much damage each time.
      Once the metal head is dealt with, climb up and go to the room on your left. Talk to the paranoid guy in there so he can fix your golem head. Next stop is Daea.

      Daea

      First things first. Head over to the bar and enter the bottom left door. Once inside, throw a bomb at the box that is blocking your way down. Now, push second box on the bottom to the right. Go back up, push the other box on it and roll under the wall to collect your Heart Ruby.
      Now, go back to the bar and head up, right above the door you came out from. Destroy the grate and roll under the wall. You will find yourself in a small maze of tunnels. Roll to the left. Now drop a bomb and hit it until it reaches the grates on the ceiling of the room below you. Get in there and collect your Moon Stone from the chest.
      Meanwhile you can buy a comic book from the shop and give it to the prisoner back in Atai City. He will reward you with a Moon Stone.
      Now you can head west and go to the king’s castle. After all the cut scenes, go west again and enter the door to the sewers. Talk twice to the guard inside and head to back to the king’s castle. You will see a little girl on the bridge in this area twice. You’ll need to find a girl called Ruby. Go back to town and find the house with no signs on it. Enter the door on the second floor and talk to the guy in the blue shirt. Head to the shop and talk to the lady in blue. She’s on the top floor, west side. Now that you know where Ruby is, go ahead and enter the sewers. The door inside should be unlocked.
      Once you enter the door below you, head right and swim until you find some pots. You will find a Moon Stone in one of them. Proceed on your way west until you climb a ladder and enter another room. Head right. You will find ladder that is out of reach. Kill the Slimes and stack up the boxes so you can climb up the ladder.
      Jail Sector C

      When you reach the main room (the one with the many locked doors), enter the save room in the middle. Once inside bomb the east wall. Destroy the boxes inside to get another Moon Stone. Now head to jail room C. You’ll find a key on a platform above you as well as 4 timed switches. Just plant a bomb between two of them and hit the other two when it blows up. Proceed forward and free everyone from their cells.

      Jail Sector D

      Go back to the main room and enter Jail sector D. Once inside, use your Slingshot to get the key down (stones from the Slingshot go through the platform). When you’re done freeing everyone from their cells, head to cell C IV and bomb the ground. You will find yourself dropping down to sector E. You’ll reach a room with two dogs and a ladder leading down. Kill the two dogs and go down. You will come across a puzzle with a magnet. Turn on the magnet and send it right so it could pick up the key. Hit the switch to open the platform blocking it and use the magnet again to drop it in the hole above you. Once that’s done, close the platform, turn on the magnet again and send it to the left. Turn it off and voilà. Once you’re out save your game, as a boss fight awaits next.

      Jail Sector B

      Before you unlock the door to Jail sector B, enter the room that’s right in front of it. You’ll see a puzzle with four timed switches. Climb up between the top two and throw a bomb down the one on the left below you. Quickly switch to the Slingshot and shoot the top left one. Turn around, hit the right one with you weapon and run down to the last one. A door will open with tree chests inside. One of them contains a Moon Stone.
      Next stop, jail sector B. Inside you’ll find 4 timed stiches and a few boxes on the right. Put a box on the platform above each switch and hit the one in the middle. Grab the key and head east.
      Boss fight
      Kill everything as fast as you possibly can.
      Try to get soldiers and/or dogs stacked so you can hit them both at once.
      Use the Slingshot to stun enemies you’re running towards. Very useful against Archers.
      Once you killed everything that tried to lay a finger on you, use the Javelin to get to the door above. Inside the room you’ll find the key to the cell. Open it up and talk to Thomas and the other Soldiers. The key to jail sector A is inside.

      Jail Sector A

      Head back to the main room and get to jail sector A. Once you reach the cell room, go in the cell on the bottom level. Blow up the wall on the left. You’ll find some boxes in there. Stack them up next to the door you came in from and drop a bomb on top to blow up the low above. Use the spear to get to second floor and blow up the right wall. You will find a Heart Ruby inside.
      You can now continue to the top cell and get out of there.
      Back in Daea, go inside the sewers again. Enter the first door below and make your way through the platforms above the water. Instead of continuing down through the water, throw a javelin on the wall and climb up. You will come across a few pots, one of which contains a Moon Stone.

      The Lucky Belt

      Go to the shop to buy a sandwich. Don’t eat it, it’s not for you! Next head back to Duri Forest. Go east until you reach a cave entrance blocked by a stone. Blow up the stone and get inside. You will reach an open area at the end of which, there are some orange fruits. Get one of those and head to Atai. Go to the potion lady and give her the orange fruit you just got.
      While she’s making the potion, go west until you come across two large boxes with an anchor mark on them. Throw a javelin at the lowest possible point on the platform, climb up and destroy them. Inside is another Moon Stone. Now head to the mayor’s house but don’t enter it. Throw a javelin on the wall in the left end and climb up the building. There is a window that is darker than the other one. Climb on it and go inside. On the right you’ll see a gap with a switch at its far end. Use the Slingshot to hit the switch and the door behind you will open. Borrow the mayor’s money by destroying everything you see inside.
      Go back to the potion lady and buy the orange potion. Go outside and check the carpets below the Inn for a hidden door. Hit the switch above you and go down until you reach 3 piles of boxes. Use them to climb all the way to the right top corner of the room. There you will find another Heart Ruby.
      Now head to the Great Walls. Give the sandwich to the guy standing on the right side of the save statue. Now go through the door on your left and give the Mikan Fragrance to the first guy you encounter. He will give you a Moon Stone. Now go to the right end of the room and roll under the wall. Use the boxes inside to trigger the pressure plates and get your Heart Ruby.
      Go outside and climb the left tower. Talk to the guy on the right edge. He’ll give you a letter and a new location – Framers Block. Go there and enter the house. Talk to the old guy on the second floor. He will ask you to take care of some noises downstairs. Enter the room in the bottom right corner, destroy all the crates there and kill the frog. Once you’re done go talk to the elder man again. He will give you the Lucky Belt.

    4. Ki Spear Technique Scroll

    5. Go to Panselo and buy a Chocolate Protein Shake from the Dojo. Next, you’ll need a Duri Fruit which you can get either from the Duri Forest or buy it for 20 rai in Atai. Now go to cross roads and give the Duri Fruit to the girl that lost her memories. Then go out and back inside the Inn and give her the Chocolate protein shake. Do the same thing, only this time, give her the Green Bracelet from your misc. items. Again, in and out and talk to her one more time. She will thank you and give you the scroll.

    6. Prince’s Tower

    7. Once you’re done gearing up and buying food (if you find it necessary), head to the Prince’s Tower.
      This is a fairly easy area to get through. Once you’ve reached the 4th floor, you will notice chest locked behind a stone barrier. Go to the right balcony and hit the time switch with the Slingshot. Make sure that you’ve left the bridge in the middle open and run down to the chest.
      On the next floor, simply use a bomb to delay the switch activation, run right to the first platform and wait for it to activate. Next comes the room with the bell traps. Once you’ve activated all the switches and the platforms are there, start climbing. The bells on the first platform can be jumped over. Another way to get through is to activate the first bell that will disable the platform and land on the second one. Roll under the traps on the second platform and jump over the ones on the third. Above are five ladders. You can get through by activating the traps only when jumping on the longest ladders (2nd 4th and 5th). Once you’ve touched a bell, quickly go down to the bottom end of the ladder and wait there until the arrows pass.
      You cannot get to the pots that are locked in the save room. You need an item that is yet to be found so no need to bang your head. Just heal up, save and go kill yourself a kobold boss.
      Boss Fight
      Never stay in front of the boss. You want to always be on his opposite side.
      Always keep a javelin on one of the walls in the bottom. Stay on its edge whenever the boss decides to open fire.
      Generally, the Kobold will always shoot twice before he starts charging his lightning ball. So be sure you’re able to reach him easily on his third time.
      If the boss is charging his death ball from the ceiling, you will need to jump and throw a javelin in order to hit him.

      Once you got the big rat, it’s time to collect your Heart Ruby and free the prince.
      After the cut scene is over and your sister managed to accuse you of loathing, you can go to the last house next to the wall. Once inside, throw a javelin against the wall, next to the ladder and climb up. On the second floor you’ll see a switch which opens a small gap on the first floor. Go down there and grab the Moon Stone.
      After you’ve had the adult-only meeting and got the artifact shard from the prince, grab lots of food and head to the Great Walls.

      Dread Lands

      Talk to the guard at the wall’s gate. He will open the gate for you and you will be able to “sneak” to Dread Lands.
      Once in Dread Lands, watch out for X signs. Those show you where mines will appear. DO NOT try to take more than one robot at once! Another thing worth mentioning is that red robots cannot be killed. So whenever you get chased by one, get out of its sight as fast as possible.
      In the third area, go down and kill everything you can until you see the red robot. Run left and let him stay there. Destroy the wooden boxes and roll under the gap. Climb the ladder and use a javelin to get to the upper level. Kill the robot behind the box (preferably with bombs so he wouldn’t get a chance to hit) and collect your key. Now push the metal box to the right and roll to the other side of the wall. DO NOT push the wooden box yet! Go right and wait for the mines to activate. After they’ve blown, push the box down the gap and then down the other one. You will find a couple of robots there, so be very careful not to destroy the box while fighting them. After you’re done dealing with them, push the box to the right wall and use a javelin to get to the grate above. Roll under it, and you will find yourself in a rather large room. Blow up the floor in the middle go downstairs and run for the door. Don’t try to kill the robots. Inside you will find a Heart Ruby.
      Get out of there and proceed to the next area. First thing to do is climb up the ladder and push the box to the right edge. Throw a javelin on the left wall, kill the robot upstairs and climb up to grab the key there. Now climb on the metal box again and throw a javelin on the right wall. Proceed right, on top of the buildings, until you find a pot that contains a Moon Stone.
      Go back the same way, until you reach the same metal box. Go right, through the gap in the wall and grab a mine. Jump down to the right edge of the wall below you. Enter the room above. Downstairs, on the left end of the room, you will find a chest full of money and on the right end, another key. Get out of there and go east until you exit the Dread lands.

      Mul Cavern

      Rocket Boots
      Once Billy has said what he has to say, go down and enter the cave left of the save statue. If you find the damned bugs in there too many and too hard to kill, just keep going left until you find the Rocket Boots.
      Above the save statue, at the entrance, fly to the right until you reach the end of the area. A few chests lie there, one of which contains a Moon Stone. Now head down and enter the cave right of the save statue. Inside you’re gonna have to destroy the hive on the right, as it is blocking your path. Try and kill all of the blue things that run away from you with your slingshot until they drop an item. In the next area head to the bottom right corner and jump down. Now head left of the save statue. Once inside, be very careful! The area is full of hives, so try to kill the bugs one by one. Enter the cave behind the hive and make your way to another Heart Ruby.
      Now head west from the statue. Inside head right until you find a hole through which you can go up. Proceed to the right until you’re out of the caverns. Since the area could get ridiculously hard and you’re probably out of food to heal up, it might be a good idea to skip the Moon Stones for now. You can see their location in the Heart Rubies & Moon Stones section.

      Ancient’s Crater Part 1

      A fairly easy area. Your goal for now is to get The Artifact. Just head west until you reach Bobby’s friends. Don’t come near the statues with big diamond in the middle. When you encounter any, either fly over them or go under.
      Once you get The Artifact and are able to deactivate the statues with it, head back to the previous area. Go west until you see a hole in the ground which is blocked. Below is a blue switch, which you can activate using the artifact.
      Then head east until you drop down into a blue room with two doors. Go to the door on the right, save your progress and use the teleport to get back to the beginning of the area. Now that you have all the mobility items, go find some gear. Collect every Heart Ruby and Moon Stone you can. You’ll find them in the Heart Rubies & Moon Stones section.

      Ancient Armor

      A fairly easy item to acquire. Go to Adar’s House, climb on top of it and fly left until you reach a cave entrance. Once inside, climb up and fly to the rightmost platform. From there, use The Artifact to activate the switch and open the gates below. Once inside, proceed west until you reach a room with golems inside. Head down and enter the rightmost door. The Ancient Armor is inside.

      The Morning Star

      To get this weapon, you will need two Asteroid Rocks. One is given to you by Fran when you acquire 25 Moon Stones. For the other one, you’ll have to visit the Misty Gorge again. From the third area, on the east side, climb on top and head west. Keep going until you reach a cave entrance, on top of the area, hidden behind a couple of rocks. Once inside, simply proceed forward until you find a Moon Stone and the rock itself next to it.
      Now head to the blacksmith in Adea and give the rocks to the apprentice. Go in and out and voila! The Morning Star is available to you for only 200 rai.

      Nebula Armlet

      This item will help you focus your Ki (holding ‘X’ will trigger the charged attack faster). Go to Atai City and jump inside the well. Head right and go through both rooms to activate the switches inside. Proceed west into the next area. You will come across a hole with lots of stones in it. Destroy all of them and enter the door that pops up. Inside you will have to get rid of all the robots in each area in order to proceed forward. Lure the red ones and hit the switch above so that they will drop down. The armlet is located in a chest, in the rightmost room of the last area.

      Forgotten Forest

      While not mandatory, going through this area will lead you to a new village where you can buy some valuable costly items. You will need to gather 30 Moon Stones and give them to Fran. This will activate the portal in his house, from which you can access the area.
      Once you get through the portal, head east until you reach a broken bridge with a Harpy flying above it. Drop down and kill the orc. He will drop the key to the door at the right end. Kill the orcs inside and get to the top felt corner. Take the metal boxes there, place them on the pressure plates and stand on the last one. A door on the bottom left side will open. Grab the key from there and enter the cave on your right. Climb up to the other area and kill the dog there. Take the key that it drops and go back to the area below.
      Go east until you reach a save statue. Enter the house on the right side of the statue, destroy the boxes and activate the switch. A ladder leading down will appear. In the rightmost room you’ll find another door leading to a robot like the one in Thomas’ lab. After you’ve dealt with it and collected the key head right, open the door and get the Moon Stone from the pots inside. Once outside the house, go east until you reach another locked door. Climb up the tree into a new area and head east until you reach the Hidden village.

      Ancient’s Crater Part 2

      Now that you’re really tough you can head on to the final area. Use the portal in the beginning of the crater. Get out of the save room, go down the ladder and use the Artifact to reveal the hidden blocks around you. Head east and enter the door. Go west and activate the switch there. Two orcs will appear. Kill them and go to the west side to activate the second switch. Go back to the middle. Right above the blocked door is a tunnel at the end of which you’ll find the third switch. Throw a spear inside and you’re good to go.
      Once you’re in the big aquarium room enter the door on the right and head west. The only thing to look out for here is the trap timing. Once you’ve dropped down to a new room and then entered another door, you’ll have to use the Artifact again to reveal your way. Careful not to fall down as you are gonna have to start anew.
      Once you’re back in the aquarium room enter the door on the left. When you get to the trap with the two robots, lure them down and hit the switch that drops bombs. Three bombs should be enough. Hit the bastards until they’re on the platform and then use the Slingshot to get them to drop down.
      In the next room you are going to have to kill a Harpy. Do not try to jump on a platform to reach it! Simply wait for it to charge at you, dodge and hit. Avoid bombs at all costs as they deal 13 damage. Once you kill the damned thing, head down the ladder and don’t forget to get the chest above you, as it contains a 45 hp Old Ration.
      Inside the next room, you’re gonna have to make your way through the traps without activating any of them. After the rather simple puzzle with the bomb you’re going to find a save room right before the boss fight. You can use the portal to go back and rest somewhere before the final fight. You might also want to get loaded with some speed and stamina boosters rather than just food. However, don’t consume them before the boss fight ends.

      Boss fight

      Once the fight starts, your first priority is to destroy all the spheres hanging in the air.
      Always kill the damned flying turret before you go hitting the boss itself.
      To crack open the boss and damage it, you’re gonna have to get the four eyes – two on the ground and two on the ceiling. Bombs do a good job here, but they can reach the eyes above, so use the Artifact. Always leave the bottom or top left eye for last so you’d have more time to smash its metal skull.
      Once you’ve dealt with the boss, sit back, relax and enjoy the last cut scene.

      66

      Now that Prince Douchebag has sent one of his killing machines after you, there is nothing to do but run. Run fast, run fancy and keep your fingers ready to hit the 1, 2, 3 and 4 buttons. Use the speed boosters (if you bought any), and always close the doors behind you. It is very important that you hit the switches from the very first time.
      After you get to a dead end enjoy the close encounter with the UFOs. This is where our epic journey comes to an end, temporarily, I hope.

    8. Heart Rubies and Moon Stones

    9. Here, you will find the locations of all the Heart Rubies and Moon Stones by zone, along with the items you need to reach them.

      Duri Forest

      Heart Ruby 1 – Given as a reward for defeating the giant toad boss.
      Heart Ruby 2 (Rocket Boots) – Inside the ruins, get to the room with the Duri Fruits. Climb on top of the tree and fly over to the left side and enter the door. Once inside, proceed to the left and enter the new room. Go to the bottom, and throw a javelin to activate the switch on the right. Climb up the platforms to find three boxes in the left corner, one of which contains the Heart Ruby.
      Moonstone 1 - Once you open the first locked gate, you will come across a room with some bridges that need to be activated through a pressure plate. On the bottom of the room, you’ll find a small cube. Grab it, head up and drop it from there. Head back to the left end of the room and enter the last door. You will see a platform that needs to be triggered through another pressure plate. Aim for the Duri fruits with you Slingshot and then hit the one that dropped off. This will trigger the pressure plate and you can now climb up and collect the Moonstone.

      Panselo

      Heart Ruby 1 – In the Dojo, once you’ve bought the Rolling technique scroll, climb up the ladder, head left and roll under the wall to grab the ruby.
      Heart Ruby 2 (Rocket Boots) – Climb up the gate on the west side and start flying from building to building, going east. Once you’ve reached Gale’s house, jump over to the window and enter. The Heart Ruby is inside.
      Moon Stone 1 - Go to the second town area and enter the first house you encounter (the one with the Pukis in front). Once inside, proceed to the right until, you will see a bunch of small boxes next to a ladder. Grab a box and put it on the pressure plate on the right. This will open a door above you. Now you can climb up the ladder and grab that Moonstone.
      Moon Stone 2 (Slingshot, Javelin) – Go inside Ruth’s house and use the slingshot to hit the switch above you. Throw a javelin at the right wall and use it to climb up the ladder where you’ll find another switch. Go down to the new area and head left to grab the moonstone.
      Moon Stone 4 (Javelin, Rocket Boots) – Climb up the last house on the west. Jump up and throw a javelin at the wall. Next, use the rocket boots to fly over to the javelin and enter the door above. You’ll find the Moon Stone in one of the boxes at the bottom.
      Moon Stone 3 (Rolling Scroll) – Go to the big wall to the west and simply roll under it. The Moon Stone is inside one of the boxes.

      Sunflower Road

      Heart ruby 1 (35 Rai) – Inside the Inn, on the bottom level is a boy who’s complaining about the size of the bees around. Buy a wooden sword from Atai and give it to him. You’ll get the Heart Ruby as a reward.
      Moon Stone 1 – On the east side of the road, climb up the leaves until you come across a honeycomb. The moon stone is right below it.
      Moon Sone 2 – West side of the road. You’ll find the Moon Stone on a leaf, left of the honeycomb. You’ll have to climb up above it and jump down or fly with the Rocket Boots to get it.

      Atai Bridge

      Heart ruby 1 (Bombs) – At the very end of the west side of the bridge, you’ll notice a Heart Ruby below. Blow up the large stones that block the path to it. Next, go right until you see two big metal boxes. Push the bottom one to the left and then use it to push the one on top of it. Once you get the box to the small gap, roll under and get that heart ruby.
      Moon Stone 1 (Bombs) – On the east side of the bridge, blow up the pile of stones above the ledge with the egg and the Moon Stone will appear.
      Moon Stone 2 – Middle section of the bridge. To the west of the Moon Stone, there should be a large metal box and a smaller one. Push the big one to the right and use the slingshot to get the small box out and stack it on top of the larger box. Position the metal box so that you can roll through and snatch the moon stone.

      Atai City

      Heart Ruby 1 – Enter the hidden door next to the lady that trades silk. Use your Slingshot to hit the switch. Next form a staircase from the big pile of boxes. The Heart Ruby is on top.
      Heart Ruby 2 – When you’ve freed Lisa and she is back to Panselo, go inside the mayor’s house and enter the kitchen from the top door. Talk to the first guard left on the left twice. He’ll give you a love letter to give Lisa. Give the letter to your sister and she’ll send her response letter through you. Once you give that to the guard, he’ll give you his Heart Ruby.
      Moon Stone 1 – Buy a comic book from Daea and give it to the bandit in Atai’s jail. He will give you the Moon Stone.
      Moon Stone 2 – Go inside the shop and break the box in the bottom left corner. Head down, break the grate and roll under. You’ll find the Moon Stone in the next room.
      Moon Stone 3 (Javelin) – Go west until you come across two large boxes with an anchor mark on them. Throw a javelin at the lowest possible point on the platform, climb up and brake them. Inside one is the Moon Stone.
      Moon Stone 4 (Javelin, Rocket Boots, Stamina booster) – Go to the mayor’s palace and use a javelin to climb on top. Jump on the pillar on the left. Use a stamina booster (i.e. honey) and fly all the way to the next pillar, with a jar on it. The Moon Stone is inside the jar.
      Moon Stone 5 – Inside the mayor’s palace head to the kitchen and enter the other door in there. Destroy the box on the left to get the Moon Stone.
      Moon Stone 6 (Javelin, Floatation Donut) – Jump inside the well and head west. Enter each door to activate the switches. Go inside the last door and head right until you see some pots. Use the Javelin to make a ledge and destroy the pots. The moon stone is in one of them.

      Bandit’s Lair

      Heart Ruby 1 – You will notice this one behind the second sequence puzzle. To get the right numbers, head right and jumping from platform to platform get to the door leading to the save room. Enter the door on the right side of the statue. Use the lamp to get through the darkness. The numbers for the sequence puzzle are written on the wall, on the west side of the room.
      Heart Ruby 2 – Prize for defeating the boss.
      Heart Ruby 3 (Javelin) – On right side of the Heart Ruby puzzle you’ll find a door in a hole. Enter it and head down until you find some water. Swim to the left and go inside the building. Press the pressure switch and use the javelin to hit the switches. Once that’s done climb to the top and break the stuff on the right to find a heart ruby.
      Moon Stone 1 – In the main entrance of the lair, with the trapped bridges, trigger a trap to fall down. The Moon Stone is behind a couple of rocks on the right wall. Throw a well-timed bomb to destroy them and simply jump there to get the stone.

      Misty Gorge

      Heart Ruby 1 – From the east side, get to the third section. Swim until you find a leaf that you can hop on and then head left to get to another flower. Climb on top of it and jump on the platforms, heading west.
      Moon Stone 1 – Get to the first area west of the Inn. Swim until you get to the green fish that spits and then go left until you find a leaf to hop on. Head west, through the platforms until you find the moon stone on a leaf.
      Moon Stone 2 (Javelin, Rocket Boots) – From the third area, on the east side (Moon Stone 1), climb on top and head west. Keep going until you reach a cave entrance, on top of the area, hidden behind a couple of rocks. Once inside, simply proceed forward until you find a Moon Stone.

      Crossroads

      Heart Ruby 1 (100 rai) – Go inside the Inn and rent a room for 100 bucks. When you wake up go outside the balcony and jump over to the one on the right. Inside you’ll find some boxes on the bottom. The Heart Ruby is inside.
      Moon Stone 1 – Go inside the Inn and talk to the green haired girl. Then head west to until you reach a tree house. Kill all the slimes there. Go to the Great Walls and find Gill, the guy on top of the right tower. Talk to him twice and head back to the tree house in the Crossroads. Talk to Floe, the girl with the orange hair to get the Moon Stone.

      Daea

      Heart Ruby 1 – Head over to the bar and enter the bottom left door. Once inside, throw a bomb at the box that is blocking your way down. Now, push second box on the bottom to the right. Go back up, push the other box on it and roll under the wall to collect your Heart Ruby.
      Heart Ruby 2 – Inside the jail, head to jail sector A. Once you reach the cell room, go in the cell on the bottom level. Blow up the wall on the left. You’ll find some boxes in there. Stack them up next to the door you came in from and drop a bomb on top to blow up the low above. Use the spear to get to second floor and blow up the right wall. You will find a Heart Ruby inside.
      Moon Stone 1 – Go to the bar and head up, right above the door you came out from. Destroy the grate and roll under the wall. You will find yourself in a small maze of tunnels. Roll to the left. Now drop a bomb and hit it until it reaches the grates on the ceiling of the room below you. Get in there and collect your Moon Stone from the chest.
      Moon Stone 2 (Rocket Boots) – Inside the Inn, head up until you get to the balcony with the kid next to you. Go to the right side and fly west until you reach another balcony with a door. Inside you’ll find a small maze. The moon stone is in the middle, blow.
      Moon Stone 3 – Go to the main entrance of the sewers. Once you see water for the first time, swim to the right until you reach a few pots. The moon stone is in one of them.
      Moon Stone 4 – Go to the save room inside the Jail. Bomb the right wall and destroy the boxes you find there. One of them contains the moon stone.
      Moon Stone 5 – Enter the room that’s right in front of the locked door leading to Jail sector B. You’ll see a puzzle with four timed switches. Climb up between the top two and throw a bomb down the one on the left below you. Quickly switch to the Slingshot and shoot the top left one. Turn around, hit the right one with you weapon and run down to the last one. A door will open with tree chests inside. One of them contains a Moon Stone.
      Moon Stone 6 – Go inside the sewers. Enter the first door below and make your way through the platforms above the water. Instead of continuing down through the water, throw a javelin on the wall and climb up. You will come across a few pots, one of which contains a Moon Stone.

      Prince Tower

      Heart Ruby 1 – Reward for defeating the boss.
      Heart Ruby 2 (Rocket boots) – Go to the top of the tower, above the room where you found the prince. Climb up the rightmost pillar and fly west until you reach a balcony. Enter the room, activate the switch and climb up the ladder and enter the door. After you’ve salved the puzzle, go to the next room and start climbing up until you reach the heart ruby.
      Moon Stone 1 – From the ground floor, proceed up until you encounter the first balconies on the sides. One of them has a moon stone that can be reached using a javelin.
      Moon stone 2 (Rocket Boots) – Go to the balcony in the save room. Jump off the balcony and use the Rocket boots to fly to the area below. Inside you’ll find a few pots, one of which contains a Moon Stone.

      Fran’s Lab

      Heart Ruby – Fran will give you the heart ruby once you’ve gathered 15 moon stones.

      Great Walls

      Heart Ruby 1 – Enter the room next to the save statue. Go to the right end and roll under. In the next room you’ll find a heart ruby.
      Moon Stone 1 – Go to the Duri forest and get a Mikan Fruit. Next head to Atai and give it to the potion lady. She will make a new potion – Mikan Fragrance. Go to the Great Walls, enter the room next to the save statue and give the potion to the first soldier you see (the one who complains about the bugs). He will give you the moon stone.

      Dread Lands

      Heart Ruby 1 – Starting from the south side, In the third area, go down and kill everything you can until you see the red robot. Run left and let him stay there. Destroy the wooden boxes and roll under the gap. Climb the ladder and use a javelin to get to the upper level. Kill the robot behind the box (preferably with bombs so he wouldn’t get a chance to hit). Now push the metal box to the right and roll to the other side of the wall. DO NOT push the wooden box yet! Go right and wait for the mines to activate. After they’ve blown, push the box down the gap and then down the other one. You will find a couple of robots there, so be very careful not to destroy the box while fighting them. After you’re done dealing with them, push the box to the right wall and use a javelin to get to the grate above. Roll under it, and you will find yourself in a rather large room. Blow up the floor in the middle go downstairs and run for the door. Don’t try to kill the robots. Inside you will find a Heart Ruby.
      Heart Ruby 2 (The Artifact) – When you find Moon Stone 1 look for another crack on the floor. Drop down and use the artifact to open the gate. Once inside salve the puzzle and head to the next room. You will find the heart ruby inside a box above.
      Moon Stone 1 – Reach the save room behind the “O” door. Once inside, fly through the gap into another room. Look for some cracks on the floor and bomb it. Drop down, head right and find the moon stone inside one of the pots.
      Moon Stone 2 – Go to the west end of the area, east of the save room. Climb up the ladder and push the box to the right edge. Climb on it and throw a javelin on the right wall. Proceed right, on top of the buildings, until you find a pot that contains a Moon Stone.
      Moon Stone 3 - Go back the same way, until you reach the same metal box (Moon Stone 2). Go right, through the gap in the wall and grab a mine. Jump down to the edge of the wall below you and throw a bomb or a javelin to destroy the cracked wall. Enter the room above. Downstairs, on the left end of the room, you will find a chest full of money and on the right end, an O key. Now go to the section west of the one with the save room. Go downstairs and unlock the door on the right. The moon stone is in one of the pots.

      Mul Cavern

      Heart Ruby – From the save room, deep inside the caverns, head left and destroy the leftmost hive in there. You will find the heart ruby at the end of the tunnel, behind the hive.
      Moon Stone 1 – Above the save statue, at the south entrance, Throw a javelin at the right wall. Fly over to the right until you reach the end of the area. A few chests lie there, one of which contains a Moon Stone.
      Moon Stone 2 – From the save room inside the caverns, head to the section to your west and then up. On your way you’ll notice a few wooden boxes above you. Climb up to the area above and then drop down from the gap leading to the boxes. The moon stone is in one on the left.
      Moon Stone 3 – From the save room in the caverns go a section up and then right. There should be a ledge above you. Use the javelin and the rocket boots to get to the mushroom with the moon stone on it.

      Forgotten Forest

      Moon Stone 1 - In the area, where the save statue is, right after you open the second door, throw a javelin on the wall to the right and climb up. You’ll find the moon stone inside a pot.
      Moon Stone 2 – Right before reaching the second statue, you’ll notice a tree branch. Climb up and fly left until you see another one. Now throw a Javelin to the wall on the right and climb up to find you moon stone.
      Moon Stone 3 – In the area with the inner save statue, head inside the house on the right side of the statue. Destroy the boxes and activate the switch. A ladder leading down will appear. In the rightmost room you’ll find another door leading to a robot like the one in Thomas’ lab. After you’ve dealt with it and collected the key head right, open the door and get the Moon Stone from the pots inside.
      Moon Stone 4 – Go two areas east of the inner save statue. You’ll find the moon stone behind a couple of rocks. Destroy the rocks with a Ki Spear or a bomb to snatch the stone.
      Moon Stone 5 – From the north entrance, head a section left. You’ll encounter some arches. Sse the tree branches and the rocket boots to climb on top of the tall arches and head left and fly to find some more branches. Fly further left to find one more. Jump and fly back until you reach the top arches. On the top arches are some pots, one of which has a moon stone.

      Hidden Village

      Heart Ruby – Once you’ve collected 40 moon stones, give them to Fran and he will reward you with a Heart Ruby.
      Moon Stone – Go inside the house, where the Inn and the shop are. On top, you’ll find a blue harpy asking for something shiny. Give her a Gold Bar and she will trade you the moon stone.

      Ancient’s Crater

      Moon Stone 1 (The Artifact) – Once you’ve collected the artifact go to the previous area. You will come across a hole in the ground, blocked by a blue barrier. Use the artifact to activate the blue switch in the ground. The moon stone is in the hole.
      Moon Stone 2 – In the main room within the ancient civilization (the one with the three floors and water in the background), enter the top right door. Once inside, get to the very end of the area and throw a javelin on the wall on the left. Fly over and use the artifact to reveal the hidden flooring. You’ll find the moon stone on the left ledge in one of the crates.

    10. Gear

    11. The Lucky Belt

      Requires a Mikan Fragment and a Sandwich
      Go to the shop in Adea to buy a sandwich. Don’t eat it, it’s not for you! Next head back to Duri Forest. Go east until you reach a cave entrance blocked by a stone. Blow up the stone and get inside. You will reach an open area at the end of which, there are some orange fruits. Get one of those and head to Atai. Go to the potion lady (the one who gave you the Talkinator) and give her the orange fruit you just got. Go in and out, and buy the orange potion.
      Now head to the Great Walls. Give the sandwich to the guy standing on the right side of the save statue. Next, go through the door on your left and give the Mikan Fragrance to the first guy you encounter. He will give you a Moon Stone.
      Go outside and climb the left tower. Talk to the guy on the right edge. He’ll give you a letter and a new location – Framers Block. Go there and enter the house. Talk to the old guy on the second floor. He will ask you to take care of some noises downstairs. Enter the room in the bottom right corner, destroy all the crates there and kill the frog. Once you’re done go talk to the elder man again. He will give you the Lucky Belt.

      Ancient Armor

      Requires Rocket Boots and The Artifact to find.
      A fairly easy item to acquire. Go to Adar’s House, climb on top of it and fly left until you reach a cave entrance. Once inside, climb up and fly to the rightmost platform. From there, use The Artifact to activate the switch and open the gates below. Once inside, proceed west until you reach a room with golems inside. Head down and enter the rightmost door. The Ancient Armor is inside.

      The Morning Star

      Requires Rocket Boots
      To get this weapon, you will need two Asteroid Rocks. One is given to you by Fran when you acquire 25 Moon Stones. For the other one, you’ll have to visit the Misty Gorge again. From the third area, on the east side, climb on top and head west. Keep going until you reach a cave entrance, on top of the area, hidden behind a couple of rocks. Once inside, simply proceed forward until you find a Moon Stone and the rock itself next to it.
      Now head to the blacksmith in Adea and give the rocks to the apprentice. Go in and out and voila! The Morning Star is available to you for only 200 rai.

      Nebula Armlet

      Requires Bombs and a Floatation Donut
      This item will help you focus your Ki (holding ‘X’ will trigger the charged attack much faster). Go to Atai City and jump inside the well. Head right and go through both rooms to activate the switches inside. Proceed west into the next area. You will come across a hole with lots of stones in it. Destroy all of them and enter the door that pops up. Inside you will have to get rid of all the robots in each area in order to proceed forward. Lure the red ones and hit the switch above so that they will drop down. The armlet is located in a chest, in the rightmost room of the last area.

      Blood Ring

      This item will heal you up to 10 health points whenever you drop below. To get it, all you need is to get to the Hidden Village. The ring is available for sale in the shop for less than 1000 rai.

      Ki Spear Technique

      Go to Panselo and buy a Chocolate Protein Shake from the Dojo. Next, you’ll need a Duri Fruit which you can get either from the Duri Forest or buy for 20 rai in Atai. Now go to Cross Roads and give the Duri Fruit to the girl that has lost her memories. Then go out and back inside the Inn and give her the Chocolate protein shake. Do the same thing, only this time, give her the Green Bracelet from your misc. items. Again, in and out and talk to her one more time. She will thank you and give you the scroll.

    12. Potions

      • Chocolate Protein Shake

      • Increases health points by 2. Can be used only 5 times.

      • Mikan Fragment

      • Quest item. Can be given to the boy in Crossroads who complains about the smells and the guard in the Great Walls with the bug bites problem.

      • Power Potion

      • This potion boosts your ground attack, making each normal hit a charged hit. It also boosts your speed and stamina for one minute.
        To get it, you’ll have to acquire a slime jelly from the wisps that run away from you inside the Mul Caverns. Once you acquire one, go to the potion lady in Atai and give it to her. The potion will be available for 300 rai.

      • Bottle of Glowy wisps

      • This potion revives you upon death. It can be bought from the shop in the Hidden Village but you can only carry one at a time.

    13. Enemies & tips

      • Slime

      • – If you can see a puddle on the ground or sealing, a slime will pop once you get close. Once they appear, they will stay idle and wonder before charging you. Just get close enough so that they will show up and kill them before they’ve moved.

      • Green Toad

      • – Annoying creatures. Easiest way to deal with them is to stay far behind and wait for them to jump. You have about a second to get close and hit them. If you encounter a toad in the water, either lure it into the ground or run away from it.

      • Caterpillar

      • – Cannot be killed. Hitting them will change their direction. Just move around

    Reply

    Phoenotopia Walkthrough - Tips, Secrets, and Enemies © Jayisgames 2014

  • Heart Rubies and Moon Stones

  • Here, you will find the locations of all the Heart Rubies and Moon Stones by zone, along with the items you need to reach them.

    Duri Forest

    Heart Ruby 1 – Given as a reward for defeating the giant toad boss.
    Heart Ruby 2 (Rocket Boots) – Inside the ruins, get to the room with the Duri Fruits. Climb on top of the tree and fly over to the left side and enter the door. Once inside, proceed to the left and enter the new room. Go to the bottom, and throw a javelin to activate the switch on the right. Climb up the platforms to find three boxes in the left corner, one of which contains the Heart Ruby.
    Moonstone 1 - Once you open the first locked gate, you will come across a room with some bridges that need to be activated through a pressure plate. On the bottom of the room, you’ll find a small cube. Grab it, head up and drop it from there. Head back to the left end of the room and enter the last door. You will see a platform that needs to be triggered through another pressure plate. Aim for the Duri fruits with you Slingshot and then hit the one that dropped off. This will trigger the pressure plate and you can now climb up and collect the Moonstone.

    Panselo

    Heart Ruby 1 – In the Dojo, once you’ve bought the Rolling technique scroll, climb up the ladder, head left and roll under the wall to grab the ruby.
    Heart Ruby 2 (Rocket Boots) – Climb up the gate on the west side and start flying from building to building, going east. Once you’ve reached Gale’s house, jump over to the window and enter. The Heart Ruby is inside.
    Moon Stone 1 - Go to the second town area and enter the first house you encounter (the one with the Pukis in front). Once inside, proceed to the right until, you will see a bunch of small boxes next to a ladder. Grab a box and put it on the pressure plate on the right. This will open a door above you. Now you can climb up the ladder and grab that Moonstone.
    Moon Stone 2 (Slingshot, Javelin) – Go inside Ruth’s house and use the slingshot to hit the switch above you. Throw a javelin at the right wall and use it to climb up the ladder where you’ll find another switch. Go down to the new area and head left to grab the moonstone.
    Moon Stone 4 (Javelin, Rocket Boots) – Climb up the last house on the west. Jump up and throw a javelin at the wall. Next, use the rocket boots to fly over to the javelin and enter the door above. You’ll find the Moon Stone in one of the boxes at the bottom.
    Moon Stone 3 (Rolling Scroll) – Go to the big wall to the west and simply roll under it. The Moon Stone is inside one of the boxes.

    Sunflower Road

    Heart ruby 1 (35 Rai) – Inside the Inn, on the bottom level is a boy who’s complaining about the size of the bees around. Buy a wooden sword from Atai and give it to him. You’ll get the Heart Ruby as a reward.
    Moon Stone 1 – On the east side of the road, climb up the leaves until you come across a honeycomb. The moon stone is right below it.
    Moon Sone 2 – West side of the road. You’ll find the Moon Stone on a leaf, left of the honeycomb. You’ll have to climb up above it and jump down or fly with the Rocket Boots to get it.

    Atai Bridge

    Heart ruby 1 (Bombs) – At the very end of the west side of the bridge, you’ll notice a Heart Ruby below. Blow up the large stones that block the path to it. Next, go right until you see two big metal boxes. Push the bottom one to the left and then use it to push the one on top of it. Once you get the box to the small gap, roll under and get that heart ruby.
    Moon Stone 1 (Bombs) – On the east side of the bridge, blow up the pile of stones above the ledge with the egg and the Moon Stone will appear.
    Moon Stone 2 – Middle section of the bridge. To the west of the Moon Stone, there should be a large metal box and a smaller one. Push the big one to the right and use the slingshot to get the small box out and stack it on top of the larger box. Position the metal box so that you can roll through and snatch the moon stone.

    Atai City

    Heart Ruby 1 – Enter the hidden door next to the lady that trades silk. Use your Slingshot to hit the switch. Next form a staircase from the big pile of boxes. The Heart Ruby is on top.
    Heart Ruby 2 – When you’ve freed Lisa and she is back to Panselo, go inside the mayor’s house and enter the kitchen from the top door. Talk to the first guard left on the left twice. He’ll give you a love letter to give Lisa. Give the letter to your sister and she’ll send her response letter through you. Once you give that to the guard, he’ll give you his Heart Ruby.
    Moon Stone 1 – Buy a comic book from Daea and give it to the bandit in Atai’s jail. He will give you the Moon Stone.
    Moon Stone 2 – Go inside the shop and break the box in the bottom left corner. Head down, break the grate and roll under. You’ll find the Moon Stone in the next room.
    Moon Stone 3 (Javelin) – Go west until you come across two large boxes with an anchor mark on them. Throw a javelin at the lowest possible point on the platform, climb up and brake them. Inside one is the Moon Stone.
    Moon Stone 4 (Javelin, Rocket Boots, Stamina booster) – Go to the mayor’s palace and use a javelin to climb on top. Jump on the pillar on the left. Use a stamina booster (i.e. honey) and fly all the way to the next pillar, with a jar on it. The Moon Stone is inside the jar.
    Moon Stone 5 – Inside the mayor’s palace head to the kitchen and enter the other door in there. Destroy the box on the left to get the Moon Stone.
    Moon Stone 6 (Javelin, Floatation Donut) – Jump inside the well and head west. Enter each door to activate the switches. Go inside the last door and head right until you see some pots. Use the Javelin to make a ledge and destroy the pots. The moon stone is in one of them.

    Bandit’s Lair

    Heart Ruby 1 – You will notice this one behind the second sequence puzzle. To get the right numbers, head right and jumping from platform to platform get to the door leading to the save room. Enter the door on the right side of the statue. Use the lamp to get through the darkness. The numbers for the sequence puzzle are written on the wall, on the west side of the room.
    Heart Ruby 2 – Prize for defeating the boss.
    Heart Ruby 3 (Javelin) – On right side of the Heart Ruby puzzle you’ll find a door in a hole. Enter it and head down until you find some water. Swim to the left and go inside the building. Press the pressure switch and use the javelin to hit the switches. Once that’s done climb to the top and break the stuff on the right to find a heart ruby.
    Moon Stone 1 – In the main entrance of the lair, with the trapped bridges, trigger a trap to fall down. The Moon Stone is behind a couple of rocks on the right wall. Throw a well-timed bomb to destroy them and simply jump there to get the stone.

    Misty Gorge

    Heart Ruby 1 – From the east side, get to the third section. Swim until you find a leaf that you can hop on and then head left to get to another flower. Climb on top of it and jump on the platforms, heading west.
    Moon Stone 1 – Get to the first area west of the Inn. Swim until you get to the green fish that spits and then go left until you find a leaf to hop on. Head west, through the platforms until you find the moon stone on a leaf.
    Moon Stone 2 (Javelin, Rocket Boots) – From the third area, on the east side (Moon Stone 1), climb on top and head west. Keep going until you reach a cave entrance, on top of the area, hidden behind a couple of rocks. Once inside, simply proceed forward until you find a Moon Stone.

    Crossroads

    Heart Ruby 1 (100 rai) – Go inside the Inn and rent a room for 100 bucks. When you wake up go outside the balcony and jump over to the one on the right. Inside you’ll find some boxes on the bottom. The Heart Ruby is inside.
    Moon Stone 1 – Go inside the Inn and talk to the green haired girl. Then head west to until you reach a tree house. Kill all the slimes there. Go to the Great Walls and find Gill, the guy on top of the right tower. Talk to him twice and head back to the tree house in the Crossroads. Talk to Floe, the girl with the orange hair to get the Moon Stone.

    Daea

    Heart Ruby 1 – Head over to the bar and enter the bottom left door. Once inside, throw a bomb at the box that is blocking your way down. Now, push second box on the bottom to the right. Go back up, push the other box on it and roll under the wall to collect your Heart Ruby.
    Heart Ruby 2 – Inside the jail, head to jail sector A. Once you reach the cell room, go in the cell on the bottom level. Blow up the wall on the left. You’ll find some boxes in there. Stack them up next to the door you came in from and drop a bomb on top to blow up the low above. Use the spear to get to second floor and blow up the right wall. You will find a Heart Ruby inside.
    Moon Stone 1 – Go to the bar and head up, right above the door you came out from. Destroy the grate and roll under the wall. You will find yourself in a small maze of tunnels. Roll to the left. Now drop a bomb and hit it until it reaches the grates on the ceiling of the room below you. Get in there and collect your Moon Stone from the chest.
    Moon Stone 2 (Rocket Boots) – Inside the Inn, head up until you get to the balcony with the kid next to you. Go to the right side and fly west until you reach another balcony with a door. Inside you’ll find a small maze. The moon stone is in the middle, blow.
    Moon Stone 3 – Go to the main entrance of the sewers. Once you see water for the first time, swim to the right until you reach a few pots. The moon stone is in one of them.
    Moon Stone 4 – Go to the save room inside the Jail. Bomb the right wall and destroy the boxes you find there. One of them contains the moon stone.
    Moon Stone 5 – Enter the room that’s right in front of the locked door leading to Jail sector B. You’ll see a puzzle with four timed switches. Climb up between the top two and throw a bomb down the one on the left below you. Quickly switch to the Slingshot and shoot the top left one. Turn around, hit the right one with you weapon and run down to the last one. A door will open with tree chests inside. One of them contains a Moon Stone.
    Moon Stone 6 – Go inside the sewers. Enter the first door below and make your way through the platforms above the water. Instead of continuing down through the water, throw a javelin on the wall and climb up. You will come across a few pots, one of which contains a Moon Stone.

    Prince Tower

    Heart Ruby 1 – Reward for defeating the boss.
    Heart Ruby 2 (Rocket boots) – Go to the top of the tower, above the room where you found the prince. Climb up the rightmost pillar and fly west until you reach a balcony. Enter the room, activate the switch and climb up the ladder and enter the door. After you’ve salved the puzzle, go to the next room and start climbing up until you reach the heart ruby.
    Moon Stone 1 – From the ground floor, proceed up until you encounter the first balconies on the sides. One of them has a moon stone that can be reached using a javelin.
    Moon stone 2 (Rocket Boots) – Go to the balcony in the save room. Jump off the balcony and use the Rocket boots to fly to the area below. Inside you’ll find a few pots, one of which contains a Moon Stone.

    Fran’s Lab

    Heart Ruby – Fran will give you the heart ruby once you’ve gathered 15 moon stones.

    Great Walls

    Heart Ruby 1 – Enter the room next to the save statue. Go to the right end and roll under. In the next room you’ll find a heart ruby.
    Moon Stone 1 – Go to the Duri forest and get a Mikan Fruit. Next head to Atai and give it to the potion lady. She will make a new potion – Mikan Fragrance. Go to the Great Walls, enter the room next to the save statue and give the potion to the first soldier you see (the one who complains about the bugs). He will give you the moon stone.

    Dread Lands

    Heart Ruby 1 – Starting from the south side, In the third area, go down and kill everything you can until you see the red robot. Run left and let him stay there. Destroy the wooden boxes and roll under the gap. Climb the ladder and use a javelin to get to the upper level. Kill the robot behind the box (preferably with bombs so he wouldn’t get a chance to hit). Now push the metal box to the right and roll to the other side of the wall. DO NOT push the wooden box yet! Go right and wait for the mines to activate. After they’ve blown, push the box down the gap and then down the other one. You will find a couple of robots there, so be very careful not to destroy the box while fighting them. After you’re done dealing with them, push the box to the right wall and use a javelin to get to the grate above. Roll under it, and you will find yourself in a rather large room. Blow up the floor in the middle go downstairs and run for the door. Don’t try to kill the robots. Inside you will find a Heart Ruby.
    Heart Ruby 2 (The Artifact) – When you find Moon Stone 1 look for another crack on the floor. Drop down and use the artifact to open the gate. Once inside salve the puzzle and head to the next room. You will find the heart ruby inside a box above.
    Moon Stone 1 – Reach the save room behind the “O” door. Once inside, fly through the gap into another room. Look for some cracks on the floor and bomb it. Drop down, head right and find the moon stone inside one of the pots.
    Moon Stone 2 – Go to the west end of the area, east of the save room. Climb up the ladder and push the box to the right edge. Climb on it and throw a javelin on the right wall. Proceed right, on top of the buildings, until you find a pot that contains a Moon Stone.
    Moon Stone 3 - Go back the same way, until you reach the same metal box (Moon Stone 2). Go right, through the gap in the wall and grab a mine. Jump down to the edge of the wall below you and throw a bomb or a javelin to destroy the cracked wall. Enter the room above. Downstairs, on the left end of the room, you will find a chest full of money and on the right end, an O key. Now go to the section west of the one with the save room. Go downstairs and unlock the door on the right. The moon stone is in one of the pots.

    Mul Cavern

    Heart Ruby – From the save room, deep inside the caverns, head left and destroy the leftmost hive in there. You will find the heart ruby at the end of the tunnel, behind the hive.
    Moon Stone 1 – Above the save statue, at the south entrance, Throw a javelin at the right wall. Fly over to the right until you reach the end of the area. A few chests lie there, one of which contains a Moon Stone.
    Moon Stone 2 – From the save room inside the caverns, head to the section to your west and then up. On your way you’ll notice a few wooden boxes above you. Climb up to the area above and then drop down from the gap leading to the boxes. The moon stone is in one on the left.
    Moon Stone 3 – From the save room in the caverns go a section up and then right. There should be a ledge above you. Use the javelin and the rocket boots to get to the mushroom with the moon stone on it.

    Forgotten Forest

    Moon Stone 1 - In the area, where the save statue is, right after you open the second door, throw a javelin on the wall to the right and climb up. You’ll find the moon stone inside a pot.
    Moon Stone 2 – Right before reaching the second statue, you’ll notice a tree branch. Climb up and fly left until you see another one. Now throw a Javelin to the wall on the right and climb up to find you moon stone.
    Moon Stone 3 – In the area with the inner save statue, head inside the house on the right side of the statue. Destroy the boxes and activate the switch. A ladder leading down will appear. In the rightmost room you’ll find another door leading to a robot like the one in Thomas’ lab. After you’ve dealt with it and collected the key head right, open the door and get the Moon Stone from the pots inside.
    Moon Stone 4 – Go two areas east of the inner save statue. You’ll find the moon stone behind a couple of rocks. Destroy the rocks with a Ki Spear or a bomb to snatch the stone.
    Moon Stone 5 – From the north entrance, head a section left. You’ll encounter some arches. Sse the tree branches and the rocket boots to climb on top of the tall arches and head left and fly to find some more branches. Fly further left to find one more. Jump and fly back until you reach the top arches. On the top arches are some pots, one of which has a moon stone.

    Hidden Village

    Heart Ruby – Once you’ve collected 40 moon stones, give them to Fran and he will reward you with a Heart Ruby.
    Moon Stone – Go inside the house, where the Inn and the shop are. On top, you’ll find a blue harpy asking for something shiny. Give her a Gold Bar and she will trade you the moon stone.

    Ancient’s Crater

    Moon Stone 1 (The Artifact) – Once you’ve collected the artifact go to the previous area. You will come across a hole in the ground, blocked by a blue barrier. Use the artifact to activate the blue switch in the ground. The moon stone is in the hole.
    Moon Stone 2 – In the main room within the ancient civilization (the one with the three floors and water in the background), enter the top right door. Once inside, get to the very end of the area and throw a javelin on the wall on the left. Fly over and use the artifact to reveal the hidden flooring. You’ll find the moon stone on the left ledge in one of the crates.

  • Gear

  • The Lucky Belt

    Requires a Mikan Fragment and a Sandwich
    Go to the shop in Adea to buy a sandwich. Don’t eat it, it’s not for you! Next head back to Duri Forest. Go east until you reach a cave entrance blocked by a stone. Blow up the stone and get inside. You will reach an open area at the end of which, there are some orange fruits. Get one of those and head to Atai. Go to the potion lady (the one who gave you the Talkinator) and give her the orange fruit you just got. Go in and out, and buy the orange potion.
    Now head to the Great Walls. Give the sandwich to the guy standing on the right side of the save statue. Next, go through the door on your left and give the Mikan Fragrance to the first guy you encounter. He will give you a Moon Stone.
    Go outside and climb the left tower. Talk to the guy on the right edge. He’ll give you a letter and a new location – Framers Block. Go there and enter the house. Talk to the old guy on the second floor. He will ask you to take care of some noises downstairs. Enter the room in the bottom right corner, destroy all the crates there and kill the frog. Once you’re done go talk to the elder man again. He will give you the Lucky Belt.

    Ancient Armor

    Requires Rocket Boots and The Artifact to find.
    A fairly easy item to acquire. Go to Adar’s House, climb on top of it and fly left until you reach a cave entrance. Once inside, climb up and fly to the rightmost platform. From there, use The Artifact to activate the switch and open the gates below. Once inside, proceed west until you reach a room with golems inside. Head down and enter the rightmost door. The Ancient Armor is inside.

    The Morning Star

    Requires Rocket Boots
    To get this weapon, you will need two Asteroid Rocks. One is given to you by Fran when you acquire 25 Moon Stones. For the other one, you’ll have to visit the Misty Gorge again. From the third area, on the east side, climb on top and head west. Keep going until you reach a cave entrance, on top of the area, hidden behind a couple of rocks. Once inside, simply proceed forward until you find a Moon Stone and the rock itself next to it.
    Now head to the blacksmith in Adea and give the rocks to the apprentice. Go in and out and voila! The Morning Star is available to you for only 200 rai.

    Nebula Armlet

    Requires Bombs and a Floatation Donut
    This item will help you focus your Ki (holding ‘X’ will trigger the charged attack much faster). Go to Atai City and jump inside the well. Head right and go through both rooms to activate the switches inside. Proceed west into the next area. You will come across a hole with lots of stones in it. Destroy all of them and enter the door that pops up. Inside you will have to get rid of all the robots in each area in order to proceed forward. Lure the red ones and hit the switch above so that they will drop down. The armlet is located in a chest, in the rightmost room of the last area.

    Blood Ring

    This item will heal you up to 10 health points whenever you drop below. To get it, all you need is to get to the Hidden Village. The ring is available for sale in the shop for less than 1000 rai.

    Ki Spear Technique

    Go to Panselo and buy a Chocolate Protein Shake from the Dojo. Next, you’ll need a Duri Fruit which you can get either from the Duri Forest or buy for 20 rai in Atai. Now go to Cross Roads and give the Duri Fruit to the girl that has lost her memories. Then go out and back inside the Inn and give her the Chocolate protein shake. Do the same thing, only this time, give her the Green Bracelet from your misc. items. Again, in and out and talk to her one more time. She will thank you and give you the scroll.

  • Potions

    • Chocolate Protein Shake

    • Increases health points by 2. Can be used only 5 times.

    • Mikan Fragment

    • Quest item. Can be given to the boy in Crossroads who complains about the smells and the guard in the Great Walls with the bug bites problem.

    • Power Potion

    • This potion boosts your ground attack, making each normal hit a charged hit. It also boosts your speed and stamina for one minute.
      To get it, you’ll have to acquire a slime jelly from the wisps that run away from you inside the Mul Caverns. Once you acquire one, go to the potion lady in Atai and give it to her. The potion will be available for 300 rai.

    • Bottle of Glowy wisps

    • This potion revives you upon death. It can be bought from the shop in the Hidden Village but you can only carry one at a time.

  • Enemies & tips

    • Slime

    • – If you can see a puddle on the ground or sealing, a slime will pop once you get close. Once they appear, they will stay idle and wonder before charging you. Just get close enough so that they will show up and kill them before they’ve moved.

    • Green Toad

    • – Annoying creatures. Easiest way to deal with them is to stay far behind and wait for them to jump. You have about a second to get close and hit them. If you encounter a toad in the water, either lure it into the ground or run away from it.

    • Caterpillar

    • – Cannot be killed. Hitting them will change their direction. Just move around them as they aren’t hostile.

    • Bat

    • – They will charge at you once you get close enough. Use the Slingshot to kill them but keep in mind that killing one will awaken the others next to it.

    • Bull Bee

    • – Not hostile. They just fly around the sunflowers doing their thing. DO NOT attack them! If you do, they will start chasing you along with all the others on their way.

    • Spider

    • – Like Slimes, Spiders will drop down once you get near them. Just move close enough, until the drop and hit them.

    • Baby sand dragon

    • – Those will pop up from the sand. If you’re close enough, they will start rolling towards you. If not, they will just spit on you (with quite the range). As soon as you see one pop up, go ahead and hit it before it does anything.

    • Red Bandit

    • – Those will simply charge at you. Easiest way to deal with them is to jump over when they’re charging and hit them when they’re idle.

    • Blue Bandit

    • – Throws axes at you. When you’re trying to kill one, use the Slingshot to stun him, in order to reach and hit him.

    • Yellow fish

    • – They just jump in and out of the water. You can either ninja your way through them or kill them with a well-timed hit.

    • Green fish

    • – Hard to kill as they will spit on you once they jump out of the water. To kill them, you’ll have to hit when they’re jumping up, and never, when falling down.

    • Ghost Wisp

    • – Not Hostile. Once you hear them coming, just get to a lower ground until they all pass through.

    • Guard Dog

    • – If you hate frogs, you’re just gonna love those little things. Try to keep them at a distance with a bomb or a spear. Once you hit them, they enter rage mode and start jumping further. Can be dealt with the same way you deal with frogs, but you’ll have to be way faster.

    • Archer Guard

    • – Just like the blue bandits, archer guards will try to keep their distance from you. Try to get them stuck in a corner, using your Slingshot to get near them.

    • Spear Guard

    • – Charges at you with a long ranged attack. Just jump over them and hit them while they’re idle.

    • Kobold

    • – Stay out their shot’s reach. Once they stop shooting, use the javelin to hit them. If you know where they will appear, you can wait for them nearby and hit once they show up to deal more damage.

    • Flying Homing Mine

    • – Those things have a blow up timer. They will chase after you, so either run or hit to keep them away.

    • Blue Toad

    • – A super fast version of the green toad. Nothing, but the Ki Spear Technique will help you here as they are impossible to fight in melee range.

    • Hive

    • – The most ridiculously hard enemies in the game. Usually found in areas with three or four more, they spawn a number of bugs (3 – 5) once you get near or hit them. The bugs can fly, jump, bite, explode and throw acid once they die. If you’re feeling brave and decide to kill them, try to stay on a higher platform and lure them to fly to you. Luckly, they die from one javelin hit, so make it count. You can also throw bombs at the hives to get rid of them and exit the area without killing the bugs. Once you go back inside they’ll be all gone.

    • Turrets

    • – will shoot at sight. Generally, just wait for the shot and go for the kill.

    • Droids

    • – In other words, flying turrets. Use your slingshot to bring them down and destroy them.

    • Arc

    • – A red and a blue bandit in one. Have them charge at you but don’t jump over them until the very last moment, as they can also jump while charging. Once you’ve dodged turn around and hit.

    • Plant Dog

    • – Insanely hard to kill with no casualties. Unlike the dogs in the prison, these take more hits to kill, deal more damage and shoot. Use the Ki Spear technique and never let them get close to you.

    • Harpy

    • – Most important thing to watch out for is the bombs they drop as they deal 13 points of damage. To kill a Harpy wait for it to charge at you and dodge, then quickly turn around and hit it on its way up. Requires 3 hits to kill.

    • Laser Tower

    • – These will destroy anything in range. They turn red when something gets near them. Can only be destroyed with The Artifact, but beware of the energy saws shot afterwards.

    • White Robots

    • - Can hit and spit acid. If there is a barrier between you and the robot, use bombs to kill it. If not, try to get it stuck in a corner and start bashing.

    • Red Robots

    • - Can only be shut down for a while, not killed. Usually, you’ll see a platform around them that leads to a pit. There should be a switch to open the pit.
      If there isn’t such a pit, look for alternative paths or just run for your life.

  • Bosses

  • A general tip is to never use the Ki technique on bosses as it will only cost you valuable time and is not as efficient as just spamming the attack button.

    • Armored Frog King

    • - First of all, you won’t damage it while bashing its head with your Bat. Instead, aim for the stack of Duri Fruits above it. This will make the frog turn around for some reason, so now you can poke it safely from behind for a brief period of time. Repeat three or four time and you’re good to go.
      THINGS THAT YOU SHOULDN’T DO:
      1. Do not try to use the Slingshot while you’re being sucked towards the frog or while it’s shooting Duri Fruits out of its mouth. This will only result in damaging yourself before you even get to shoot. Aim for the fruits only before and right after the frog throws up some Duris at you.
      2. Do not try to focus your Ki for a stronger hit (holding ‘X’). This will only slow you down. Just spam the damn button until the gigantic jerk switches sides.

    • Sand Dragon

    • - There isn’t much to say about this boss. You’re gonna have to drop bombs whenever it comes out of the sand to bite you. Once it has swallowed the bomb, it will come up as soon as the bomb explodes and you’ll be able to deal some damage. Make every hit count as the Sand Dragon will get angrier each time it swallows a bomb.

    • Giant laser shooting robot(Thom’s lab)

    • - Don’t try to dodge the lasers! You will get hit at least twice if you do. Instead just jump over the robot and let it shoot in the other direction.
      Always have your Slingshot ready for action! As soon as mister Terminator shuts down for a while, hit him until he’s on the platform and then hit the timed switch above you. That way you’ll deal about twice as much damage each time.

    • Kobold General

    • - Never stay in front of the boss. You want to always be on his opposite side.
      Always keep a javelin on one of the walls in the bottom. Stay on its edge whenever the boss decides to open fire.
      Generally, the Kobold will always shoots twice before he starts charging his lightning ball. So be sure you’ll be able to reach him easily on his third time.
      If the boss is charging his death ball from the ceiling, you will need to jump and throw a javelin in order to hit him.

    • Eye bot

    • - Once the fight starts, your first priority is to destroy all the spheres hanging in the air.
      Always kill the damned flying turret before you go hitting the boss itself.
      To crack open the boss and damage it, you’re gonna have to get the four eyes – two on the ground and two on the ceiling. Bombs do a good job here, but they can reach the eyes above, so use the Artifact. Always leave the bottom or top left eye for last so you’d have more time to smash its metal skull.

    • 66

    • – After Prince Douchebag has sent one of his killing machines after you, there is nothing to do but run. Run fast, run fancy and keep your fingers ready to hit the 1, 2, 3 and 4 buttons. Use the speed boosters (if you bought any), and always close the doors behind you. Your only chance is to hit the switches from the very first time.

    Reply

    Phoenotopia: Step-By-Step Walkthrough © Jayisgames 2014

    Here you’ll find a detailed walkthrough for Phoenotopia, along with all secrets and tips on enemies and bosses. Keep in mind though, that the walkthrough contains a lot of spoilers.

    1. General info and tips

      • Most important thing to remember when playing Phoenotopia, is that the game is full of secret places where you’ll find valuable items. Keep your eyes open all the time. Check every corner, climb every ladder, enter each room and destroy every box and pot you come across.

      • Money could be an issue, especially if you’re looking to become a killing machine. Play smart and only use money to resurrect when your last save is far away.

      • Talk to everyone you see. While some of them will give you useful information, others will be in need of something. If you manage to find out what it is and give it to them, you’ll almost always be rewarded.

      • Always carry at least a couple of healing items in your inventory. Stamina and speed boosters (i.e. hoeny) could also come in handy, especially when salving puzzles.

      • Don’t just rush into enemies. Observe their movements and always enter combat with a strategy in mind.

      • The maximum amount of health points you can have is 99. You will need all 23 Heart Rubies and 5 Chocolate Protein Shakes to get there.

      • There is a total of 42 Moon Stones in the game. Unless you’re going for the “Master Moon Stone Hunter” medal, you won’t be needing the last two.

      • You can use the number keys to switch your tools quickly.

    2. Step by step walkthrough


    3. The walkthrough covers the whole game. From the moment you wake up in Panselo, until the very last boss. Moon stones and heart rubies are also included in here, as you progress through the game. However, if you’re looking for their actual locations, check the Heart Rubies and Moon Stones section.

      First thing to do when you wake up is to go left and through the door. You’ll find yourself in a house with two floors. Although the game has a great story, if you aren’t interested in details you can skip talking to everyone inside and head through one of the doors on the upper floor. Go right to the second town area and enter the first house you encounter (the one with the Pukis in front). Once inside, you will see a gray box. Push it to the right, until it reaches the wall and climb up to pick up the Wooden Bat. Equip it and proceed forward. You will see a bunch of small boxes next to a ladder. Grab a box and put it on the plate on the right. This will open a door above you. Now you can climb up the ladder and grab that Moonstone. Moonstones are precious and often well hidden, so keep in that in mind while exploring new areas.
      Now that you are armed with a deadly stick, get out of that house and head left. Talk to clem, the guy standing in the carrot field, to learn the location of the Duri forest. Proceed to the left until you reach the village gate. Climb up the ladder and hit the gate switch (purple sphere thingy). Head out and go to the Duri Forest, where you adventure will begin.

      Duri Forest

      Once here, simply proceed forward until you reach a cut scene. There are a few things to look out for, however. First of all, look all around for any treasures. Second, frogs are jerks! I know what you’re thinking: “Oh, look a frog. I’ll just go ahead and poke it with the might of my Wooden Bat until it drops dead.” Now, like I said, frogs are jerks and they will probably piss you off. The easiest way to deal with them, is to wait for them to jump and then strike. Sadly it takes two hits at this point of the game. As a Ki student you will have to learn to be patient, not just with frogs, but with most creatures you encounter in the game (all jokes aside).
      If you find yourself low on health, hit the fruits on the Duri trees and then smash them. They will either drop a Duri Fruit for you to eat, or get shattered into pieces, which heal you. Last thing to look out for is save statues. Save as often as you possibly can, as reviving costs money which you will really, really need later on.
      Once you’ve found Alex and obtained the slingshot, hit the switch with it and go inside the dungeon. Kill Slimes one by one if you don’t want any trouble. Bats can be dealt with using the Slingshot. Keep in mind that the stone from the Slingshot will bounce 2 times. This will allow you to hit some switches indirectly and push items that you cannot reach.
      Once you obtain the key to the top floor and enter it, you will come across a room with some bridges that need to be activated through a pressure plate. On the bottom of the room, you’ll find a small cube. Grab it, head up and drop it from there. Before you proceed, head back to the left end of the room and enter the last door. You will see a platform that needs to be triggered through another pressure plate. Aim for the Duri fruits with you Slingshot and then hit the one that dropped off. This will trigger the pressure plate and now you can climb up and collect the Moonstone. Once you’re done with that go back to the big room, activate the bridge the same way as before and proceed forward. Go through all the rooms before you head into the one with the boss.

      Boss fight
      Now that you hate frogs (as we all do at this point), a giant armored frog for a boss doesn’t seem too pleasant, does it? Not to worry. This is a fairly easy boss. Here’s how to deal with it in case you’re having trouble:
      First of all, you won’t damage it while bashing its head with your Bat. Instead, aim for the stack of Duri Fruits above it. This will make the frog turn around for some reason, so now you can poke it safely from behind for a brief period of time. Repeat three or four time and you’re good to go.
      THINGS THAT YOU SHOULDN’T DO:
      1. Do not try to use the Slingshot while you’re being sucked towards the frog or while it’s shooting Duri Fruits out of its mouth. This will only result in damaging yourself before you even get to shoot. Aim for the fruits only before and right after the frog throws up some Duris at you.
      2. Do not try to focus your Ki for a stronger hit (holding ‘X’). This will only slow you down. Just spam the damn button until the gigantic jerk switches sides.
      Finally, if you are having that much trouble or the frog is just pissing you off and no one is looking, hit space, go full screen and if your game is moving slower you’ll be able to deal a lot more damage for one turn (but that’s cheating).
      Congratulations! You just killed your first boss and obtained your first Heart Ruby. You can now proceed to the next room and get a hold of the “Shooting Star”. After the “close encounter” with that Spaceship flying above your village, head back to Pansello. You will need to find your little brother there. He’s on top of the very last building on the right. If you haven’t already do some exploring in the buildings on your way there. You will find quite a lot of money stored in chests, boxes and piggybanks.
      Now do as Alex says and head back to your home and talk to him again so he can tell you what to do. After you’ve realized that you aren’t the smart one in the family, go and find him again after you’ve woken up. He will give you the location of the Sunflower Road.
      Before you head off, stop by the Dojo and buy the Scroll of Rolling. It costs only 50 rai while you should have about 100 – 130, so it shouldn’t be a problem. Then head right and climb the ladder to the upper floor. At the left end you will find a small gap. Roll in there and get that Heart Ruby. Now get out and head to the wall at the right end of the village. There is a hidden gap under which you can roll. Inside you’ll find some boxes, one of which contains a Moonstone. You might also want to stop by the shop and buy some food for desperate times.
      Go to Sunflower Road. Whatever you do there, DO NOT attack the bees as they will group up and start chasing you. There is a Moonstone on one of the leaves but getting there can be tricky as the bees keep flying around the sunflowers. Proceed forward through the village and the broken bridge until you reach Atai.

      Atai Bridge

      Once you’ve reached the middle section of the bridge you’ll notice a Moon Stone. To the west of it, there should be a large metal box and a smaller box. Push the box to the right and use a slingshot to get the small box out of the broken bridge and stack it on top of the larger box. Position the metal box so that you can roll through and snatch the moon stone.
      Once you’ve got the Bombs, you want to destroy the stones and free that scientist looking guy. He’s really hard to miss so you shouldn’t have trouble finding him.
      At the very end on the west side of the bridge, you’ll notice a Heart Ruby. Blow up the large stones that block the path to it. Next, go right until you see two big metal boxes. Push the bottom one to the left and then use it to push the one on top of it. Once you get the box to the small gap, roll under and get that heart ruby.

      Atai City

      Once you’re in Atai, you might want to ask around to know what’s going on. There is a bandit in the jail, who won’t say anything about the Bandit’s Lair. If you’ve done your research in the city, you’d know that you’re going to have to visit the local potioner. You’ll find her in the last door to the left above the food shops. You can buy a Talkinator Juice for the imprisoned bandit. Before you get too excited about the 5000 rai bounty that you’re going after, go explores the areas to the left. You will find your weird sister there begging you to help her with some debt. After you’ve talked to her, go and visit her “boss” to the left. While you’re there, you might want to go in the kitchen. Enter the door on the ground floor and destroy all the boxes, one of which contains a moonstone. Now that you’ve talked to the mayor and found out that you’re going to have to give away the whole bounty for someone who hates animals, go back to the city.
      Climb on top of a building and start going left until you reach the top of the prison. You will notice that one of the windows is darker. Jump on it and enter. Find the bandit in his cell and give him the potion. He will give you the location of the Bandit’s Lair. Now head back to your sister and ask her about interesting places to visit. This will give you the location of Adar’s house – the guy from whom you’re going to borrow some bombs for the Bandit’s Lair. On your way out of the city, drop by the Inn. On the ground floor you will find a big wooden box blocking a ladder. Destroy it and go down. Once in, roll your way through the tunnels to find another Moon Stone. You might want to visit the shop as well. There is a decent weapon for sell, an armor and a lamp. If you don’t have enough money to buy everything, only buy the Iron Hammer. Your next priority is the Lamp. The Leather Armor should be a luxury at this point.

      Adar’s House

      Once you get there, head west until you reach the end of a cave. You will find the bombs just standing there. Grab them and head back. Stop buy his house, blow up that rock blocking the ladder and “borrow” his money as well.

      The last thing to do before heading to the Bandit’s Lair, if you have 25 rai to spare, is to stop by the shop in Atai and buy a Wooden Sword. Then go to the Inn in the Sunflower city and give that sword to the little boy. He’ll reward you with a Heart Ruby.

      Bandit’s Lair

      Go to the west end of the area and destroy the last rock on the right. A door to the Lair will appear. Once you reach the room with the bridge, be very careful! The ground is full of pressure plates, which will trigger traps. Eventually you will fall down in an area full of Bats and Sand Dragons. You can either try to kill the Sand Dragons or you can try and ninja your way to the switch in the bottom right corner. Hit that through the stone and head up the stone ladders. Right above the switch, you’ll see a Moon Stone, blocked by some rocks. You can get to it by jumping and throwing a bomb right before it explodes. Once you’re done with that too, head to the upper right side of the area and climb up the ladder.
      Once you enter the door right of the bridge, you’ll find yourself in another room with a blocked door with a button sequence puzzle. Go in the room in the sand. You’ll see five or six bandits sleeping in there. As long as you’re a decent ninja and don’t touch or hit them, they won’t wake up. At the west end of the room you’ll find another door. Inside is a journal containing the right order for the buttons puzzle.
      In the next room head left and go through the door below. You’ll find some money in there as well as another frog in a box. Go back jump up from platform to platform heading west, until you reach a save room. Inside are two more doors. In the room to the right, you’ll find the sequence to the second puzzle. Then enter the upper door. There’s a ladder there, leading to some treasure and to the top of the building. Once you’ve collected everything, head back to the main room and enter one of the two doors below. Now go through the door on the east end of the room. Climb up the ladder and go left. Trigger both traps but do try to avoid any damage. You’ll see a timed switch. Climb up and drop a bomb, then quickly go get the key below you. That’s one out of two keys. Head back to the previous room. You’ll see a switch right above the bridge. To avoid any fatal damage, wait until all the bandits are on the left side and hit the switch with your Slingshot. Now quickly get them all with their backs against the wall and kill them simultaneously.
      Head right and enter the door. In the new room, go downstairs. You’ll see another puzzle with timed switches. All of the switches will open a different barrier. Only the last one on the left will stop the magnet for a short period of time. Drop a bomb next to the rightmost switch and right before the bomb explodes, hit the left switch, so that the key can drop. Next comes the switch on your right and then the next one.
      Now that you have the second key, head up and start climbing the ladders. Be very careful not to touch any of the bells, as they will trigger an unavoidable arrow trap. Once you’re out, go back to the main room. Now save your game and proceed through the locked doors.
      Boss Fight
      There isn’t much to say about this boss. You’re gonna have to drop bombs whenever it comes out of the sand to bite you. Once it has swallowed the bomb, it will come up as soon as the bomb explodes and you’ll be able to deal some damage. Make every hit count as the Sand Dragon will get angrier each time it swallows a bomb.
      Now that you’ve defeated the boss, collected your heart ruby and captured the bandit chief, head back to the safe room. Go to the upper room and climb the ladder all the way to the top of the building. You’ll come across a sign warning you not to jump off, since apparently Bob thought it’s a clever shortcut and broke his leg. Now, you aren’t Bob and you don’t get beaten by little girls with pink hair, so don’t hesitate and jump right off. You’ll land right above the entrance door. Destroy the rocks in front of you and a hidden door will pop. Inside you’ll find a piece of High Quality Cotton Silk which you can sell to the silk lady in Atai for a decent amount of rai.
      Nothing left to do, but head back to Atai City and free your sis. Go to the prison to give the guards the Bandit Chief. After a few cut scenes, your sister will be free and you will have to head back to your home village. Head to your house and talk to your little brother. Lisa will tell you to look for Thomas, the scientist guy and will show the location of the next area – Misty Corge. Before heading there, visit the mayor’s kitchen in Atai again.
      Once inside, talk twice to Albert, the first guy left of the door. He’ll give you a love letter for your sister. Once you deliver to Lisa, she will give you her reply letter, so head back to Atai and give it to Albert one last time.
      Now that you’ve crushed the poor bastard’s heart, it’s time to pack and head to the Misty Corge.

      Misty Corge

      You will need to cross a river to continue the adventure. But as we know from earlier, you can’t really swim. Not to worry! You can buy a Floatation Donut from the fisherman inside the shop. If you don’t have the 60 bucks, go kill some monsters and hope that they will drop some money. There isn’t much to do here. Just go east as fast as you can. This is a dangerous area. The only place you would want to stop is the third area east of the Inn. Once you’ve reached it, swim until you see a flower on which you can climb. Hop on it and head back left to climb up another flower. Then go right, jumping from platform to platform until you see another Heart Ruby. Beware of Spiders and Wisps.

      Crossroads

      In the Inn in this town, you’ll find a girl with brown hair, in a karate costume. In order to restore her memories, you’ll need a Duri Fruit and a Chocolate Protein Shake.
      In order to get the Heart Ruby in this village, you’ll need to rent a room and rest. Go outside the balcony and jump over to the one on the right. Inside you will find the Ruby inside a box. So whenever you fell like spending a 100 bucks to rest and get another ruby you know where to find it.
      To get the Moon Stone, talk to Lass, the green haired girl inside the Inn. Next, head east to the tree house and kill all the Slimes. Collect your money from Lass once you’re done and leave the village. Go to the Great Walls. On the top of the second tower, you’ll locate a guy named Gill (you need to find him at Fran’s lab first). Talk to him and head back to the Crossroads. Go to the tree house again and talk to Floe, the girl with the orange hair. She will give you the Moon Stone.
      Another thing that you can do here is to get a robot toy for the guy in the first room on the left. You will find those in Daea’s shop.

      Fran’s lab

      By this time you should have at least 5 stones, so head to Fran’s lab and talk to him, so he can reward you. Keep coming every time you get 5 more. He will eventually give you a Heart Ruby and more.

      Thomas’ Lab

      Head to Thomas’ lab next. Once inside use the Slingshot to destroy the box above the door and activate the switch. This will open the door in the top right corner of the room. In there, grab the box from the bottom of the room and put on the pressure plate above. On the ground you’ll see four more pressure plates. Put boxes on three of them and stand on the fourth one. The wall on the right will open. In there you’ll have to fight a giant robot that shoots lasers.
      Boss Fight
      Don’t try to dodge the lasers! You will get hit at least twice if you do. Instead just jump over the robot and let it shoot in the other direction.
      Always have your Slingshot ready for action! As soon as mister Terminator turns off for a while, hit him until he’s on the platform and then hit the timed switch above you. That way you’ll deal about twice as much damage each time.
      Once the metal head is dealt with, climb up and go to the room on your left. Talk to the paranoid guy in there so he can fix your golem head. Next stop is Daea.

      Daea

      First things first. Head over to the bar and enter the bottom left door. Once inside, throw a bomb at the box that is blocking your way down. Now, push second box on the bottom to the right. Go back up, push the other box on it and roll under the wall to collect your Heart Ruby.
      Now, go back to the bar and head up, right above the door you came out from. Destroy the grate and roll under the wall. You will find yourself in a small maze of tunnels. Roll to the left. Now drop a bomb and hit it until it reaches the grates on the ceiling of the room below you. Get in there and collect your Moon Stone from the chest.
      Meanwhile you can buy a comic book from the shop and give it to the prisoner back in Atai City. He will reward you with a Moon Stone.
      Now you can head west and go to the king’s castle. After all the cut scenes, go west again and enter the door to the sewers. Talk twice to the guard inside and head to back to the king’s castle. You will see a little girl on the bridge in this area twice. You’ll need to find a girl called Ruby. Go back to town and find the house with no signs on it. Enter the door on the second floor and talk to the guy in the blue shirt. Head to the shop and talk to the lady in blue. She’s on the top floor, west side. Now that you know where Ruby is, go ahead and enter the sewers. The door inside should be unlocked.
      Once you enter the door below you, head right and swim until you find some pots. You will find a Moon Stone in one of them. Proceed on your way west until you climb a ladder and enter another room. Head right. You will find ladder that is out of reach. Kill the Slimes and stack up the boxes so you can climb up the ladder.
      Jail Sector C

      When you reach the main room (the one with the many locked doors), enter the save room in the middle. Once inside bomb the east wall. Destroy the boxes inside to get another Moon Stone. Now head to jail room C. You’ll find a key on a platform above you as well as 4 timed switches. Just plant a bomb between two of them and hit the other two when it blows up. Proceed forward and free everyone from their cells.

      Jail Sector D

      Go back to the main room and enter Jail sector D. Once inside, use your Slingshot to get the key down (stones from the Slingshot go through the platform). When you’re done freeing everyone from their cells, head to cell C IV and bomb the ground. You will find yourself dropping down to sector E. You’ll reach a room with two dogs and a ladder leading down. Kill the two dogs and go down. You will come across a puzzle with a magnet. Turn on the magnet and send it right so it could pick up the key. Hit the switch to open the platform blocking it and use the magnet again to drop it in the hole above you. Once that’s done, close the platform, turn on the magnet again and send it to the left. Turn it off and voilà. Once you’re out save your game, as a boss fight awaits next.

      Jail Sector B

      Before you unlock the door to Jail sector B, enter the room that’s right in front of it. You’ll see a puzzle with four timed switches. Climb up between the top two and throw a bomb down the one on the left below you. Quickly switch to the Slingshot and shoot the top left one. Turn around, hit the right one with you weapon and run down to the last one. A door will open with tree chests inside. One of them contains a Moon Stone.
      Next stop, jail sector B. Inside you’ll find 4 timed stiches and a few boxes on the right. Put a box on the platform above each switch and hit the one in the middle. Grab the key and head east.
      Boss fight
      Kill everything as fast as you possibly can.
      Try to get soldiers and/or dogs stacked so you can hit them both at once.
      Use the Slingshot to stun enemies you’re running towards. Very useful against Archers.
      Once you killed everything that tried to lay a finger on you, use the Javelin to get to the door above. Inside the room you’ll find the key to the cell. Open it up and talk to Thomas and the other Soldiers. The key to jail sector A is inside.

      Jail Sector A

      Head back to the main room and get to jail sector A. Once you reach the cell room, go in the cell on the bottom level. Blow up the wall on the left. You’ll find some boxes in there. Stack them up next to the door you came in from and drop a bomb on top to blow up the low above. Use the spear to get to second floor and blow up the right wall. You will find a Heart Ruby inside.
      You can now continue to the top cell and get out of there.
      Back in Daea, go inside the sewers again. Enter the first door below and make your way through the platforms above the water. Instead of continuing down through the water, throw a javelin on the wall and climb up. You will come across a few pots, one of which contains a Moon Stone.

      The Lucky Belt

      Go to the shop to buy a sandwich. Don’t eat it, it’s not for you! Next head back to Duri Forest. Go east until you reach a cave entrance blocked by a stone. Blow up the stone and get inside. You will reach an open area at the end of which, there are some orange fruits. Get one of those and head to Atai. Go to the potion lady and give her the orange fruit you just got.
      While she’s making the potion, go west until you come across two large boxes with an anchor mark on them. Throw a javelin at the lowest possible point on the platform, climb up and destroy them. Inside is another Moon Stone. Now head to the mayor’s house but don’t enter it. Throw a javelin on the wall in the left end and climb up the building. There is a window that is darker than the other one. Climb on it and go inside. On the right you’ll see a gap with a switch at its far end. Use the Slingshot to hit the switch and the door behind you will open. Borrow the mayor’s money by destroying everything you see inside.
      Go back to the potion lady and buy the orange potion. Go outside and check the carpets below the Inn for a hidden door. Hit the switch above you and go down until you reach 3 piles of boxes. Use them to climb all the way to the right top corner of the room. There you will find another Heart Ruby.
      Now head to the Great Walls. Give the sandwich to the guy standing on the right side of the save statue. Now go through the door on your left and give the Mikan Fragrance to the first guy you encounter. He will give you a Moon Stone. Now go to the right end of the room and roll under the wall. Use the boxes inside to trigger the pressure plates and get your Heart Ruby.
      Go outside and climb the left tower. Talk to the guy on the right edge. He’ll give you a letter and a new location – Framers Block. Go there and enter the house. Talk to the old guy on the second floor. He will ask you to take care of some noises downstairs. Enter the room in the bottom right corner, destroy all the crates there and kill the frog. Once you’re done go talk to the elder man again. He will give you the Lucky Belt.

    4. Ki Spear Technique Scroll

    5. Go to Panselo and buy a Chocolate Protein Shake from the Dojo. Next, you’ll need a Duri Fruit which you can get either from the Duri Forest or buy it for 20 rai in Atai. Now go to cross roads and give the Duri Fruit to the girl that lost her memories. Then go out and back inside the Inn and give her the Chocolate protein shake. Do the same thing, only this time, give her the Green Bracelet from your misc. items. Again, in and out and talk to her one more time. She will thank you and give you the scroll.

    6. Prince’s Tower

    7. Once you’re done gearing up and buying food (if you find it necessary), head to the Prince’s Tower.
      This is a fairly easy area to get through. Once you’ve reached the 4th floor, you will notice chest locked behind a stone barrier. Go to the right balcony and hit the time switch with the Slingshot. Make sure that you’ve left the bridge in the middle open and run down to the chest.
      On the next floor, simply use a bomb to delay the switch activation, run right to the first platform and wait for it to activate. Next comes the room with the bell traps. Once you’ve activated all the switches and the platforms are there, start climbing. The bells on the first platform can be jumped over. Another way to get through is to activate the first bell that will disable the platform and land on the second one. Roll under the traps on the second platform and jump over the ones on the third. Above are five ladders. You can get through by activating the traps only when jumping on the longest ladders (2nd 4th and 5th). Once you’ve touched a bell, quickly go down to the bottom end of the ladder and wait there until the arrows pass.
      You cannot get to the pots that are locked in the save room. You need an item that is yet to be found so no need to bang your head. Just heal up, save and go kill yourself a kobold boss.
      Boss Fight
      Never stay in front of the boss. You want to always be on his opposite side.
      Always keep a javelin on one of the walls in the bottom. Stay on its edge whenever the boss decides to open fire.
      Generally, the Kobold will always shoot twice before he starts charging his lightning ball. So be sure you’re able to reach him easily on his third time.
      If the boss is charging his death ball from the ceiling, you will need to jump and throw a javelin in order to hit him.

      Once you got the big rat, it’s time to collect your Heart Ruby and free the prince.
      After the cut scene is over and your sister managed to accuse you of loathing, you can go to the last house next to the wall. Once inside, throw a javelin against the wall, next to the ladder and climb up. On the second floor you’ll see a switch which opens a small gap on the first floor. Go down there and grab the Moon Stone.
      After you’ve had the adult-only meeting and got the artifact shard from the prince, grab lots of food and head to the Great Walls.

      Dread Lands

      Talk to the guard at the wall’s gate. He will open the gate for you and you will be able to “sneak” to Dread Lands.
      Once in Dread Lands, watch out for X signs. Those show you where mines will appear. DO NOT try to take more than one robot at once! Another thing worth mentioning is that red robots cannot be killed. So whenever you get chased by one, get out of its sight as fast as possible.
      In the third area, go down and kill everything you can until you see the red robot. Run left and let him stay there. Destroy the wooden boxes and roll under the gap. Climb the ladder and use a javelin to get to the upper level. Kill the robot behind the box (preferably with bombs so he wouldn’t get a chance to hit) and collect your key. Now push the metal box to the right and roll to the other side of the wall. DO NOT push the wooden box yet! Go right and wait for the mines to activate. After they’ve blown, push the box down the gap and then down the other one. You will find a couple of robots there, so be very careful not to destroy the box while fighting them. After you’re done dealing with them, push the box to the right wall and use a javelin to get to the grate above. Roll under it, and you will find yourself in a rather large room. Blow up the floor in the middle go downstairs and run for the door. Don’t try to kill the robots. Inside you will find a Heart Ruby.
      Get out of there and proceed to the next area. First thing to do is climb up the ladder and push the box to the right edge. Throw a javelin on the left wall, kill the robot upstairs and climb up to grab the key there. Now climb on the metal box again and throw a javelin on the right wall. Proceed right, on top of the buildings, until you find a pot that contains a Moon Stone.
      Go back the same way, until you reach the same metal box. Go right, through the gap in the wall and grab a mine. Jump down to the right edge of the wall below you. Enter the room above. Downstairs, on the left end of the room, you will find a chest full of money and on the right end, another key. Get out of there and go east until you exit the Dread lands.

      Mul Cavern

      Rocket Boots
      Once Billy has said what he has to say, go down and enter the cave left of the save statue. If you find the damned bugs in there too many and too hard to kill, just keep going left until you find the Rocket Boots.
      Above the save statue, at the entrance, fly to the right until you reach the end of the area. A few chests lie there, one of which contains a Moon Stone. Now head down and enter the cave right of the save statue. Inside you’re gonna have to destroy the hive on the right, as it is blocking your path. Try and kill all of the blue things that run away from you with your slingshot until they drop an item. In the next area head to the bottom right corner and jump down. Now head left of the save statue. Once inside, be very careful! The area is full of hives, so try to kill the bugs one by one. Enter the cave behind the hive and make your way to another Heart Ruby.
      Now head west from the statue. Inside head right until you find a hole through which you can go up. Proceed to the right until you’re out of the caverns. Since the area could get ridiculously hard and you’re probably out of food to heal up, it might be a good idea to skip the Moon Stones for now. You can see their location in the Heart Rubies & Moon Stones section.

      Ancient’s Crater Part 1

      A fairly easy area. Your goal for now is to get The Artifact. Just head west until you reach Bobby’s friends. Don’t come near the statues with big diamond in the middle. When you encounter any, either fly over them or go under.
      Once you get The Artifact and are able to deactivate the statues with it, head back to the previous area. Go west until you see a hole in the ground which is blocked. Below is a blue switch, which you can activate using the artifact.
      Then head east until you drop down into a blue room with two doors. Go to the door on the right, save your progress and use the teleport to get back to the beginning of the area. Now that you have all the mobility items, go find some gear. Collect every Heart Ruby and Moon Stone you can. You’ll find them in the Heart Rubies & Moon Stones section.

      Ancient Armor

      A fairly easy item to acquire. Go to Adar’s House, climb on top of it and fly left until you reach a cave entrance. Once inside, climb up and fly to the rightmost platform. From there, use The Artifact to activate the switch and open the gates below. Once inside, proceed west until you reach a room with golems inside. Head down and enter the rightmost door. The Ancient Armor is inside.

      The Morning Star

      To get this weapon, you will need two Asteroid Rocks. One is given to you by Fran when you acquire 25 Moon Stones. For the other one, you’ll have to visit the Misty Gorge again. From the third area, on the east side, climb on top and head west. Keep going until you reach a cave entrance, on top of the area, hidden behind a couple of rocks. Once inside, simply proceed forward until you find a Moon Stone and the rock itself next to it.
      Now head to the blacksmith in Adea and give the rocks to the apprentice. Go in and out and voila! The Morning Star is available to you for only 200 rai.

      Nebula Armlet

      This item will help you focus your Ki (holding ‘X’ will trigger the charged attack faster). Go to Atai City and jump inside the well. Head right and go through both rooms to activate the switches inside. Proceed west into the next area. You will come across a hole with lots of stones in it. Destroy all of them and enter the door that pops up. Inside you will have to get rid of all the robots in each area in order to proceed forward. Lure the red ones and hit the switch above so that they will drop down. The armlet is located in a chest, in the rightmost room of the last area.

      Forgotten Forest

      While not mandatory, going through this area will lead you to a new village where you can buy some valuable costly items. You will need to gather 30 Moon Stones and give them to Fran. This will activate the portal in his house, from which you can access the area.
      Once you get through the portal, head east until you reach a broken bridge with a Harpy flying above it. Drop down and kill the orc. He will drop the key to the door at the right end. Kill the orcs inside and get to the top felt corner. Take the metal boxes there, place them on the pressure plates and stand on the last one. A door on the bottom left side will open. Grab the key from there and enter the cave on your right. Climb up to the other area and kill the dog there. Take the key that it drops and go back to the area below.
      Go east until you reach a save statue. Enter the house on the right side of the statue, destroy the boxes and activate the switch. A ladder leading down will appear. In the rightmost room you’ll find another door leading to a robot like the one in Thomas’ lab. After you’ve dealt with it and collected the key head right, open the door and get the Moon Stone from the pots inside. Once outside the house, go east until you reach another locked door. Climb up the tree into a new area and head east until you reach the Hidden village.

      Ancient’s Crater Part 2

      Now that you’re really tough you can head on to the final area. Use the portal in the beginning of the crater. Get out of the save room, go down the ladder and use the Artifact to reveal the hidden blocks around you. Head east and enter the door. Go west and activate the switch there. Two orcs will appear. Kill them and go to the west side to activate the second switch. Go back to the middle. Right above the blocked door is a tunnel at the end of which you’ll find the third switch. Throw a spear inside and you’re good to go.
      Once you’re in the big aquarium room enter the door on the right and head west. The only thing to look out for here is the trap timing. Once you’ve dropped down to a new room and then entered another door, you’ll have to use the Artifact again to reveal your way. Careful not to fall down as you are gonna have to start anew.
      Once you’re back in the aquarium room enter the door on the left. When you get to the trap with the two robots, lure them down and hit the switch that drops bombs. Three bombs should be enough. Hit the bastards until they’re on the platform and then use the Slingshot to get them to drop down.
      In the next room you are going to have to kill a Harpy. Do not try to jump on a platform to reach it! Simply wait for it to charge at you, dodge and hit. Avoid bombs at all costs as they deal 13 damage. Once you kill the damned thing, head down the ladder and don’t forget to get the chest above you, as it contains a 45 hp Old Ration.
      Inside the next room, you’re gonna have to make your way through the traps without activating any of them. After the rather simple puzzle with the bomb you’re going to find a save room right before the boss fight. You can use the portal to go back and rest somewhere before the final fight. You might also want to get loaded with some speed and stamina boosters rather than just food. However, don’t consume them before the boss fight ends.

      Boss fight

      Once the fight starts, your first priority is to destroy all the spheres hanging in the air.
      Always kill the damned flying turret before you go hitting the boss itself.
      To crack open the boss and damage it, you’re gonna have to get the four eyes – two on the ground and two on the ceiling. Bombs do a good job here, but they can reach the eyes above, so use the Artifact. Always leave the bottom or top left eye for last so you’d have more time to smash its metal skull.
      Once you’ve dealt with the boss, sit back, relax and enjoy the last cut scene.

      66

      Now that Prince Douchebag has sent one of his killing machines after you, there is nothing to do but run. Run fast, run fancy and keep your fingers ready to hit the 1, 2, 3 and 4 buttons. Use the speed boosters (if you bought any), and always close the doors behind you. It is very important that you hit the switches from the very first time.
      After you get to a dead end enjoy the close encounter with the UFOs. This is where our epic journey comes to an end, temporarily, I hope.

    Reply

    Just some words to congratulate Stan (a new writer in the team) for his incredible work with this full guide.
    I really hope you will enjoy with it.

    Reply
    eNKayDee October 24, 2014 2:29 AM replied to chacha51

    @chacha51 Your idea about using the potion to make the bandit talks is right, but you missed one step:
    Use the ladder right next to the door with the "inn" sign to climb up. When you climbed up to the top, jump to the right. You're on the right track if you sees a guard walking up there! Then jump to the right, onto another roof with a semi-circle thing. Then, just jump down to the lower roof and you see two windows and a semi-oval thing (it's right above the big sign and the door that leads to the jail where the bandit is). In one of the windows, you'll see the right one has the shadow thing. Jump on the right window, and walk in there. You're in! You'll see you're upstair, right above the guards and behind the door that was blocked upstair. Jump on the bookshelf, and you'll see the grey thing that links to the other side. Break it with the stick or other weapons (I used stick), and roll in. If you can't roll, then you didn't buy the rolling ability. You'll need to go back to Panselo, then go in the Dojo, and buy the thing that looks like a scroll. It cost money so you need to have money. When you buy it, roll by pressing the down key (by default, it's the down arrow) and then press the jump key (by default, it's the z key). Remember to keep holding the down arrow key when you press the z key. Back to the main, after you roll in the jail, the bandit will say he's thirsty. Give the potion to him, and he'll say it out! Then the location will appear on the map! Hope you understand! Just ask me for more help :)

    Reply
    elephantdude October 25, 2014 4:04 PM

    Important note when battling

    harpies

    walkthrough says the best way to beat them is to

    melee them when they charge

    however I find it much more effective to

    slingshot the bomb before they drop it

    Reply
    ChrisBall October 26, 2014 2:49 AM

    I'm stuck! In the princes tower 4th floor or so, there is a stone door running horizontally, dividing the screen in two. There are four balconies. That door is closed and I can't go higher. I've tried everything, there's just no dang way.

    What am I not seeing?

    Reply
    Furipu October 26, 2014 8:47 AM replied to ChrisBall

    If I remember correctly, there're vines you can climb like a ladder on the balconies. One will be blocked by a door on the higher floor, but the other one should be open.

    Reply
    silent george October 27, 2014 6:06 PM replied to elephantdude

    In theory, elephantdude, perhaps, but for me it's still a vanishingly small rate of success. I still have not managed to

    hit a harpy with a slingshot/bomb combo. The only kills I've made are with a charged spear, hopping up really high after they've divebombed

    .

    I could use any tips/encouragement people have. I'm stuck.

    Reply

    Hmm, I feel quite lucky because I got the drop from the

    ghost wisps in Misty Gorge

    on pretty much the second try. Though I haven't managed to get a drop from the

    jellies in Mul Cavern

    yet.

    @Bavnar, for the last boss:

    Yes, I did use the javelin for the switches, it was easier than melee attacking.
    I did use the 10 rai respawn at checkpoint for the chase, and the good thing is that after each death, your original amount of money is restored as well as your items that you had before dying. You probably won't need to use items in the chase itself except for honey/anything similar because of the instant kill.

    Another note which I found interesting, each time after respawning using the 10 rai checkpoint for the chase, it gave me honey, which I didn't buy beforehand. I assumed it was intentional, since it occurred multiple times after dying multiple times, and it was very helpful as I could throw javelins at switches without having to wait.

    Finally, a Ki-charged hit from the morning star can one-hit the sentries that pop out from the ground, which I found to be quite useful in the chase.

    Hope this helped :)

    Reply
    theawesomeperson654 December 7, 2014 9:43 PM

    After saving the prince in the Prince Tower, keep proceeding with your quest and claim the rocket boots, once done go back to the tower and reach the top. Once you are there use the rocket boots and fly to east and you will find a secret tower go inside it and TRY to get through it good luck.

    Reply
    theawesomeperson654 December 7, 2014 10:29 PM

    In Fran's lab after giving him 15 you get a hearty' if you give him 25 he will give you a rare metal which is used at the blacksmith in Daea. There is another one hidden some were else i'll try to find that one

    Reply

    I need a bit of help--I've gotten through the Dread Lands and even collected a Moonstone there, but for some reason only the South end of Mul Cavern is opening up for me. I watched another person's play through on YouTube and when he completed Dread Lands, he got both ends of Mul Cavern open. Is this a glitch? Is there something I neglected to do that someone can point out for me so I can go back and do it?

    It's super frustrating--I have the rocket boots and the Morning star too, but....

    Reply

    I did all the steps the walkthrough said to get to the

    hidden village

    , but when I went to

    unlock the door to the east

    , I found I didn't

    have an extra key - I used it to get the moonstone that the walkthrough said to do.

    How do I open that door?

    Reply

    In reference to the comment above...

    what I noticed is

    the dog didn't drop a key when I killed it like the walkthrough said it would.

    Reply
    Kitten-Kaboodles May 14, 2015 9:19 PM replied to saviourv

    @Savior-V, sorry to revive such a dead thread, but I spent several days working to collect all the moonstones and health upgrades. I then unlocked the secret area, and was incredibly disappointed.

    All I found were a couple of purple pods, and I unlocked an achievement. Is that it?

    Reply

    Heh, I just got 100% before I realized there were two pages of comments here. I looked at the scribd document and it appears I only missed one quest and one room. I must have spent nearly 8 hours of that just looking for those moonstones.

    And probably an hour just buying golem figurines and giving them out!

    Some comments on bosses:

    It's very important to bring enough healing, as I found out trying to hammer a boss to death at the top of Prince Tower. (I actually managed it with just 6 health to spare, but I really should've used the javelin.) I've been walking around with a bag full of bento since then.

    On that last boss though,

    I found it hard enough to beat the eyes that I went back and tried to gold-arbitrage my way to an inventory full of wisps. But you can't have more than one bottle! So I got to the chase scene with essentially infinite respawns.

    Advice: you don't actually have to be perfect and close every door, especially on the third room of the chase I got away with just running through. I brought honey but don't recall drinking it - it's still a good idea.

    About those harpies:

    It's usually wiser to flee from combat, but there's one time it's forced - in the Phoenix Lab, where you can get the first strike by using a charged javelin from the right platform.

    (One of the keys in the Forbidden Forest was guarded by a harpy and a puzzle with boxes. You can kill the other enemies on that screen, solve the box puzzle and then dodge the harpy's attacks to get the key.)

    About the 42-moonstone area, I don't see any gameplay purpose to it, but

    according to the soundtrack listing, the music there is an alternate version of the title theme (and is literally the last song). The blue wisp effect also appears on the title screen. Note that the title screen isn't just what you see on the save select; there's more background art if you read the credits from there.

    Its existence may also be referenced in Panselo when you start, when Nairi mentions that she wants to scale the highest mountain. But this might just be coincidence because Gill already mentions it.

    Other loose ends:

    You can use Mikan fragrance from the menu, but I haven't actually seen it repel bugs.

    It seems that Ruth's teleporter still hasn't activated, and I don't see another one around. Perhaps Thomas's skills just aren't that good?

    If, as a certain golem near Adar's house mentions, there is a wakeup event in 50 years, exactly what plan was disrupted by the events of the game?

    Reply
    Kitten-Kaboodles May 20, 2015 8:08 PM replied to kktkkr

    @kktkkr, hhmph, it's a shame about the bonus area, I, like you, worked really hard getting all the moonstones/health upgrades, and just wandering around in a new place really doesn't feel like an adequate reward.

    On the Mikan fragrance, I highly suspect that like the 'talking juice,' it would be too much of a pain to code, and given the sheer atrocity of the beetles in Mul Caverns, in my opinion, it would practically turn you into a god.

    One of the very few qualms I have about this fantastic game are the finer bits of the plotline, and I can only hope that the holes you pointed out are just foreshadowing.

    Reply
    IronHight June 19, 2015 12:00 PM

    I Have a problem in the sewers
    I can't manage to have all timed switches on.
    Please help Me

    Reply

    Small typo:

    When talking to Gill (the purple-haired adventurer) in Atai City after having rescued Fran, but before clearing the thieves lair, the character tag on the second speech bubble says "Gil" and not "Gill".

    Reply

    And another typo:

    Before beginning the letter quest with the soldier on the top of the left tower of "the wall", his tag will be "Solider" on his second speech bubble.

    Reply

    A note regarding the silk:

    It can also be sold to the guards hatching plans outside of the mayors house. If you give it to the left one after they have gotten the news that the bandit leader has been caught (and they are talking about silk prices) you will recieve 60 rai.

    Reply

    ok i'm at the Forest Edge cave and I shot the second switch ledge but I can't make the jump? does no one else have any trouble making the gap?

    Reply
    Patreon Contributor Questioner May 10, 2016 1:40 PM replied to rayout

    There is a way to make the jump shorter...

    ...by hitting the switch to the left again.

    Reply

    help meeeee!!!!! i am stuck trying to get to the hidden village i beat the robot dude and now i can't get past the locked door outside

    Reply

    also now i keep spawning with 0 health

    Reply

    I have been in B jail for like a day and I can't do it…any hints?

    Reply
    Patreon Contributor kktkkr July 20, 2016 11:38 AM replied to Patrick Dillon

    @Patrick Dillon I assume you're talking about the room with three chests in it, since there's nothing much to get stuck on for the inside of Jail B. One method of clearing this is given in the walkthough, but it doesn't hurt to have more.

    Some analysis:

    The room has four switches: two on top, one on the left, and one on the bottom. Label these switches UL, UR, L and B.

    All four switches have to be on simultaneously to open the door. Each switch turns off after 3 seconds.
    You can turn on switches using melee, slingshot or bombs, but due to the way they're spaced you can only turn on two at once with melee or bombs.
    You fall faster than you can climb, so you should start from the top.
    You can hit L and B from the top platform with well placed slingshots, but I don't think you can do both and still solve the puzzle.
    Bombs take 4 seconds to explode, so you should start with those.

    About timing and positioning:

    To hit L with a bomb: throw it from the left vertical brown column (next to the table) or anywhere to the left of it, or drop it and swing your weapon at it (goes further but wastes time).
    To hit UL with a bomb: Stand on the table to the left of the candlestick, jump and throw. The further left you are, the earlier you have to throw. For UR, do the same but mirrored.
    To hit B with a slingshot: Stand anywhere on the rightmost floor tile, and launch as soon as possible. The flight time is about 2.5 seconds.
    The first two switches should be triggered as close together as possible. You may have to delay a jump or aim in order to get them synchronized.

    Paths I've been able to perform, from easiest to hardest:

    2 slingshot: L(bomb), B(slingshot), UL(slingshot), UR.
    No melee: L(bomb), B(slingshot), UL(slingshot), UR(slingshot).
    As in walkthrough: L(bomb), UL(slingshot), UR, B. You should be near UR when aiming the slingshot at UL.
    Bank shot: L(bomb), B(slingshot), UR, UL.
    L last: UR(bomb), B(slingshot), UL, L.
    No slingshot: L(bomb), UL(bomb), UR, B.

    Experiment and practice.

    Reply
    KelpTheGreat April 28, 2017 5:41 AM

    I created this account specifically to comment on something @Shudog wrote a few years ago. I don't normally do things like that, but his comment is pissing me off the more I read it, and so I feel I have to respond.

    Shudog: This is a really good game. It's moderately difficult. The amount of complaining and whining about the controls, difficulty, button mapping, etc. is mostly based on your lack of skill as a gamer. If you and the other unskilled hordes of players out there who you're misguidedly whining on the behalf of have trouble with it, and just want to enjoy the story, go watch someone who's actually a gamer play through the game on YouTube.

    You then complain about Flash taking up processing. The game runs perfectly fine on my years-old, un-customized laptop. I'd suggest you upgrade your hardware if you have problems. It boggles my min d how you can gush about the graphics and music, and then complain that the game doesn't run well. It's not the game that's the problem! The game looks and sounds good, and that requires certain levels of hardware.

    I'd now like to comment on three specific things you said:

    "No one will open your book if the pages are glued together."
    This is a terrible analogy. If the game WAS a book whose pages were glued together, it'd cost hundreds of dollars, require the most advanced hardware, have one-hit kills, and no save points. A more accurate analogy would be: This book is wide open, sitting on a shelf in the library, just waiting to be enjoyed. The font it's printed in is a bit smaller than old fogies might be able to read it at, but not 100% of content can be enjoyed by everyone, equally.

    "I bet this isn't even play-tested to be handicapped accessible either."
    You're frickin' right it's not. The game was made by, like, one guy. He designed the game for the vast majority of people who can play and enjoy it. Not everything has to be available to everyone. Do you stand outside bowling alleys and complain that people without arms aren't included? Do you stand outside ski resorts and complain that skiing isn't a wheelchair-friendly pastime? Those are extreme examples, I know, but unless you are yourself handicapped and complaining that you wanted to enjoy it but couldn't, I'd let them whine on their own behalf. I'm sure they have plenty of other things they can enjoy.

    "And if they can create all this other stuff, why neglect the very basis of the game?"
    The very basis of the game? The basis of the game is to have fun, dipwad. If it's not fun, stop playing it.

    End rant. No one is probably going to read this anyway, but every now and again you just gotta get something off your chest.

    Reply
    KelpTheGreat April 28, 2017 5:44 AM

    Now, ON-TOPIC: I don't know who writes these walkthroughs, but there are several mistakes, mainly relating to directions. Several times you say "west" when you mean "east", or vice-versa. In a 2D game, west is LEFT, east is RIGHT. No exceptions. Two times I can remember are in the moonstone/heart ruby walkthrough sections; in Panselo you say to roll under the wall at the west end of town, when you mean the east end, and in the Prince tower you say to climb to the very top and hover west, when you mean east.

    Reply
    Williams June 15, 2017 1:13 PM

    I'm not sure if this is a spoiler or not, but if you click below you can find out how to receive an item that restores 25 HP.

    I'm not to exact on the details, but, if you go to Daea and buy appreciation flowers(cost $15)(second area from entering, on the top floor)...give them to Lisa. Then, Lisa will give you a Roasted Toad Leg that restores 25 HP.

    Also, in the beginning of the game, when Kiter (or Kilter) ask you to fetch the kids, keep talking to him and he will give you a Roasted Toad Leg as well.

    Reply
    Williams June 15, 2017 1:17 PM replied to Williams

    Also, when buying the flowers then giving them to Lisa, you can do it more than once.

    Reply
    Williams June 15, 2017 2:07 PM

    I don't know is this is a spoiler, but there is a process you can do in order to get a item that restores 50 HP.

    When you enter Misty Gorge, hit the blue wisp with your iron hammer (or baseball), it will either poof, drop money, or become/drop Translucent Meat. Now,once you have the meat, don't eat it. Give to the female Chef in Daea (located where you buy the food, keep moving west till you reach a door, go in give it to the green head), she will pay you. Then leave out the shop, come back in, and there is a new food Mystery Bento...it restores 50 HP.

    Also, if you continue to get Translucent Meat, give it to the Chef, she still pays (That's a good way to receive money when you need it).

    Reply
    Williams June 15, 2017 2:09 PM replied to Williams

    F.Y.I: The Mystery Bento still cost money, even though you helped create it!

    Reply

    ^ Scroll Up | Homepage >

    Leave a comment [top of page]

    Please consider creating a Casual Gameplay account if you're a regular visitor here, as it will allow us to create an even better experience for you. Sign-up here!
    • PLEASE UNDERSTAND SITE POLICIES BEFORE POSTING COMMENTS
    • You may use limited HTML tags for style:
      (a href, b, br/, strong, em, ul, ol, li, code, spoiler)
      HTML tags begin with a less-than sign: < and end with a greater-than sign: >. Always. No exceptions.
    • To post spoilers, please use spoiler tags: <spoiler> example </spoiler>
      If you need help understanding spoiler tags, read the spoiler help.
    • Please Preview your comment before posting, especially when using spoilers!
    • No link dropping, no domains as names; do not spam, and do not advertise! (rel="nofollow" in use)
    jayisgames.com Do you have what it takes to quickly merge different dinosaurs and warriors to battle your enemies?...  ...
    jayisgames.com As video games become an increasingly popular form of entertainment, more and more people are becoming interested in creating their own games. While it may seem daunting to those without programming experience, it is actually quite possible for beginners...  ...
    jayisgames.com World of Warcraft is a legendary game. One of the reasons for its popularity is the depth and complexity of the gameplay. The game offers a huge world to explore, and many different quests and challenges....  ...
    jayisgames.com Revamping the classic gameplay of Tetris, this puzzle game offers a fresh take....  ...

    HELP Jayisgames.com

    Recent Comments


    Display 5 more comments
    Limit to the last 5 comments

    Game of the week

    
Dark Romance: Vampire Origins Collector's Edition

    Your Favorite Games edit

    add
    Save links to your favorite games here. Use the Favorites editor.

    Monthly Archives